Alias is a reference to a single entity or group of entities that are used in the widgets. Alias may be static or dynamic.
They can range from a simple reference to a single device to a complex search query for specific assets from a list.
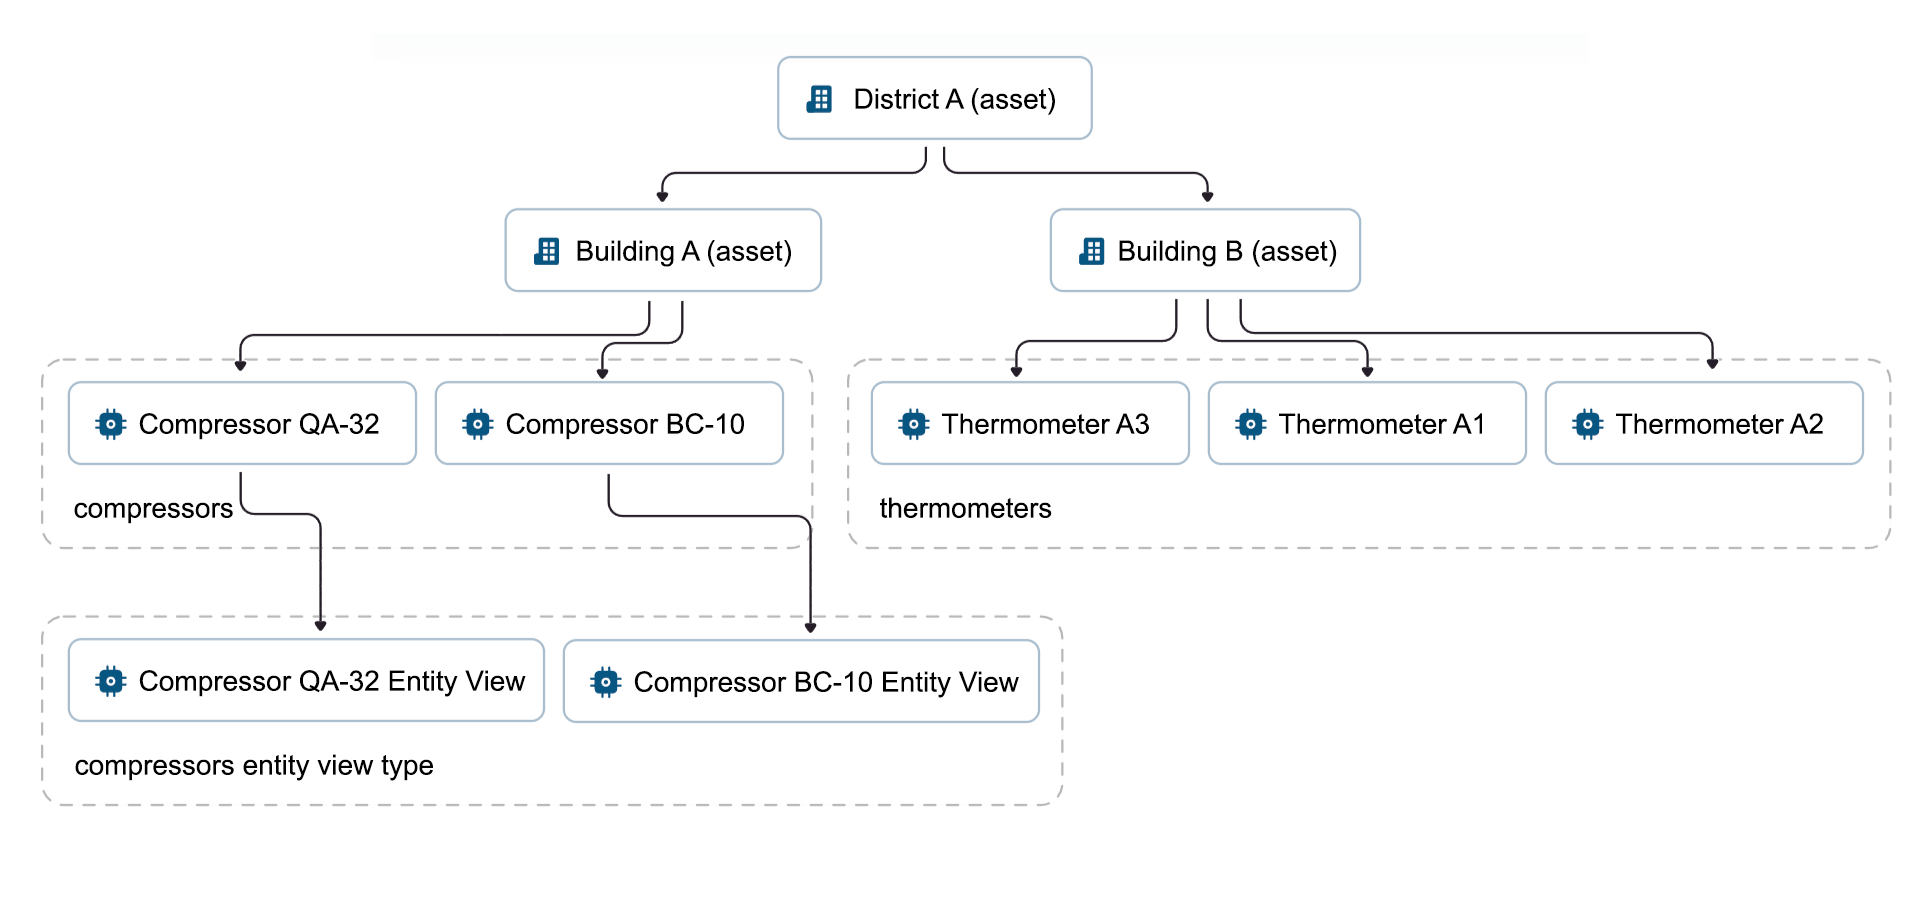
In this tutorial, aliases will be used in the system according to the scheme shown below. And all devices transmit telemetry values - “temperature”.
Prerequisites
Before proceeding with this guide, it’s recommended that you follow Getting Started guide to become familiar with ThingsBoard devices, dashboards and widgets. This will enhance your learning experience and understanding of the concepts presented here.
Creating alias
To create an alias, you need to define the entities from which data will be extracted.
Then follow these steps:
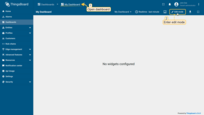
- Open your dashboard and switch to Edit mode;
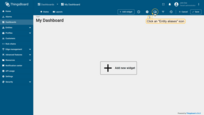
- Click the "Entity aliases" icon in the upper right corner of the window;
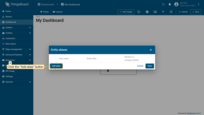
- In the opened "Entity aliases" window click the “Add alias” button on the left side of the dialog box;
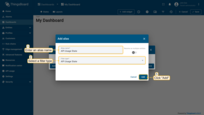
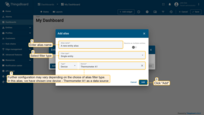
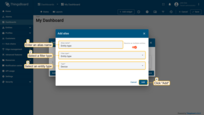
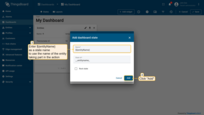
- In the opened "Add alias" dialog, enter a name for the alias and select a filter type. Then, fill in all required fields and click the "Add" button in the lower right corner;
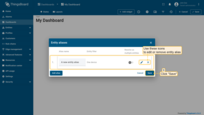
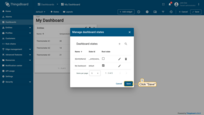
- We can now see that a new alias has been added. In this window you can view, edit and delete your aliases. Click "Save" in the lower right corner of the dialog box.
Now, let’s use the added alias in a widget:
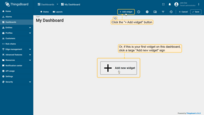
- Click the "Add widget" button at the top of the screen or click the large "Add new widget" icon in the center of the screen (if this is your first widget on this dashboard);
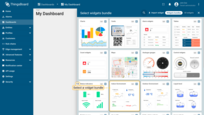
- Select the widget bundle. For example, select "Indoor Environment" widgets bundle;
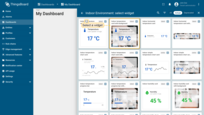
- Now, select the "Indoor temperature card with background" widget;
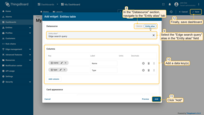
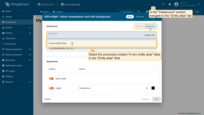
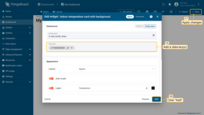
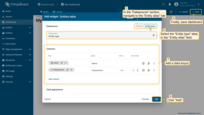
- The "Add Widget" window will appear. Navigate to the "Entity alias" tab. Specify the previously created "A new entity alias" in the "Entity alias" field.
- Specify the data key(s) in the "Data key" field. In our example is the "temperature" data key. Then, click "Add";
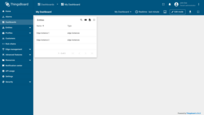
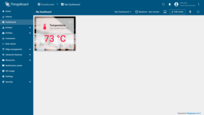
- You have added a widget that uses the previously configured alias as a data source.
Alias types
In the ThingsBoard, there are various types of aliases, each offering different capabilities for configuring widgets: Single entity, Entity list, Entity name, Entity type, Entity from dashboard state, Asset type, Device type, Entity view type, Edge type, Api Usage State, Relations query, Asset search query, Device search query, Entity view search query, and Edge search query.
They provide flexibility and powerful capabilities for configuring dashboards in ThingsBoard, allowing users to efficiently organize and visualize data from various sources.
Let’s take a look at each of them.
Single entity
This alias allows choosing a single entity. It can be a device, asset, entity view, tenant, customer, user, dashboard, edge, current customer, current tenant, current user or current user owner.
Adding an alias: in the “Add alias” dialog, enter the alias name, and select the “Single entity” filter type. Then choose the entity type and specify the final entity.
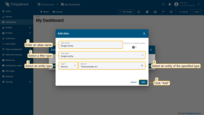
In this example, an alias has been created that filters one device - Thermometer A1.
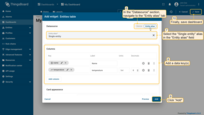
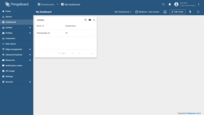
Let’s use an added alias in a widget. In the “Tables” widgets bundle select the “Entities table” widget. Navigate to the “Entity alias” tab. Specify the “Single entity” alias in the “Entity alias” field and “temperature” data key in the “Columns” section. Click “Add” and apply changes. The Entities table widget with the alias that displays one device - Thermometer A1 has been added.
Entity list
This alias allows you to display multiple entities. It can be devices, assets, entity views, tenants, customers, dashboards, users or edges.
Adding an alias: in the “Add alias” dialog, enter the alias name, and select the “Entity list” filter type. Then choose the entities type and specify entities whose data you want to display on the widget.
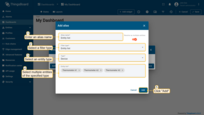
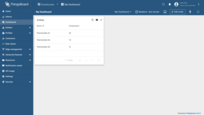
This alias filters a list from specified devices: Thermometer A1, Thermometer A2, and Thermometer A3.
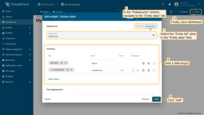
Let’s use an added alias in a widget. In the “Tables” widgets bundle select the “Entities table” widget. Navigate to the “Entity alias” tab. Specify the “Entity list” alias in the “Entity alias” field and “temperature” data key in the “Columns” section. Click “Add” and apply changes.
The Entities table widget with the alias that displays a list of several devices, which in this case are Thermometer A1, Thermometer A2, and Thermometer A3 has been added.
Entity name
This alias allows you to display entities whose names start with the entered expression. These objects can be devices, assets, entity views, tenants, customers, users, dashboards or edges.
Adding an alias: in the “Add alias” dialog, enter the alias name, and select the “Entity name” filter type. Then choose the entities type and enter an expression that will filter the names of the displayed entities.
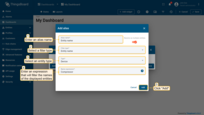
This alias filters devices with names start with “Compressor”.
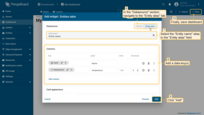
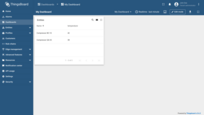
Let’s use an added alias in a widget. In the “Tables” widgets bundle select the “Entities table” widget. Navigate to the “Entity alias” tab. Specify the “Entity name” alias in the “Entity alias” field and “temperature” data key in the “Columns” section. Click “Add” and apply changes. The Entities table widget with alias that filters devices, which names start with ‘Compressor’, has been added.
Entity type
This alias allows you to display all your entities and your customers’ entities of the specified type. These objects can be devices, assets, entity views, tenants, customers, users, dashboards or edges.
Adding an alias: in the “Add Alias” dialog, enter the alias name, select the filter as “Entity Type”, and choose the entity type.
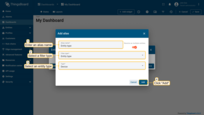
This alias displays all your and your customers’ devices.
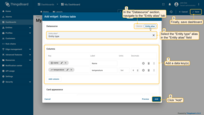
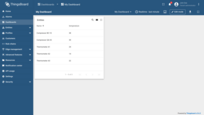
Let’s use an added alias in a widget. In the “Tables” widgets bundle select the “Entities table” widget. Navigate to the “Entity alias” tab. Specify the “Entity type” alias in the “Entity alias” field and “temperature” data key in the “Columns” section. Click “Add” and apply changes. The Entities table widget displaying all your devices and your customers’ devices has been added.
Entity from dashboard state
This alias allows choosing one or more entities from the dashboard state. The entities can be a device, asset, entity view, tenant, customer, user, dashboard, edge, current customer, current tenant, current user, or current user owner.
For example, if Entities table widget is created on a root dashboard state with several entities displayed on it, and you’d like to create a dashboard state which will display a widget with the entity you clicked on, you need to use this alias.
Adding an alias: in the “Add alias” dialog, enter the alias name, and select the filter type “Entity from dashboard state”. Then click “Add”.
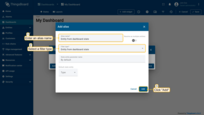
This alias is used for filtering data for other dashboard states.
For the next example, we will need two aliases: the previously discussed “Entity type” alias and the “Entity from dashboard state” alias. Let’s start:
First we need to create an Entity table widget that will display a list of entities: add an Entities table widget that will display a list of entities. Use the “Entity type” alias as a data source.
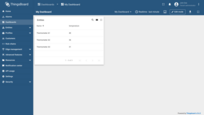
After adding the Entities table widget, add a new a state:
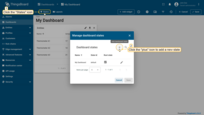
- Click the layers icon in the top left corner of the dashboard to create a new state. In the opened dialog window, click a "+" icon to add a new state;
- Enter state's name. For the state to be named after the entity, use ${entityName} as the name of the state. Thus, during the action, you will be transitioned to a state named after the entity that took part in the action. Click "Add";
- Now you see a list with two states: the root one, and the one that has just been created. Click "Save" in the lower right corner of the dialog.
Time to add an action to a root dashboard widget and execute it using an Entity from dashboard state alias on the widget in the created state:
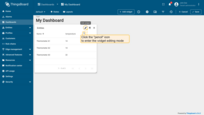
- In the root dashboard state, enter widget Edit mode by clicking the “pencil” icon in the upper right corner;
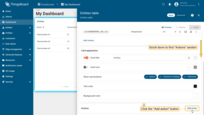
- Scroll down to find "Actions" section. Click "Add action" button;
- The "Entities table: Actions" window will be opened. Click the "Add action" button in the top right corner;
- In the "Add action" dialog, enter the action name, and select an action source responsible for each entity separately (action cell button, on row click etc.). Then, choose the action type "Navigate to new dashboard state" and specify the new dashboard state to which the transition will be made. After, click "Add";
- After successfully adding the action, click the "Save" button. Then, click the "Apply" button;
- Now, go to the created state by selecting it from the drop-down menu accessed through the layers icon in the upper left corner;
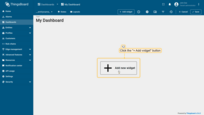
- Click the “Add new widget” icon in the center of the screen;
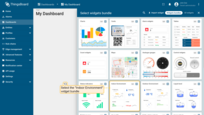
- In the opened widget bundles selection, select "Indoor Environment";
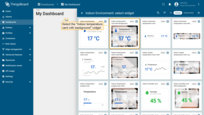
- Select the "Indoor temperature card with background" widget;
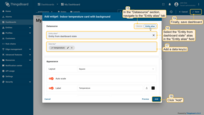
- In the add widget window, navigate to the "Entity alias" tab. Specify the "Entity from dashboard state" alias in the "Entity alias" field and "temperature" data key in the “Columns” section. Click the "Add" button in the lower right corner;
- After adding the widget save all applied changes;
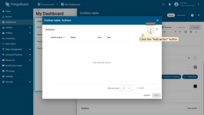
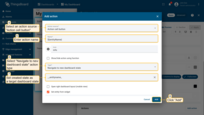
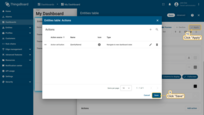
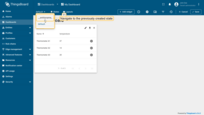
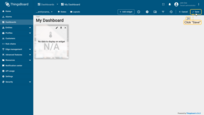
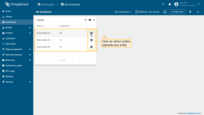
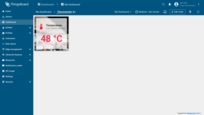
Now, click the action button next to any entity. You will be transitioned to an inner state, which contains a widget with the details of the selected entity.
Asset type
This alias allows you to filter assets by the specified asset profile(s) (and optionally by names starting with the entered query).
Adding an alias: in the “Add alias” dialog, enter the alias name, and select the “Asset type” filter type. Then specify the asset profile(s) and enter an expression that will filter the names of the displayed assets.
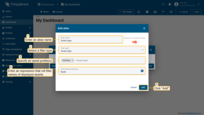
This alias filters assets whose asset profile is “buildings” and whose names start with “Build”.
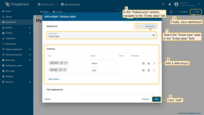
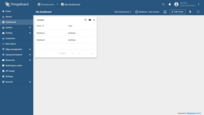
Let’s use an added alias in a widget. In the “Tables” widgets bundle select the “Entities table” widget. Navigate to the “Entity alias” tab. Specify the “Asset type” alias in the “Entity alias” field. Click “Add” and apply changes. The Entities table widget that displays assets with the asset profile “buildings” and whose name begins with “Build” has been added.
Device type
This alias allows you to filter devices by the specified device profile(s) (and optionally by names starting with the entered query).
Adding an alias: in the “Add alias” dialog, enter the alias name, and select the “Device type” filter type. Then specify the device profile(s) and enter an expression that will filter the names of the displayed devices.
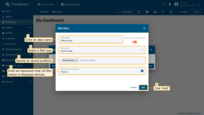
This alias filters devices whose device profile is “thermometers” and whose names start with “Therm”.
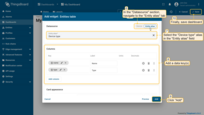
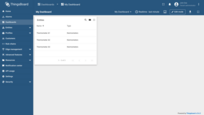
Let’s use an added alias in a widget. In the “Tables” widgets bundle select the “Entities table” widget. Navigate to the “Entity alias” tab. Specify the “Device type” alias in the “Entity alias” field. Click “Add” and apply changes. The Entities table widget that displays devices with the device profile “thermometers” and whose name begins with “Therm” has been added.
Entity View type
This alias allows you to filter devices by the specified entity view type(s) (and optionally by names starting with the entered query).
Adding an alias: in the “Add alias” dialog, enter the alias name, and select the “Entity view type” filter type. Then specify the entity view type(s) and enter an expression that will filter the names of the displayed entity views.
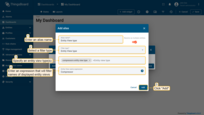
This alias filters entity views of type “Compressors Entity View Type” and with name starting with “Compressor”.
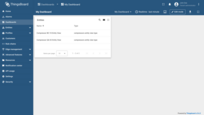
Let’s see an example. Entity views named “Compressor BC-10 Entity View” and “Compressor QA-32 Entity View” have been created with the type “Compressors Entity View Type,” providing access to the ‘Power’ timeseries from Compressor BC-10 and Compressor QA-32.
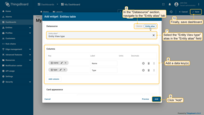
Let’s use an added alias in a widget. In the “Tables” widgets bundle select the “Entities table” widget. Navigate to the “Entity alias” tab. Specify the “Entity view type” alias in the “Entity alias” field. Click “Add” and apply changes. The Entities table widget that displays entity views with the entity view type “Compressors Entity View Type” and whose name begins with “Compressor” has been added.
Edge type
This alias allows you to filter devices by the specified edge type(s) (and optionally by names starting with the entered query).
Adding an alias: in the “Add alias” dialog, enter the alias name, and select the “Entity view type” filter type. Then specify the entity view type(s) and enter an expression that will filter the names of the displayed entity view.
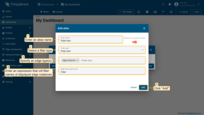
This alias filters edges with an edge type of “edge instance” and names starting with “Edge”.
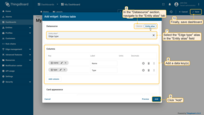
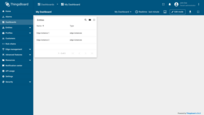
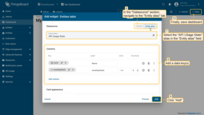
Let’s use an added alias in a widget. In the “Tables” widgets bundle select the “Entities table” widget. Navigate to the “Entity alias” tab. Specify the “Edge type” alias in the “Entity alias” field. Click “Add” and apply changes. The Entities table widget that displays edges with the edge type “edge instance” and whose name begins with “Edge” has been added.
API Usage State
There is an API Usage layout in the main menu of the TB platform. API Usage shows full statistics on the platform.
Api Usage State alias allows fetching only the data you need from the user dashboard statistics.
Let’s learn how to use the “Api Usage State” alias in a widget. In the “Tables” widgets bundle select the “Entities table” widget. Navigate to the “Entity alias” tab. Specify the “Api Usage State” alias in the “Entity alias” field and add data key(s) in the “Columns” section that fetches statistics from an API usage. Click “Add” and apply changes. The Entities table widget that displays API usage statistics has been added.
Relations query
This alias allows displaying entities that are related to a specified originator up to a specified level and in a specified direction.
Adding an alias: in the “Add alias” dialog, enter the alias name, specify the “Relations query” filter type. Then, select the entity type and the entity itself for which you want to display the relationship. Set direction to “From” or “To” and max relation level.
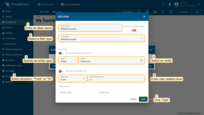
In the example alias displays entities that have any relation to asset ‘District A’ up to relation level 3.
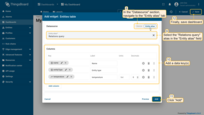
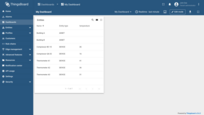
Let’s learn how to use the “Relations query” alias in a widget. In the “Tables” widgets bundle select the “Entities table” widget. Navigate to the “Entity alias” tab. Specify the “Relations query” alias in the “Entity alias” field and add the “entityType” data key in the “Columns” section. Click “Add” and apply changes. The Entities table widget displays entities and their type that have any relation to the asset “District A” up to relation level 3.
Asset search query
This alias allows displaying assets of the specified asset profile(s) that are related to a specified entity up to a specified level and in a specified direction.
Adding an alias: in the “Add alias” dialog, enter the alias name, select the “Asset search query” filter type, and select the entity type and an entity itself, for which you want to display the relationship. Set direction to “From” or “To”, max relation level and specify the asset profile(s) by which the assets will be filtered.
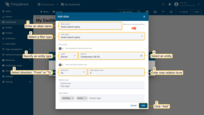
This alias displays assets with “buildings” and “district” asset profiles that have any relation to the device “Compressor QA-32” with a direction “From” and a relation level of 2.
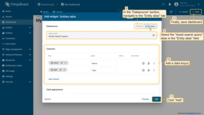
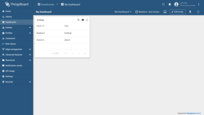
Let’s learn how to use the “Asset search query” alias in a widget. In the “Tables” widgets bundle select the “Entities table” widget. Navigate to the “Entity alias” tab. Specify the “Asset search query” alias in the “Entity alias” field, and add “name” and “type” data keys in the “Columns” section. Click “Add” and apply changes. The Entities table widget that displays assets that have any relation to the device “Compressor QA-32” with relation level of 2 has been added.
Device search query
This alias allows displaying devices of specified device profile(s) that are related to a specified originator up to a specified level and in a specified direction.
Adding an alias: in the “Add alias” dialog, enter the alias name, select the “Device search query” filter type, and select the entity type and an entity itself, for which you want to display the relationship. Set direction to “From” or “To”, max relation level and specify the device profile(s) by which the devices will be filtered.
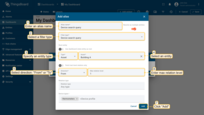
This alias displays devices with the “thermometers” device profile that have any relation to the asset “Building A” with direction “From” and relation level of 1.
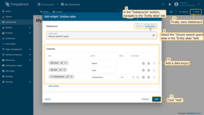
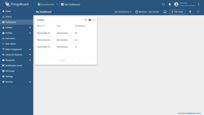
Let’s learn how to use the “Device search query alias” in a widget. In the “Tables” widgets bundle select the “Entities table” widget. Navigate to the “Entity alias” tab. Specify the “Device search query” alias in the “Entity alias” field and add “name”, “type” and “temperature” data keys in the “Columns” section. Click “Add” and apply changes. The Entities table widget that displays devices that have any relation to the asset “Building A” up to relation level of 1 has been added.
Entity view search query
This alias allows displaying entity views of the specified type that are related to a specified originator up to a specified level and in a specified direction.
A “Compressor BC-10 Entity View” entity view which has a relation to the “Compressor BC-10” device was created with a type “compressors entity view type” providing access to “temperature” timeseries from Compressor BC-10.
Adding an alias: in the “Add alias” dialog, enter the alias name, select the “Entity view search query” filter type, and select the entity type and an entity itself, for which you want to display the relationship. Set direction to “From” or “To”, max relation level and specify the entity view type(s) by which entity views will be filtered.
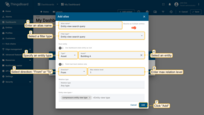
This alias filters entity views with the “compressors entity view type” type that have any relation to the asset “Building A” with direction “From” and relation level of 1.
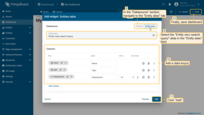
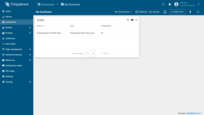
Let’s learn how to use the “Entity view search query” alias in a widget. In the “Tables” widgets bundle, select the “Entities table” widget. Navigate to the “Entity alias” tab. Specify the “Entity view search query” alias in the “Entity alias” field and add “name”, “type” and “temperature” data keys in the “Columns” section. Click “Add” and apply changes. The Entities table widget displaying entity views that have any relation to the asset “Building A” up to relation level of 1 has been added.
Edge search query
This alias allows displaying edges of the specified type that are related to a specified originator up to a specified level and in a specified direction.
Adding an alias: in the “Add alias” dialog, enter the alias name, select the “Edge search query” filter type, and select the entity type and an entity itself, for which you want to display the relationship. Set direction to “From” or “To”, max relation level and specify the edge type(s) by which the edges will be filtered.
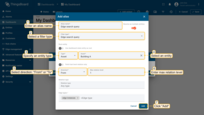
This alias filters edges with the “edge instance” type that have any relation to the asset “Building A” with a direction “From” and relation level of 1.
Let’s learn how to use the “Edge search query” alias in a widget. In the “Tables” widgets bundle select the “Entities table” widget. Navigate to the “Entity alias” tab. Specify the “Edge search query” alias in the “Entity alias” field and add “name” and “type” data keys in the “Columns” section. Click “Add” and apply changes. The Entities table widget displaying edges with any relation to the asset “Building A” up to relation level of 1 has been added.
