ThingsBoard allows you to send remote procedure calls RPC from server-side applications to devices and vice versa.
This Tutorial is to show you how to send a remote request call to a Related Device using Rule Engine.
- Use case
- Prerequisites
- Model definition
- Message flow
- Configuring the Rule Chain
- How to verify the Rule Chain
- Configuring Dashboards
- See Also
- Next steps
Use case
Let’s assume the following use case:
- you have the following devices connected to ThingsBoard:
- Wind Direction Sensor.
- Rotating System.
- also, you have one asset:
- Wind Turbine.
- You want to initiate an RPC request to the Rotating System and change the direction of the Wind Turbine according to the direction of the wind.
- The RPC call will have two properties:
- method: spinLeft or spinRight.
- params: value.
| Note: |
|
Turning the Rotating System to the left or to the right is based on which way is better and faster so that the angle between the direction of the wind and the wind turbine has to be no more than 5 degrees. |
Prerequisites
We assume you have completed the following guides and reviewed the articles listed below:
- Getting Started guide.
- Rule Engine Overview.
Model definition
The Wind Turbine has two devices installed: Wind Direction Sensor and Rotating System.
- The Wind turbine is represented as an Asset. Its name is Wind Turbine and its type is Wind turbine.
- The Wind Direction Sensor is represented as a Device. Its name is Wind Direction Sensor and its type is Direction Sensor.
- The Rotating System is represented as a Device. Its name is Rotating System and its type is Rotating System.
- Create a relation of the type Contains:
- from Wind Turbine to Wind Direction Sensor, and
- from Wind Turbine to Rotating System.
- Create a relation of the type Uses:
- from Rotating System to Wind Direction Sensor.
Message flow
In this section, we explain the purpose of each node in this tutorial:
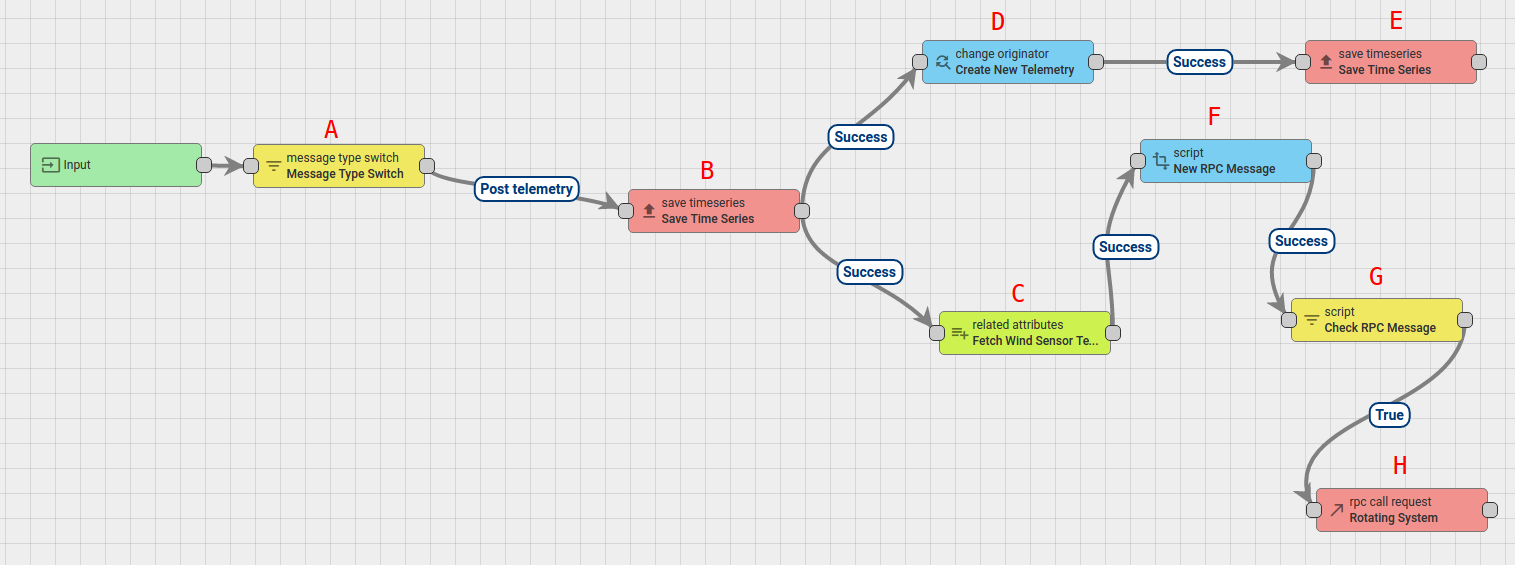
- Node A: message type switch node.
- Routes incoming messages based on the message type.
- Node B: save time series node.
- Stores messages telemetry from Wind Direction Sensor and Rotating System into the database.
- Node C: related device attributes.
- Loads the source telemetry windDirection of the related Wind Direction Sensor and save it into the Message metadata with the name windDirection.
- Node D: change originator node.
- Change the originator from Devices Wind Direction Sensor and Rotating System to the related Asset Wind Turbine and the submitted message will be processed as a message from Asset.
- Node E: save time series node.
- Stores messages telemetry from Asset Wind Turbine into the database.
- Node F: transformation script.
- Transform an original message into RPC request message.
- Node G: filter script node.
- Checks if msgType of incoming message is RPC message.
- Node H: rpc call request node.
- Takes the message payload and sends it as a response to the Rotating System.
Configuring the Rule Chain
The following screenshot shows how the Tutorial of RPC Call Request Rule Chain should look like:
- Download the attached json file for the rule chain indicated above and import it.
- Don’t forget to mark the new rule chain as “root”.
Also, you can create the new Rule Chain from scratch. The following section shows you how to create it.
Creating a new Rule Chain (Tutorial of RPC Call Request)
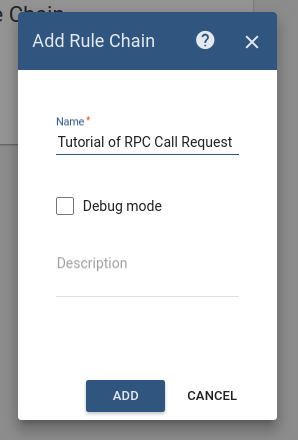
- Go to Rule Chains -> Add new Rule Chain
- Enter the Name field as Tutorial of RPC Call Request, then click the ADD button.
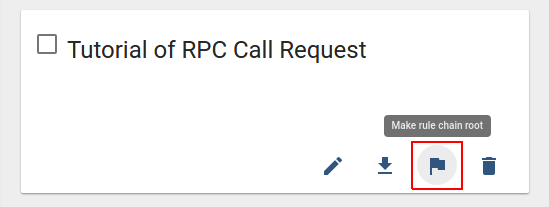
- The new Rule Chain is now created. Don’t forget to mark it as “root”.
Adding the required nodes
In this tutorial, you will create 8 nodes as it will be explained in the following sections:
Node A: Message Type Switch
-
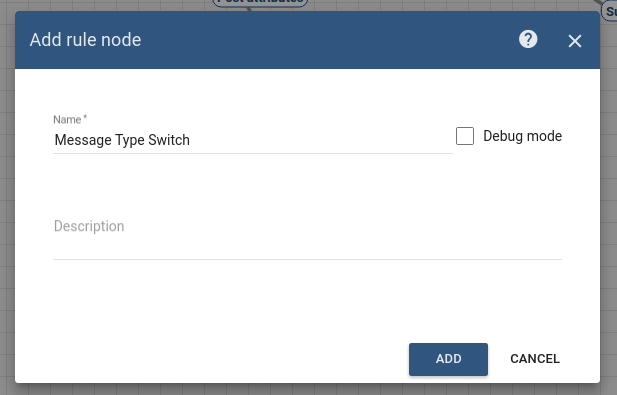
Add the Message Type Switch node and connect it to the Input node.
This node will route the incoming messages according to the message type, namely POST_TELEMETRY_REQUEST. -
Enter the Name field as Message Type Switch.
Node B: Save TimeSeries
-
Add the Save TimeSeries node and connect it to the Message Type Switch node with a relation type Post telemetry.
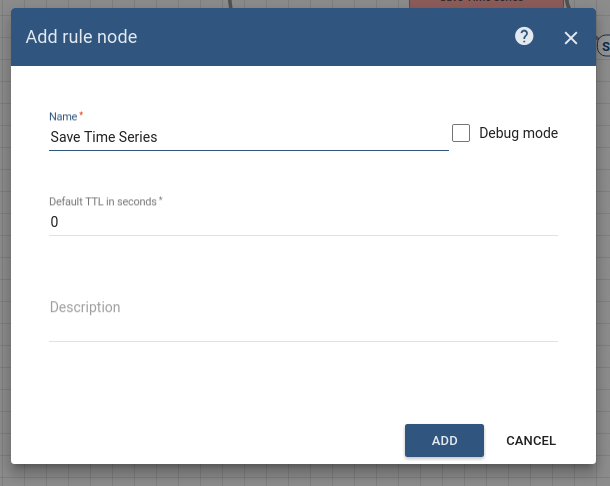
This node will store TimeSeries data from incoming Message payload to the database and associate them to the Device, that is identified by the Message Originator, namely Wind Direction Sensor and Rotating System. -
Enter the Name field as Save Time Series.
Node C: Related attributes
- Add the Related attributes node and connect it to the Save TimeSeries node with a relation type Success.
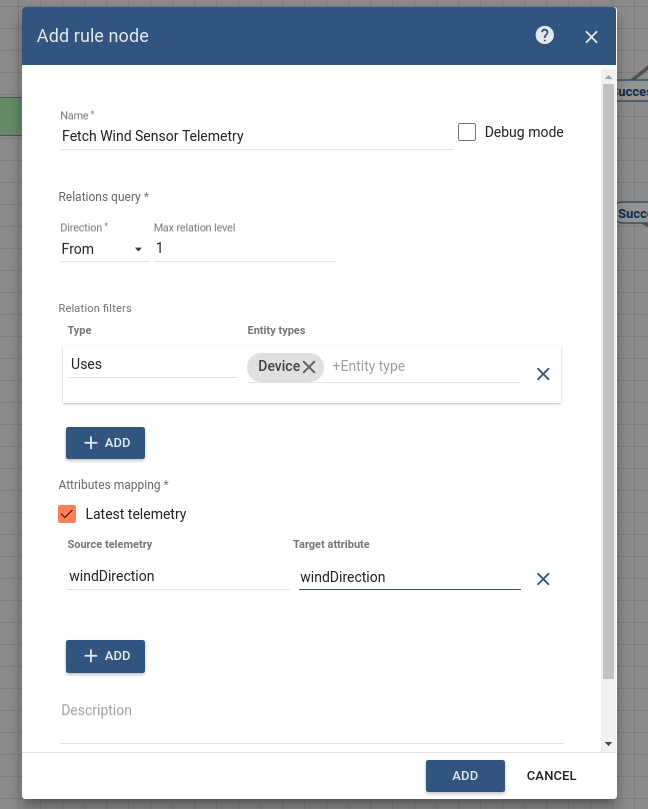
This node will load the source telemetry windDirection from the related Wind Direction Sensor to Rotating System and save it into the Message metadata with the name windDirection. - Fill in the fields with the input data shown in the following table:
| Field | Input Data |
| Name | Fetch Wind Sensor Telemetry |
| Direction | From |
| Max relationship level | 1 |
| Relationship type | Uses |
| Entity type | Device |
| Latest telemetry | true |
| Source telemetry | windDirection |
| Target telemetry | windDirection |
Node D: Change Originator
- Add the Change Originator node and connect it to the Save TimeSeries node with a relation type Success.
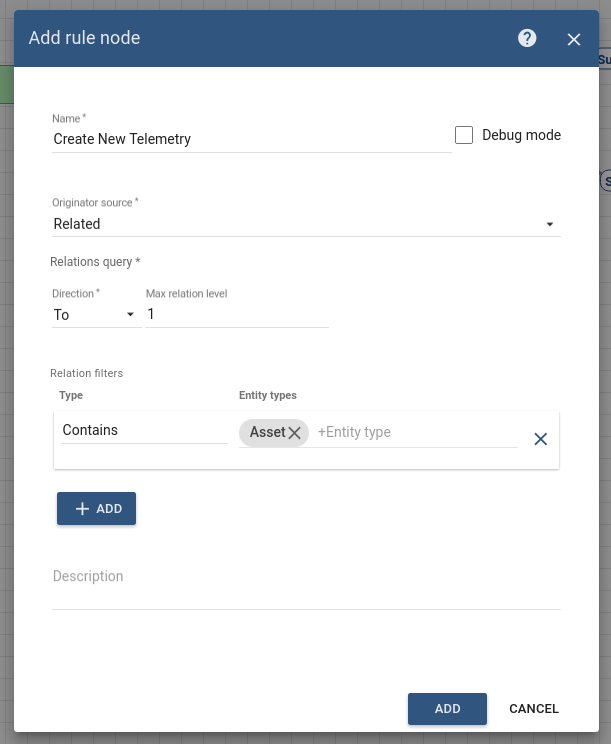
This node will change the originator from Devices Wind Direction Sensor and Rotating System to the Related Asset Wind Turbine that has a relation of the type Contains from each of them.
As a result, the submitted message will be processed as a message from this Entity - Fill in the fields with the input data shown in the following table:
| Field | Input Data |
| Name | Create New Telemetry |
| Originator source | Related |
| Direction | To |
| Max relationship level | 1 |
| Relationship type | Contains |
| Entity type | Asset |
Node E: Save TimeSeries
- Add the Save TimeSeries node and connect it to the Change Orignator node with a relation type Success.
This node will store the TimeSeries data from the incoming Message payload into the database from the Asset Wind Turbine that is Message Originator. - Enter the Name field as Save Time Series.

Node F: Transform Script
- Add the Transform Script node and connect it to the Related attributes node with a relation type Success.
This node will transform an original message into RPC request message. - The RPC call will have 2 properties:
- method: spinLeft or spinRight.
- params: value.
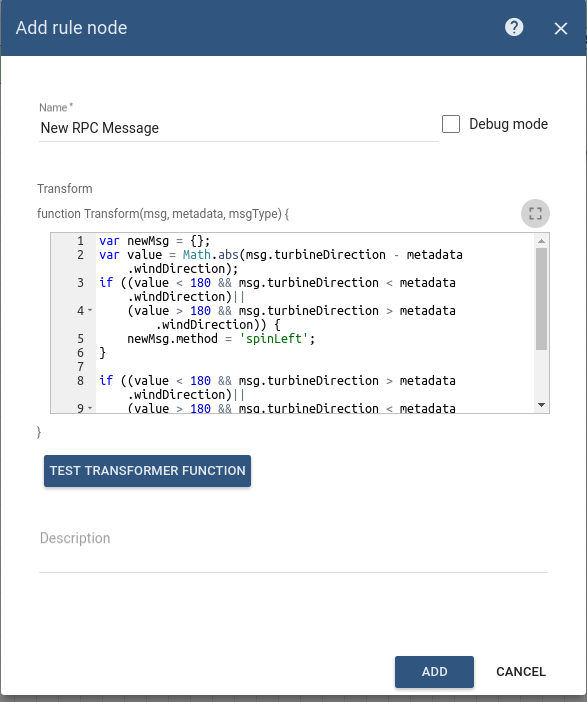
- Enter the Name field as New RPC Message.
- Add the following Script:
1
2
3
4
5
6
7
8
9
10
11
12
13
14
15
 var newMsg = {};
 var value = Math.abs(msg.turbineDirection - metadata.windDirection);
 if ((value < 180 && msg.turbineDirection < metadata.windDirection)||
     (value > 180 && msg.turbineDirection > metadata.windDirection)) {
     newMsg.method = 'spinLeft';
 }
 if ((value <= 180 && msg.turbineDirection > metadata.windDirection)||
     (value >= 180 && msg.turbineDirection < metadata.windDirection)) {
     newMsg.method = 'spinRight';
 }
 if(newMsg.method == 'spinLeft' || 'spinRight'){
     msgType = 'RPC message';
 }
 newMsg.params = Math.round(value * 100) / 100;
 return {msg: newMsg, metadata: metadata, msgType: msgType};
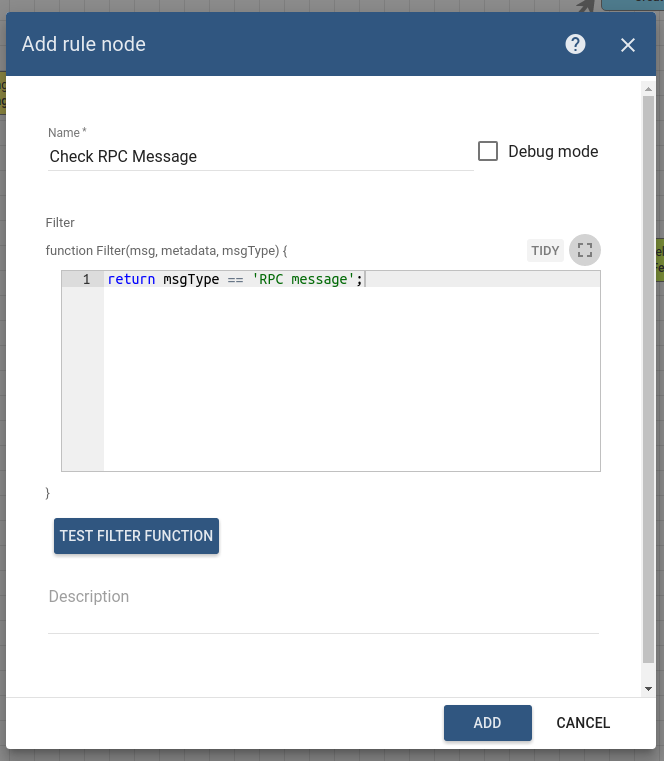
Node G: Filter Script
-
Add the the Filter Script node and connect it to the Transform Script node with a relation type Success.
This node will check if msgType of incoming message is RPC message. - Enter the Name field as Check RPC Message.
- Add the following Script:
1
: return msgType == 'RPC message';
Node H: RPC call request
- Add the RPC call request node and connect it to the Filter Script node with a relation type True.
This node takes the message payload and sends it as a response to the Message Originator. - Enter the Name field as Rotating System.
- Enter the Timeout value as 60 seconds.

This Rule chain is now ready and you need to save it.
How to verify the Rule Chain
- Use the following javascript code to emulate the Wind Direction Sensor device.
- Also, use the following javascript code to emulate the Rotating System device.
This code contains a method to emulate changing the turbine direction based on the incoming RPC message.
To run the scripts, you need to do the following steps:
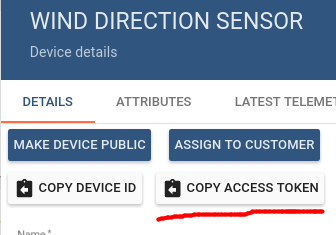
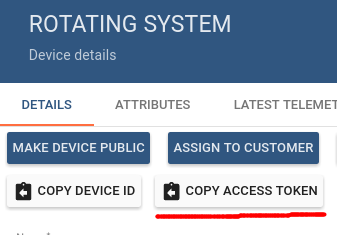
- Copy the Wind Direction Sensor device access token and the Rotating System device access token, then paste them in the script.
You can copy the access token from the Device page.
In this tutorial,- the Wind Direction Sensor device access token is Z61K03FAGSziW9b0nKsm
- the Rotating System device access token is jSuvzrURCbw7q4LGtygc
However, these access tokens are unique and you will need to copy the access tokens of your devices.
- Open the terminal and go to the folder that contains these emulator scripts, then run the following commands:
- node WindDirectionEmulator.js
- node RotatingSystemEmulator.js
Configuring Dashboards
The following screenshot shows how the Wind Turbine Dashboard should look like:

Download the attached json file for the dashboard indicated above and import it.
- Go to Dashboards -> Add new Dashboard -> Import Dashboard and drop the downloaded json file.
The next Step is to configure the aliases used by the imported dashboard.
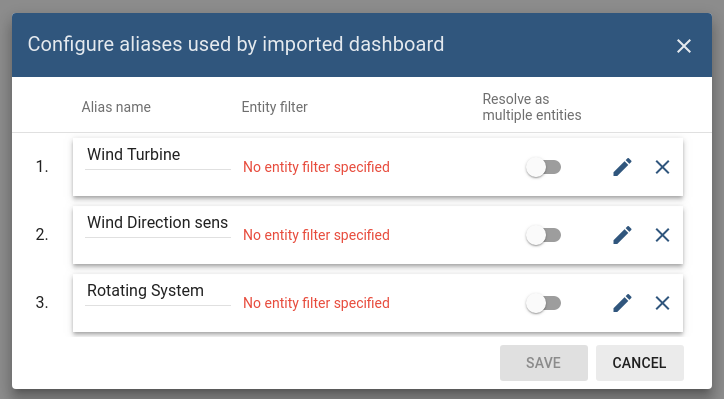
Click the Edit alias button and enter the input data shown in the following table:
| Alias | Field | Input Data |
| Wind Turbine | Filter type | Single entity |
| Type | Asset | |
| Asset | Wind Turbine | |
| Wind Direction Sensor | Filter type | Single entity |
| Type | Device | |
| Device | Wind Direction Sensor | |
| Rotating System | Filter type | Single entity |
| Type | Device | |
| Device | Rotating System |
The configuration of the dashboard is now completed and you can verify that it works as expected.
Also, you can see:
- how to work with RPC call reply Rule Node
Please refer to the second link under the See Also section to see how to do this.
See Also
-
For more details about how RPC works in Thignsboard, please refer to the RPC capabilities guide.
Next steps
-
Getting started guides - These guides provide quick overview of main ThingsBoard features. Designed to be completed in 15-30 minutes.
-
Connect your device - Learn how to connect devices based on your connectivity technology or solution.
-
Data visualization - These guides contain instructions on how to configure complex ThingsBoard dashboards.
-
IoT Data analytics - Learn how to use rule engine to perform basic analytics tasks.
-
Advanced features - Learn about advanced ThingsBoard features.
-
Contribution and Development - Learn about contribution and development in ThingsBoard.