- Collections types
- Permissions and Visibility between users
- Collection and view management
- Next Steps
Collections are individual folders designed to enhance navigation and restrict access rights and visibility among users of different ranks, providing a more convenient way to organize and manage views.
Collections types
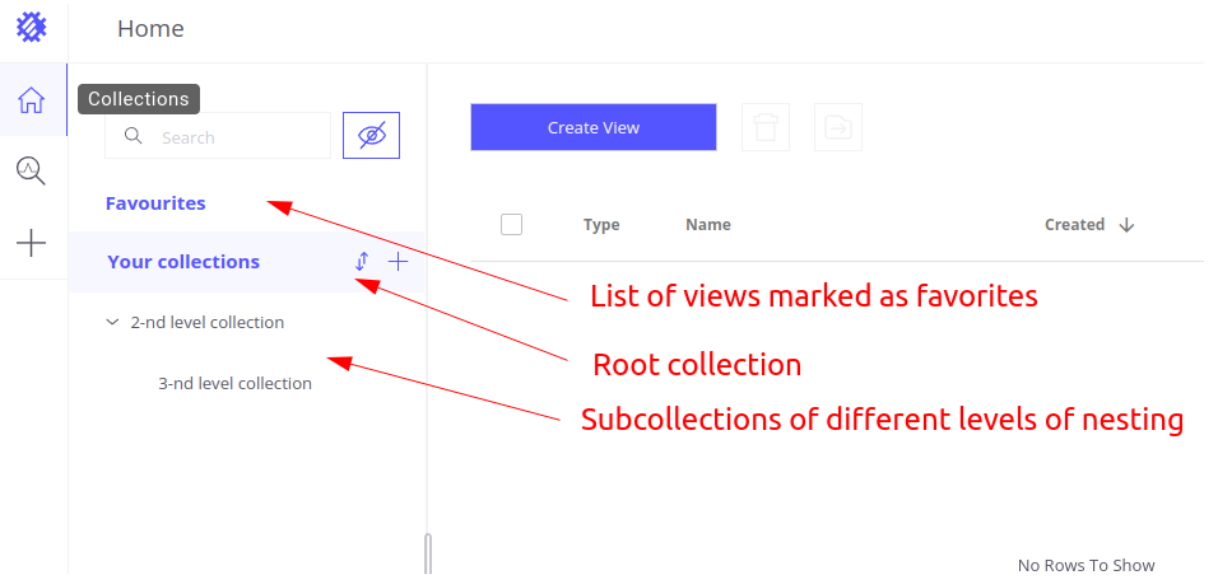
- Your collections (root) : This is the default common folder that is consistently available for all users and cannot be deleted. It serves as the root directory for creating all other subcollections.
- Subcollections : These are all the folders that have been created within the root collection. Subcollections can be nested inside one another without any limitation on the level of nesting.
- Favourites : These are lists of frequently used views that you have personally selected to facilitate faster access. To choose a collection, all you need to do is click on the star icon located in the views table.
Permissions and Visibility between users
There are three types of permissions on collections and visualization:
- Full permissions (read, write, and run) : This means the user can make changes to the visualization or collection (save it). Only the owner (creator) has full rights, meaning that even a tenant cannot modify visualizations created by other users (customers, subcostomers or users).
- ** Limited permissions (read and run)**: In this case, the user can view and interact with the visualization or collection, but cannot save any changes. Limited rights are granted to users with higher rank who are not the owners. In other words, the tenant, for example, can view all the visualizations created by customers, utilize them, and customize them, but he is unable to save any changes. This restriction also applies to collections.
- No permissions : The user will not see the visualization within their collections. Users of the same rank have limited visibility rights, ensuring privacy and data separation. For example, a customer will not have access to the folders and visualizations of another customer, a subcustomer will not have access to another subcustomer’s data, and a user will not have access to other users’ data.
To view the collections and visualizations of users of a lower rank, you can enable this option by clicking on the “Show subcustomers collections and views” button.
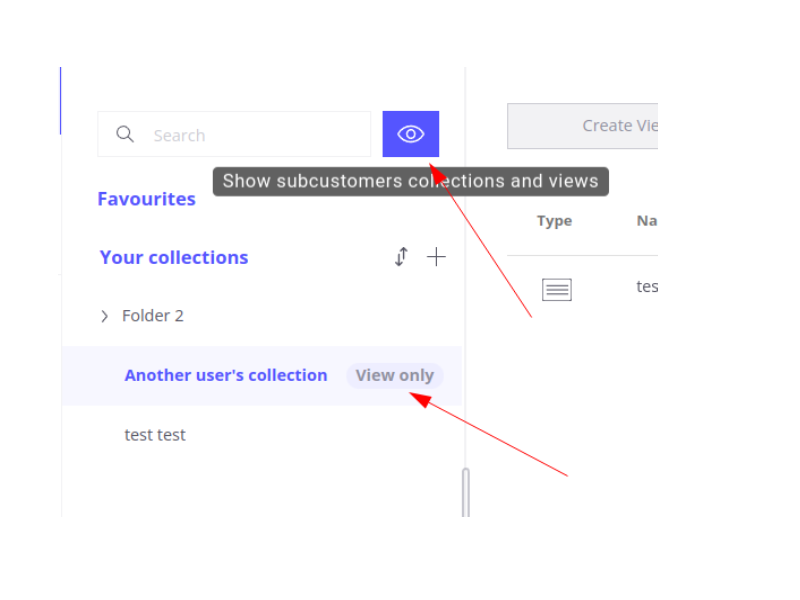
The outcome is as follows: Users of a higher rank have access to view all collections and visualizations of lower-ranked users, but only the user who created the visualization or collection can save changes. Users with the same rank cannot see each other’s collections or visualizations.
Collection and view management
Creation
A new collection is created by pressing the “Add new” button on the previously created collection, within which the new one will appear.
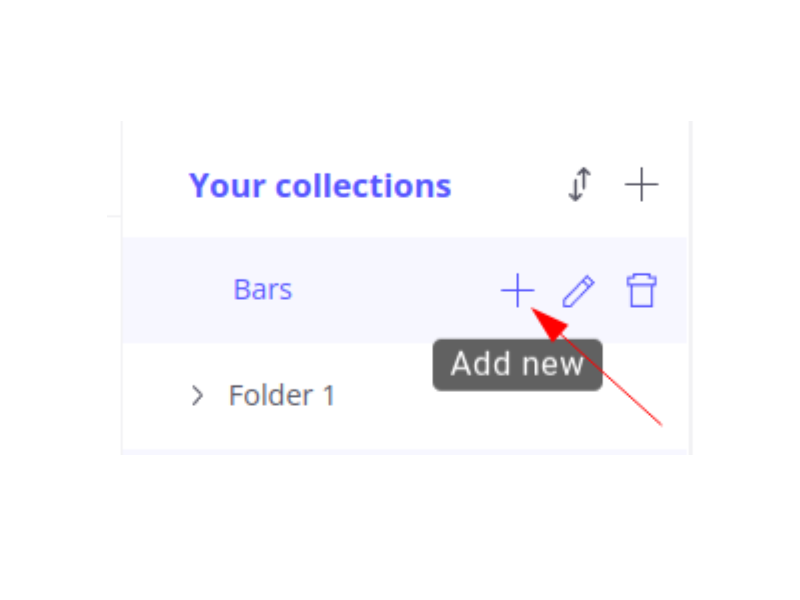
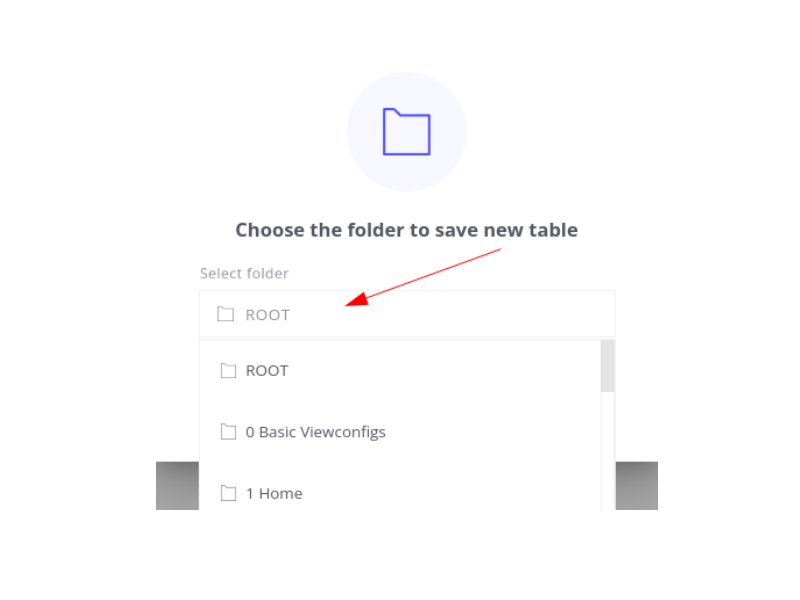
When creating a new visualization, it is not automatically associated with any collection until it is saved. During the initial save process, you will be prompted to choose the collection in which you want to save the visualization.
Sorting
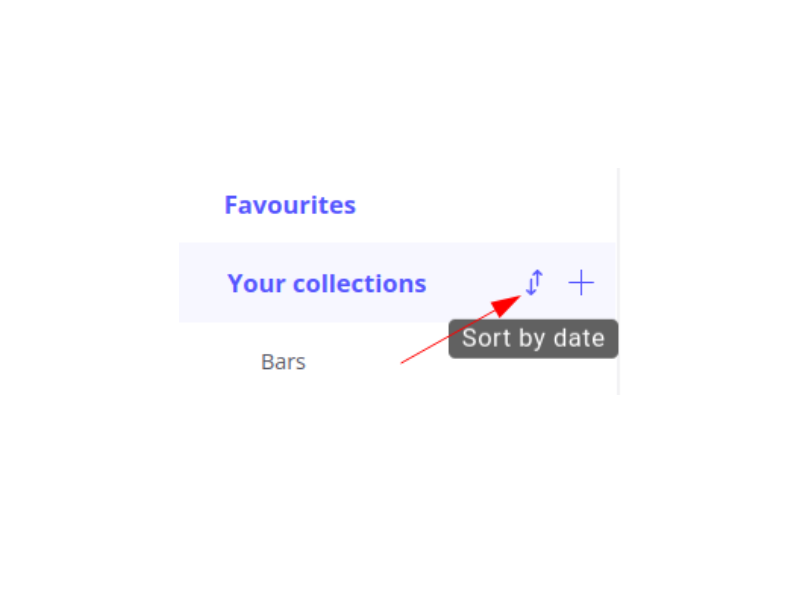
Collections can be sorted either by name or by date. By default, the sorting is based on the collection names. To switch to sorting by date, simply click on the “Sort by date” button located next to the name of the root collection. The sort order is not preserved. After reloading the page, it will be changed back to default.
Editing
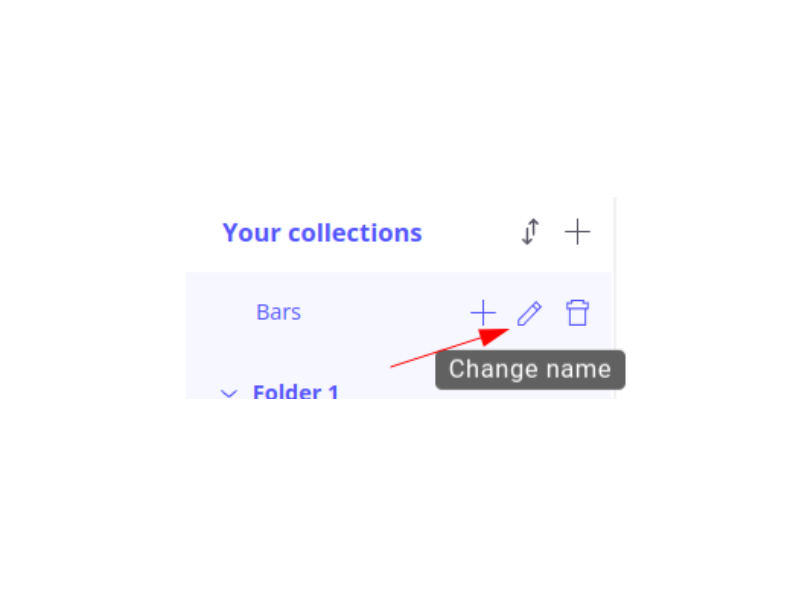
A previously created collection (except for the root one) can be renamed. To do this, click on the “Change name” button.
You can perform various actions on a visualization, such as renaming it, moving it to another collection, or making a copy of it. These options, along with the deletion feature, are accessible through a menu. To access the menu, click on the button with three dots located in the visualization table.

Additionally, you have the option to perform bulk actions on multiple visualizations, such as moving them to another collection or deleting them.

Deletion
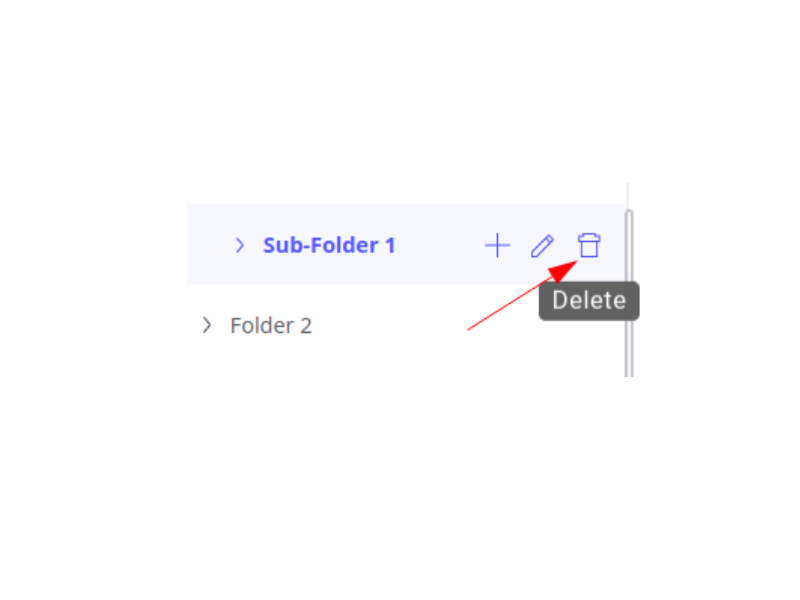
To ensure data integrity, it is not possible to delete a collection that still contains at least one visualization or non-empty subcollection. In order to delete a collection, you must first remove or move all the visualizations within it to another collection.
Next Steps
-
Getting started guide - These guide provide quick overview of main Trendz features.
-
Installation guides - Learn how to setup ThingsBoard on various available operating systems.
-
Metric Explorer - Learn how to explore and create new metrics with Trendz Metric Explorer.
-
Anomaly Detection - Learn how to identify anomalies in the data.
-
Calculated Fields - Learn about Calculated fields and how to use them.
-
States - Learn how to define and analyse states for assets based on raw telemetry.
-
Prediction - Learn how to make forecasts and predict telemetry behavior.
-
Available Visualizations - Learn about visualization widgets available in Trendz and how to configure them.
-
Share and embed Visualizations - Learn how to add Trendz visualizations on ThingsBoard dashboard or 3rd party web pages.
-
AI Assistant - Learn how to utilize Trendz AI capabilities.