Key Concepts
Trendz Metric Explorer allows you to create new metrics from existing telemetries. Let’s describe the flow of metric creation:
Metric Definition
A Metric Definition is an object that describes a future metric. Basically, it includes:
- Metric Name - The name that will appear in the fields tab (in the generated metrics folder).
- Metric Description - A short description explaining what this metric should do.
- How to calculate metrics - A step-by-step instruction explaining how to calculate this metric.
A Metric Definition does not have any implementation, it’s just a textual description of what should be implemented - a blueprint for a future metric.
Generated Metric
A Generated Metric is an implemented metric definition. It contains Python code that can be executed to generate telemetry points (graph or table of values). A metric does not represent points in ThingsBoard, it calculates values in real time. Also, you cannot use a generated metric directly in the Trendz ecosystem - it’s just a template for a future ThingsBoard telemetry.

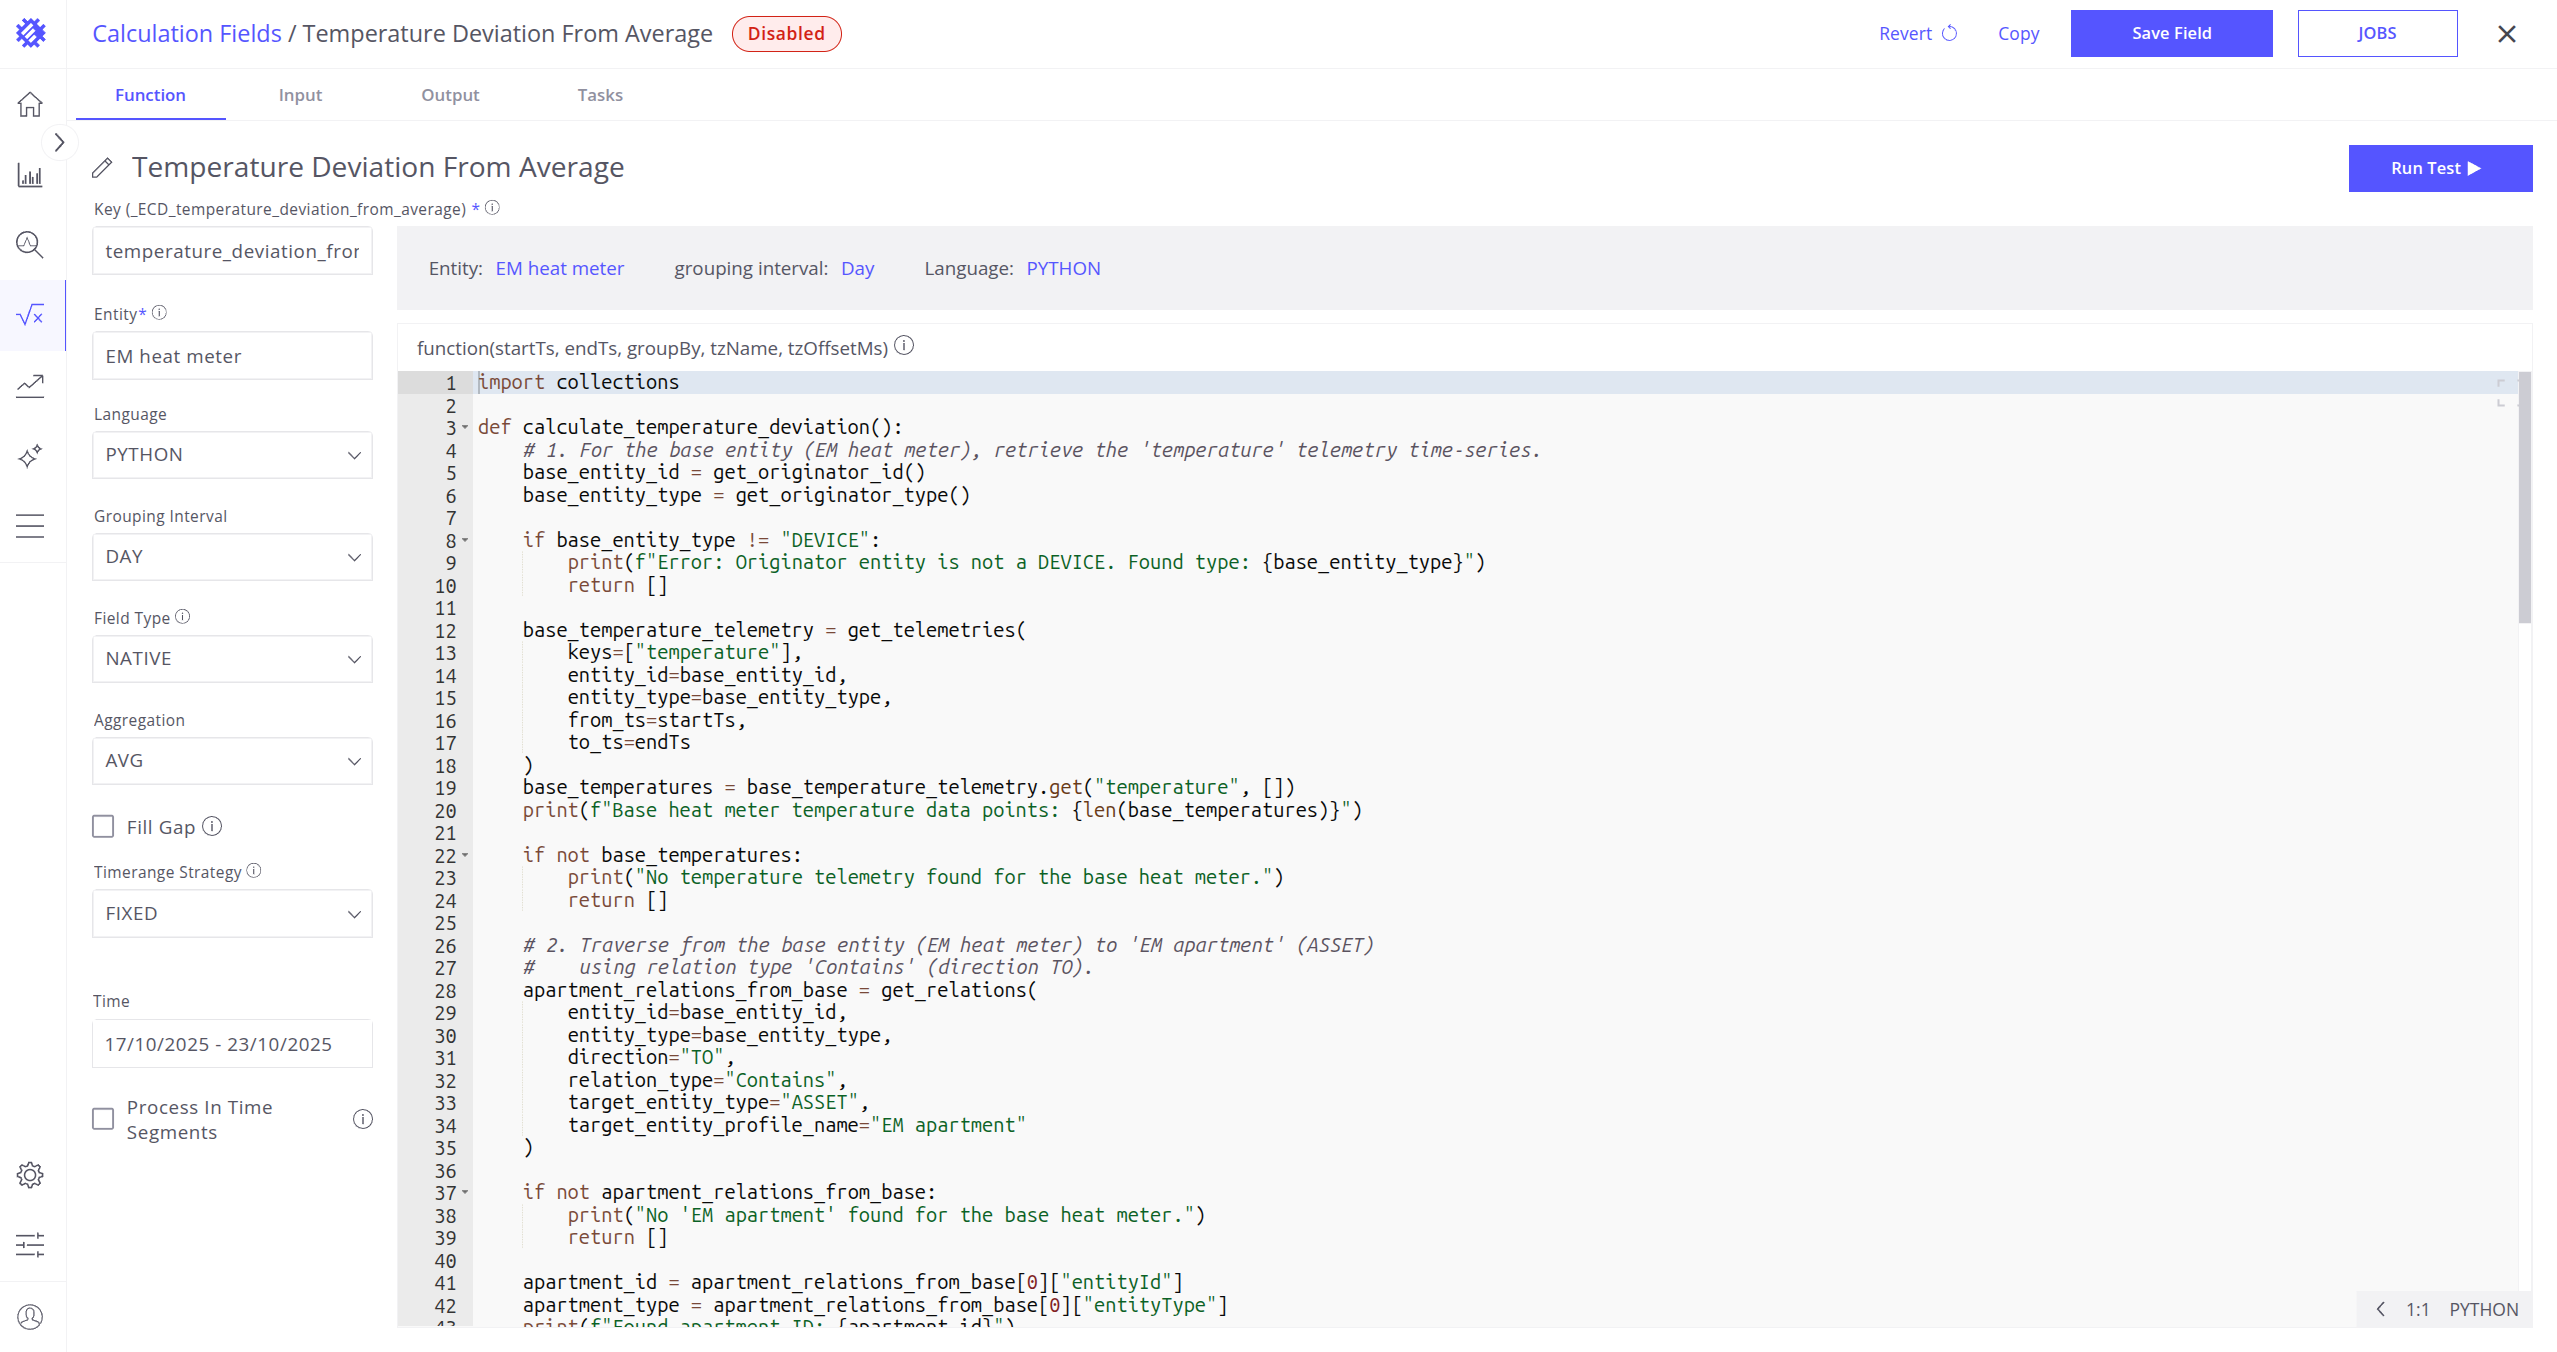
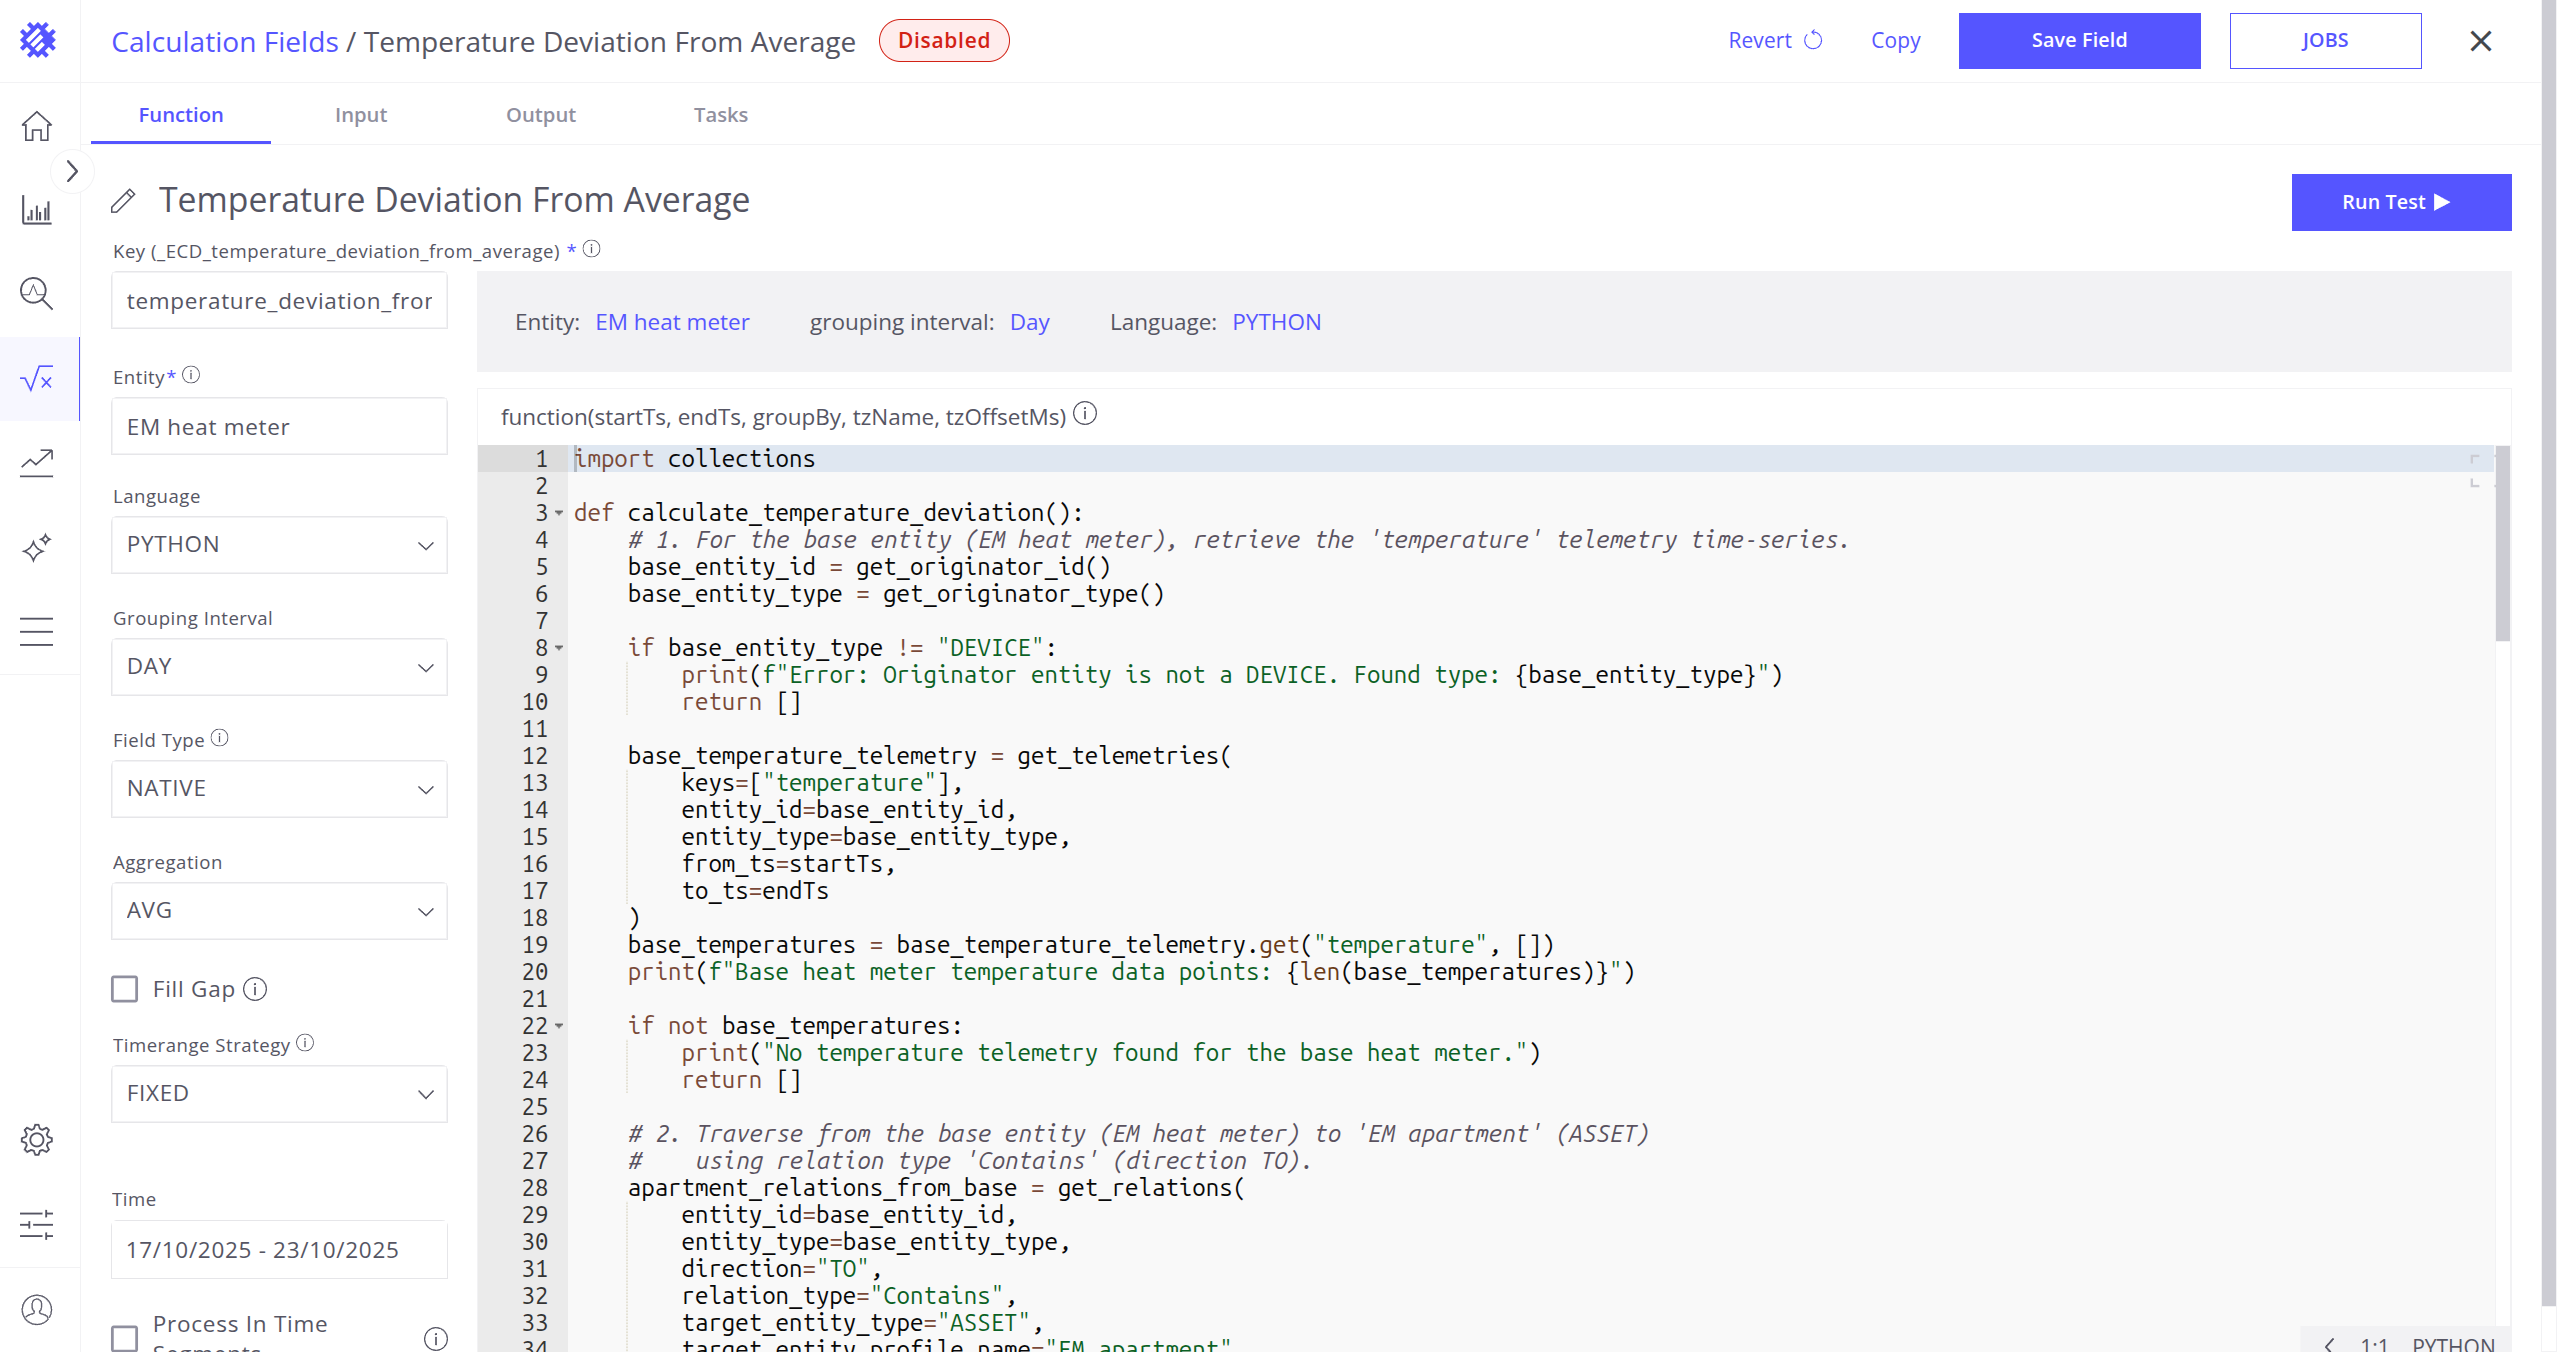
Native Calculation Field
Each metric can be converted into a Native Calculation Field. This field contains the code from the metric that is already integrated into the Trendz ecosystem. At this level, we still do not have points in ThingsBoard, but we can use this Calculation Field as a real-time Calculation Field.
Read more about Native Calculation Fields here.
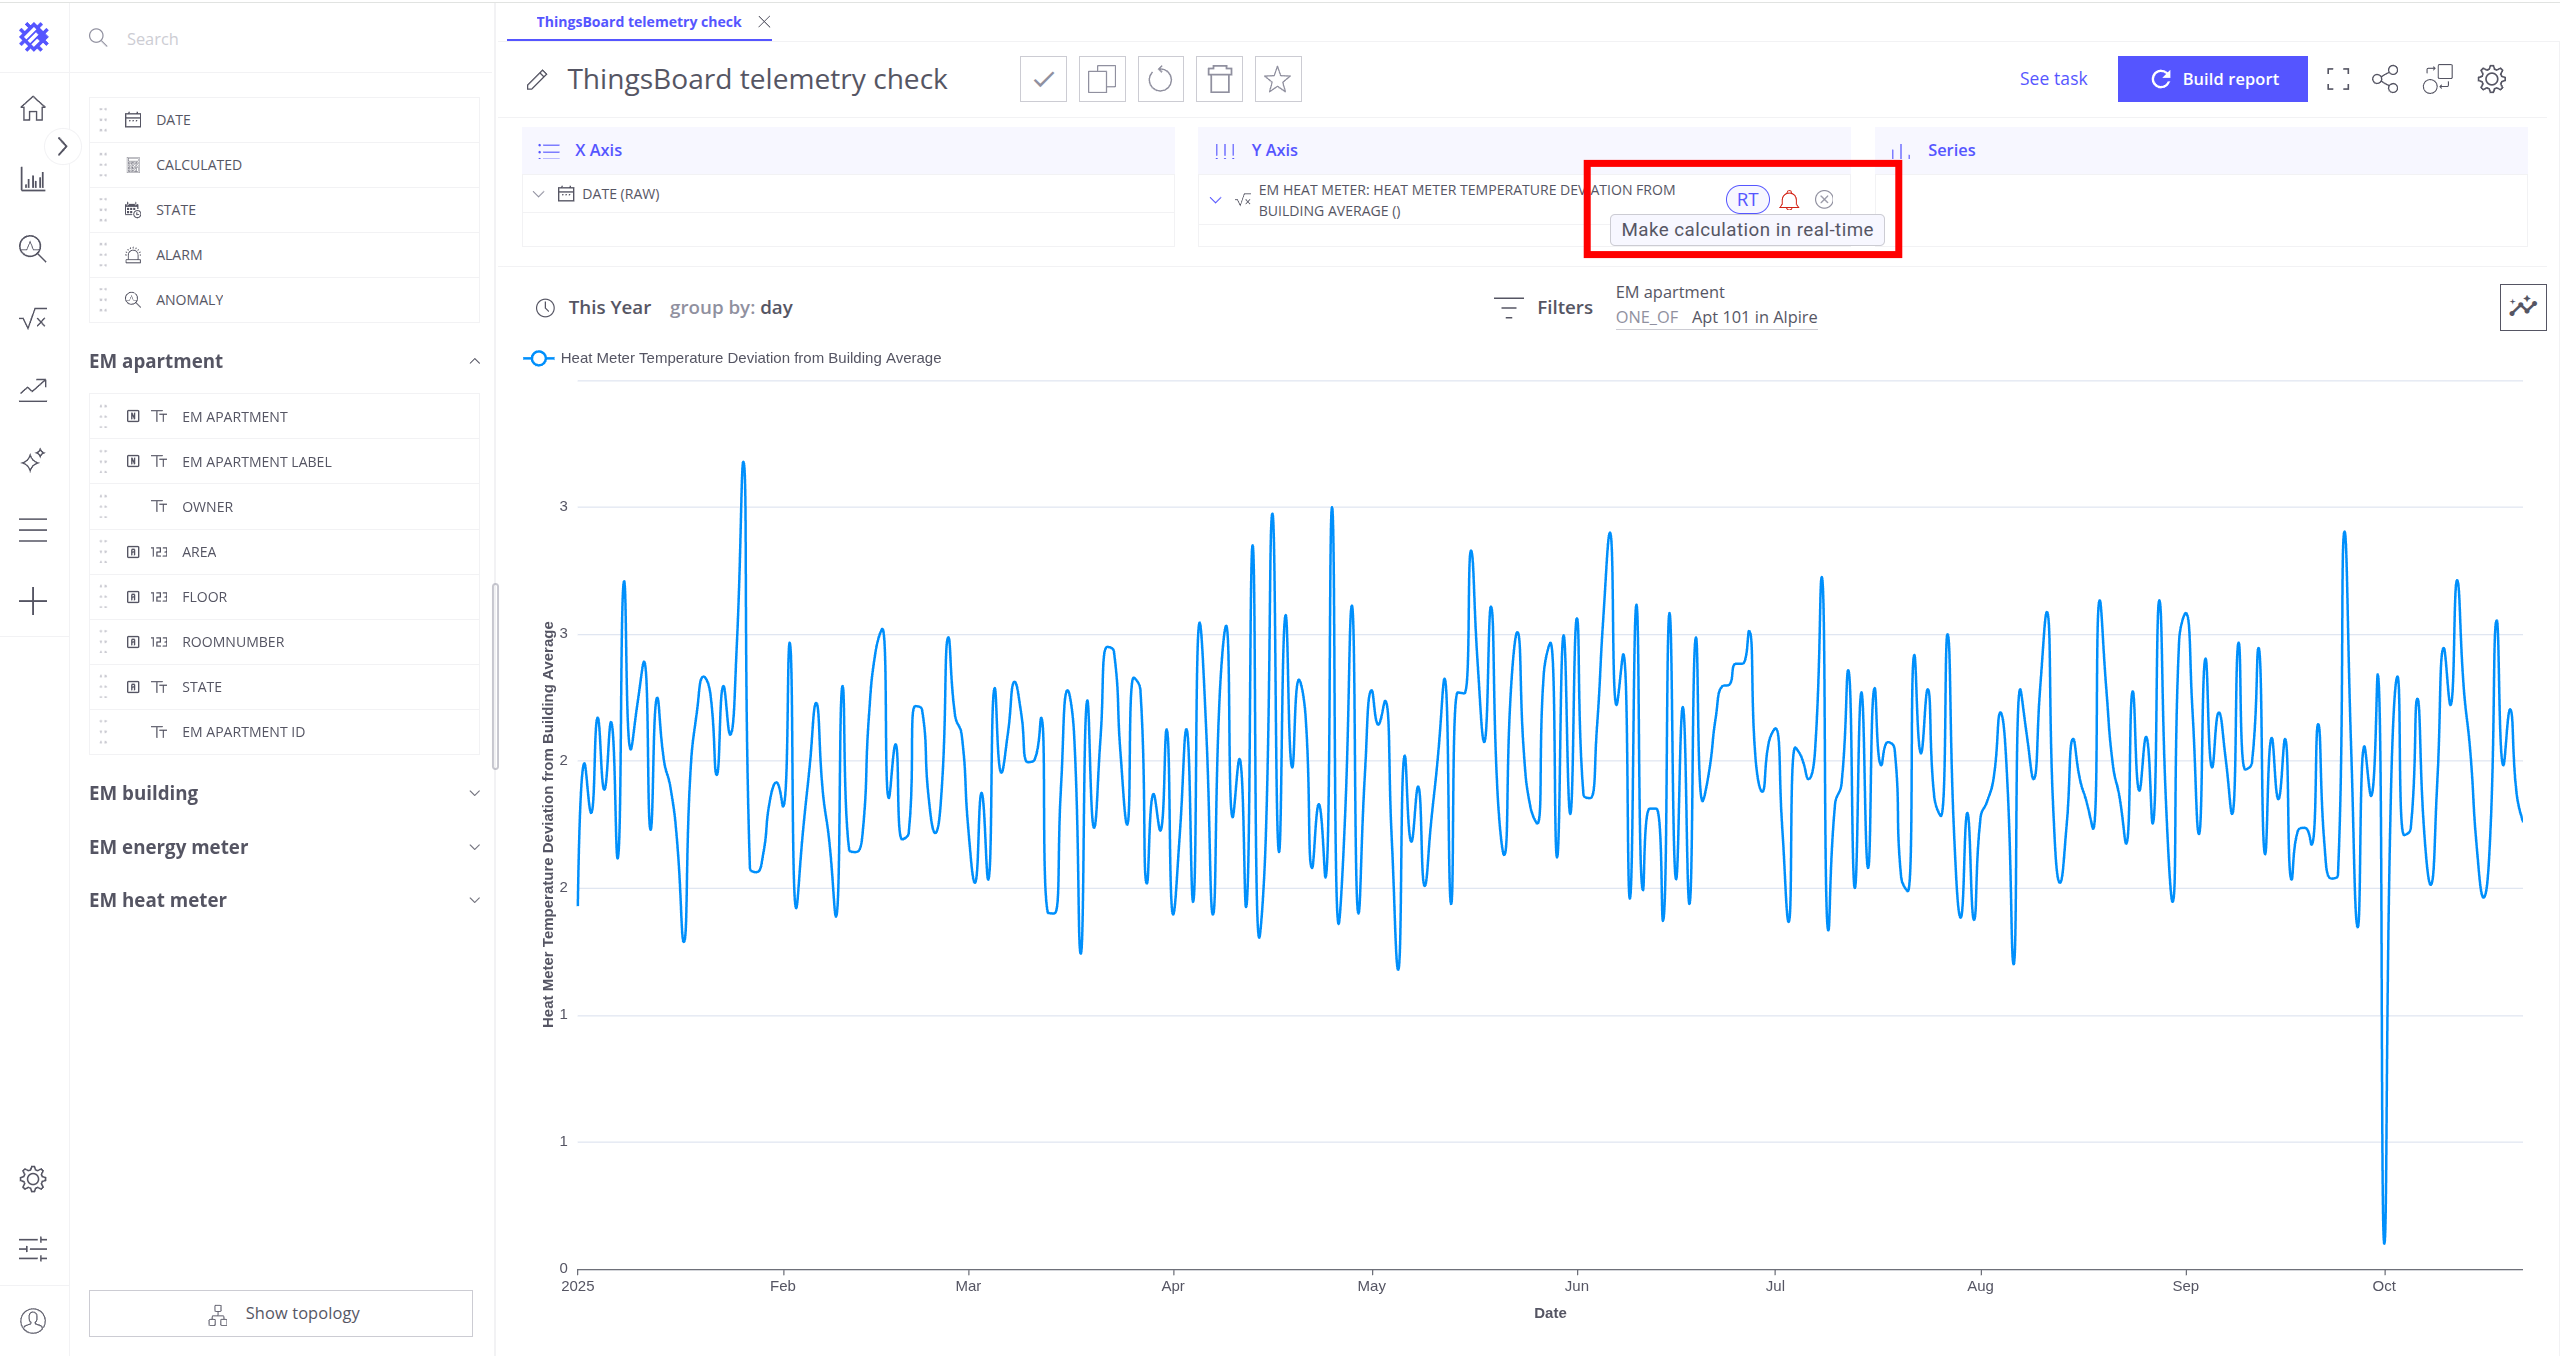
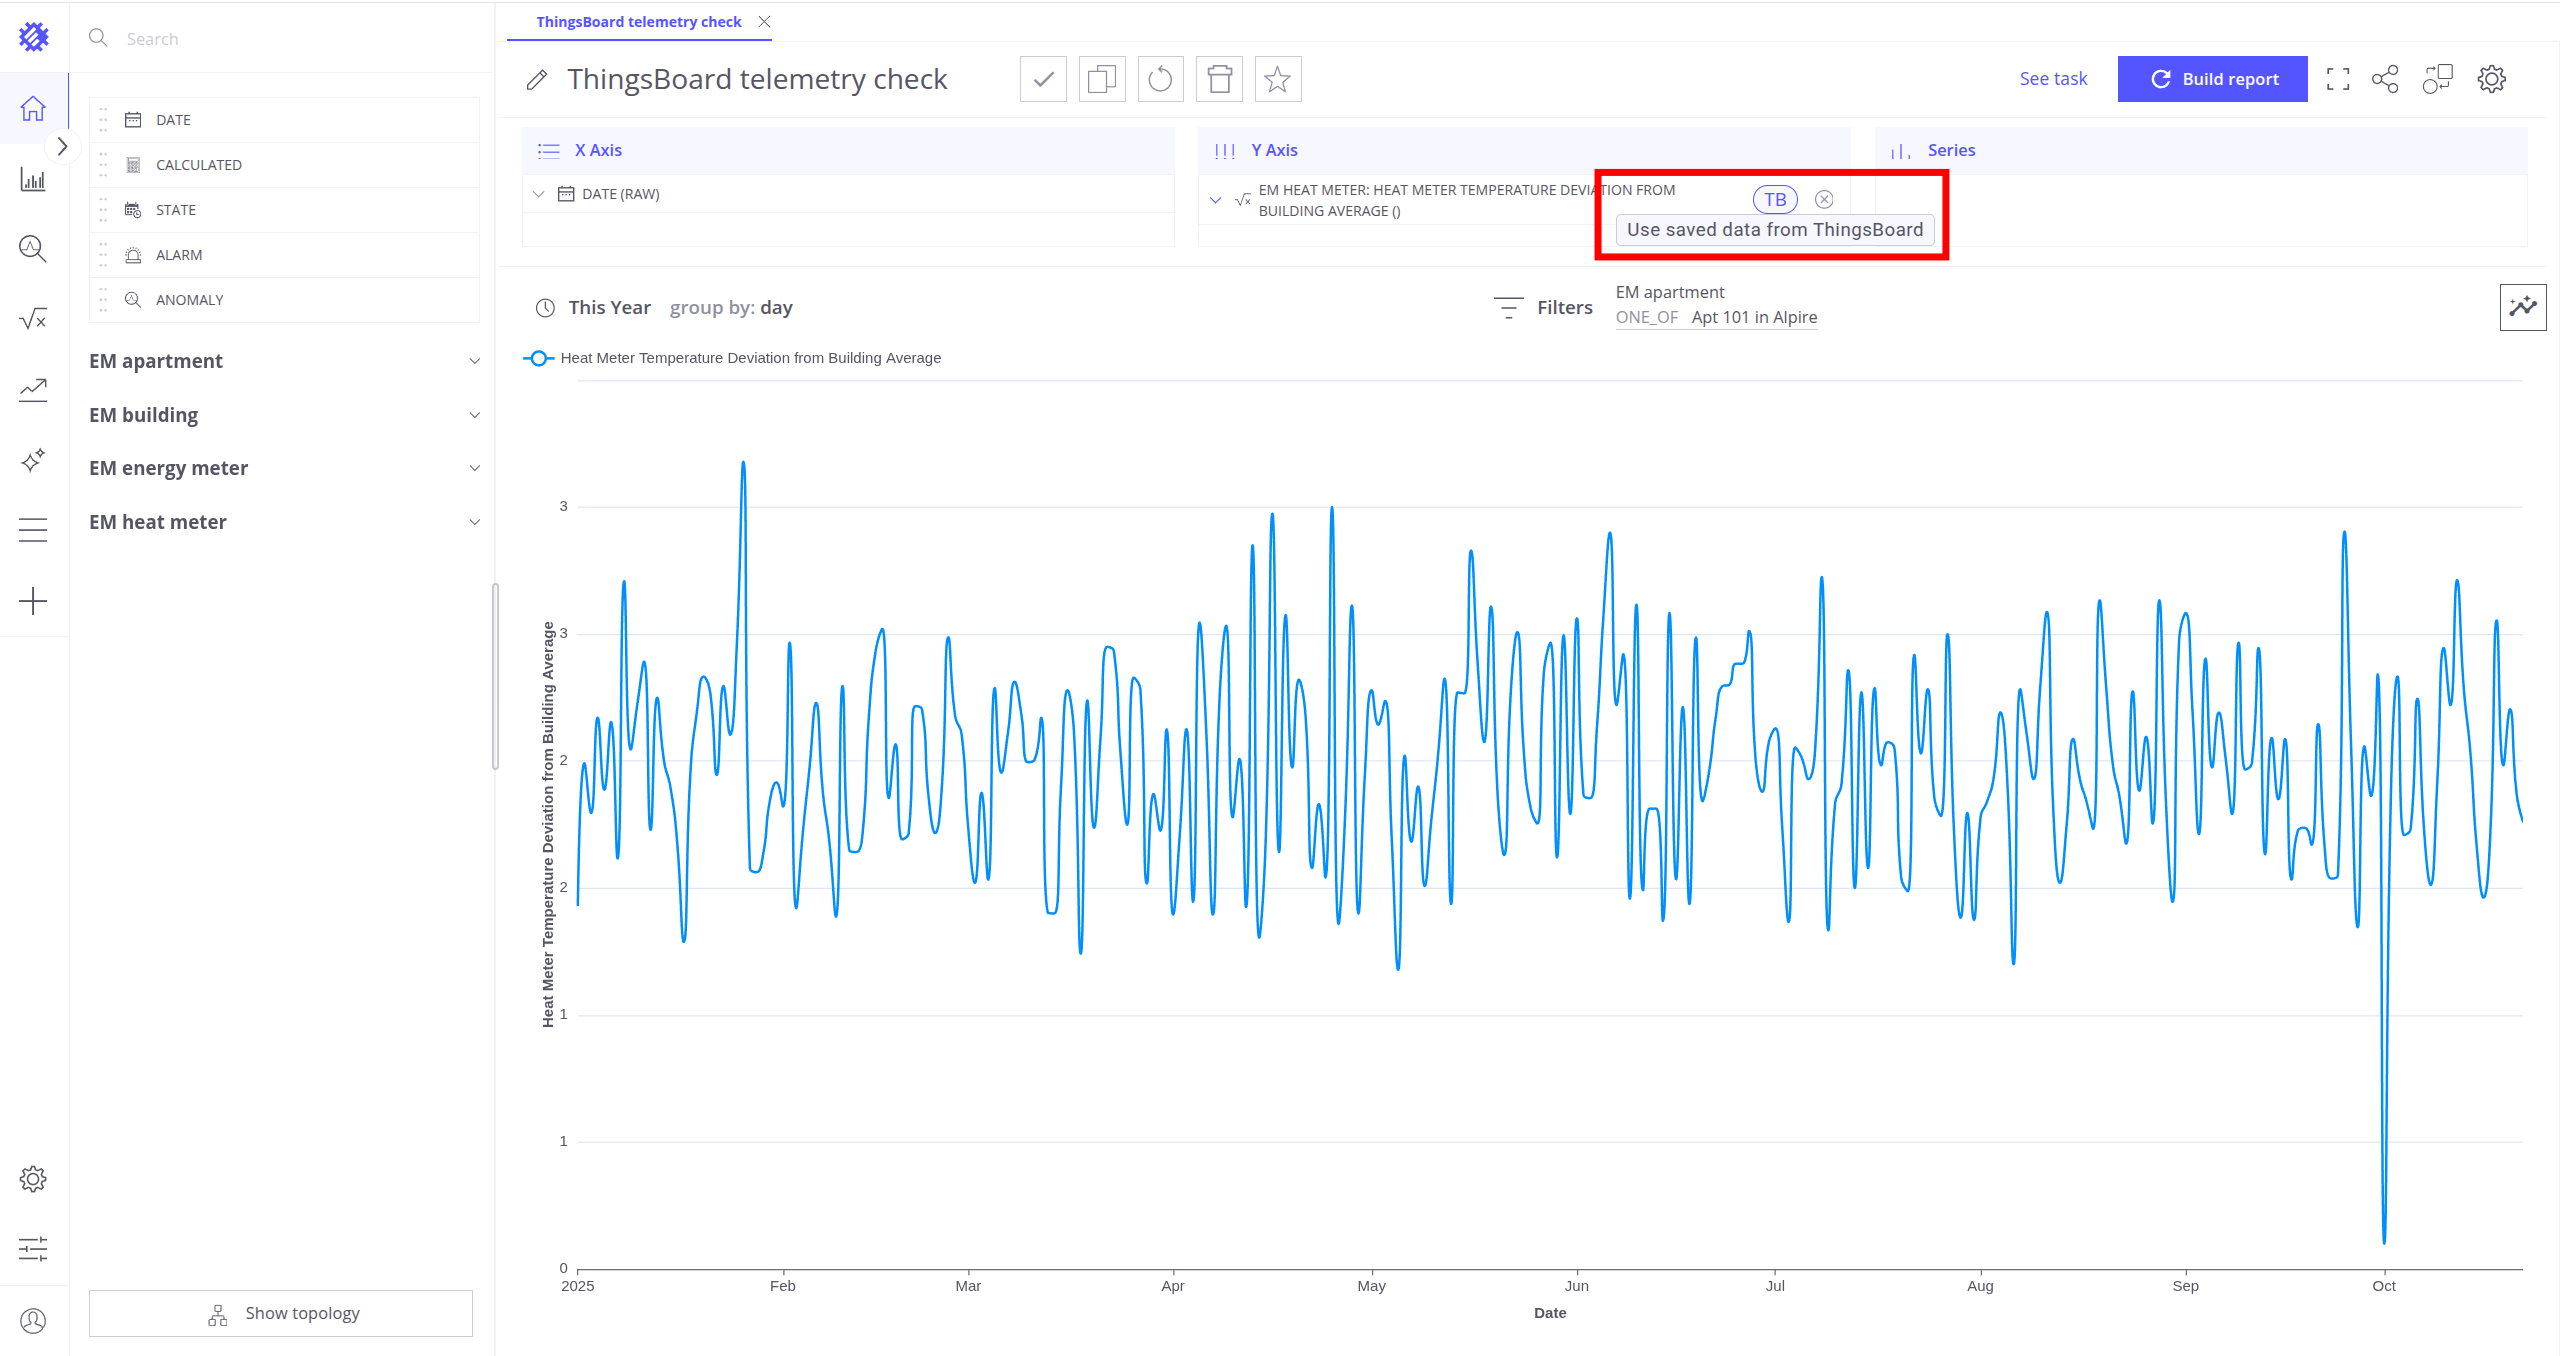
Native Calculation Field with Telemetry Points
To save telemetry points to ThingsBoard, it’s necessary to set up a reprocess or refresh job for the Native Calculation Field.
The flow of saving metric telemetry to ThingsBoard is described here.
Create New Metric
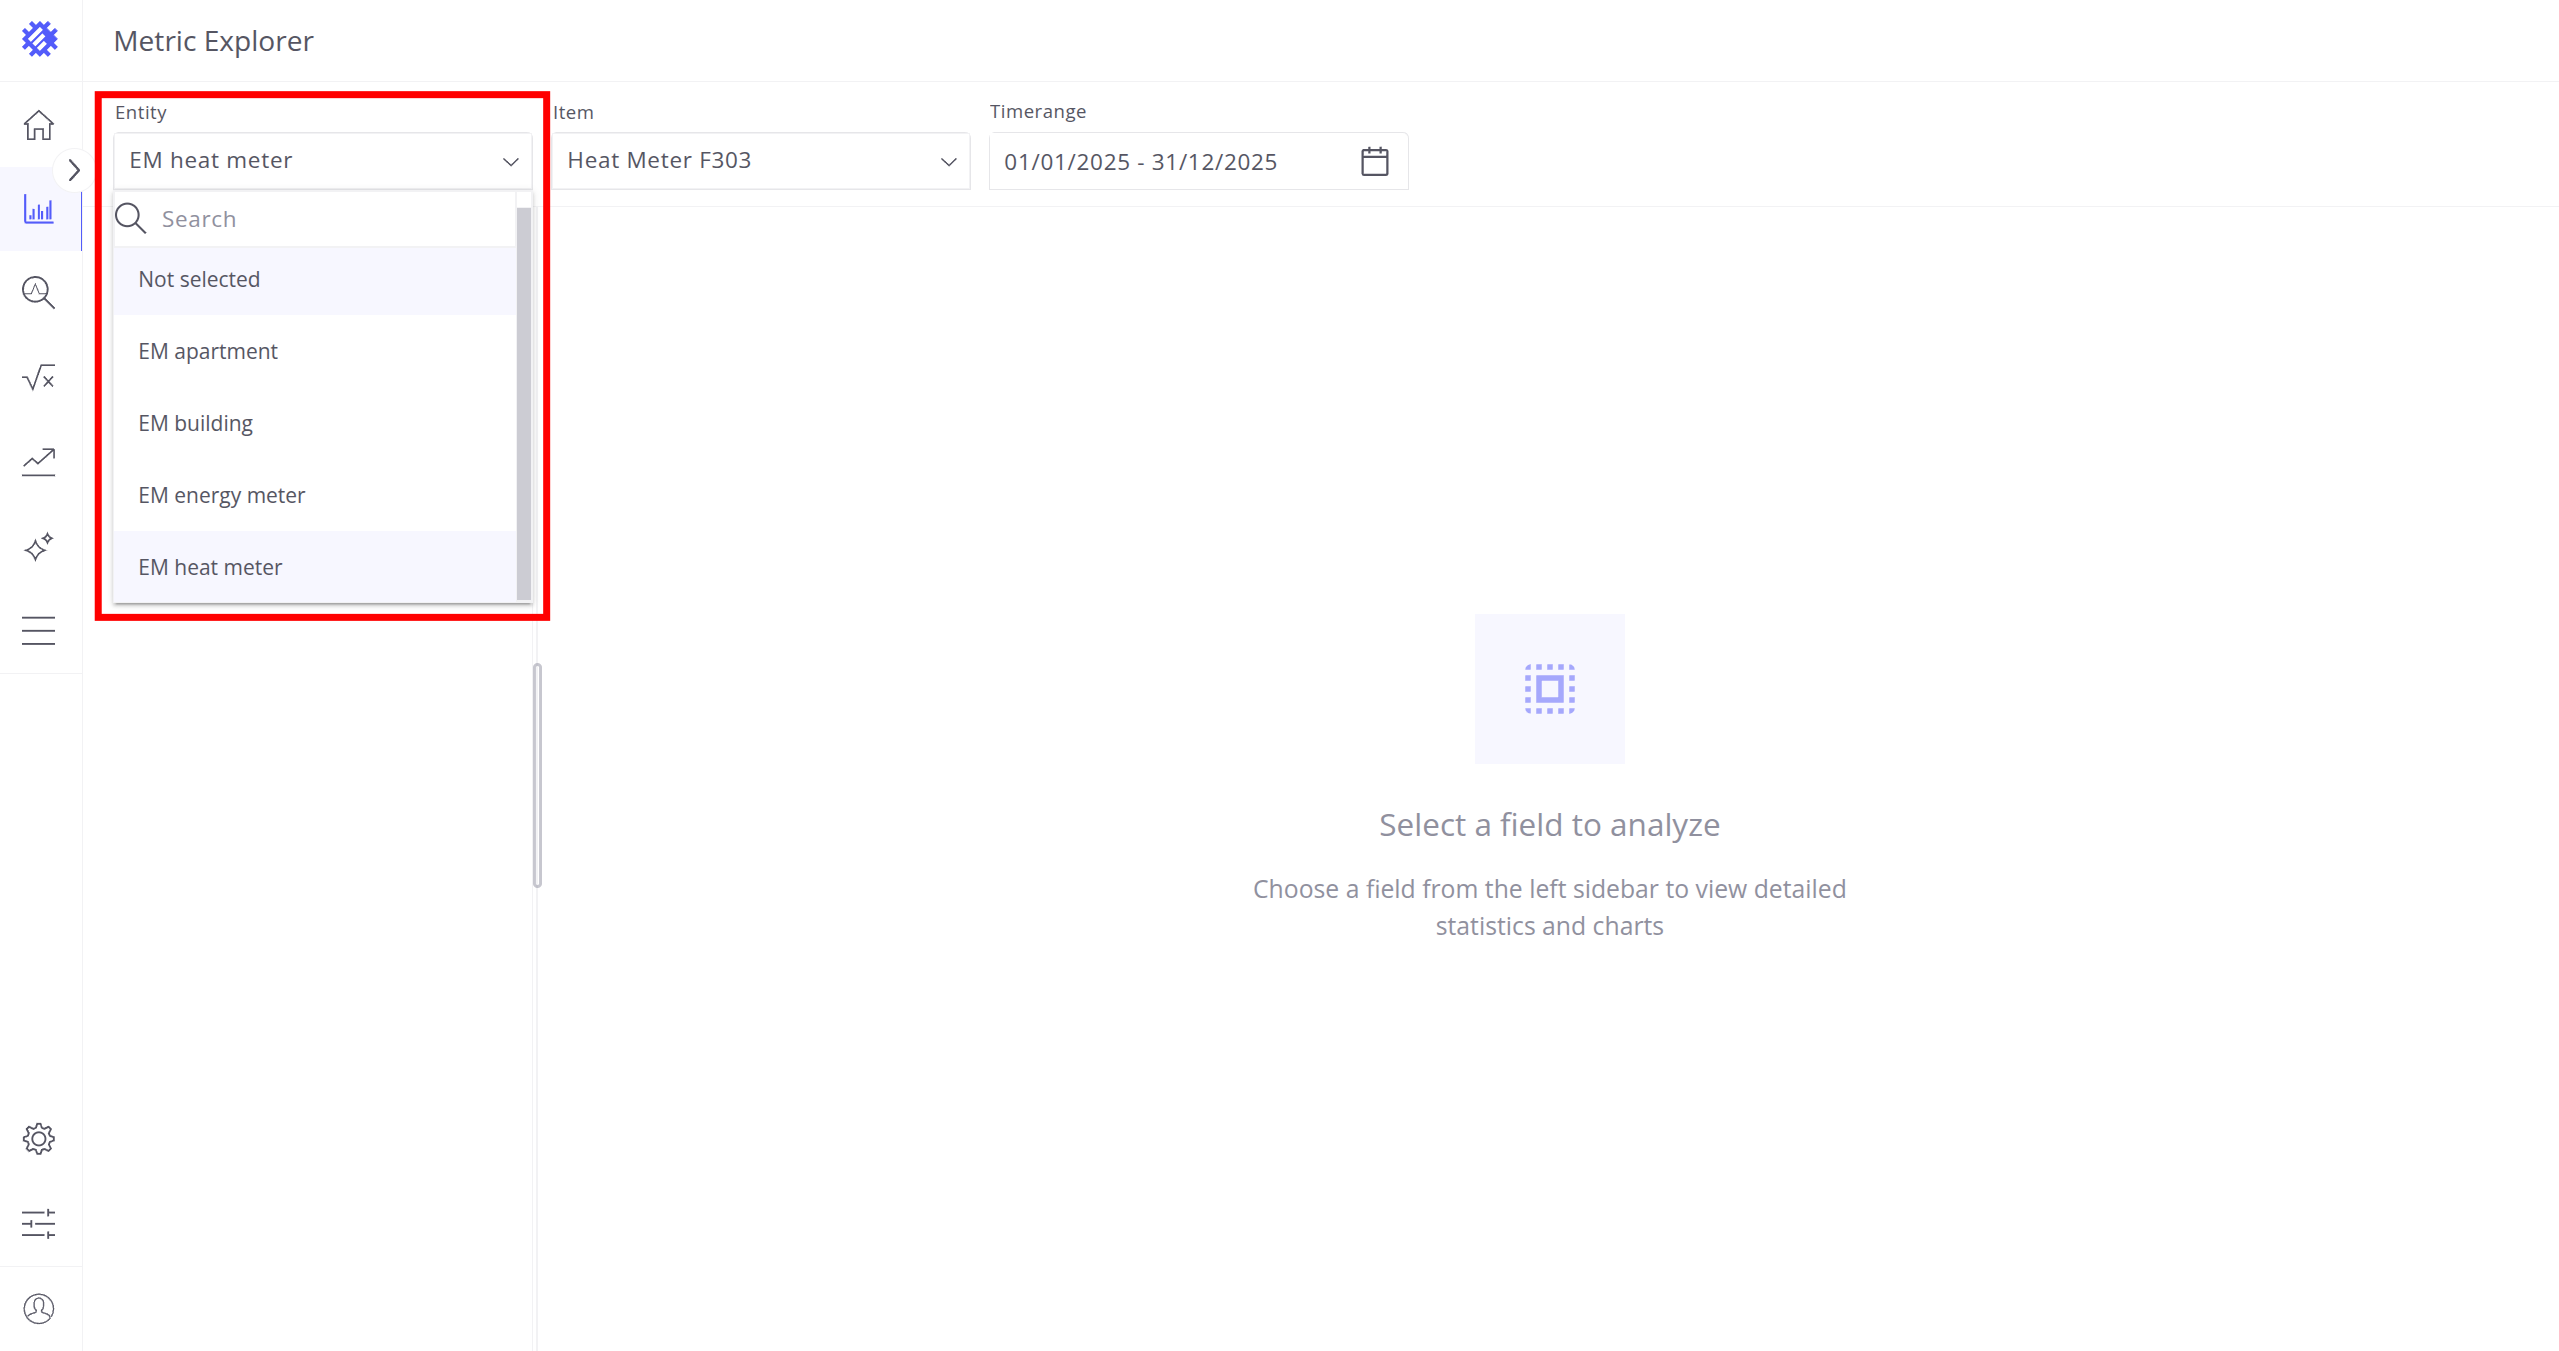
To create a new metric, you need to:
- Choose the business entity for which the metric will be generated.
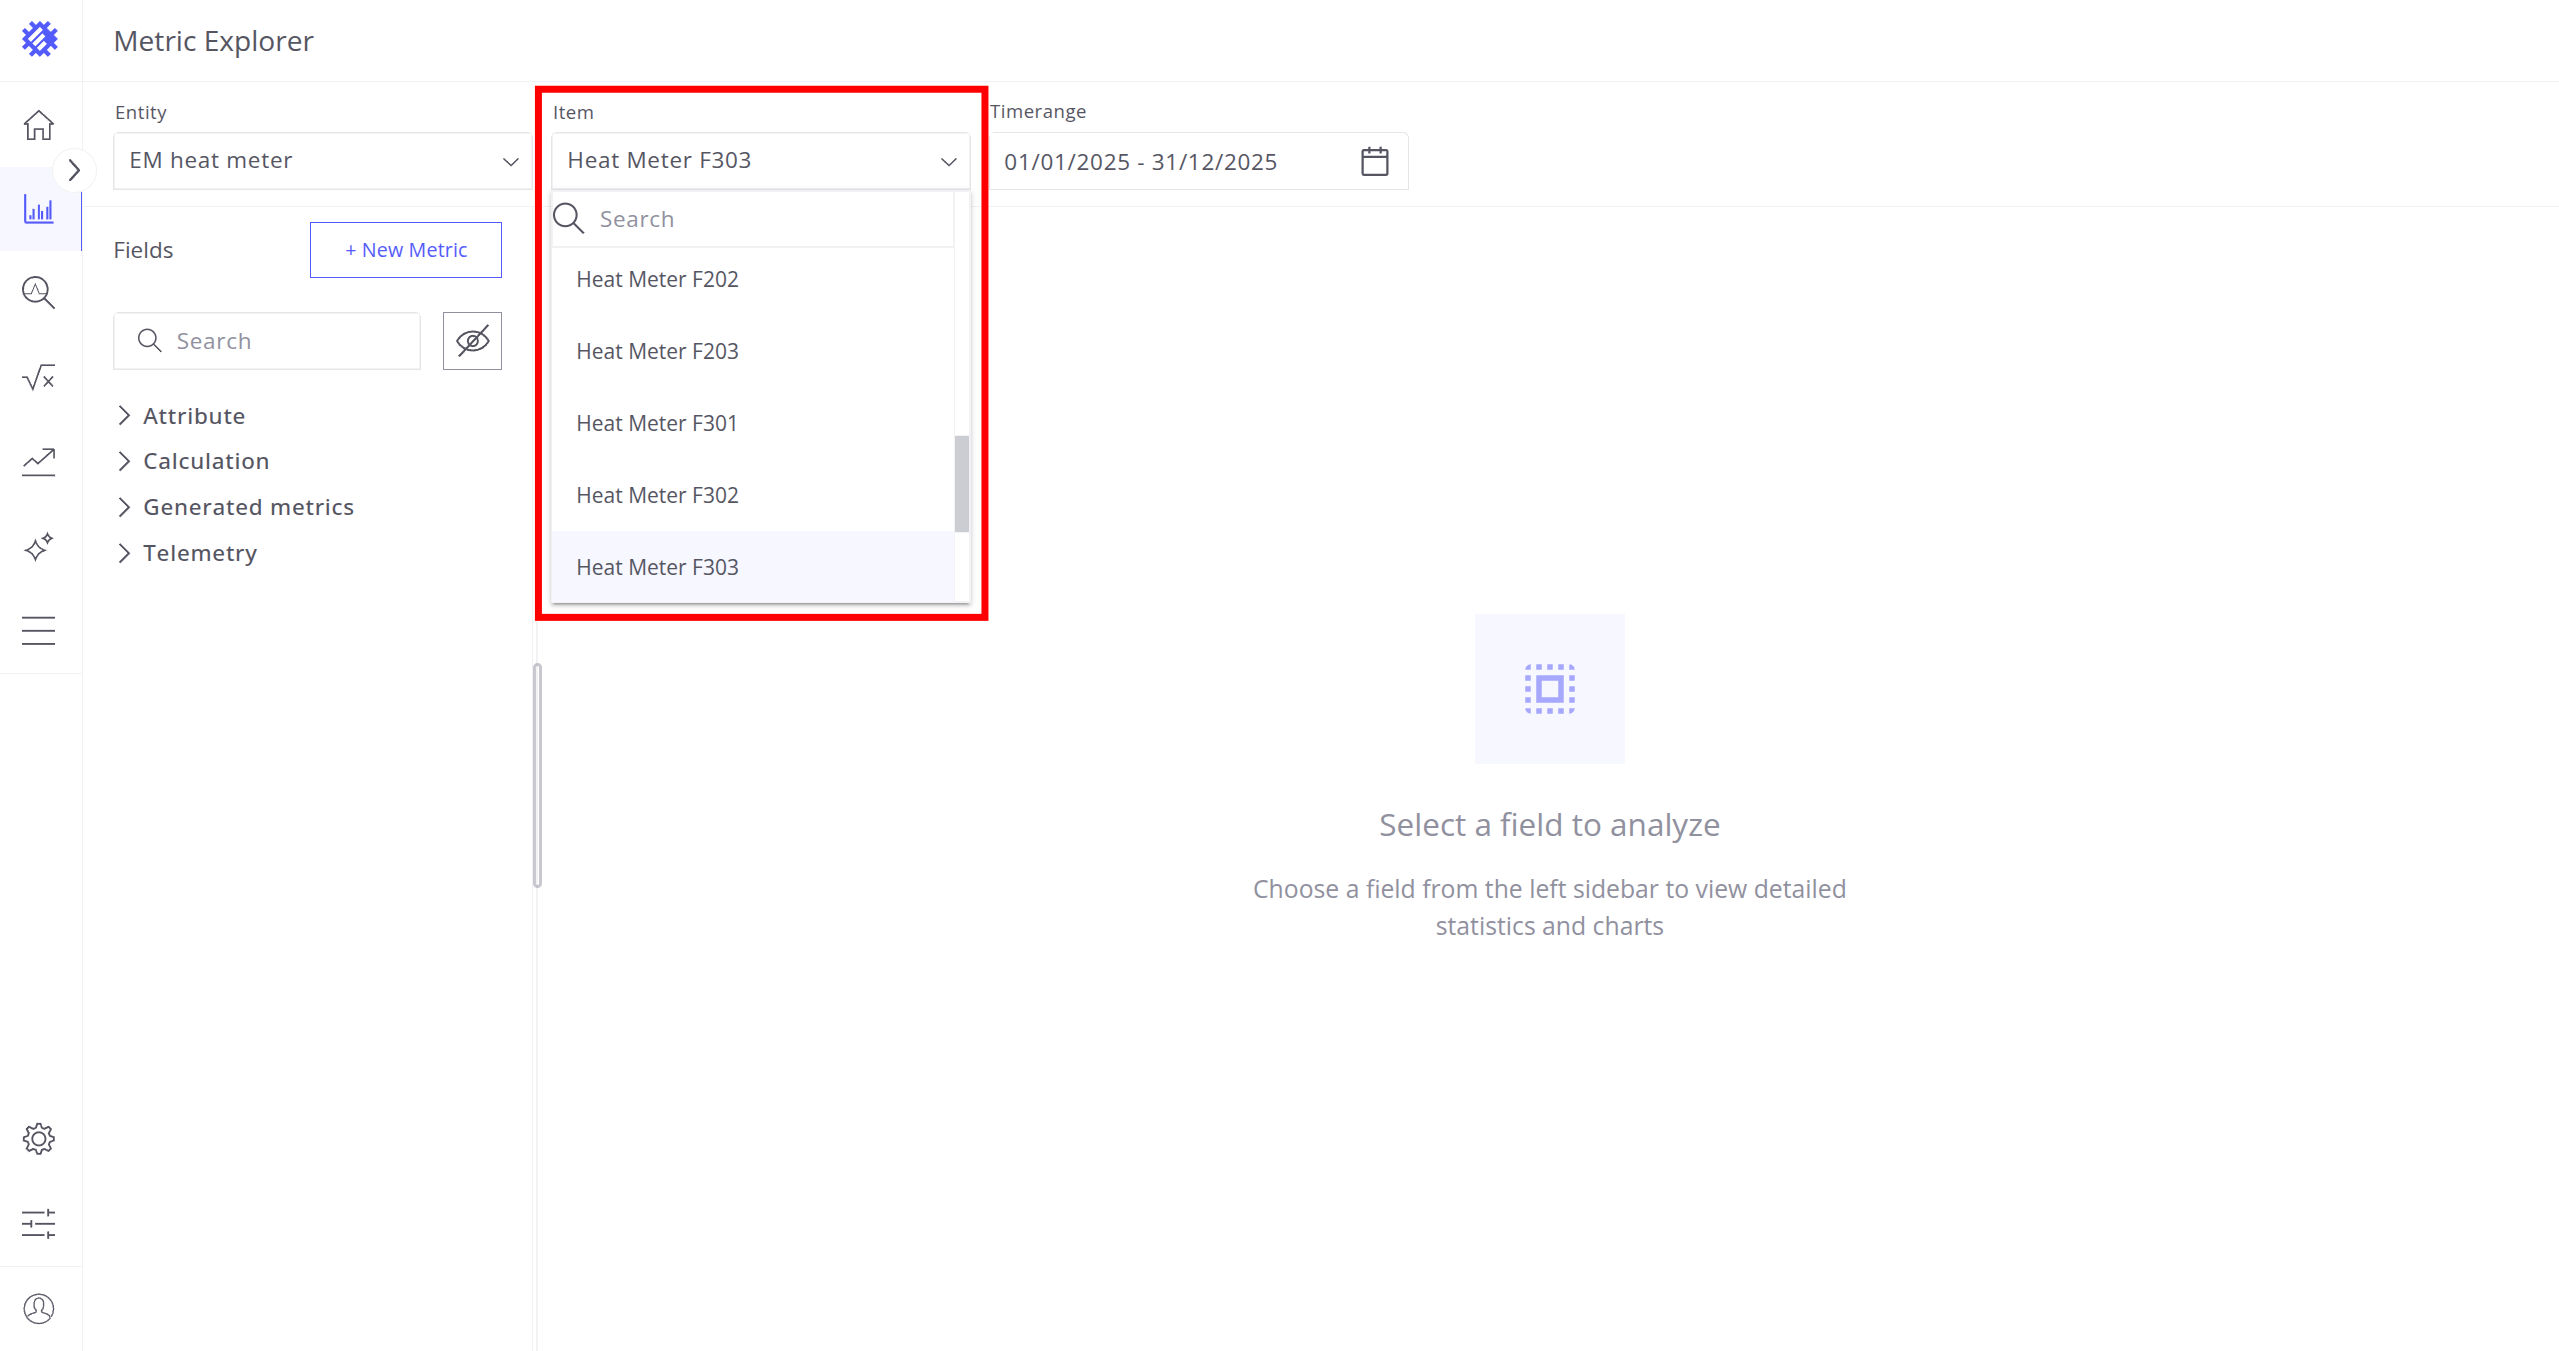
- Choose the item on which the metric will be tested.
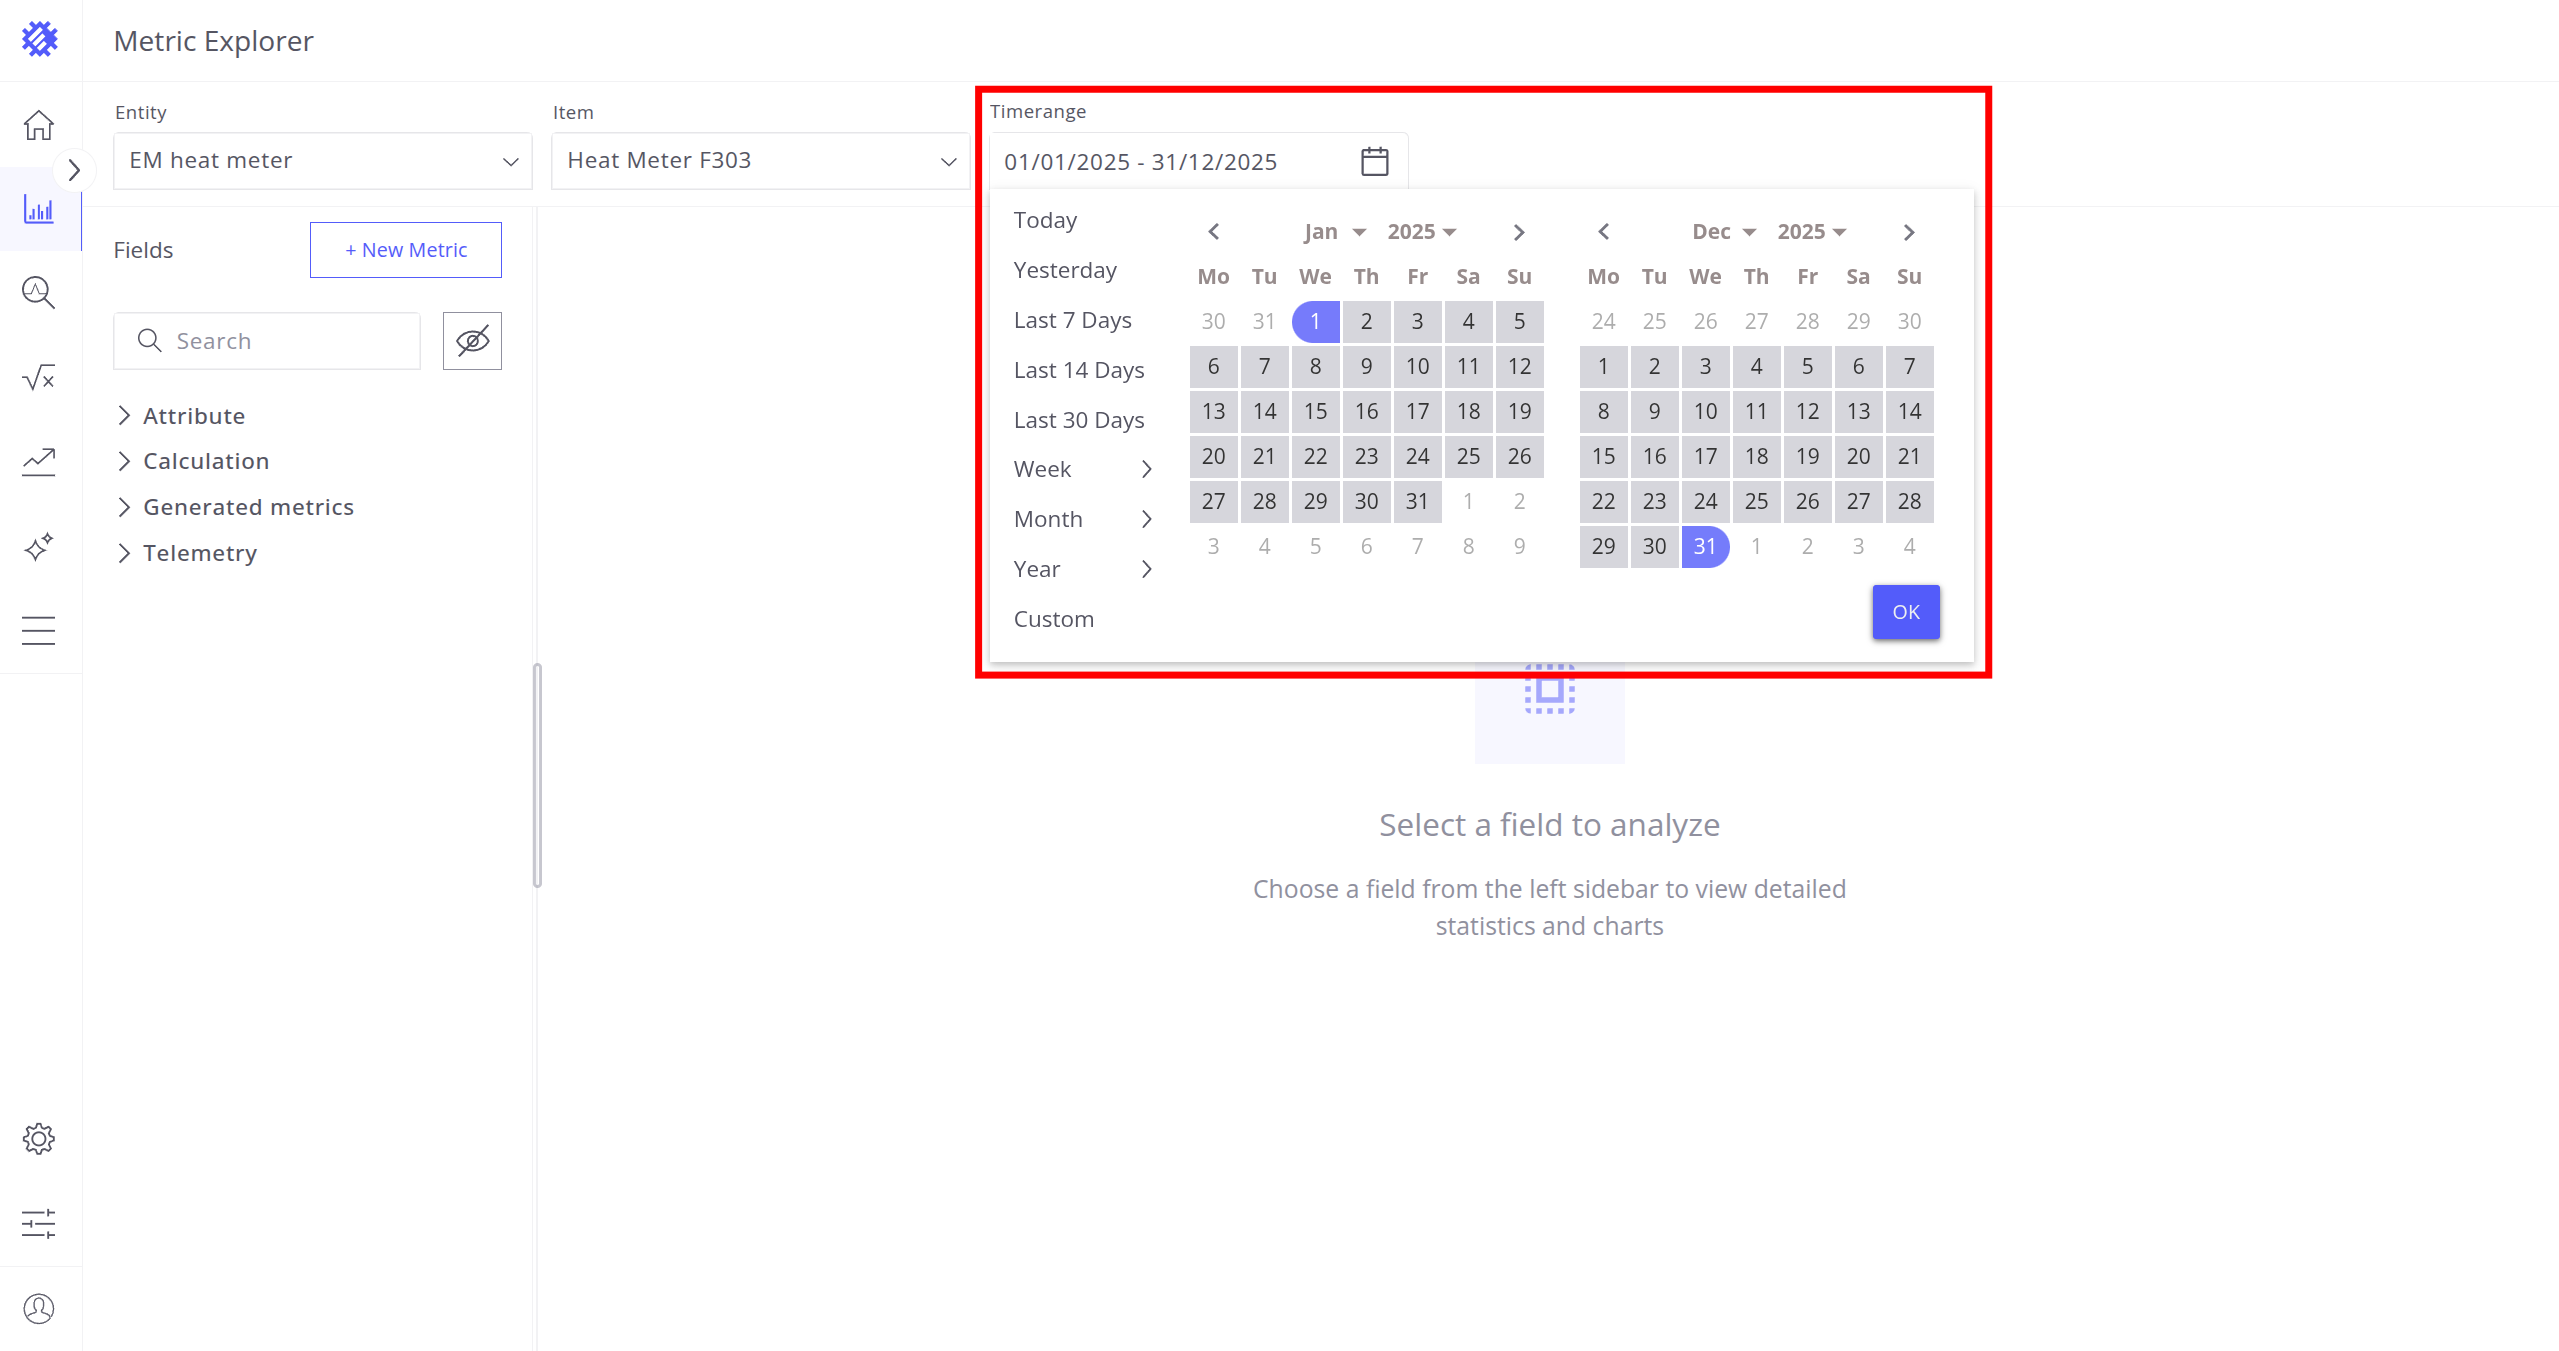
- Choose the timerange on which the metric will be tested.
- Click + New Metric.
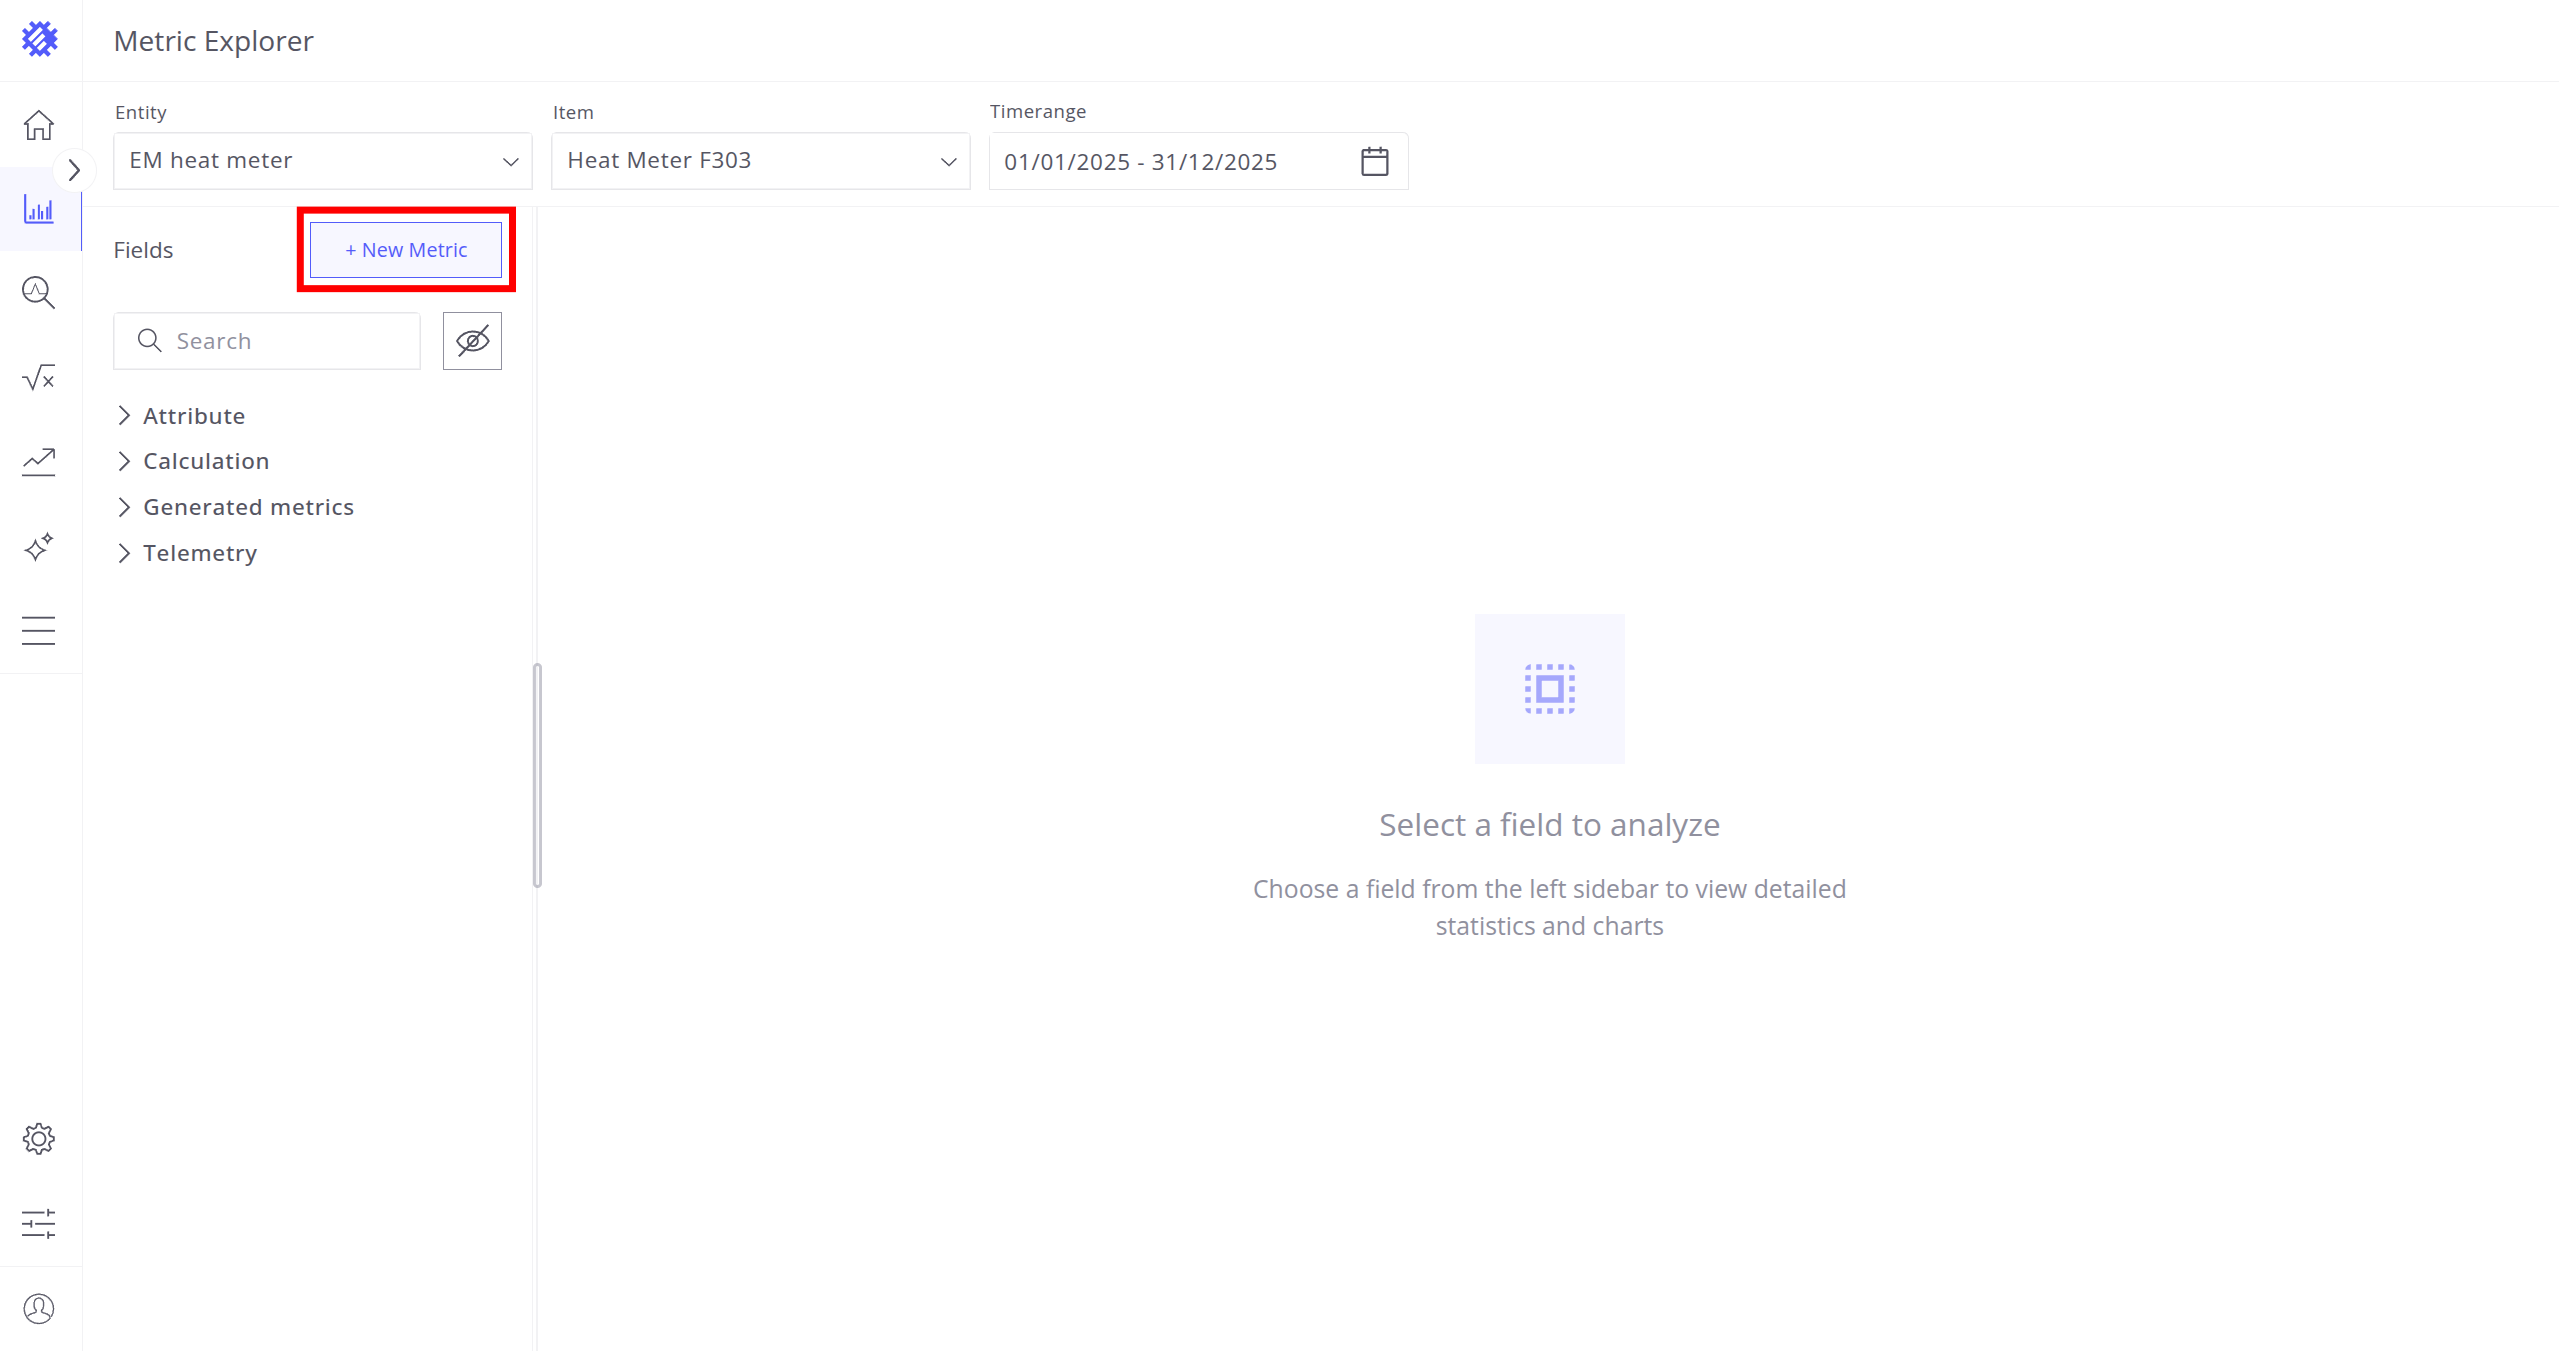
You will see two options:
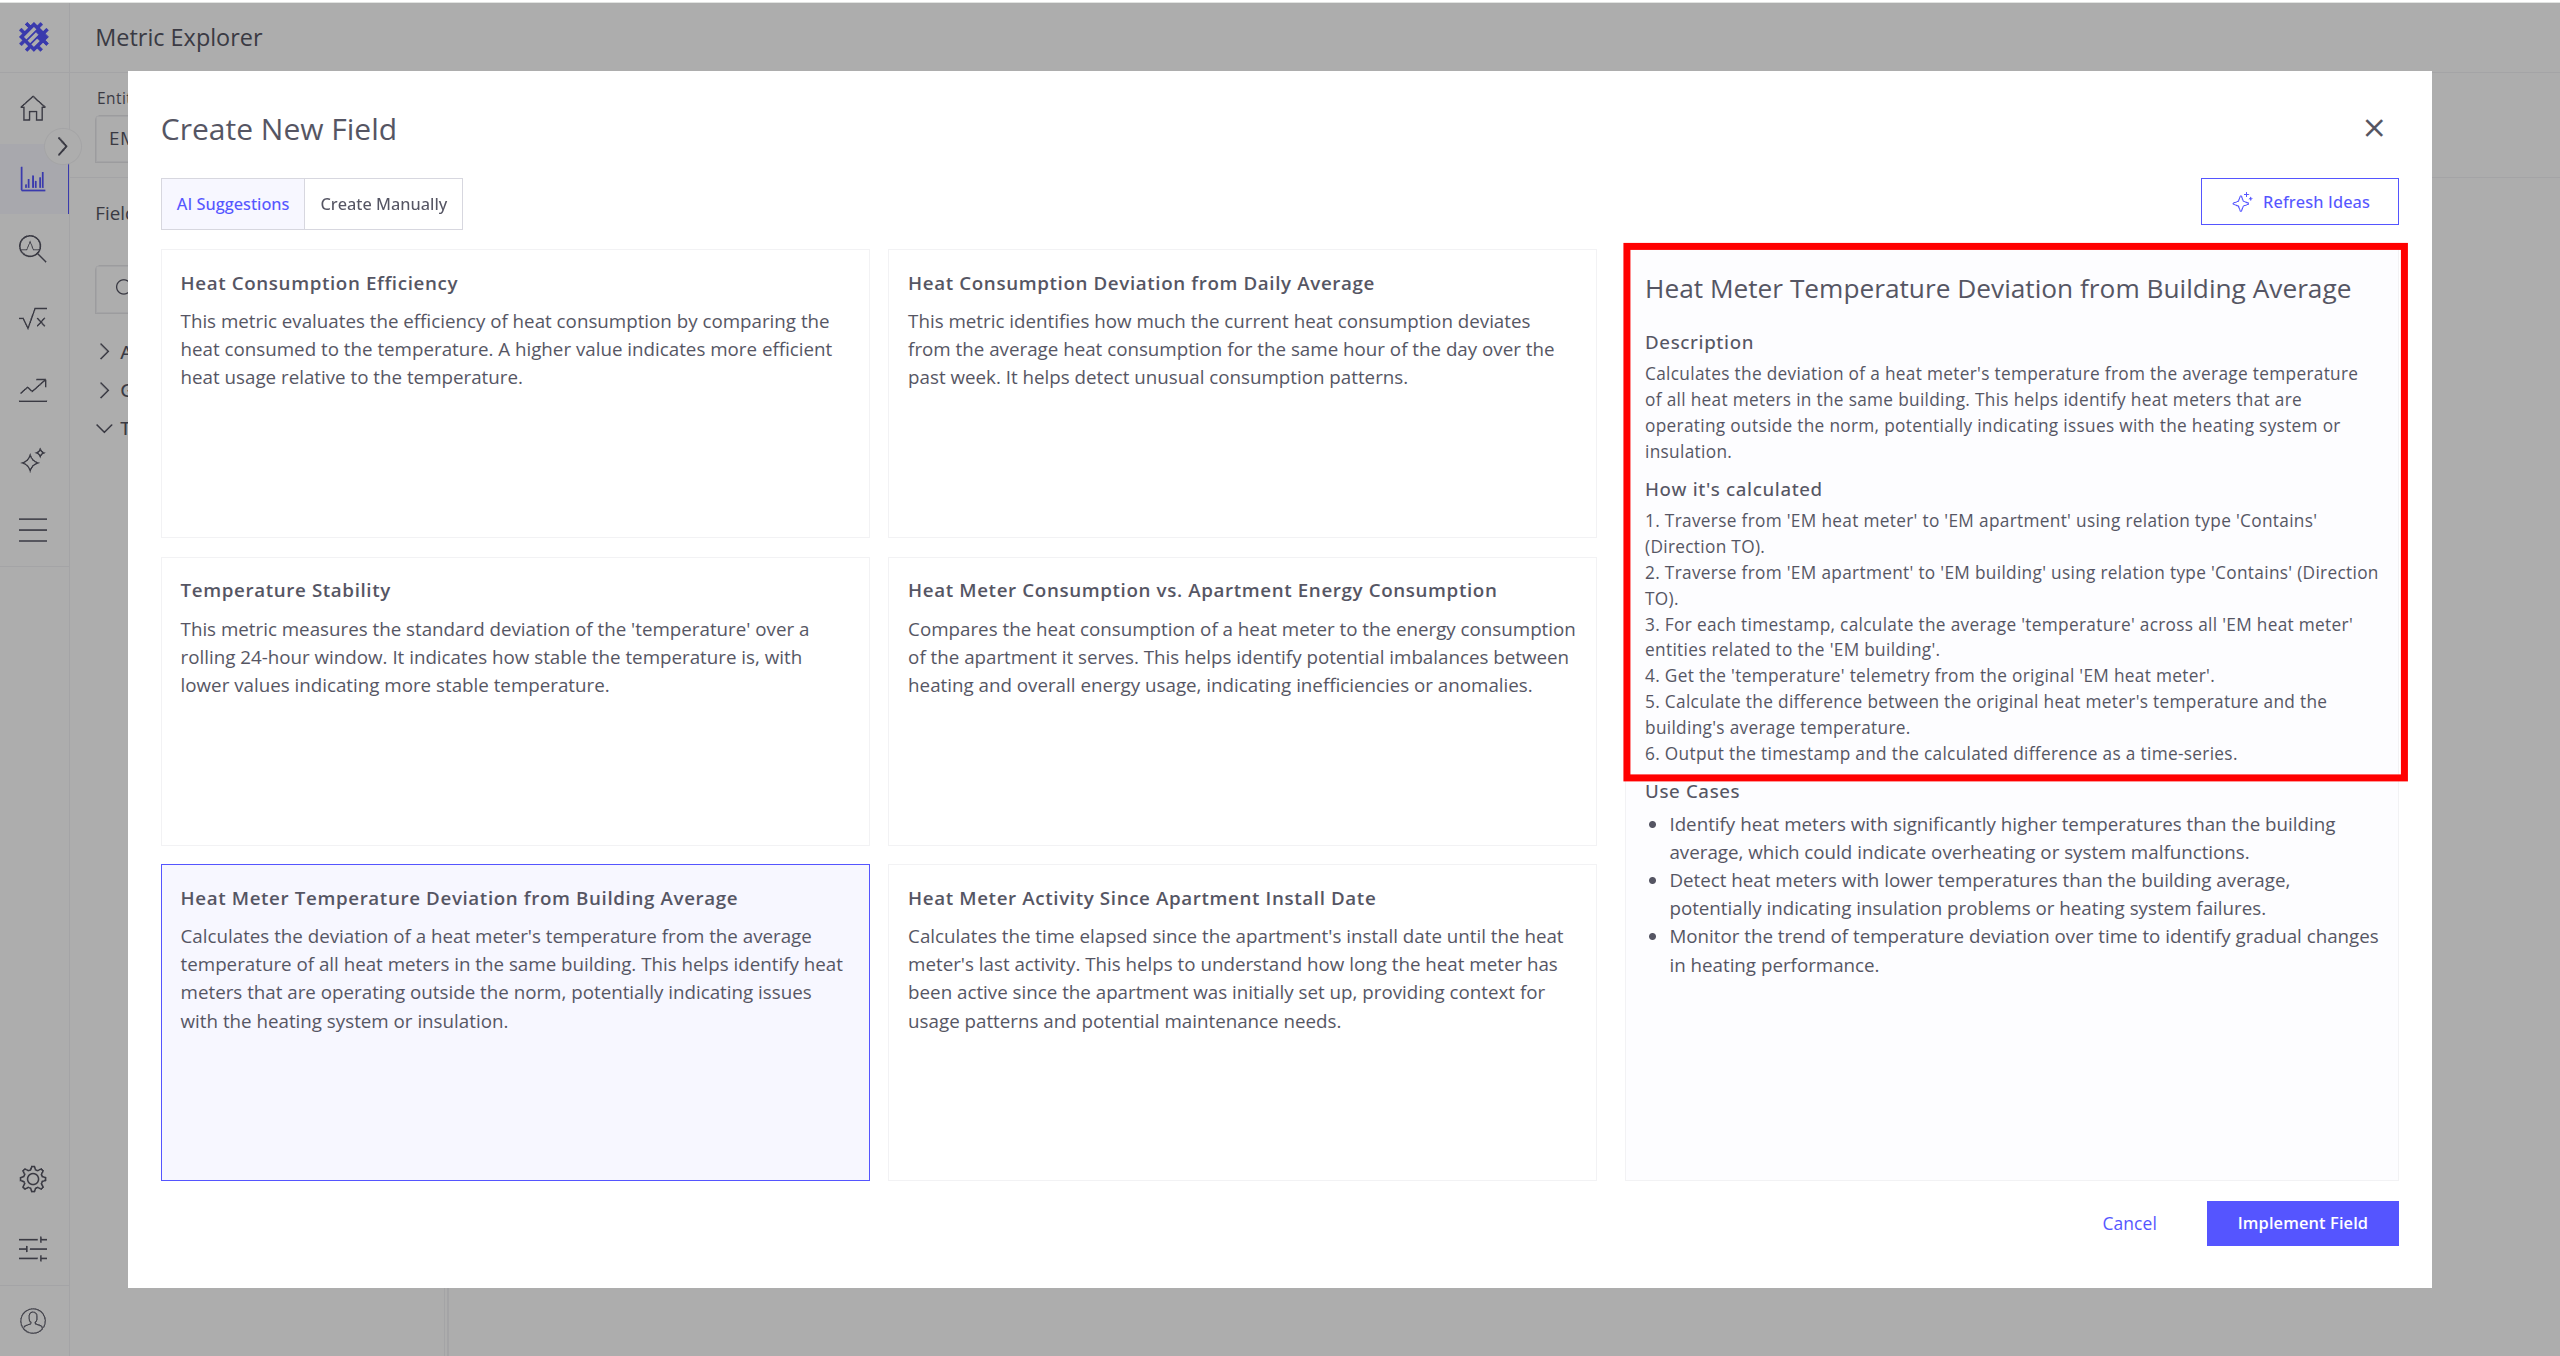
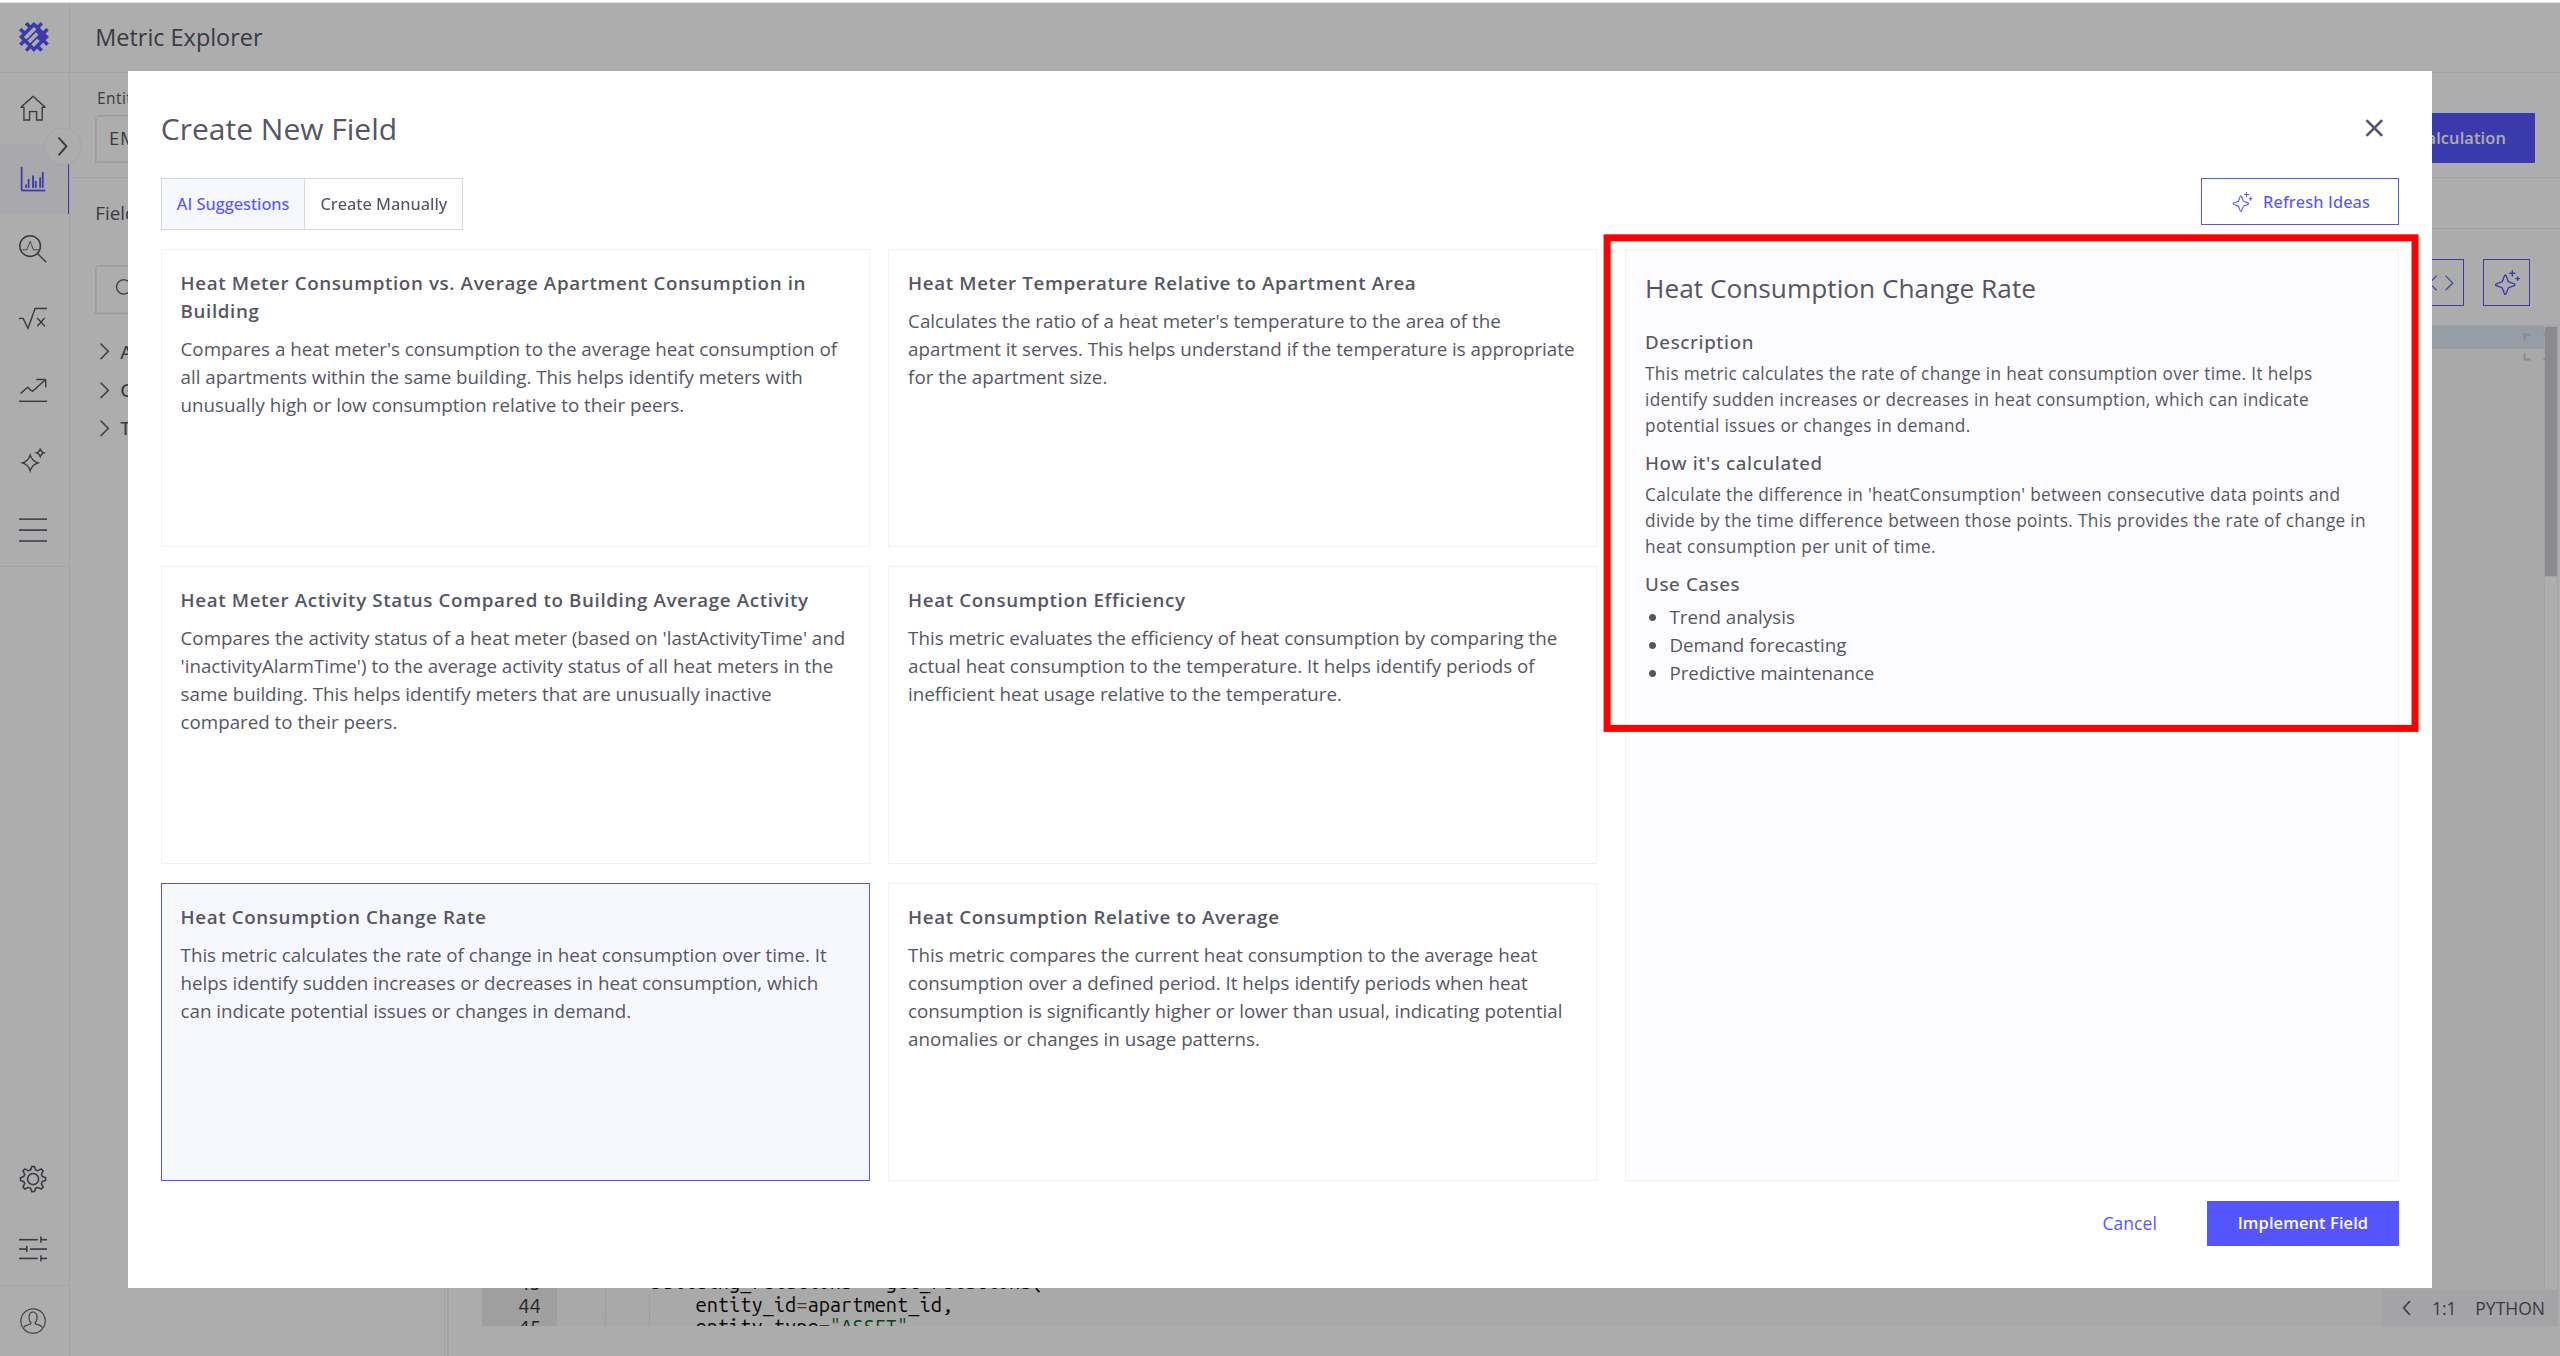
AI Suggestions
The AI agent will propose six different metrics based on your telemetries and topology. You can check each metric by clicking on it - you will see a metric definition (name, description, and how it’s calculated) and use cases.
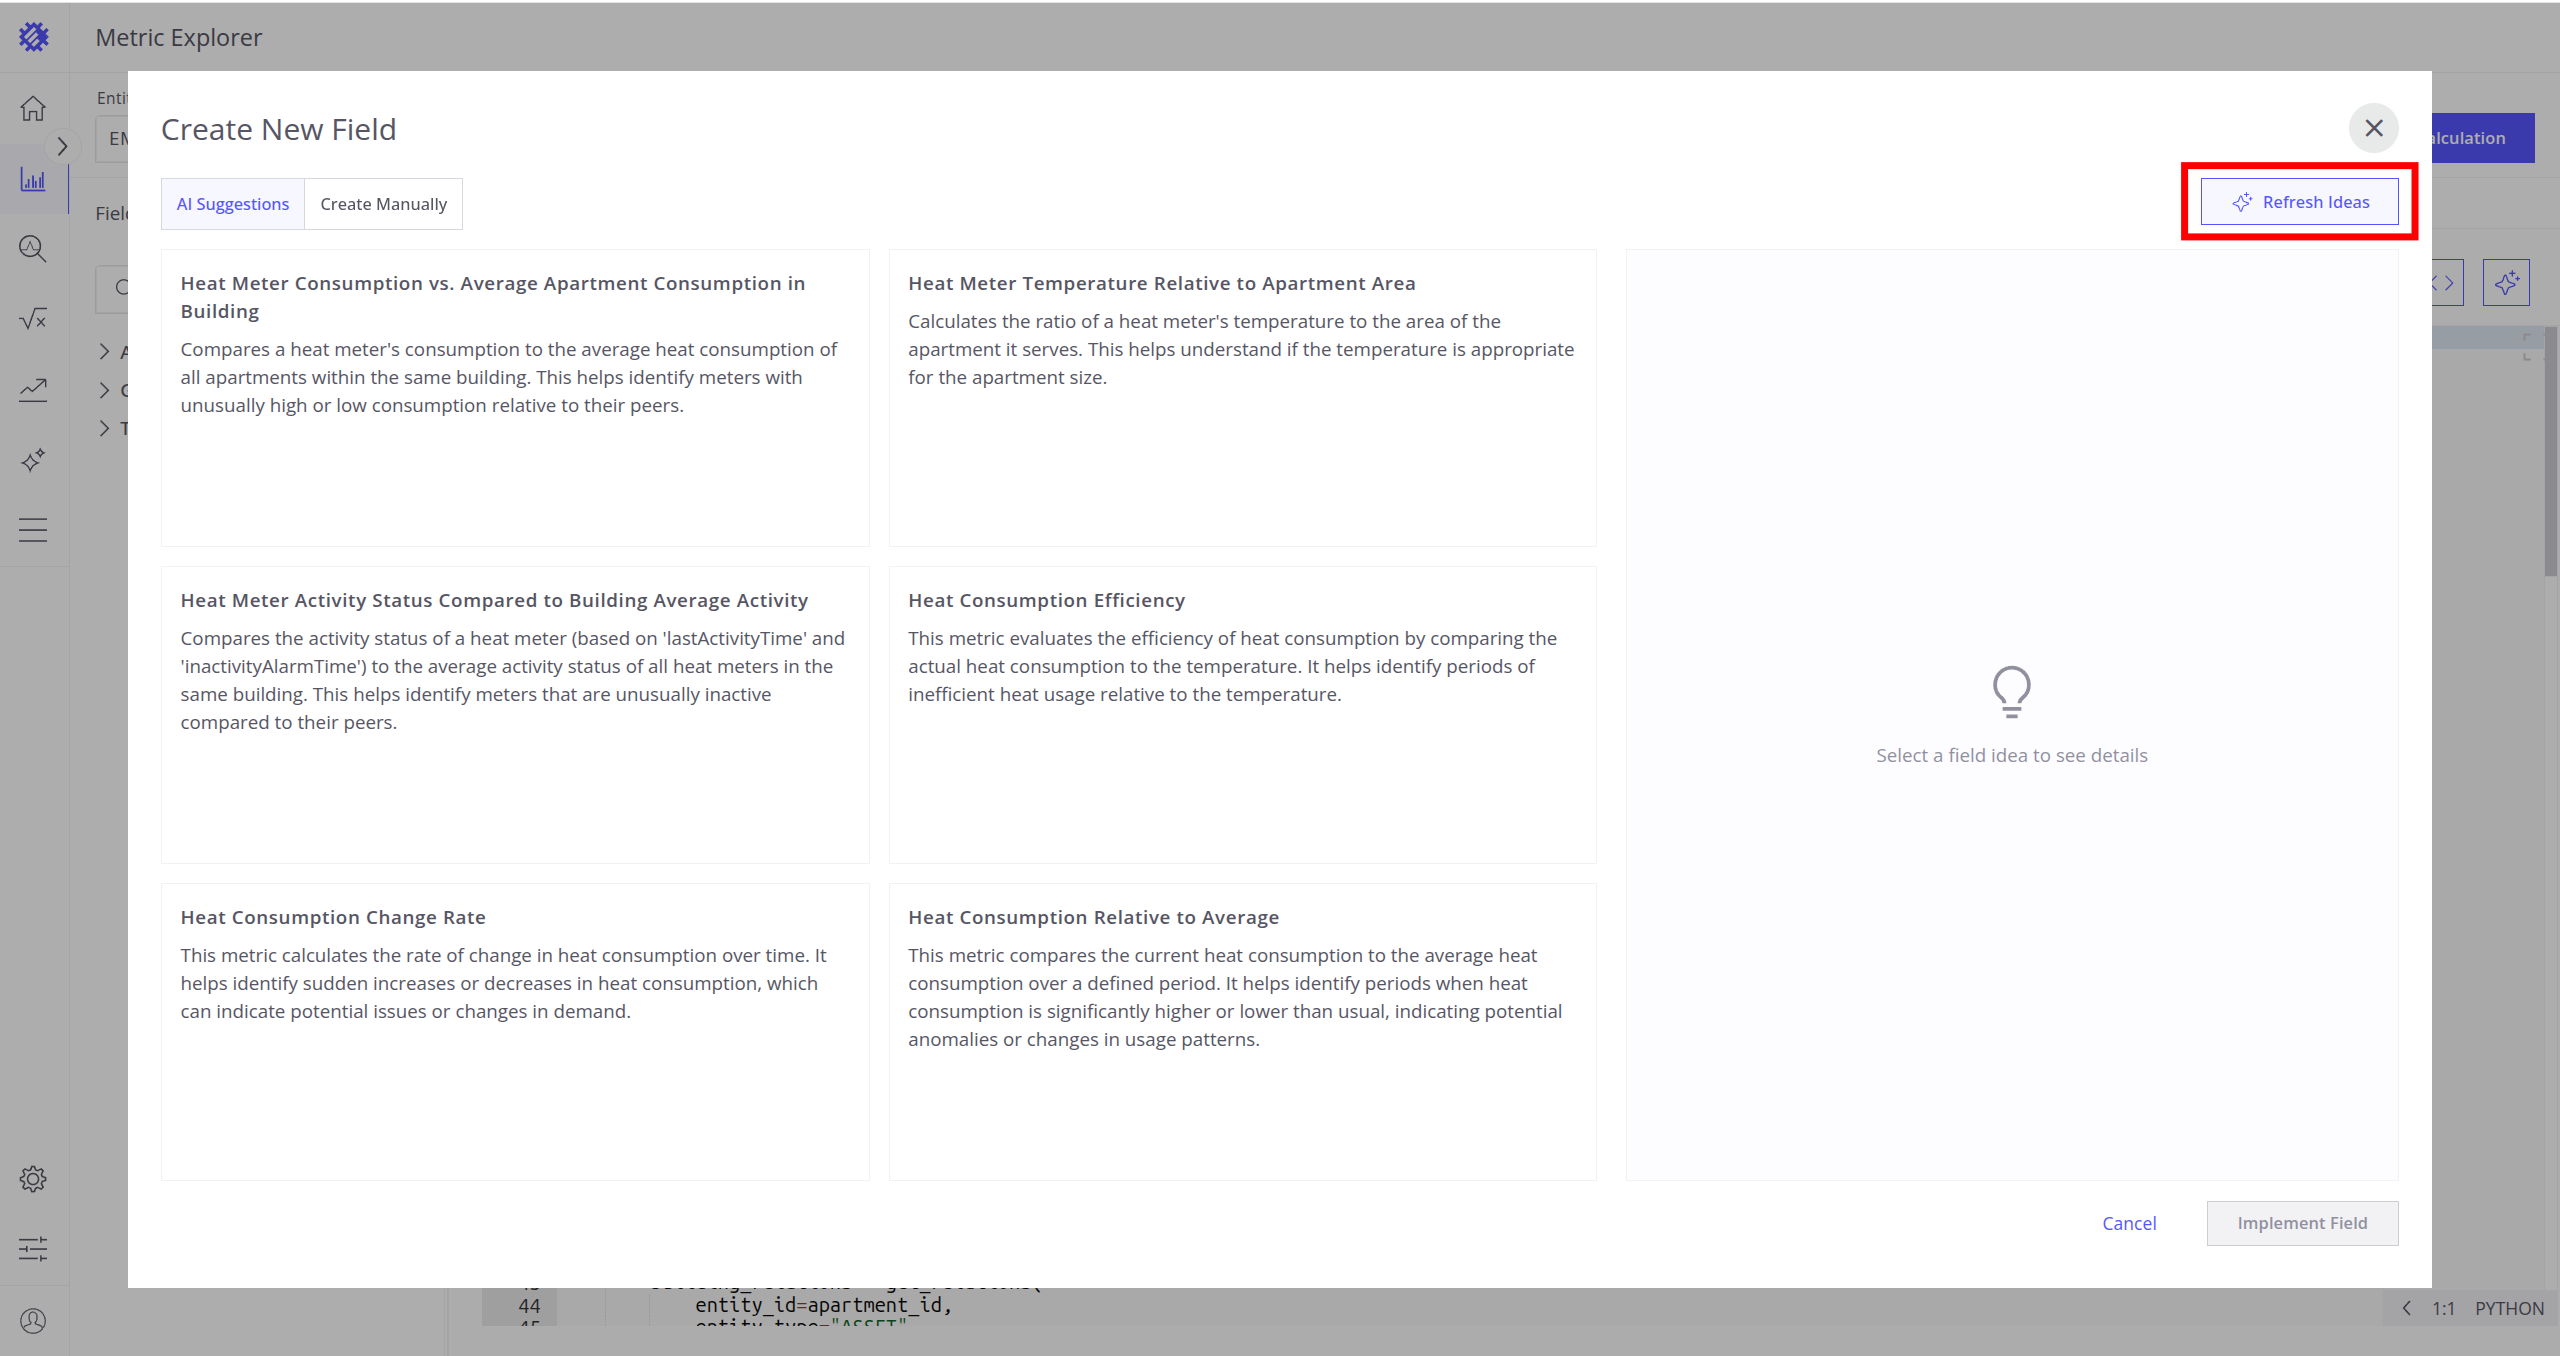
If you don’t like the generated metrics, click Refresh Ideas to generate new AI suggestions.
If you like a metric, click Implement Field. Then you will be redirected to the Generated Metric Overview tab. This tab’s functionality will be covered later in this article.

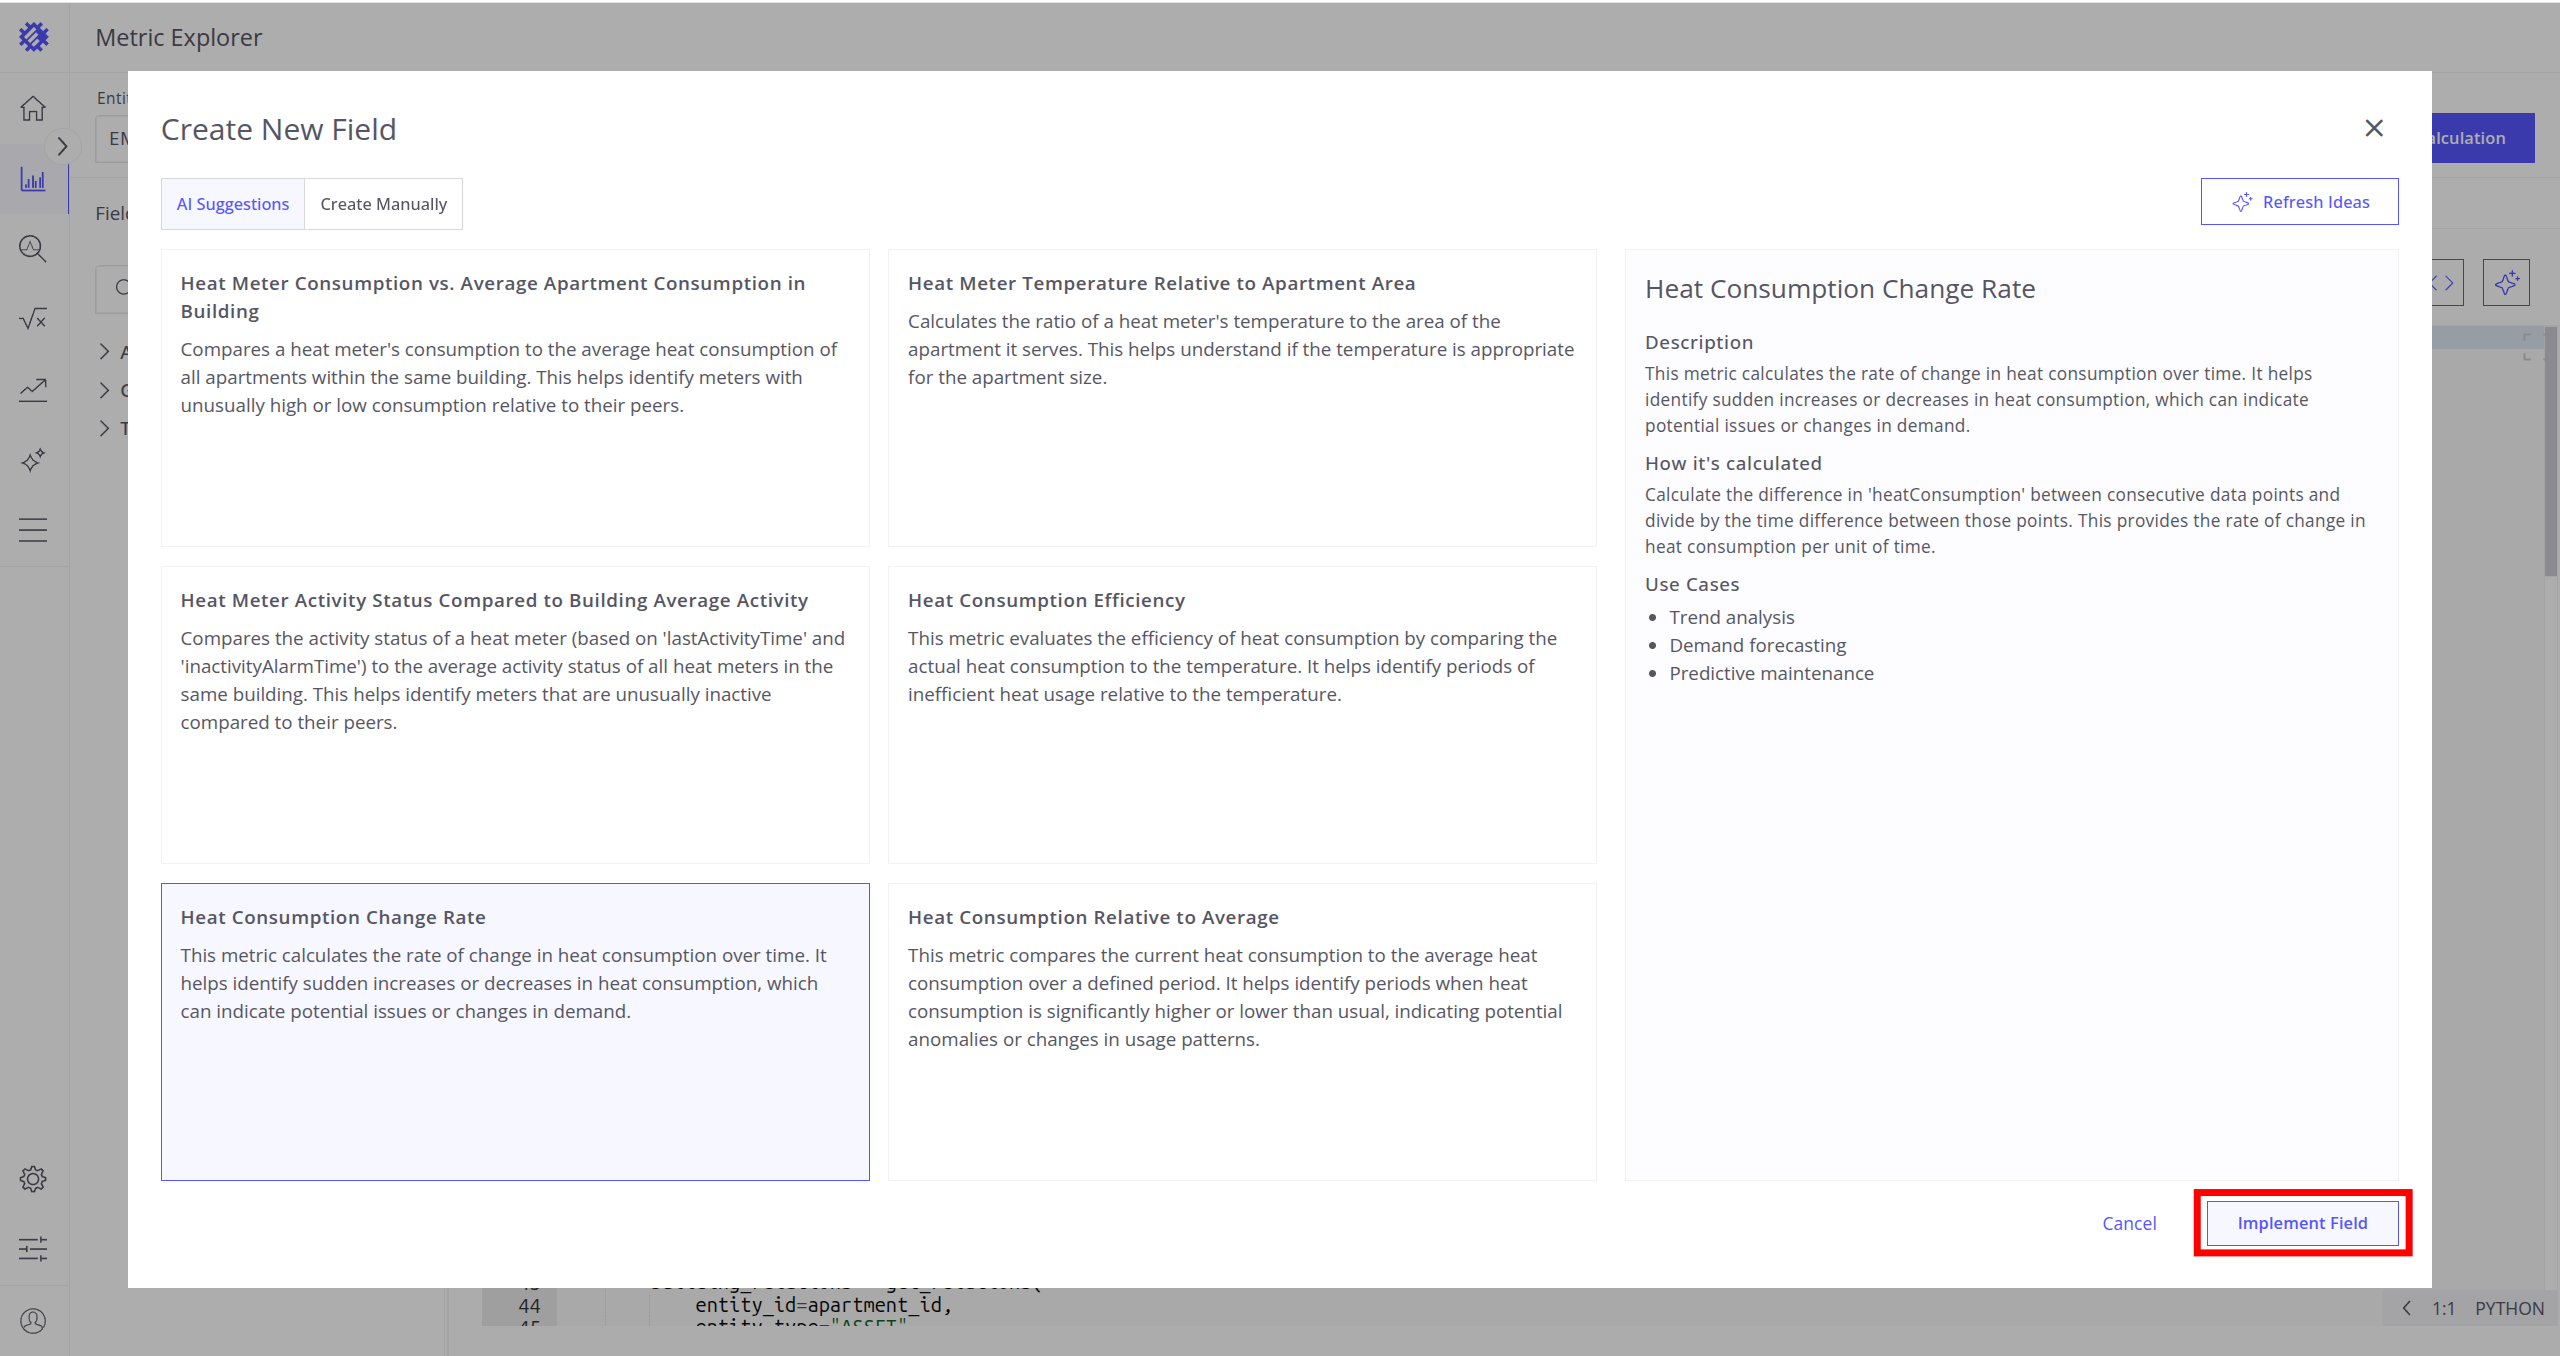
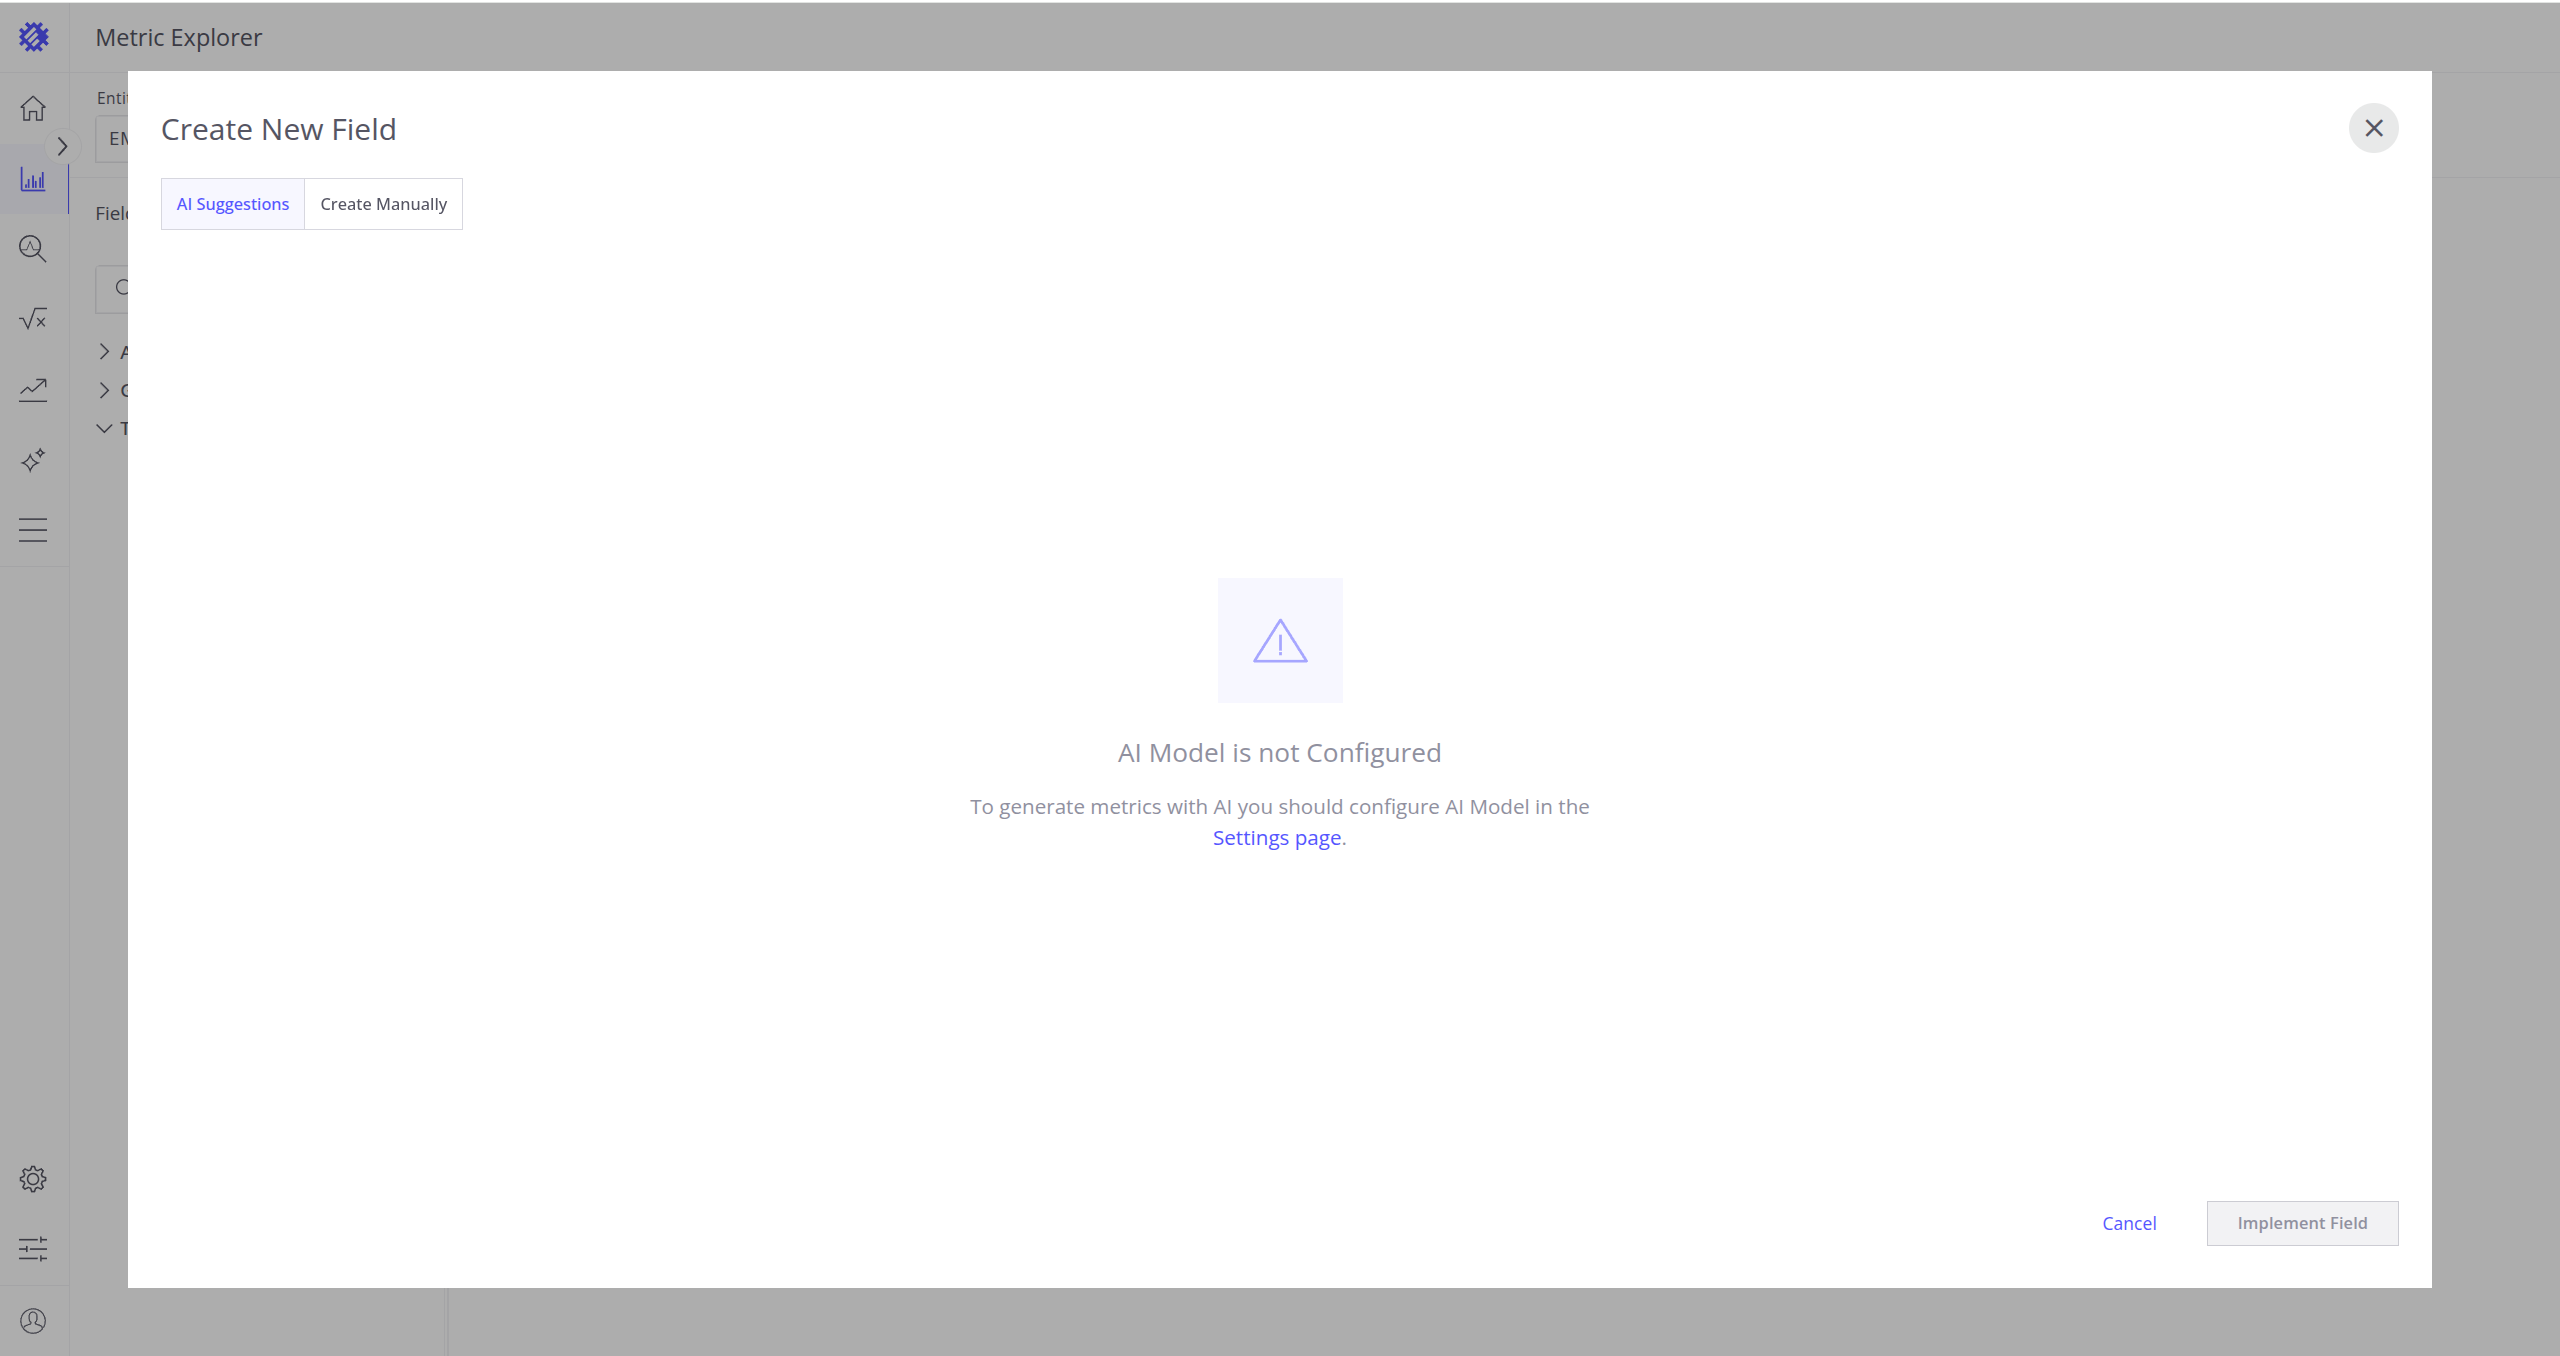
Important note: AI Suggestions are disabled if the AI Feature Metric Code Assistant is not enabled. Learn how to enable it here.
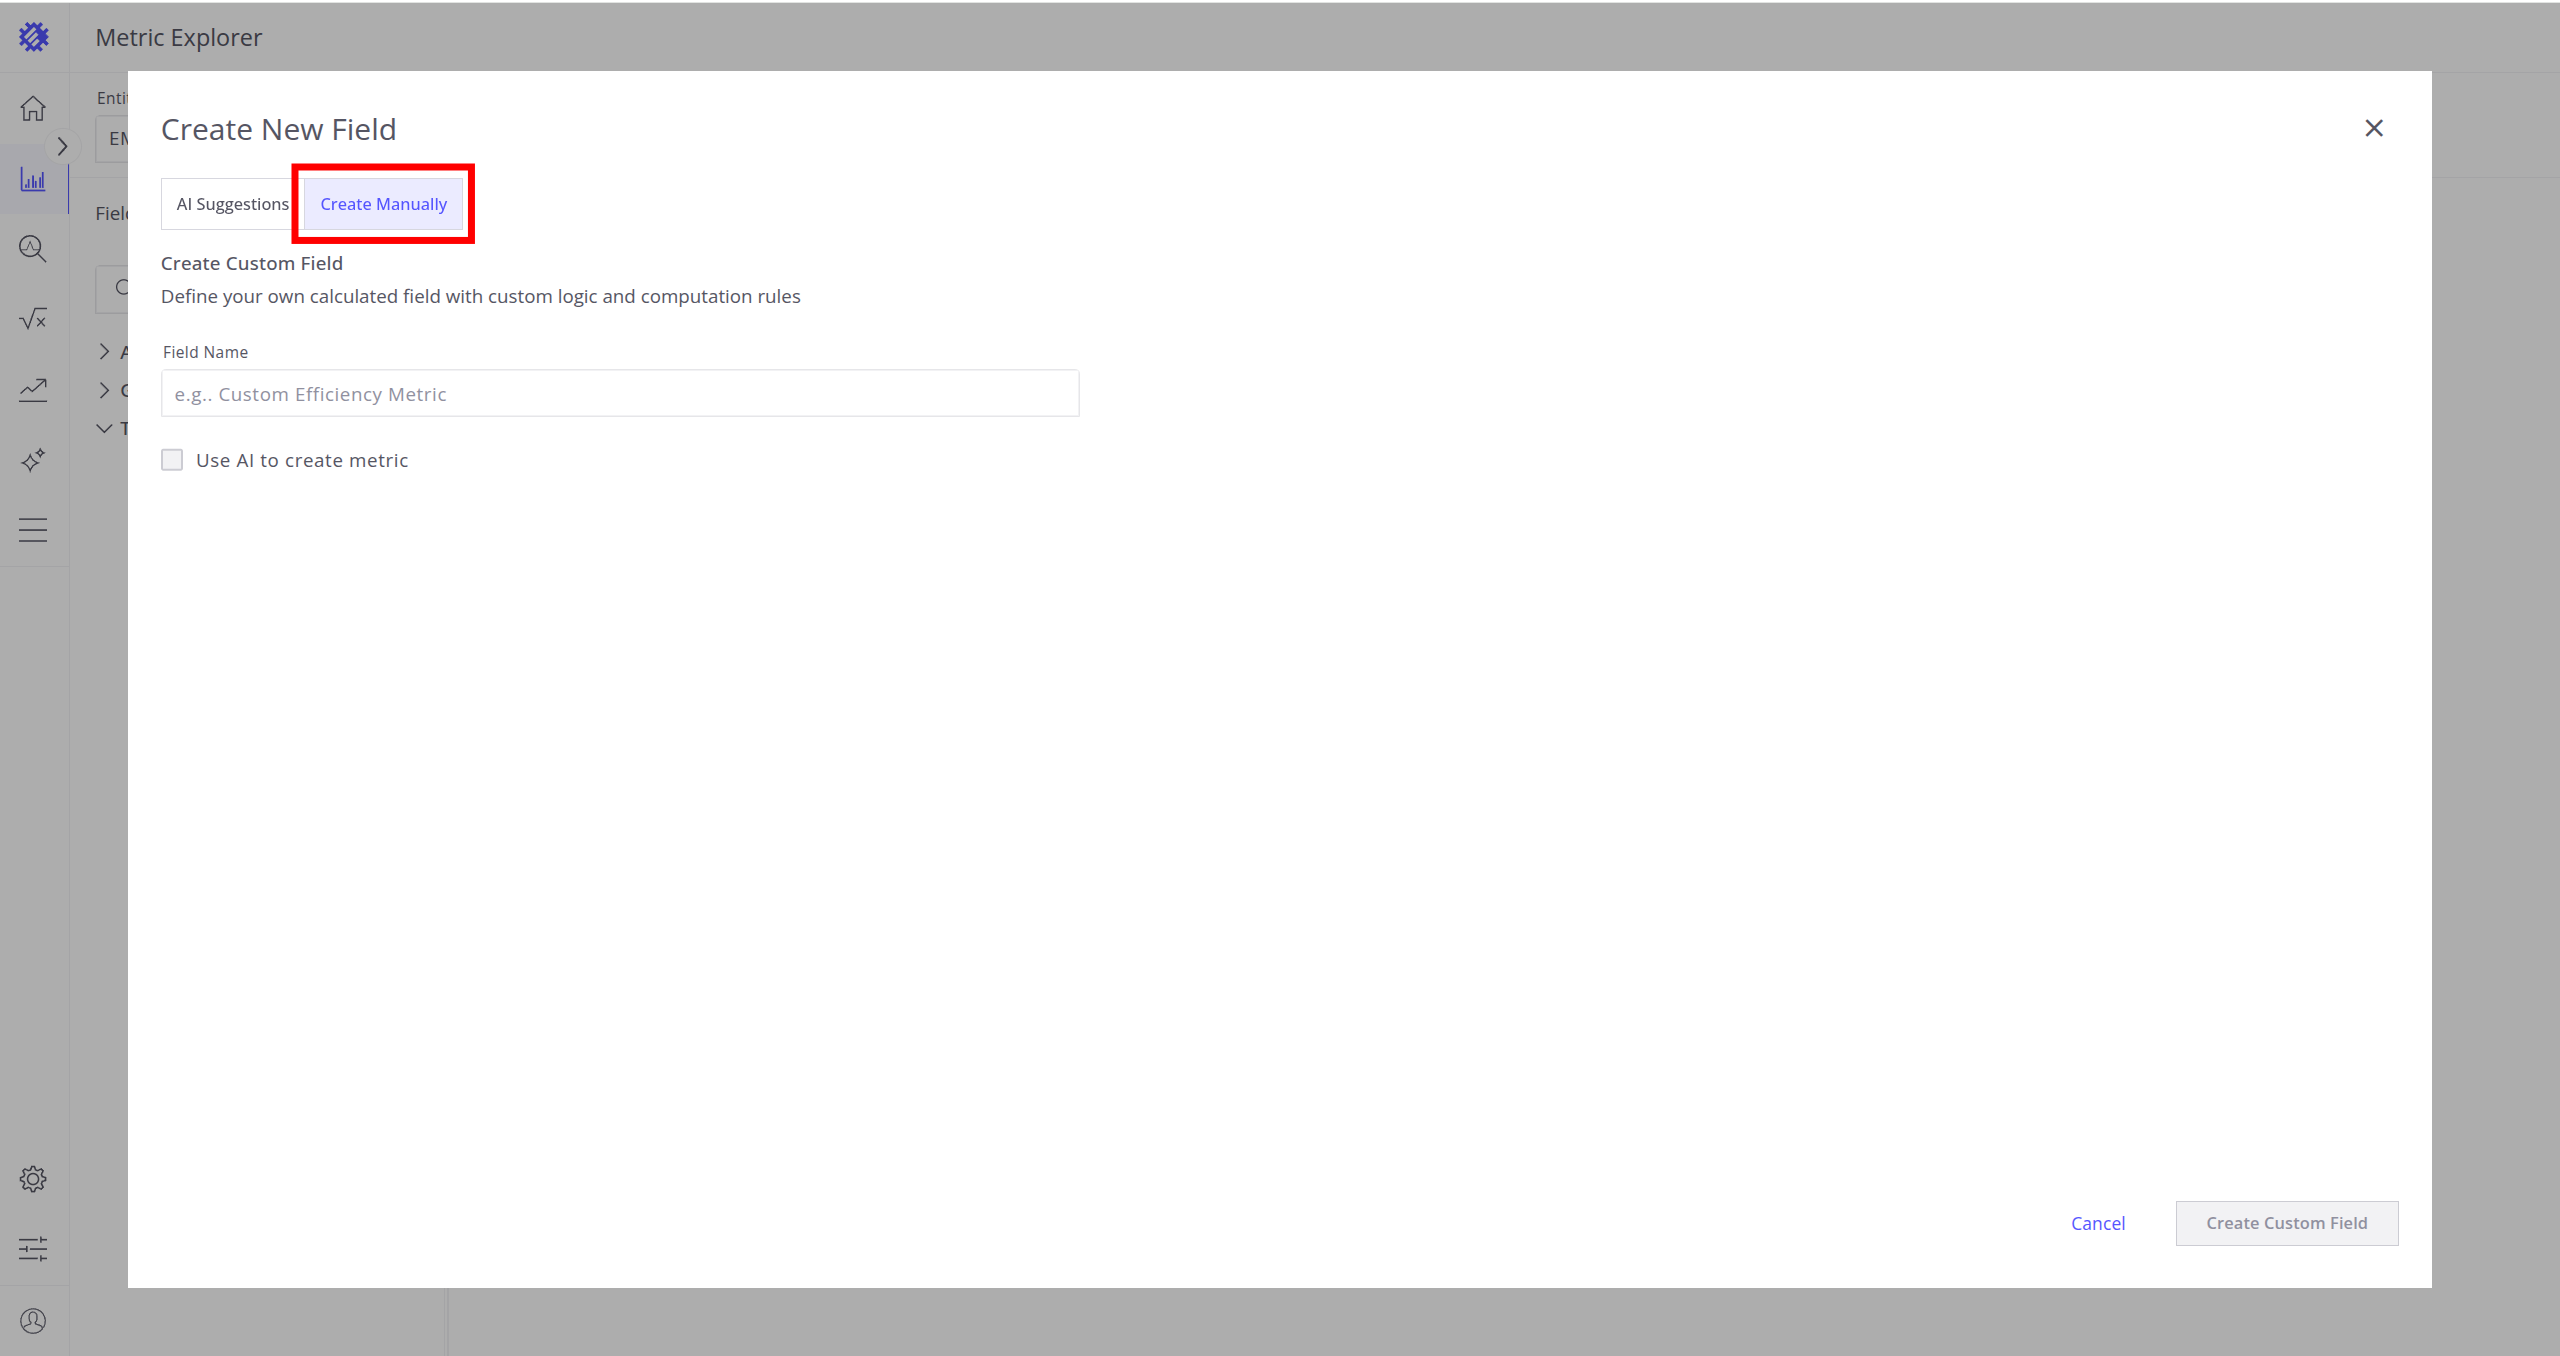
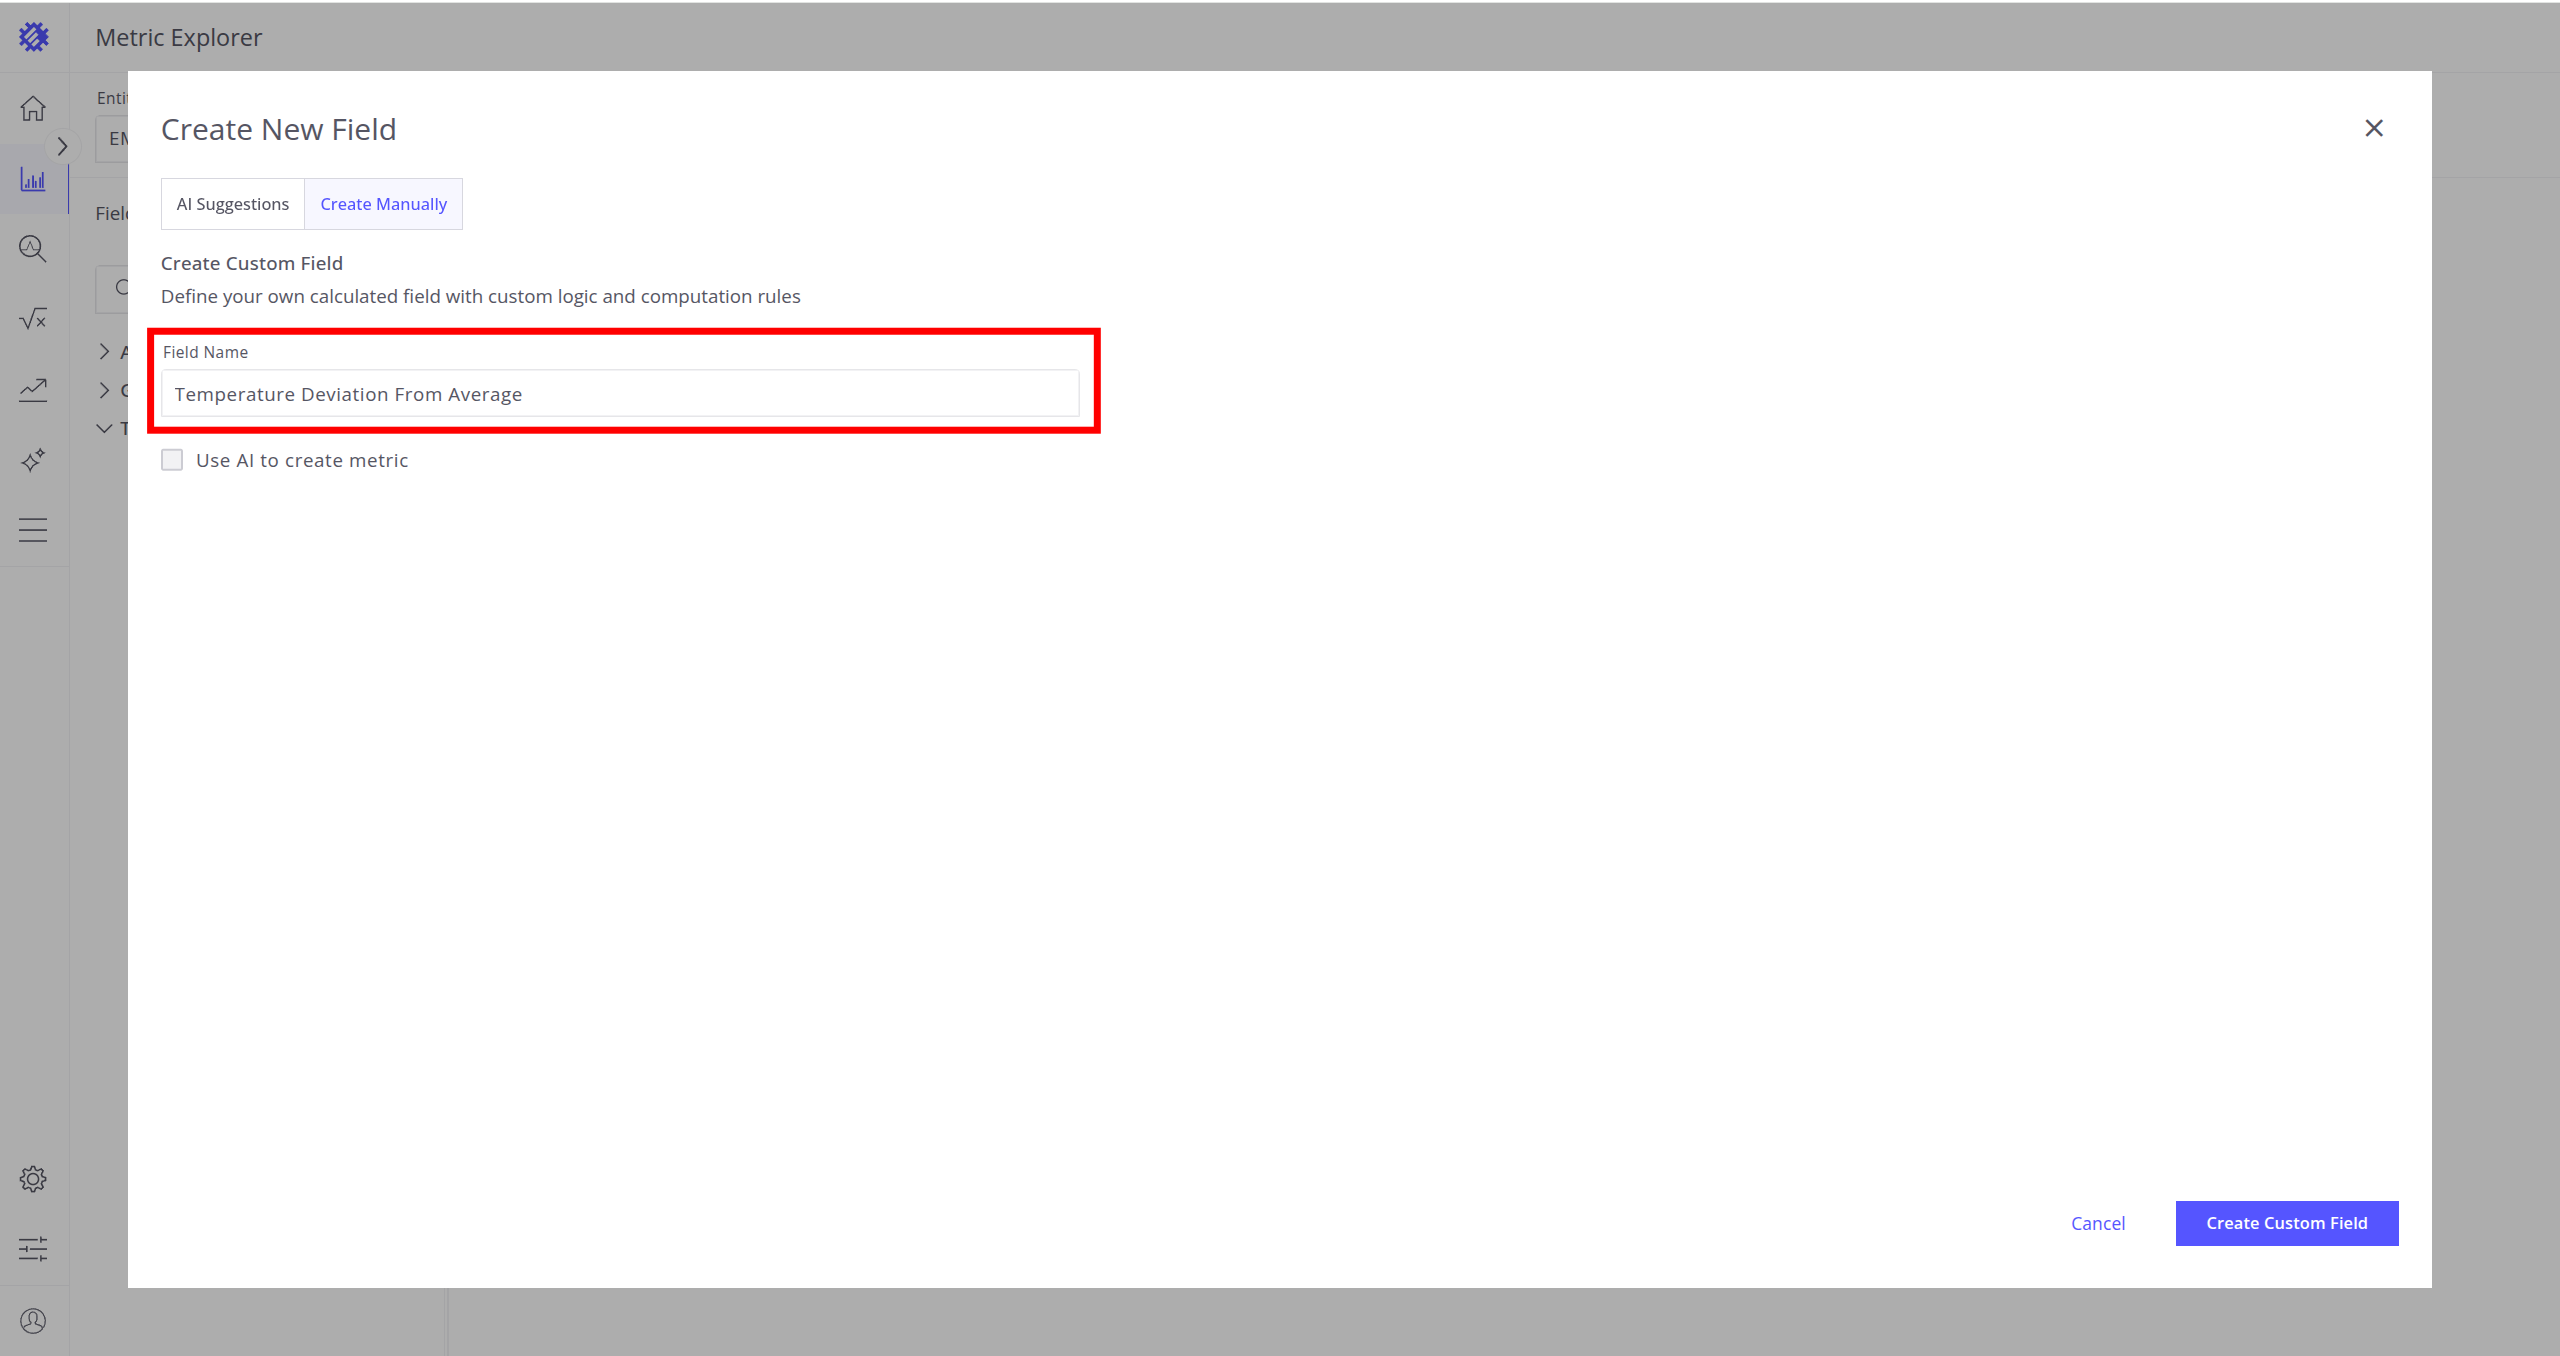
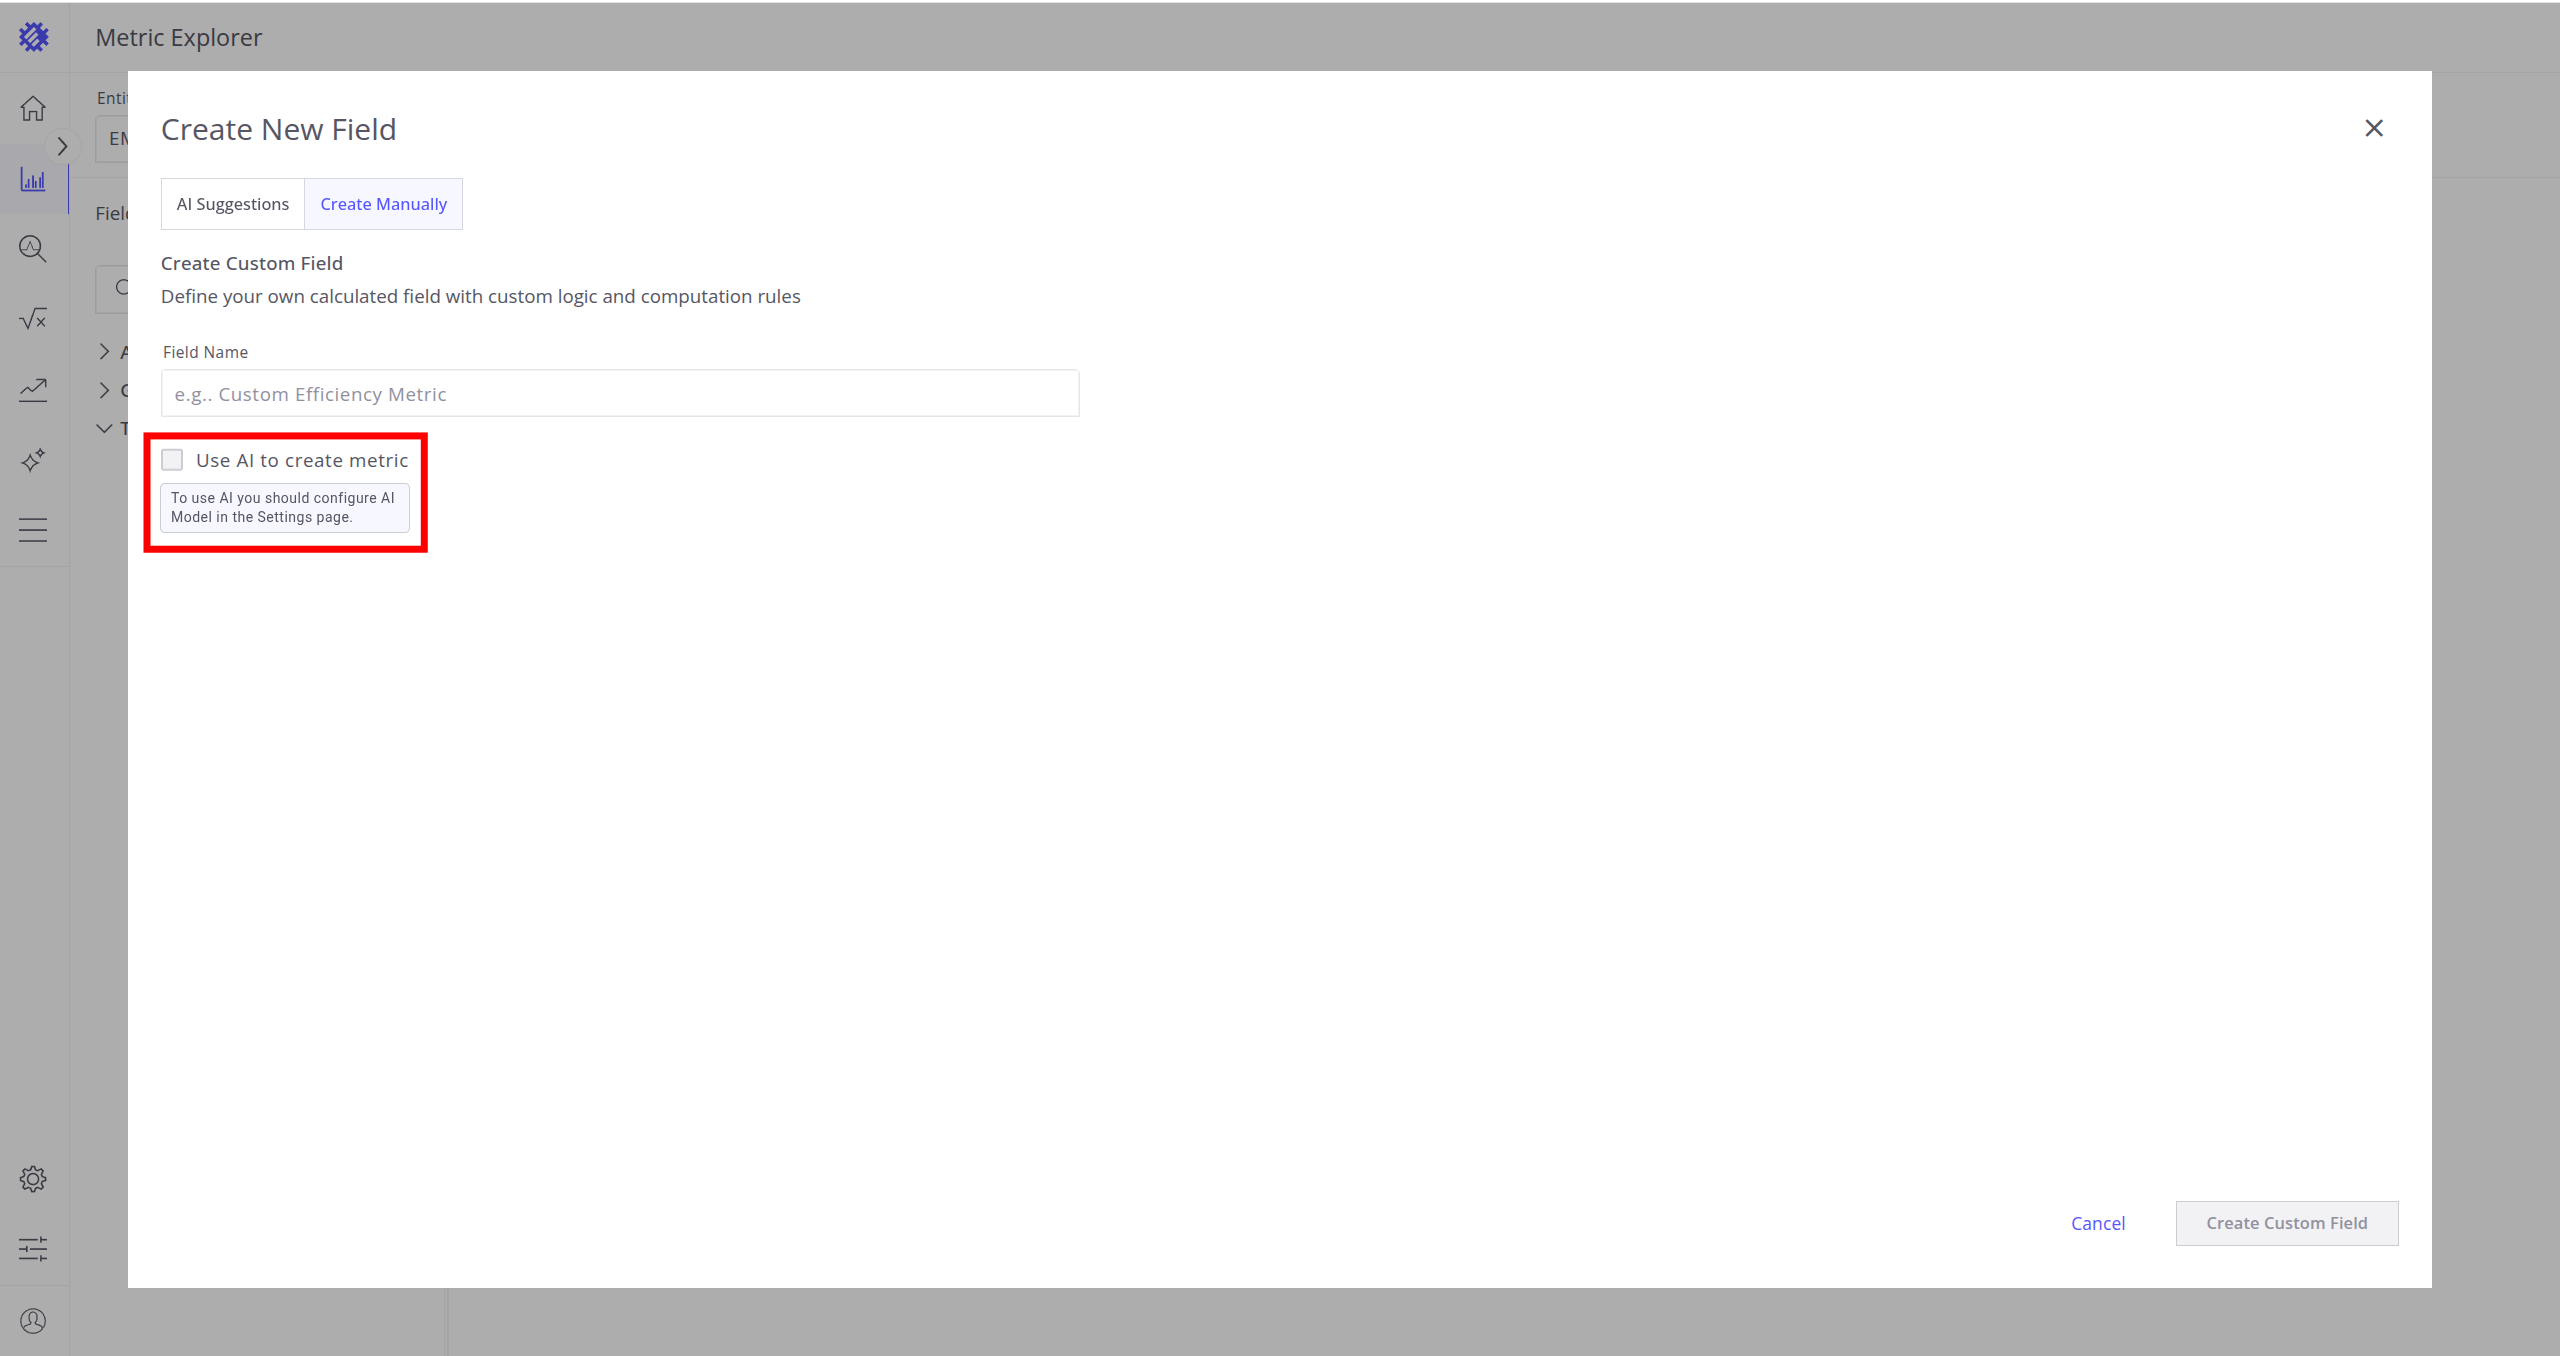
Create Manually
This option allows you to create any metric you want, with or without AI assistance. To switch to it, click Create Manually button.
If you want to generate a metric without AI, just submit a Field Name. You will see this name in the generated metrics folder.
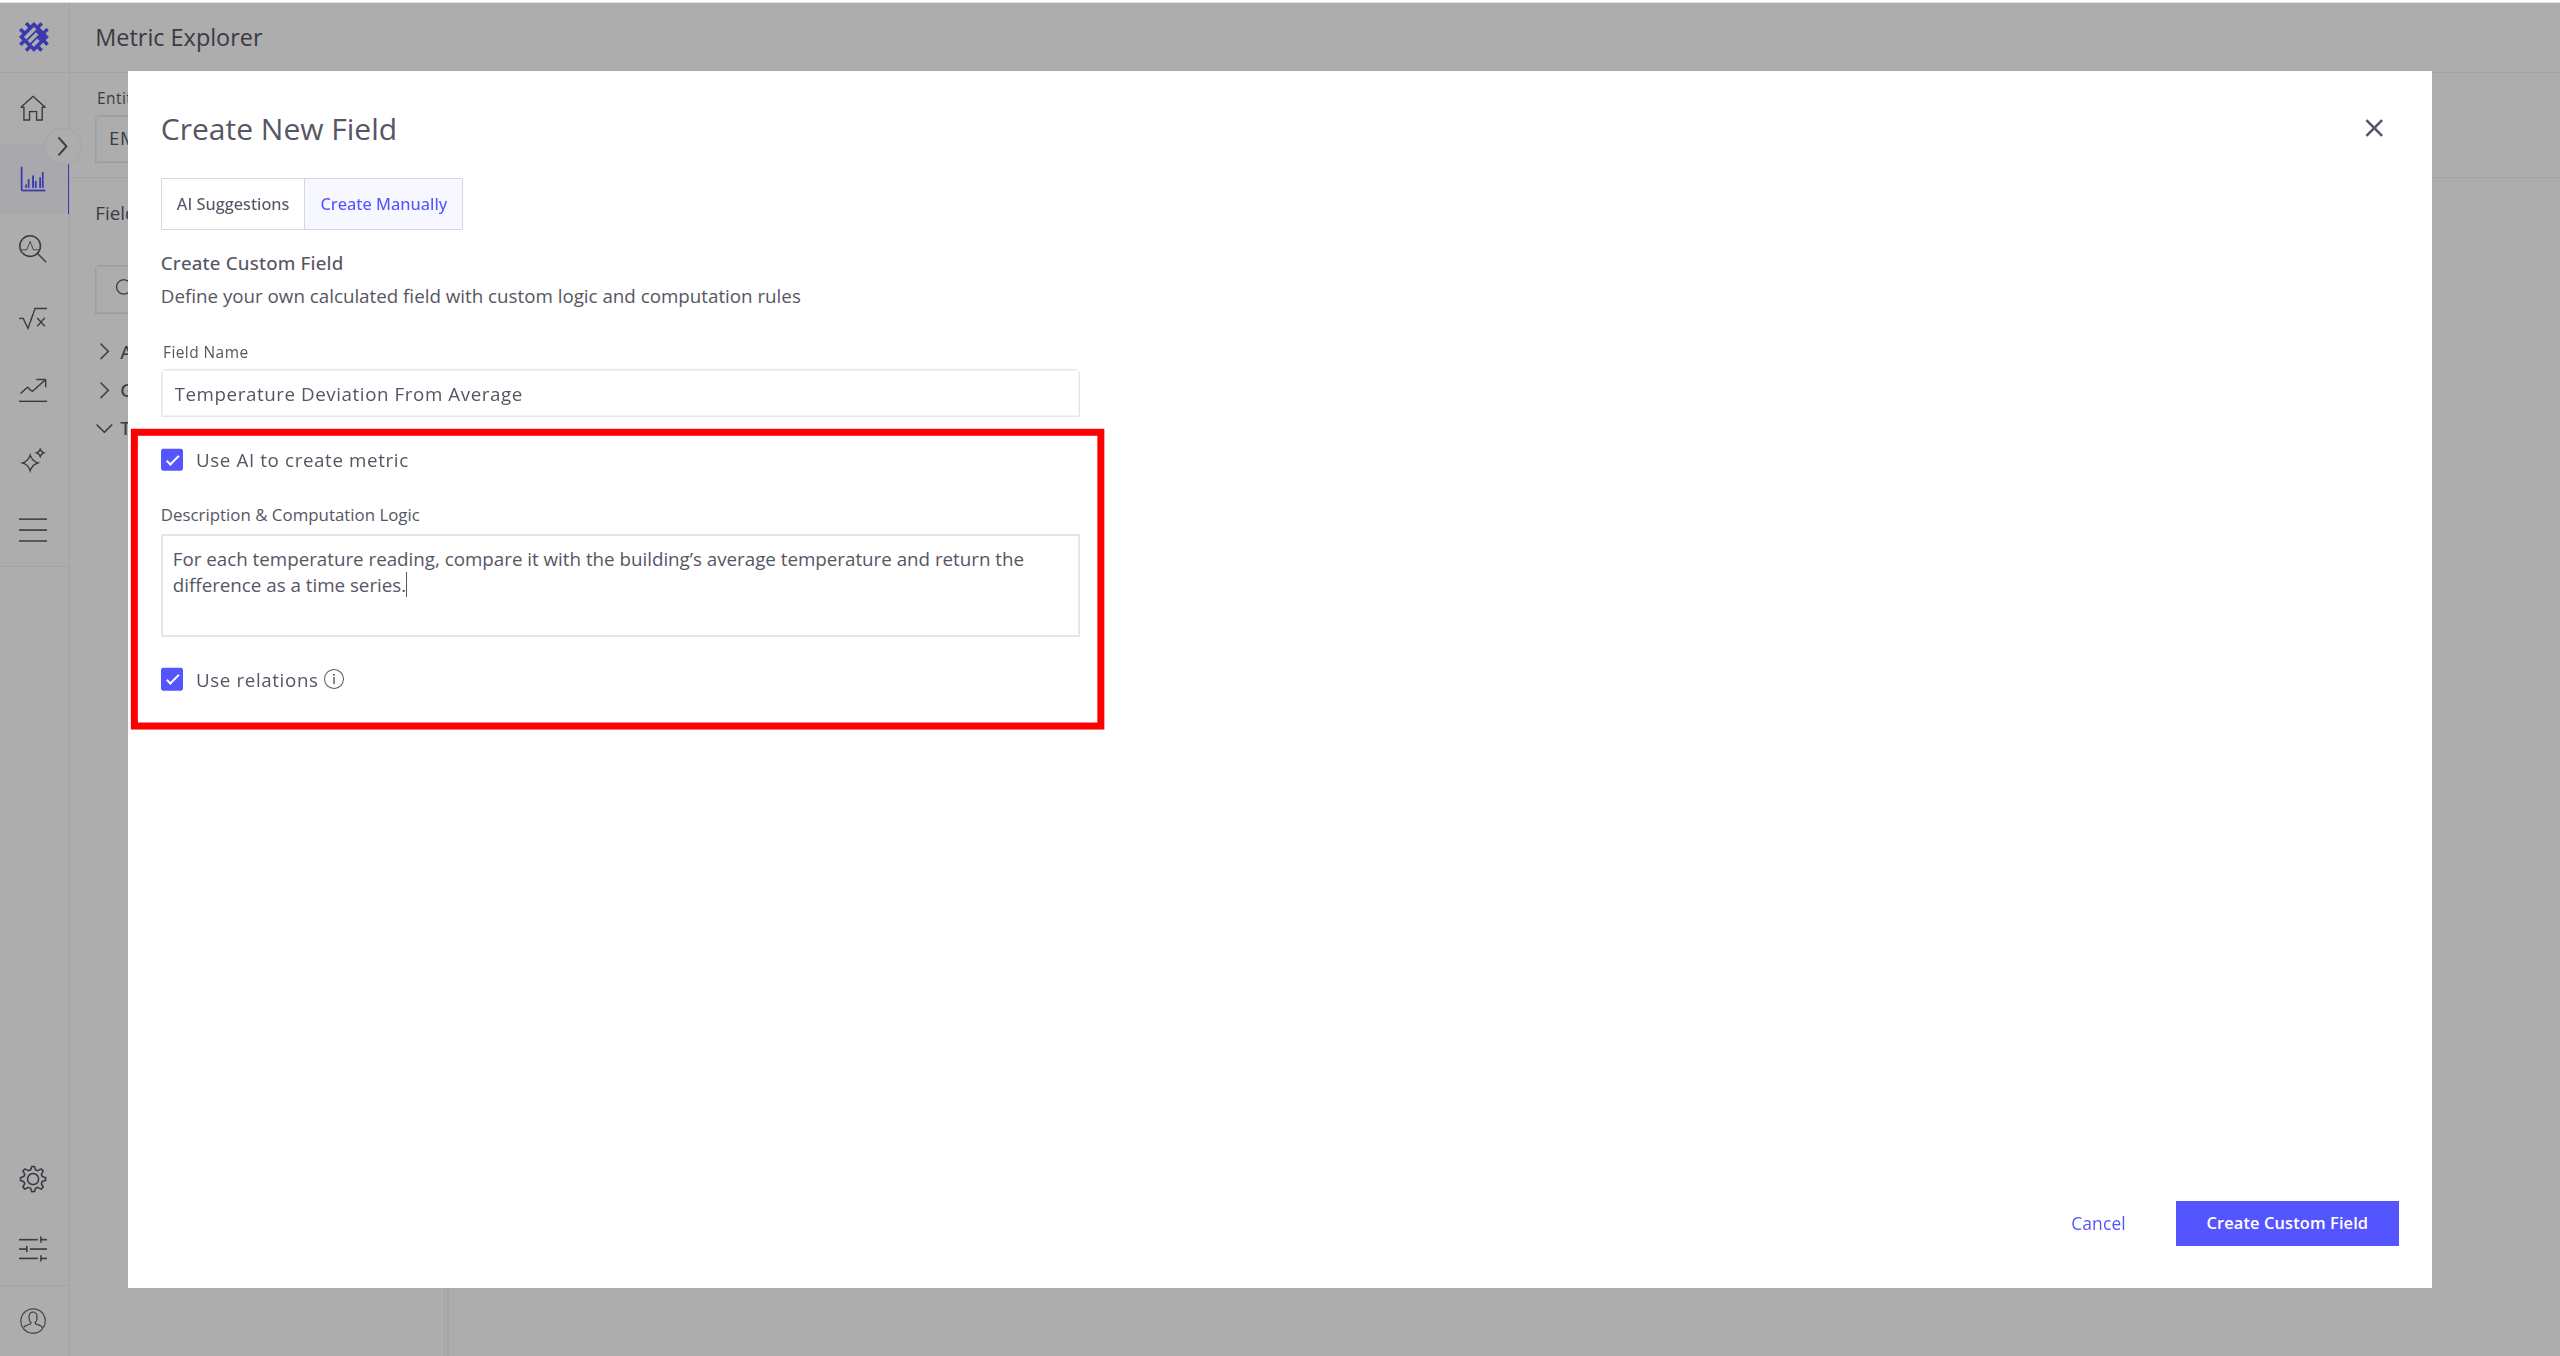
If you want to generate it with AI, click the checkbox Use AI to create metric, and then fill in these fields:
- Description and Computation Logic - Describe what your field should do and how it should be implemented.
- Use Relations - If yes, this code will be able to use telemetries from related entities.
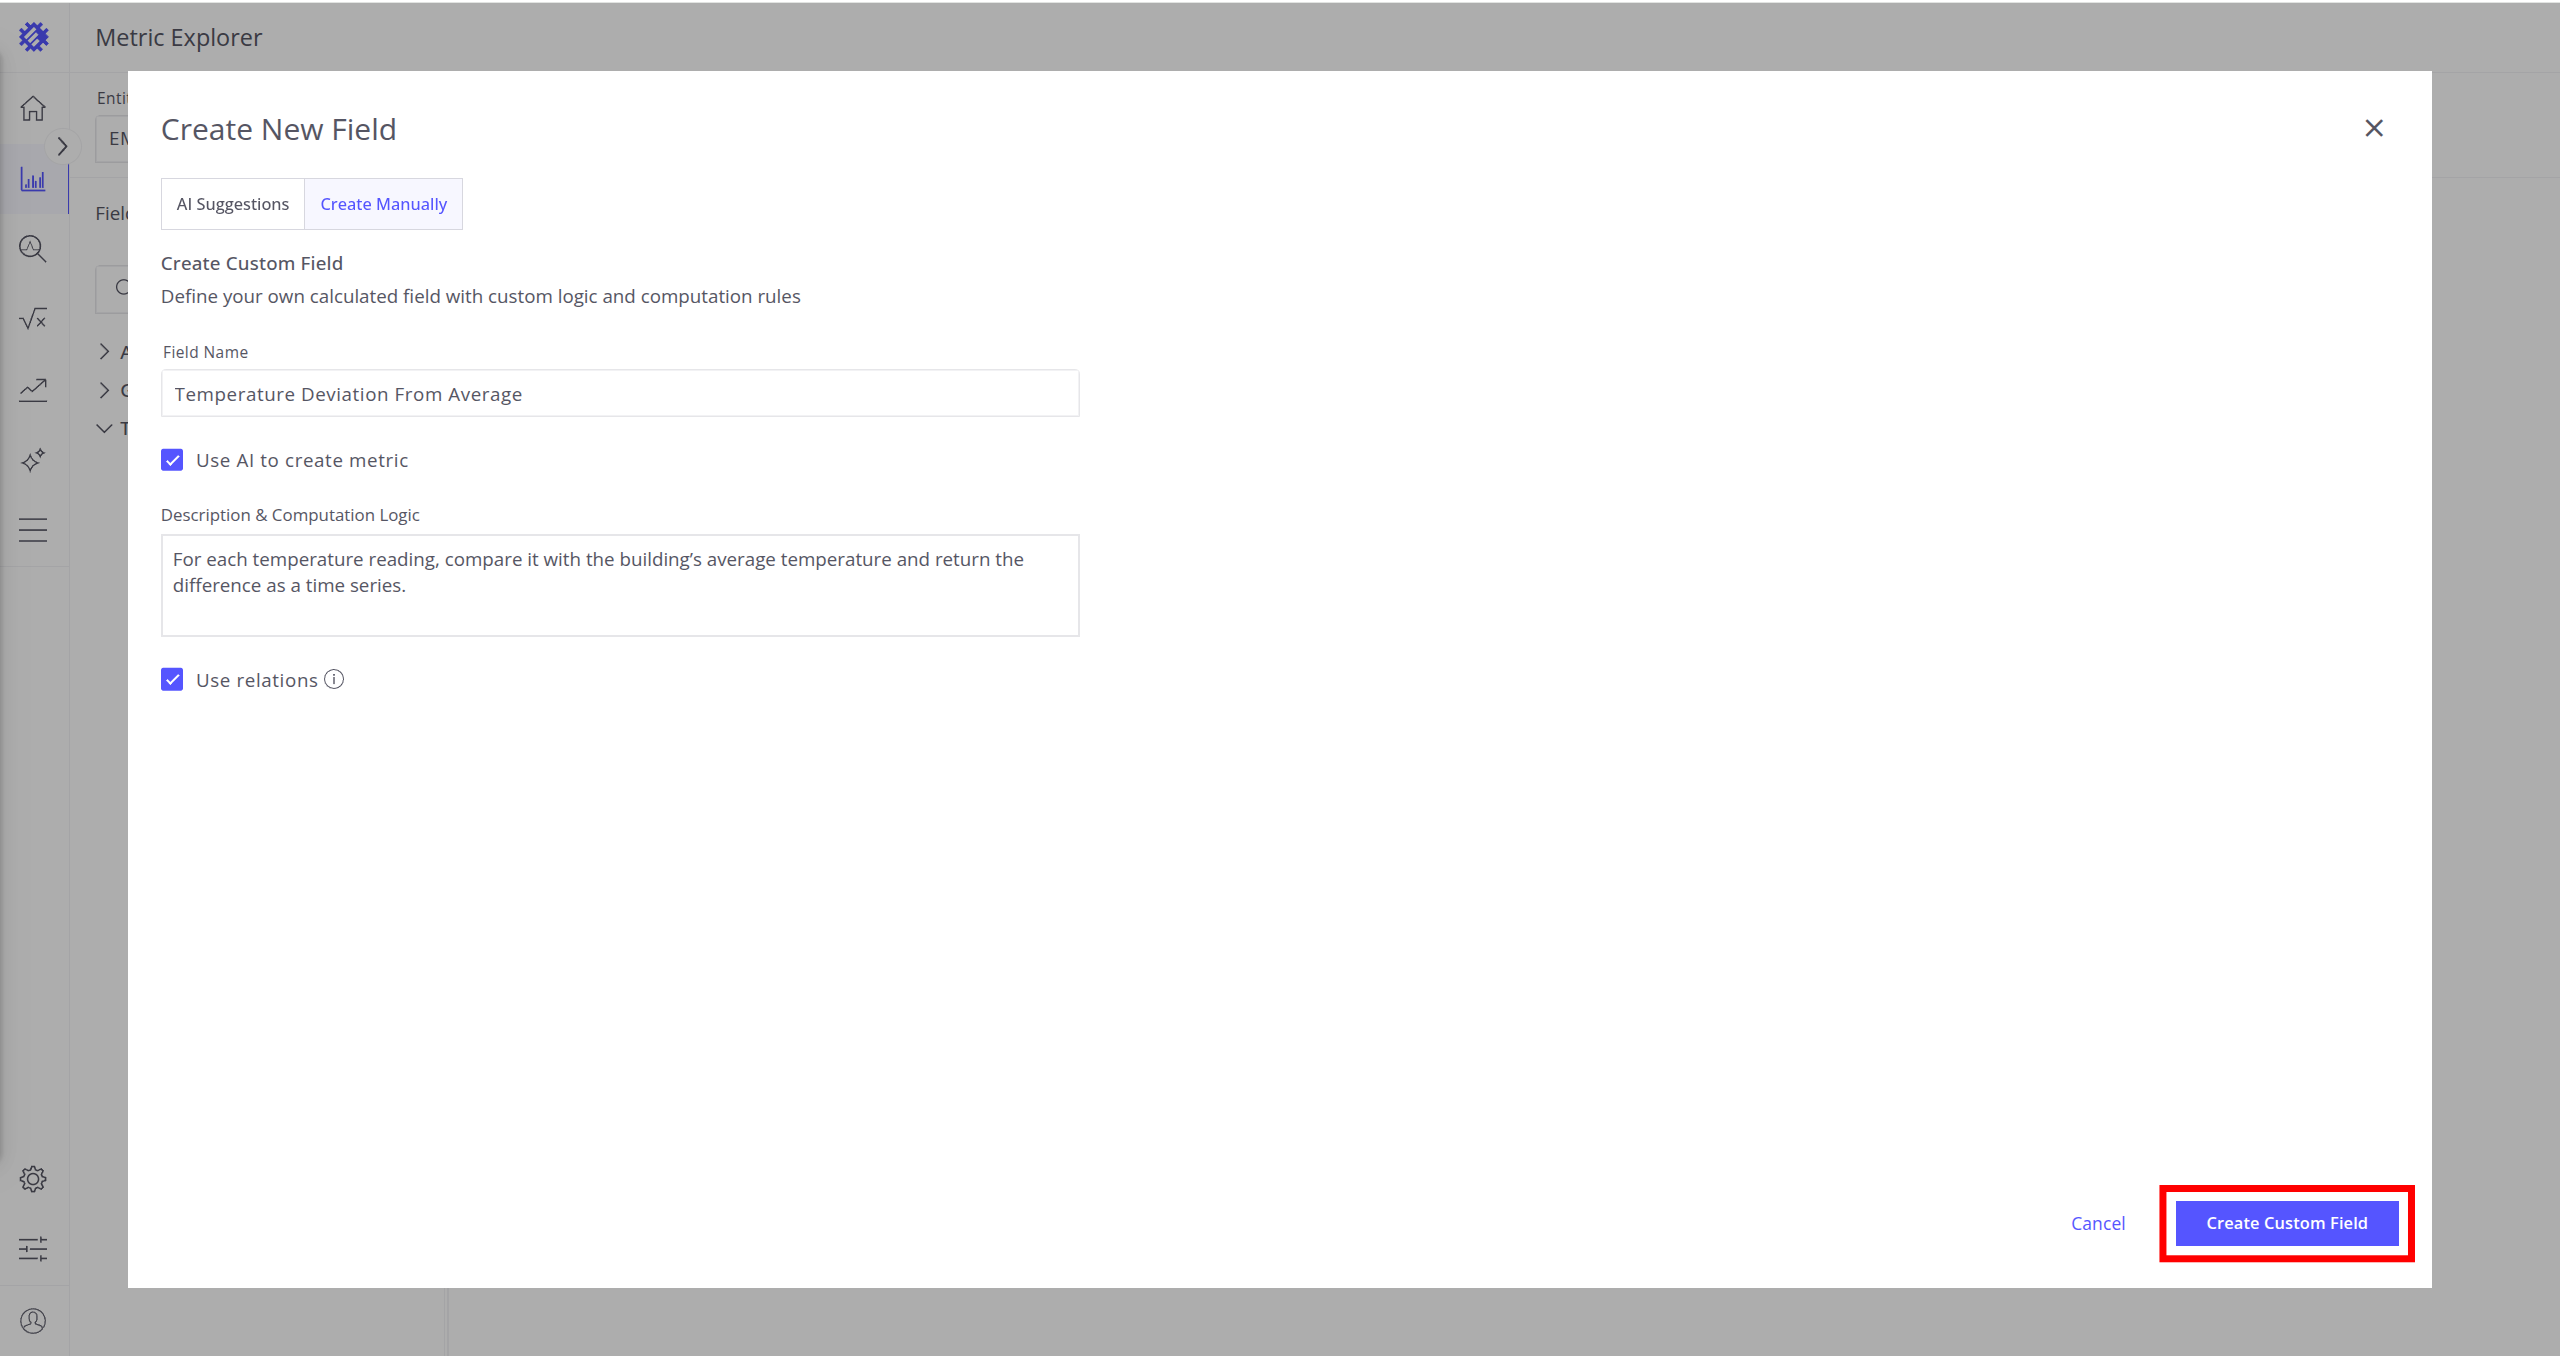
When everything is submitted, click Create Custom Field and you will be redirected to the overview tab with the generated code. This functionality is described in the next section.
Important note: Generate with AI is disabled if the AI Feature Metric Code Assistant is not enabled. Learn how to enable it here.
Generated Metrics Actions
You can access the Generated Metrics Overview section in several ways:
- Click on any metric from the Generated Metric Fields section.
- Implement a metric using methods from the Create New Metric section of this documentation.
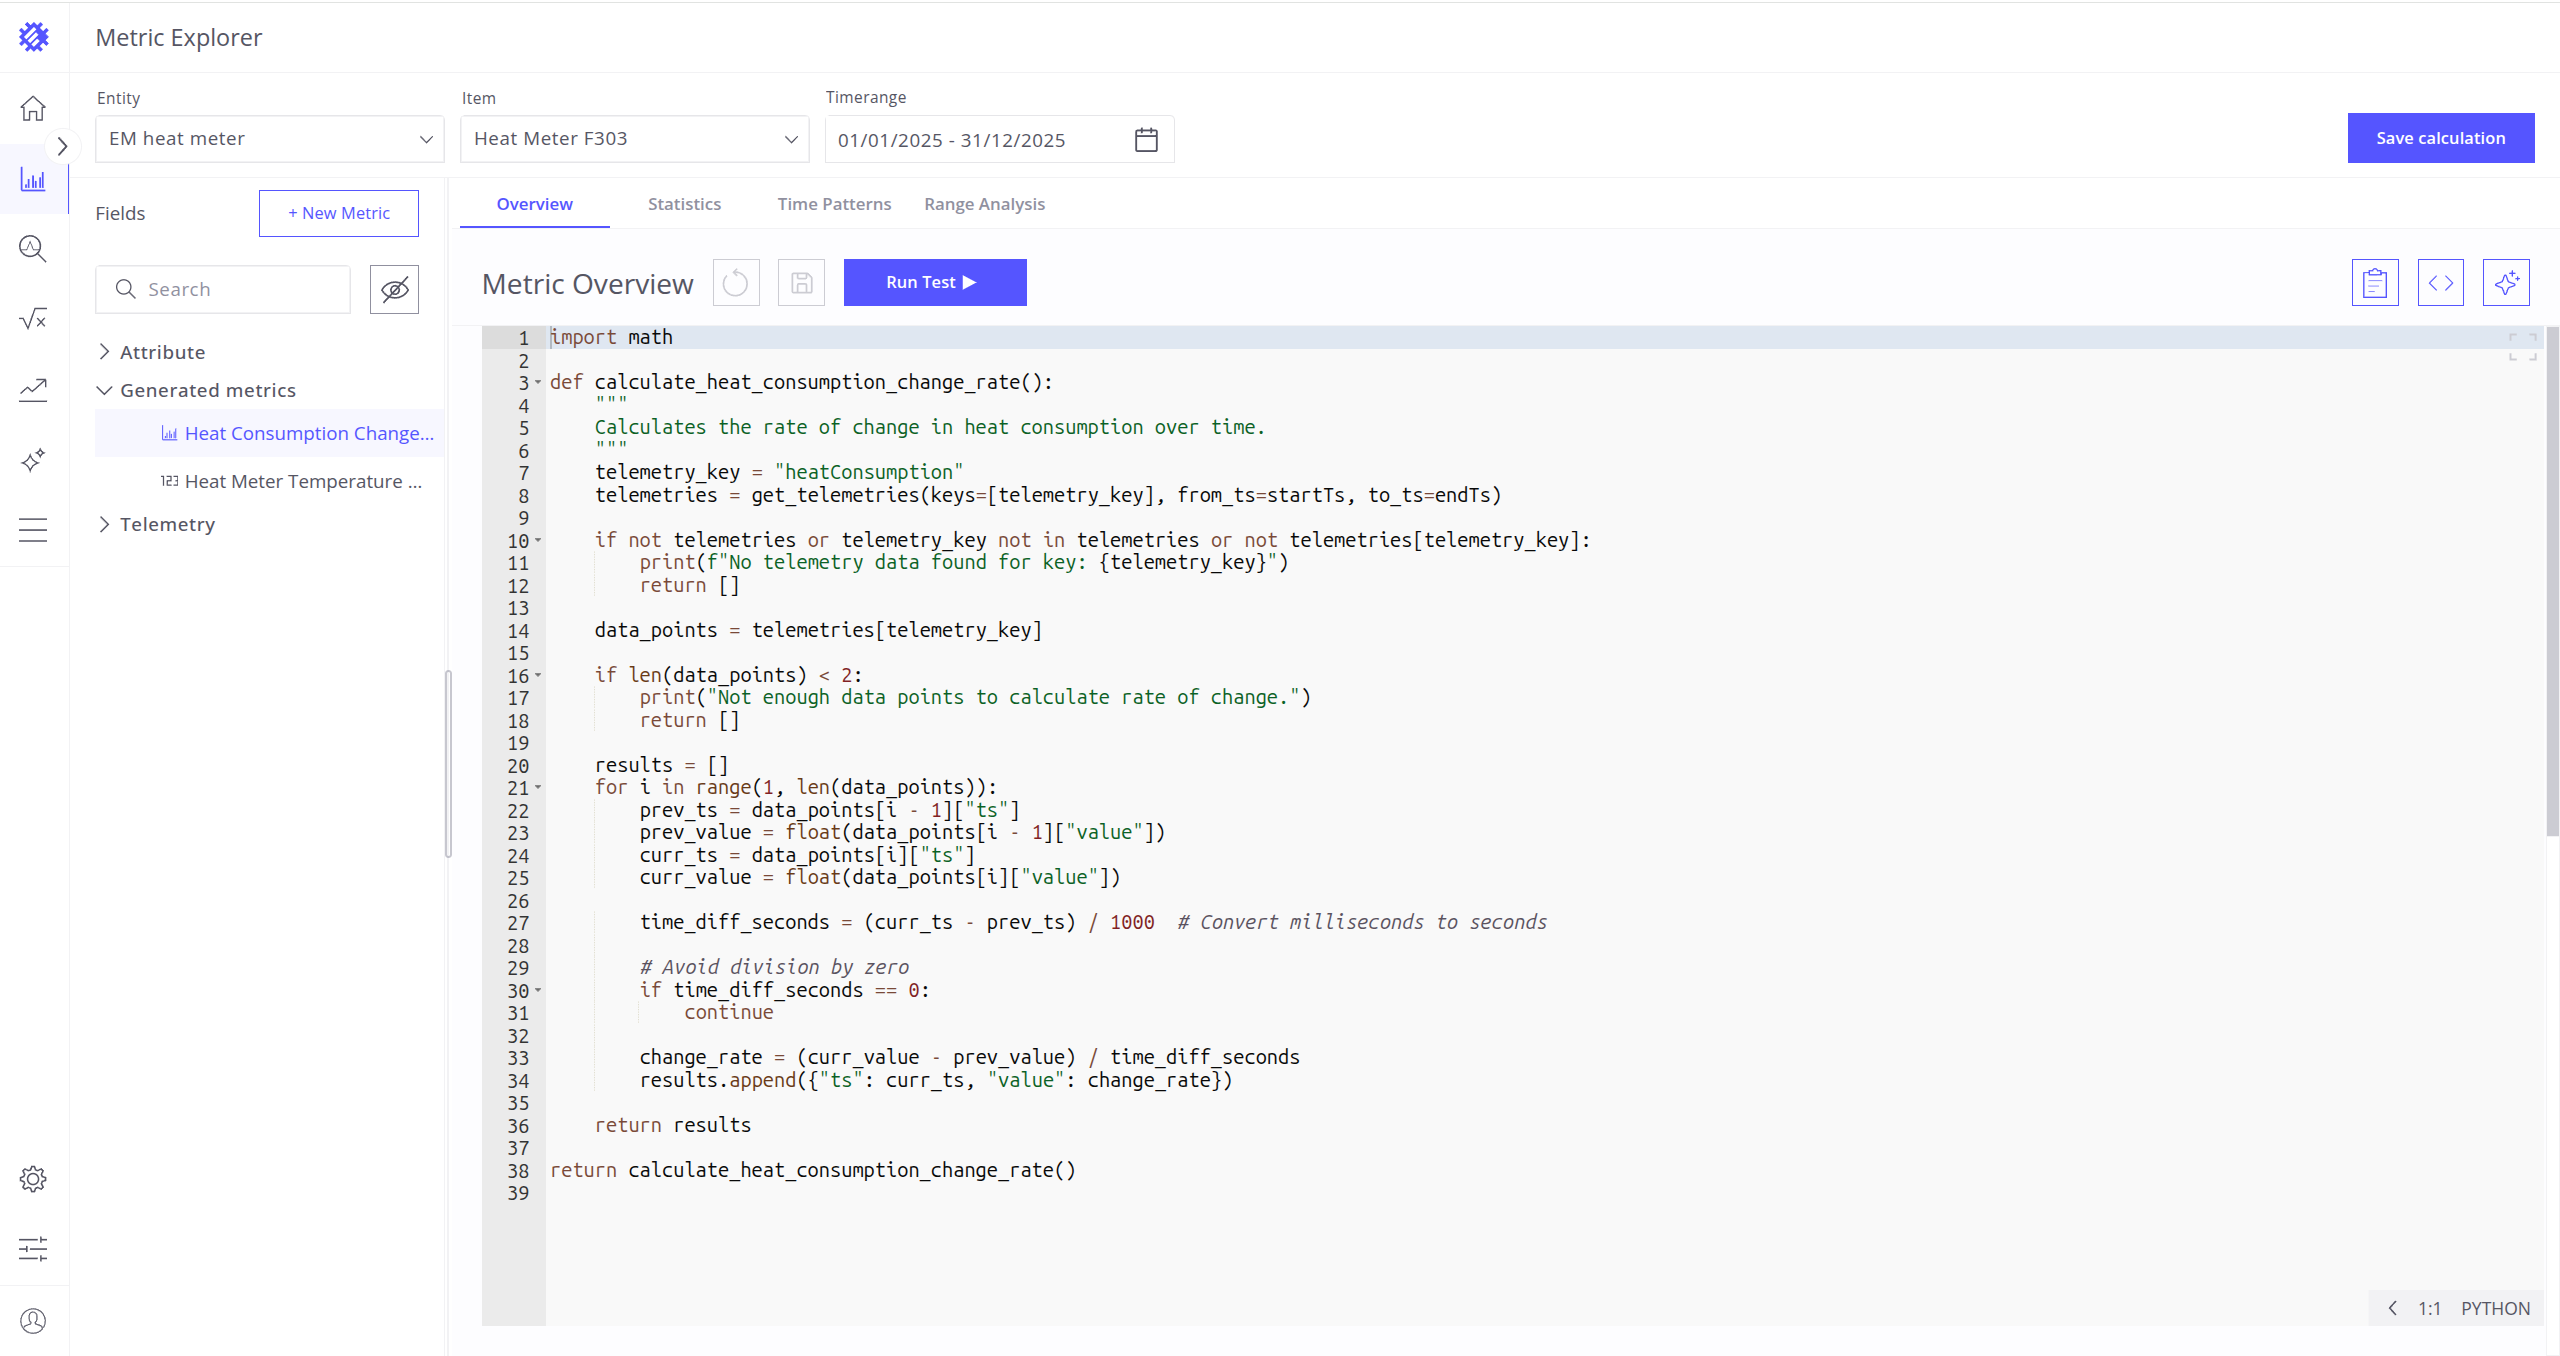
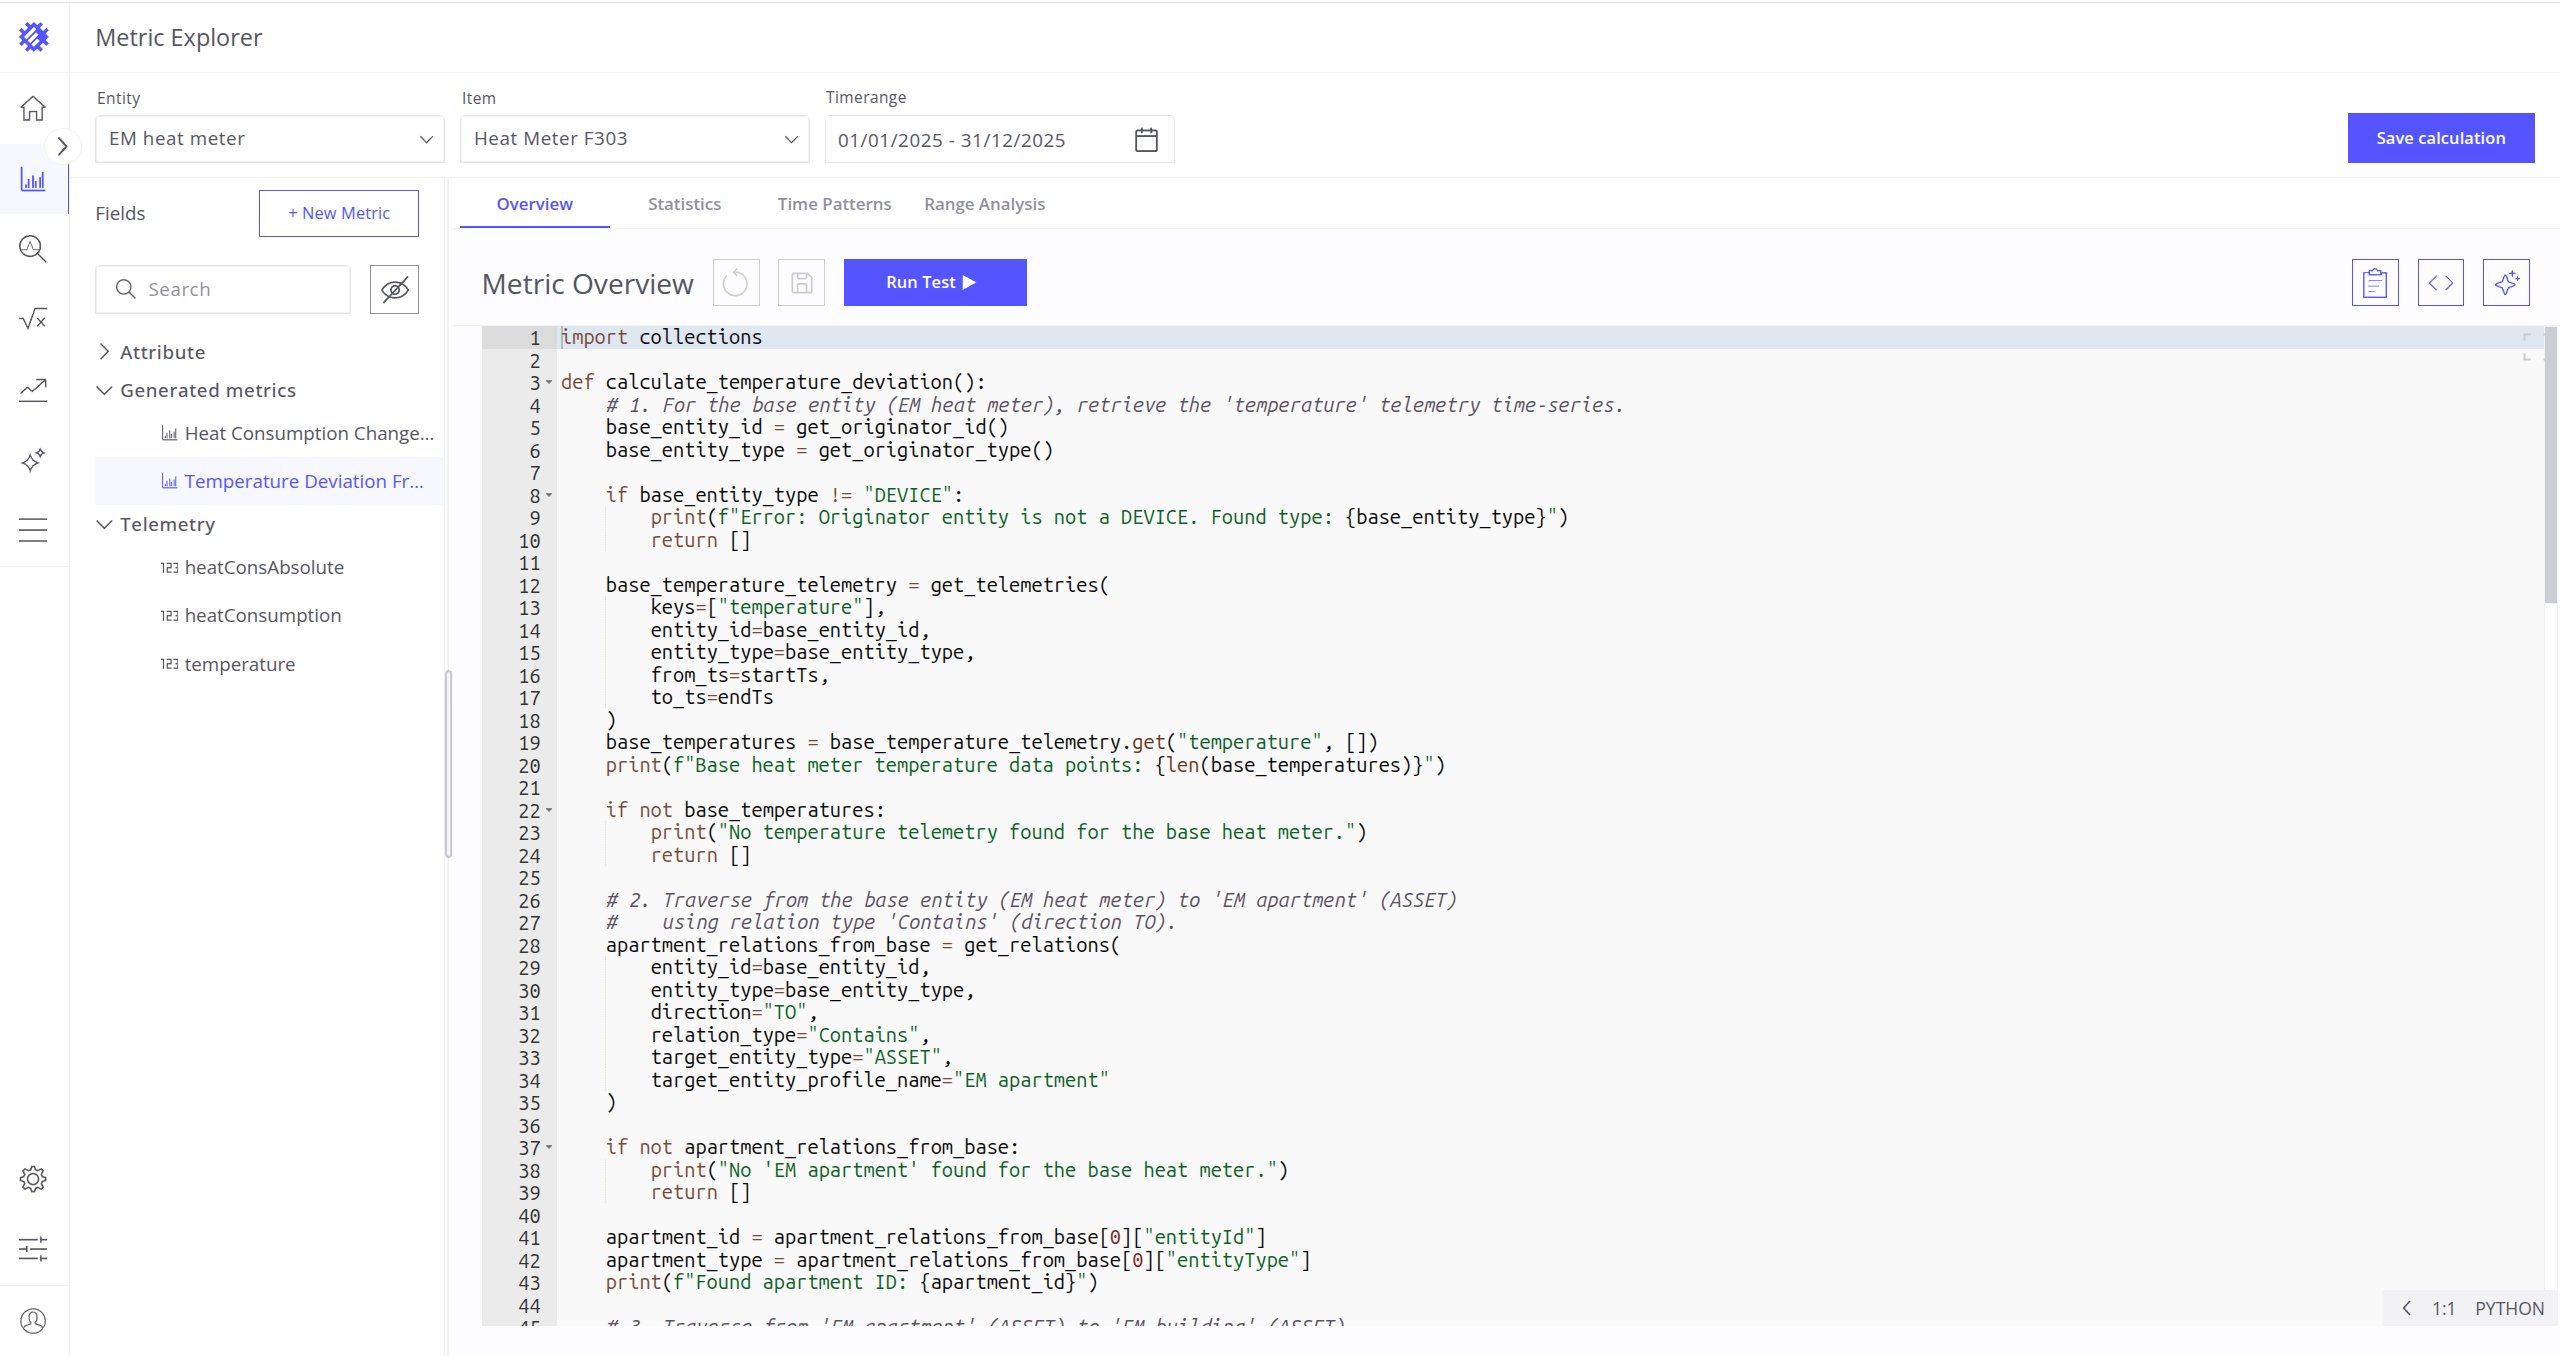
If you generated the metric without AI, you will see an empty code editor; otherwise, you will see AI-generated code.
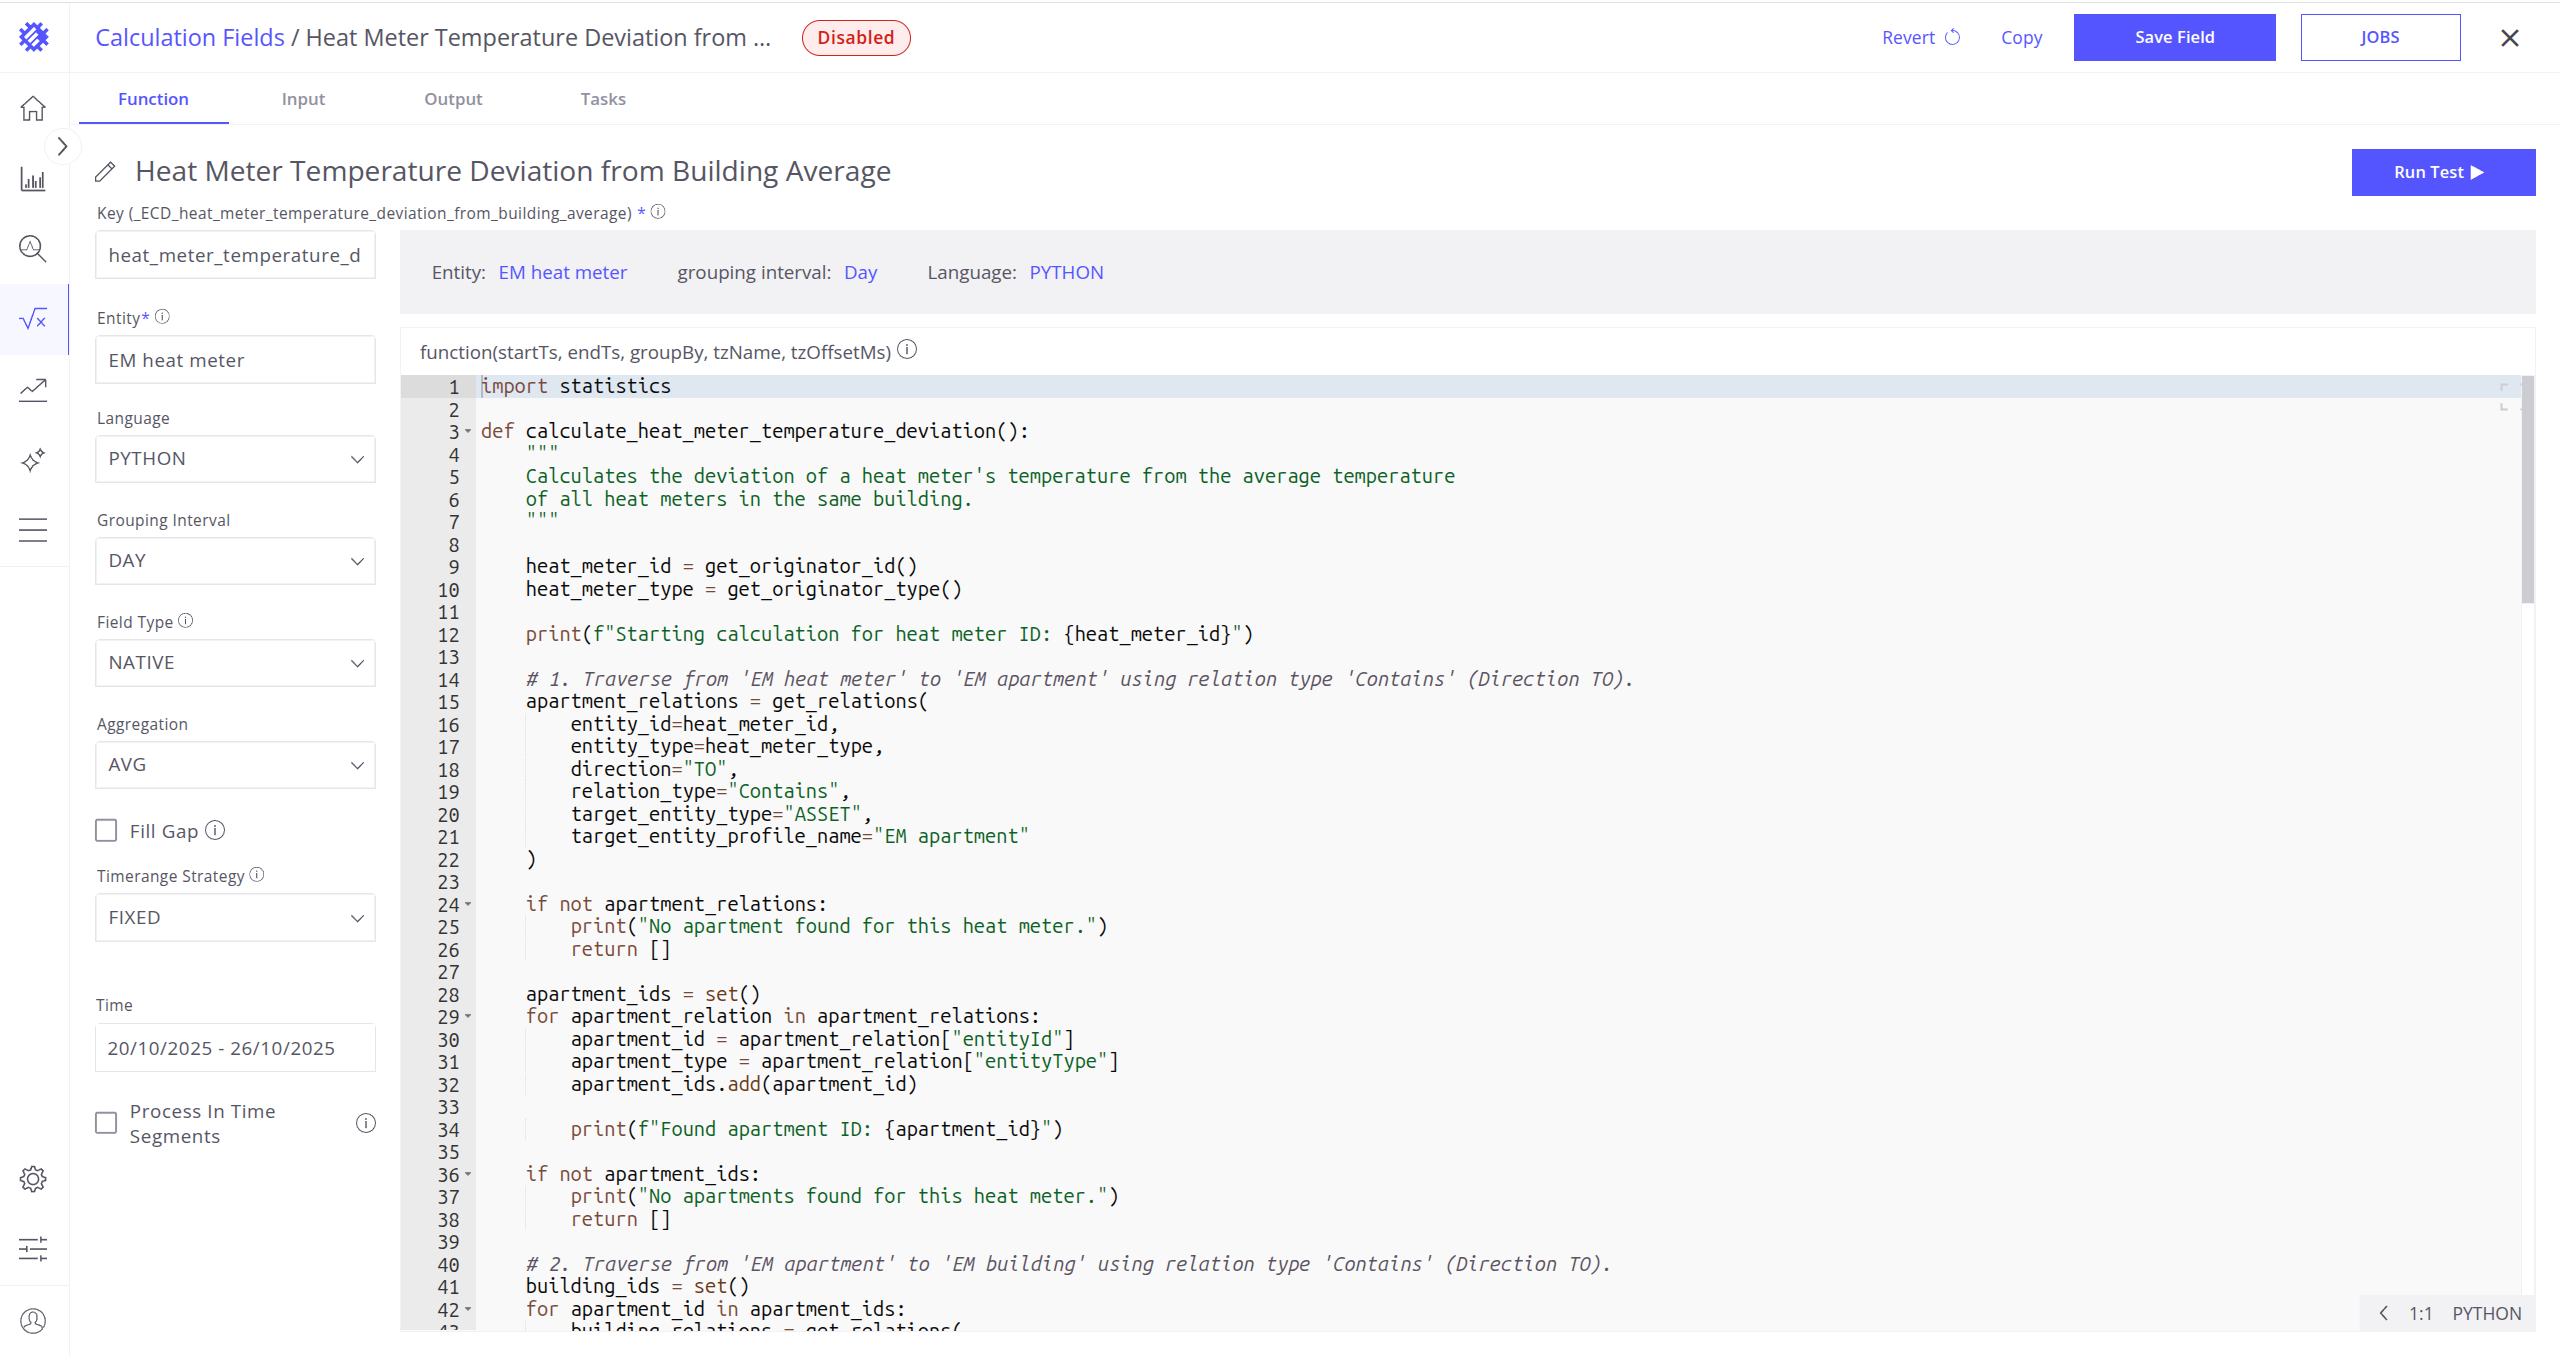
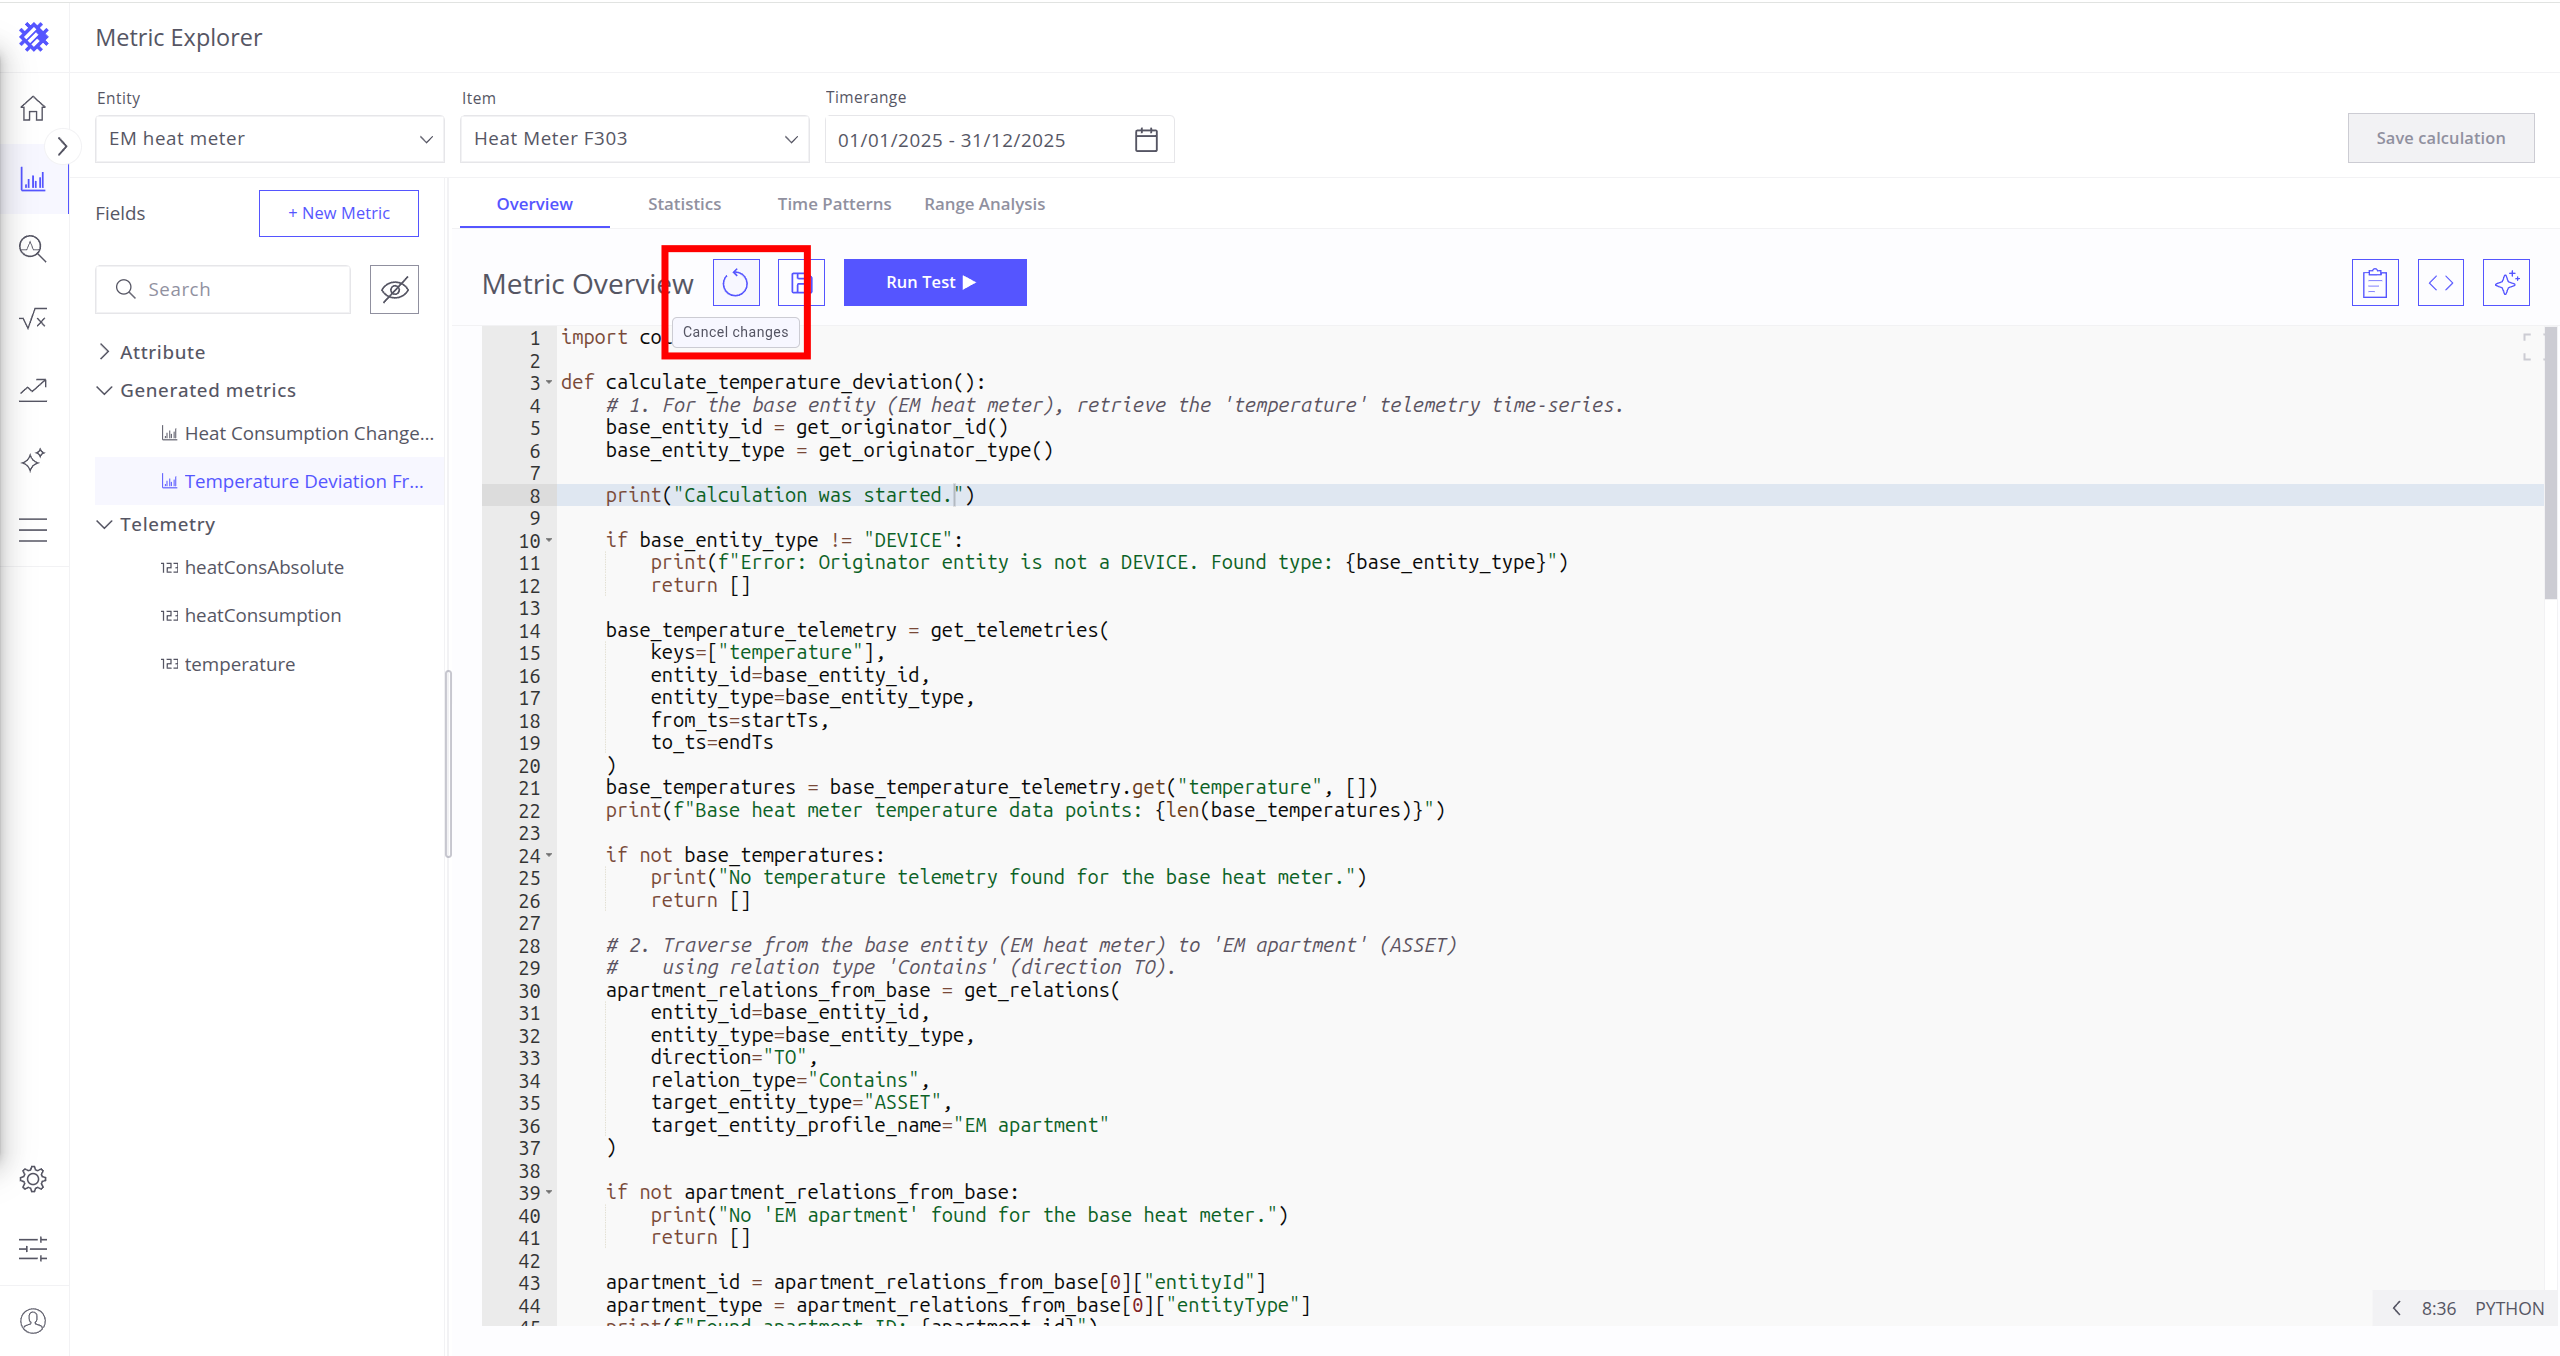
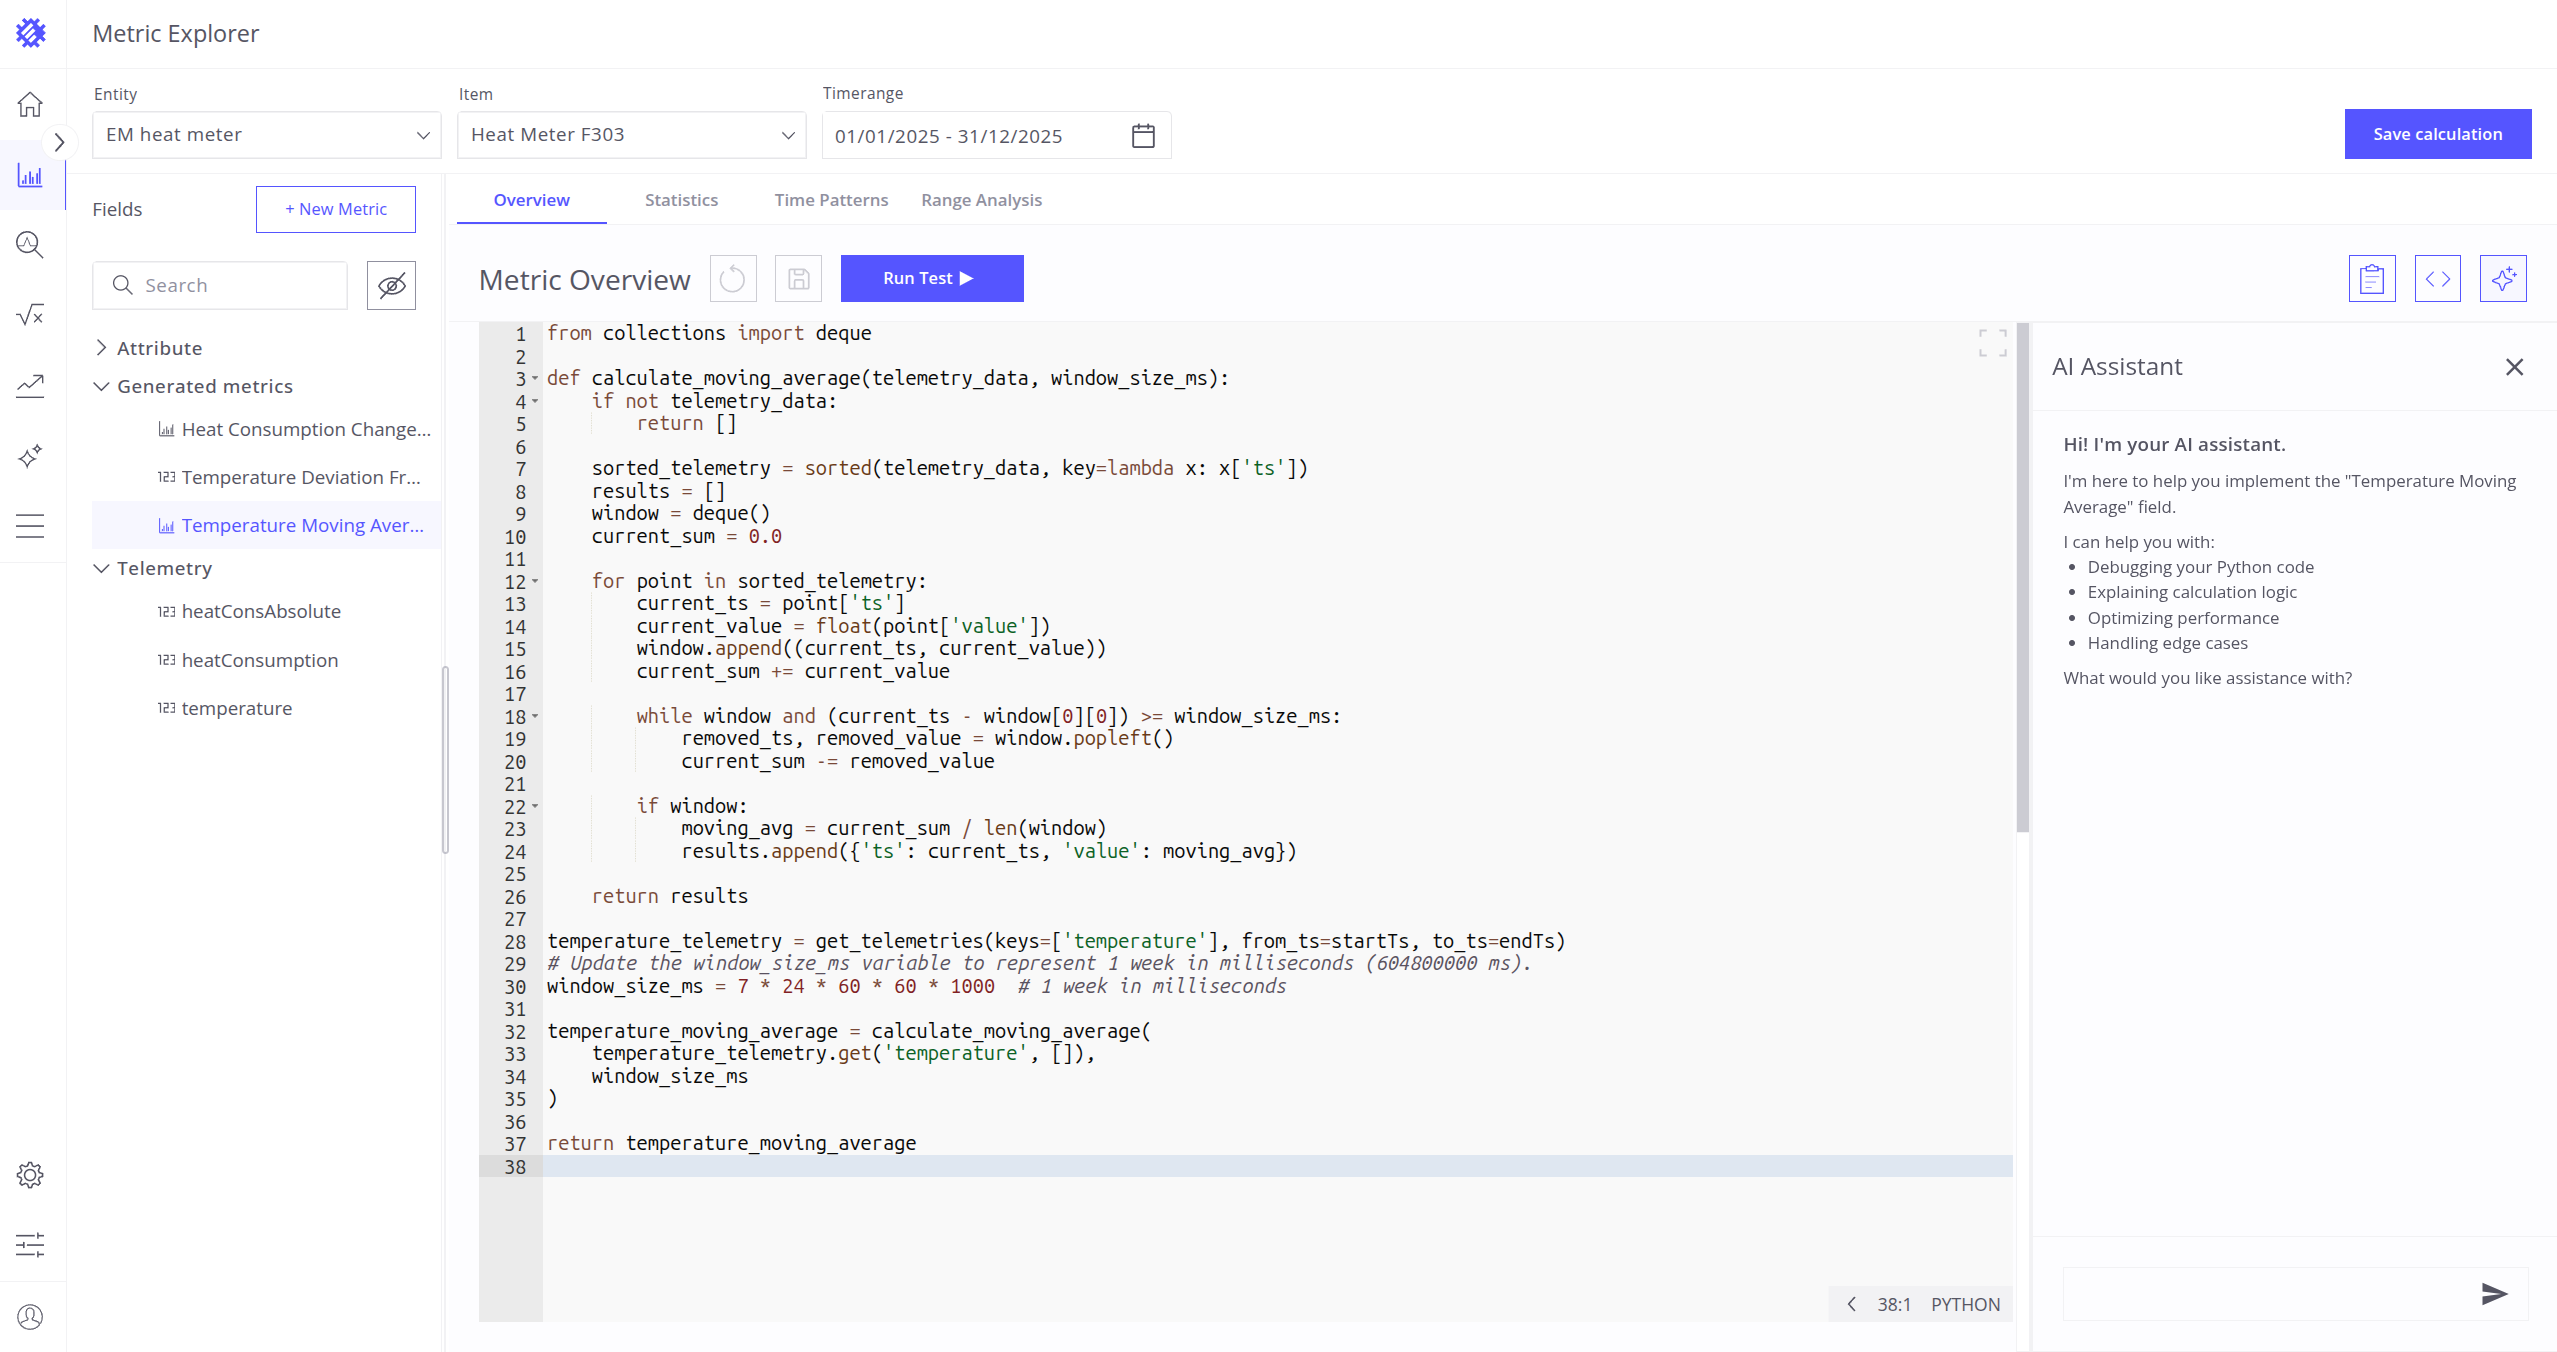
Code Editor
In the code editor, you can write or modify metric code. This code has the same syntax as the Native Calculation Field. You can read about it here.
Once the code is modified, you can save it using the Save Changes button or revert changes using Cancel Changes button.
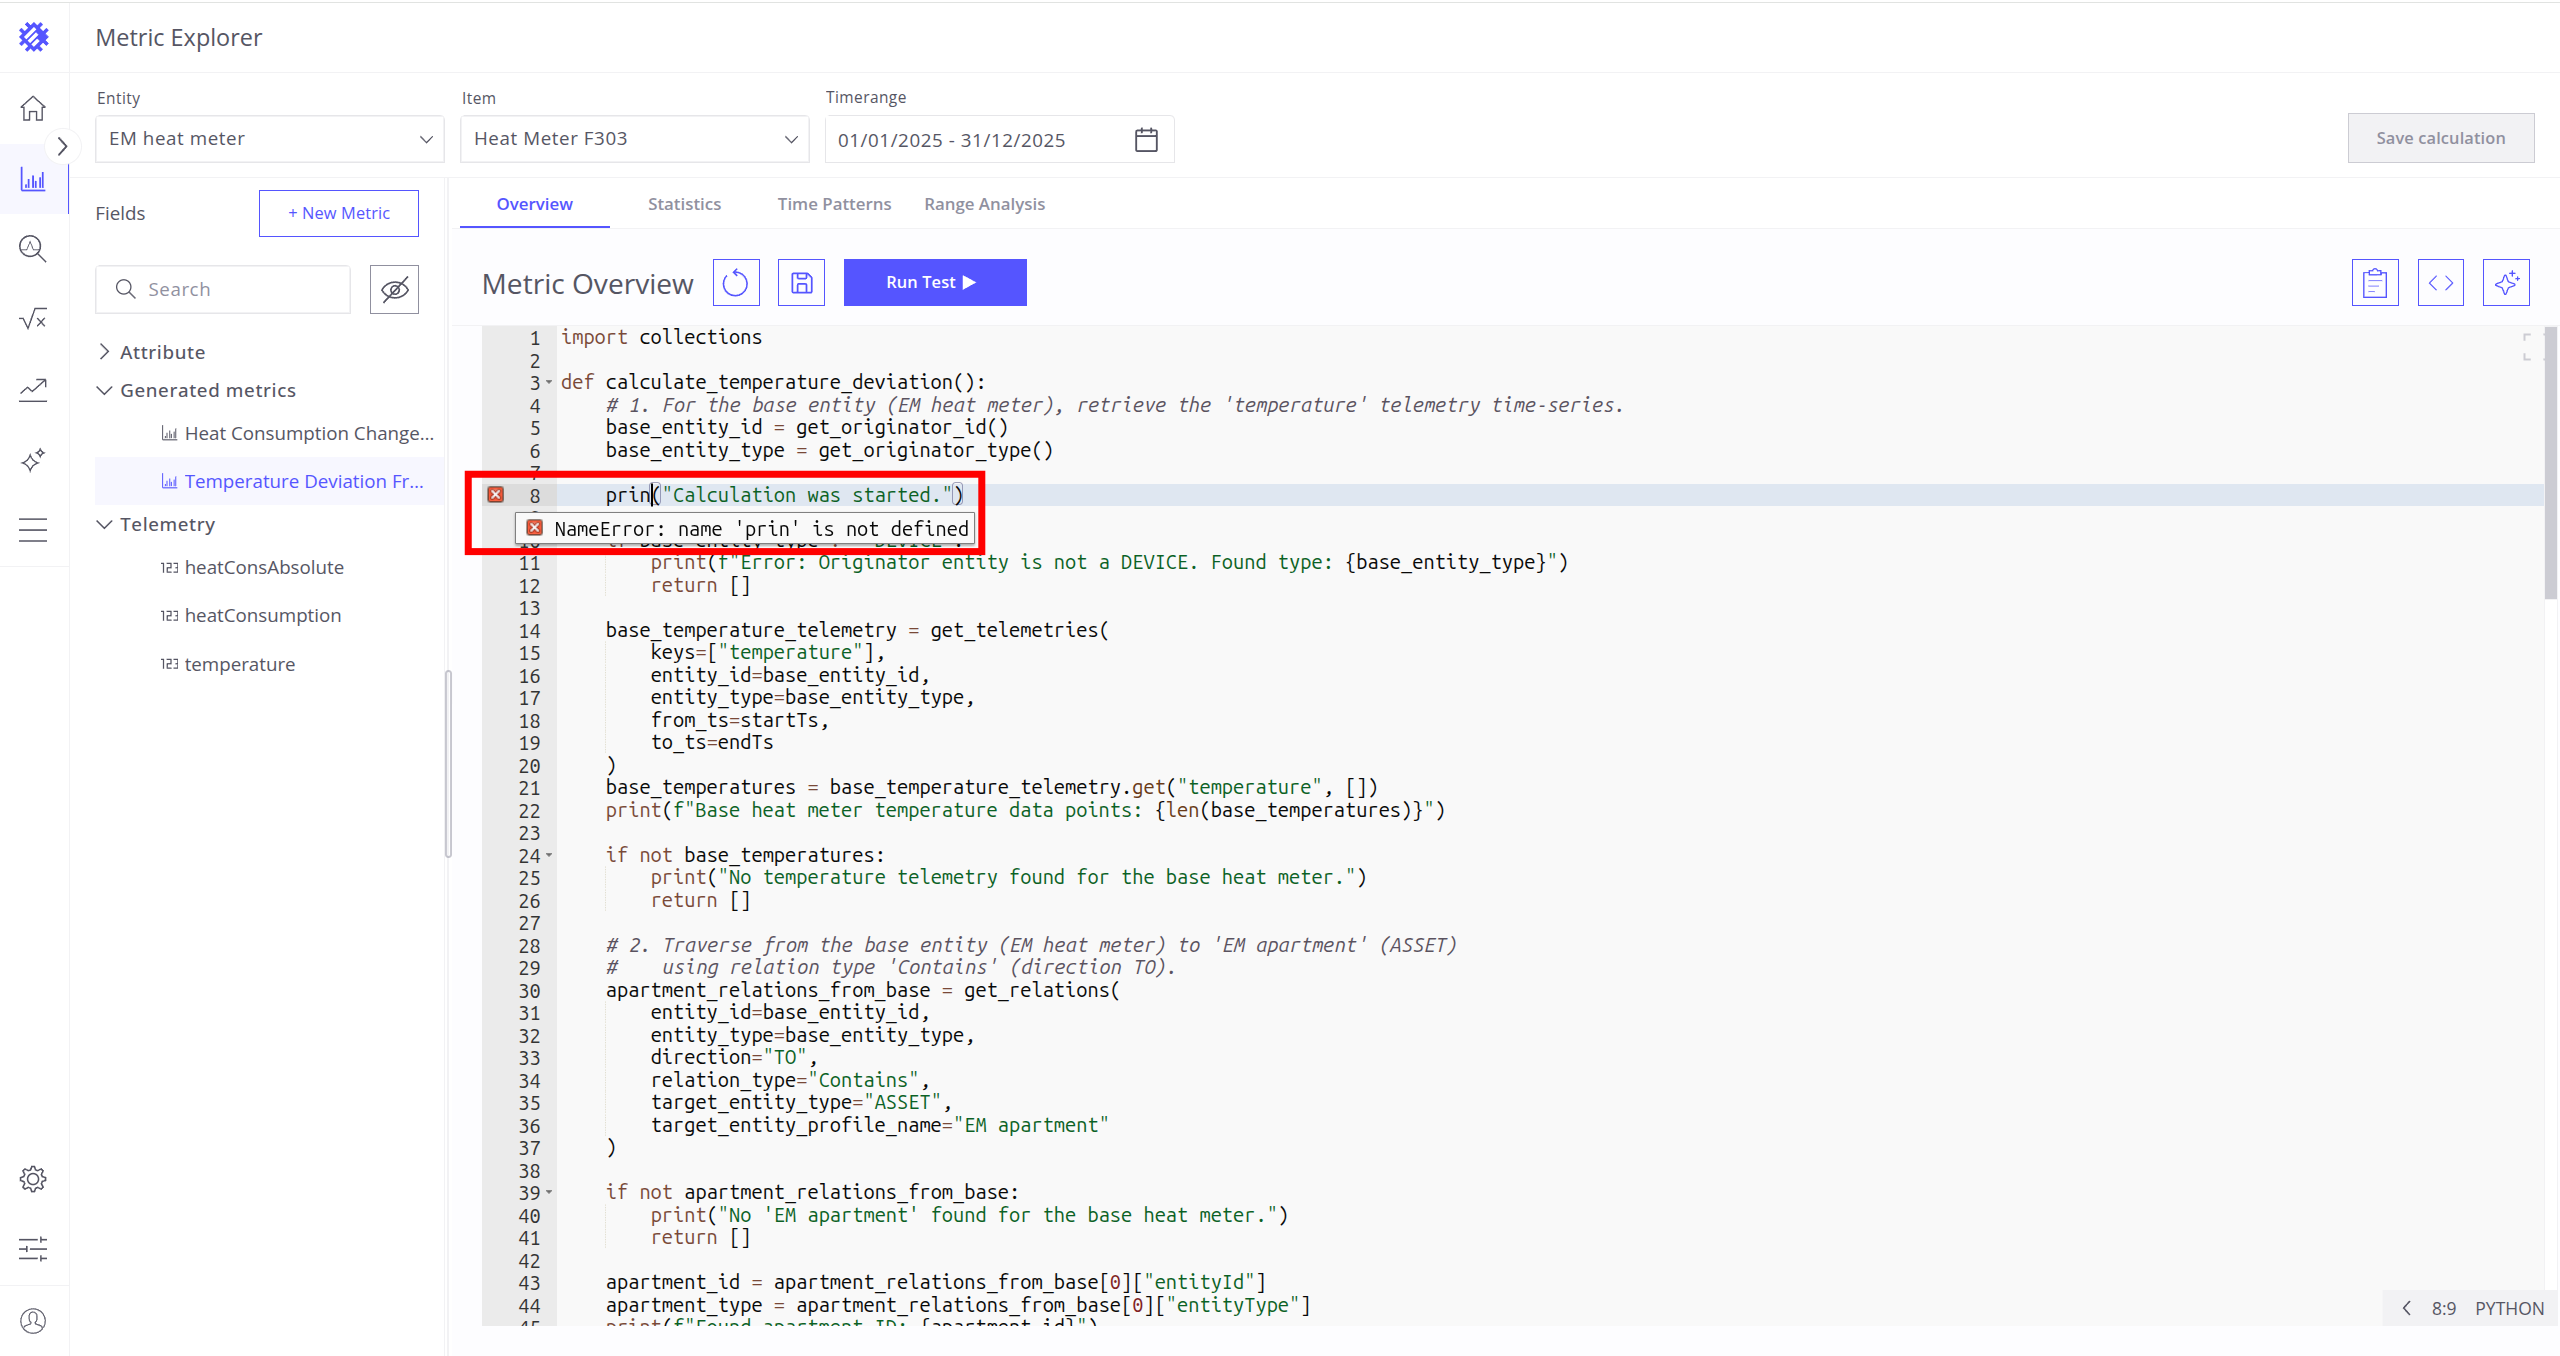
If the code has problems, you’ll see a red cross next to the line with the issue.

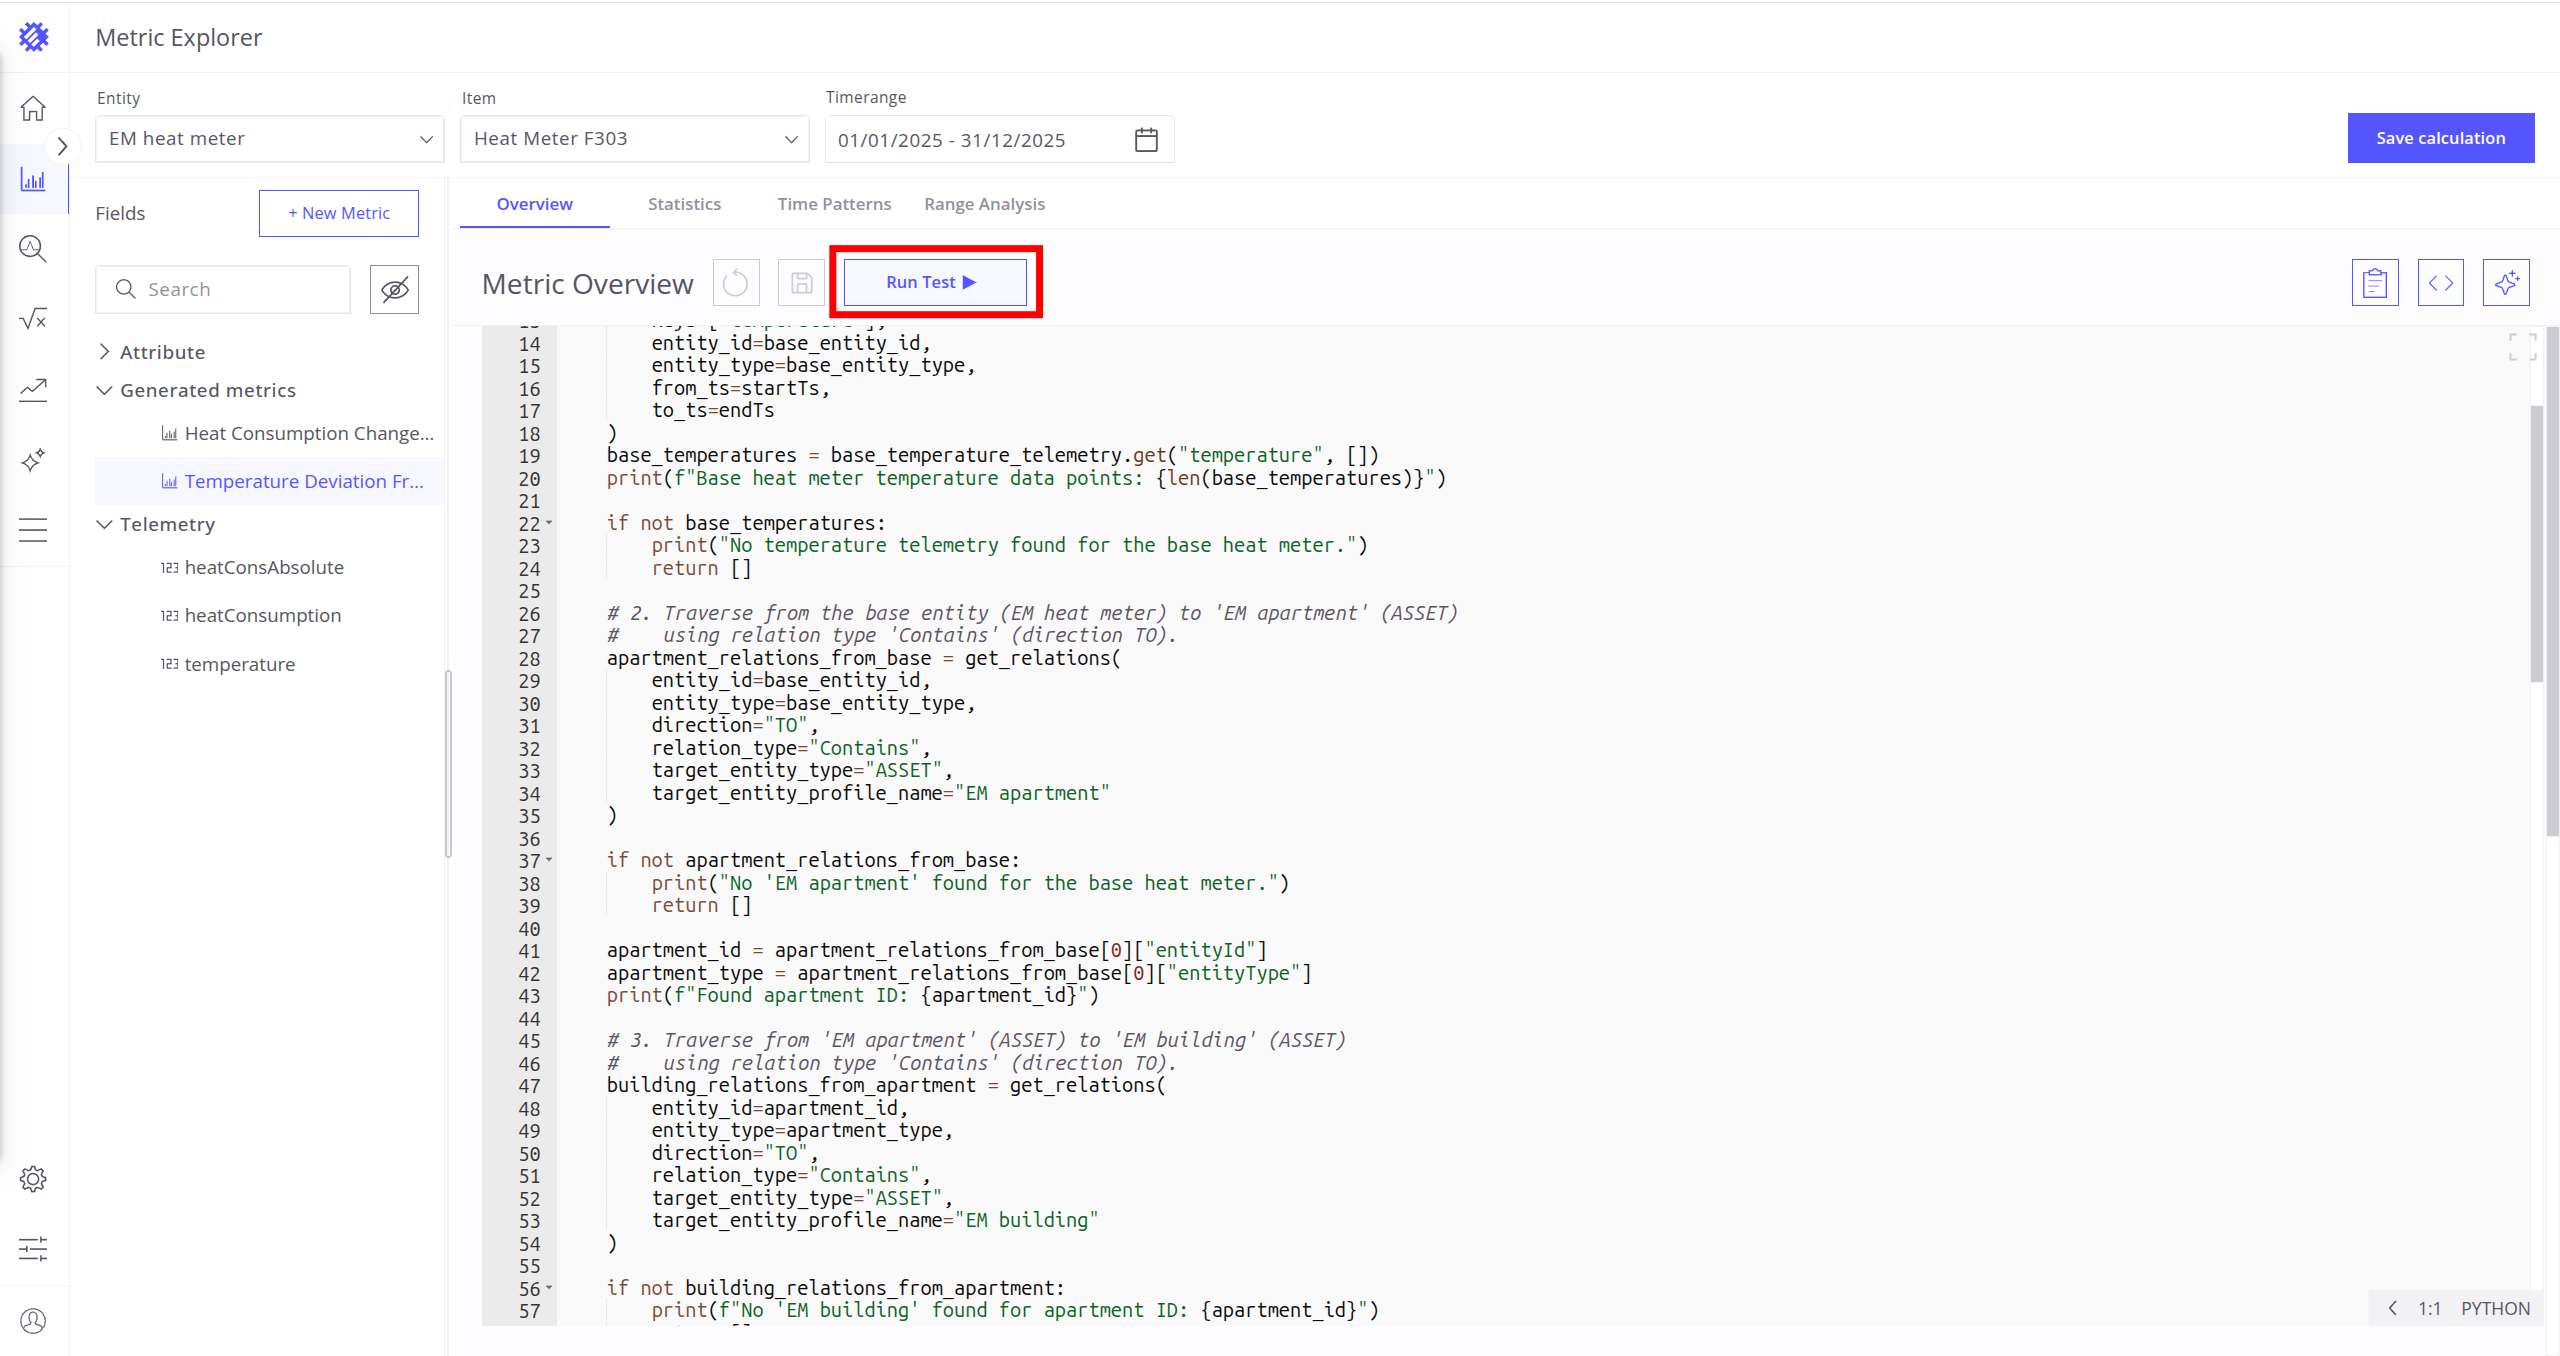
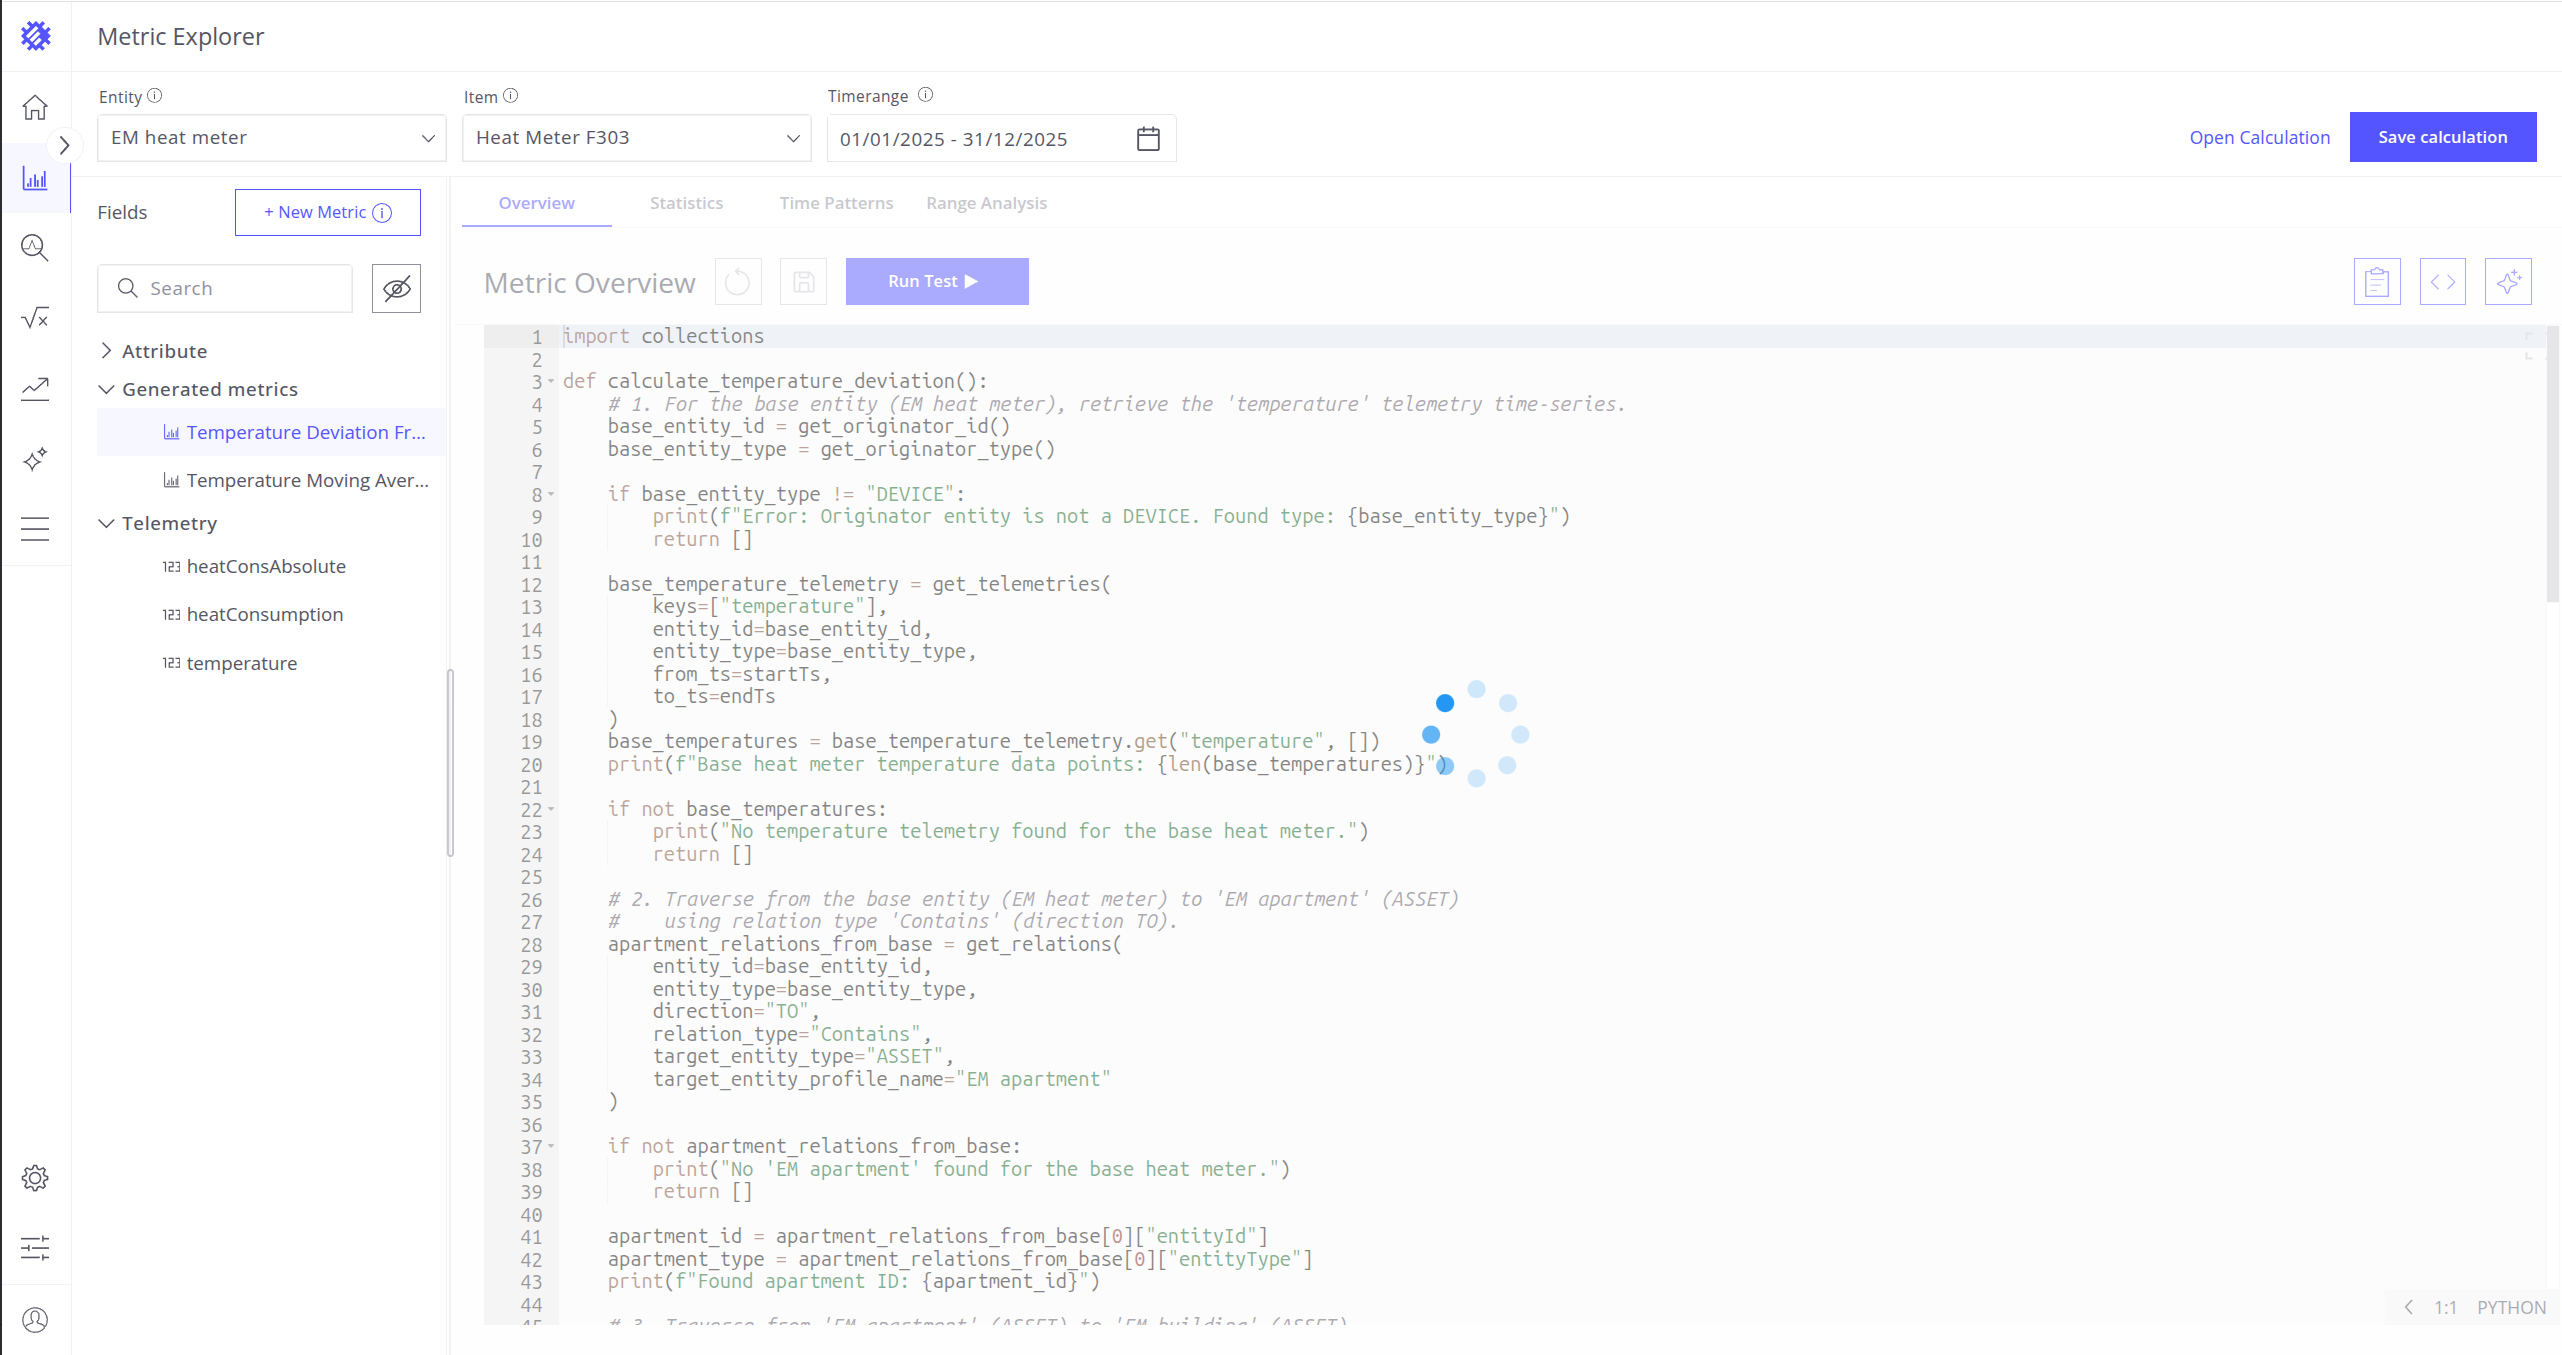
Test Code
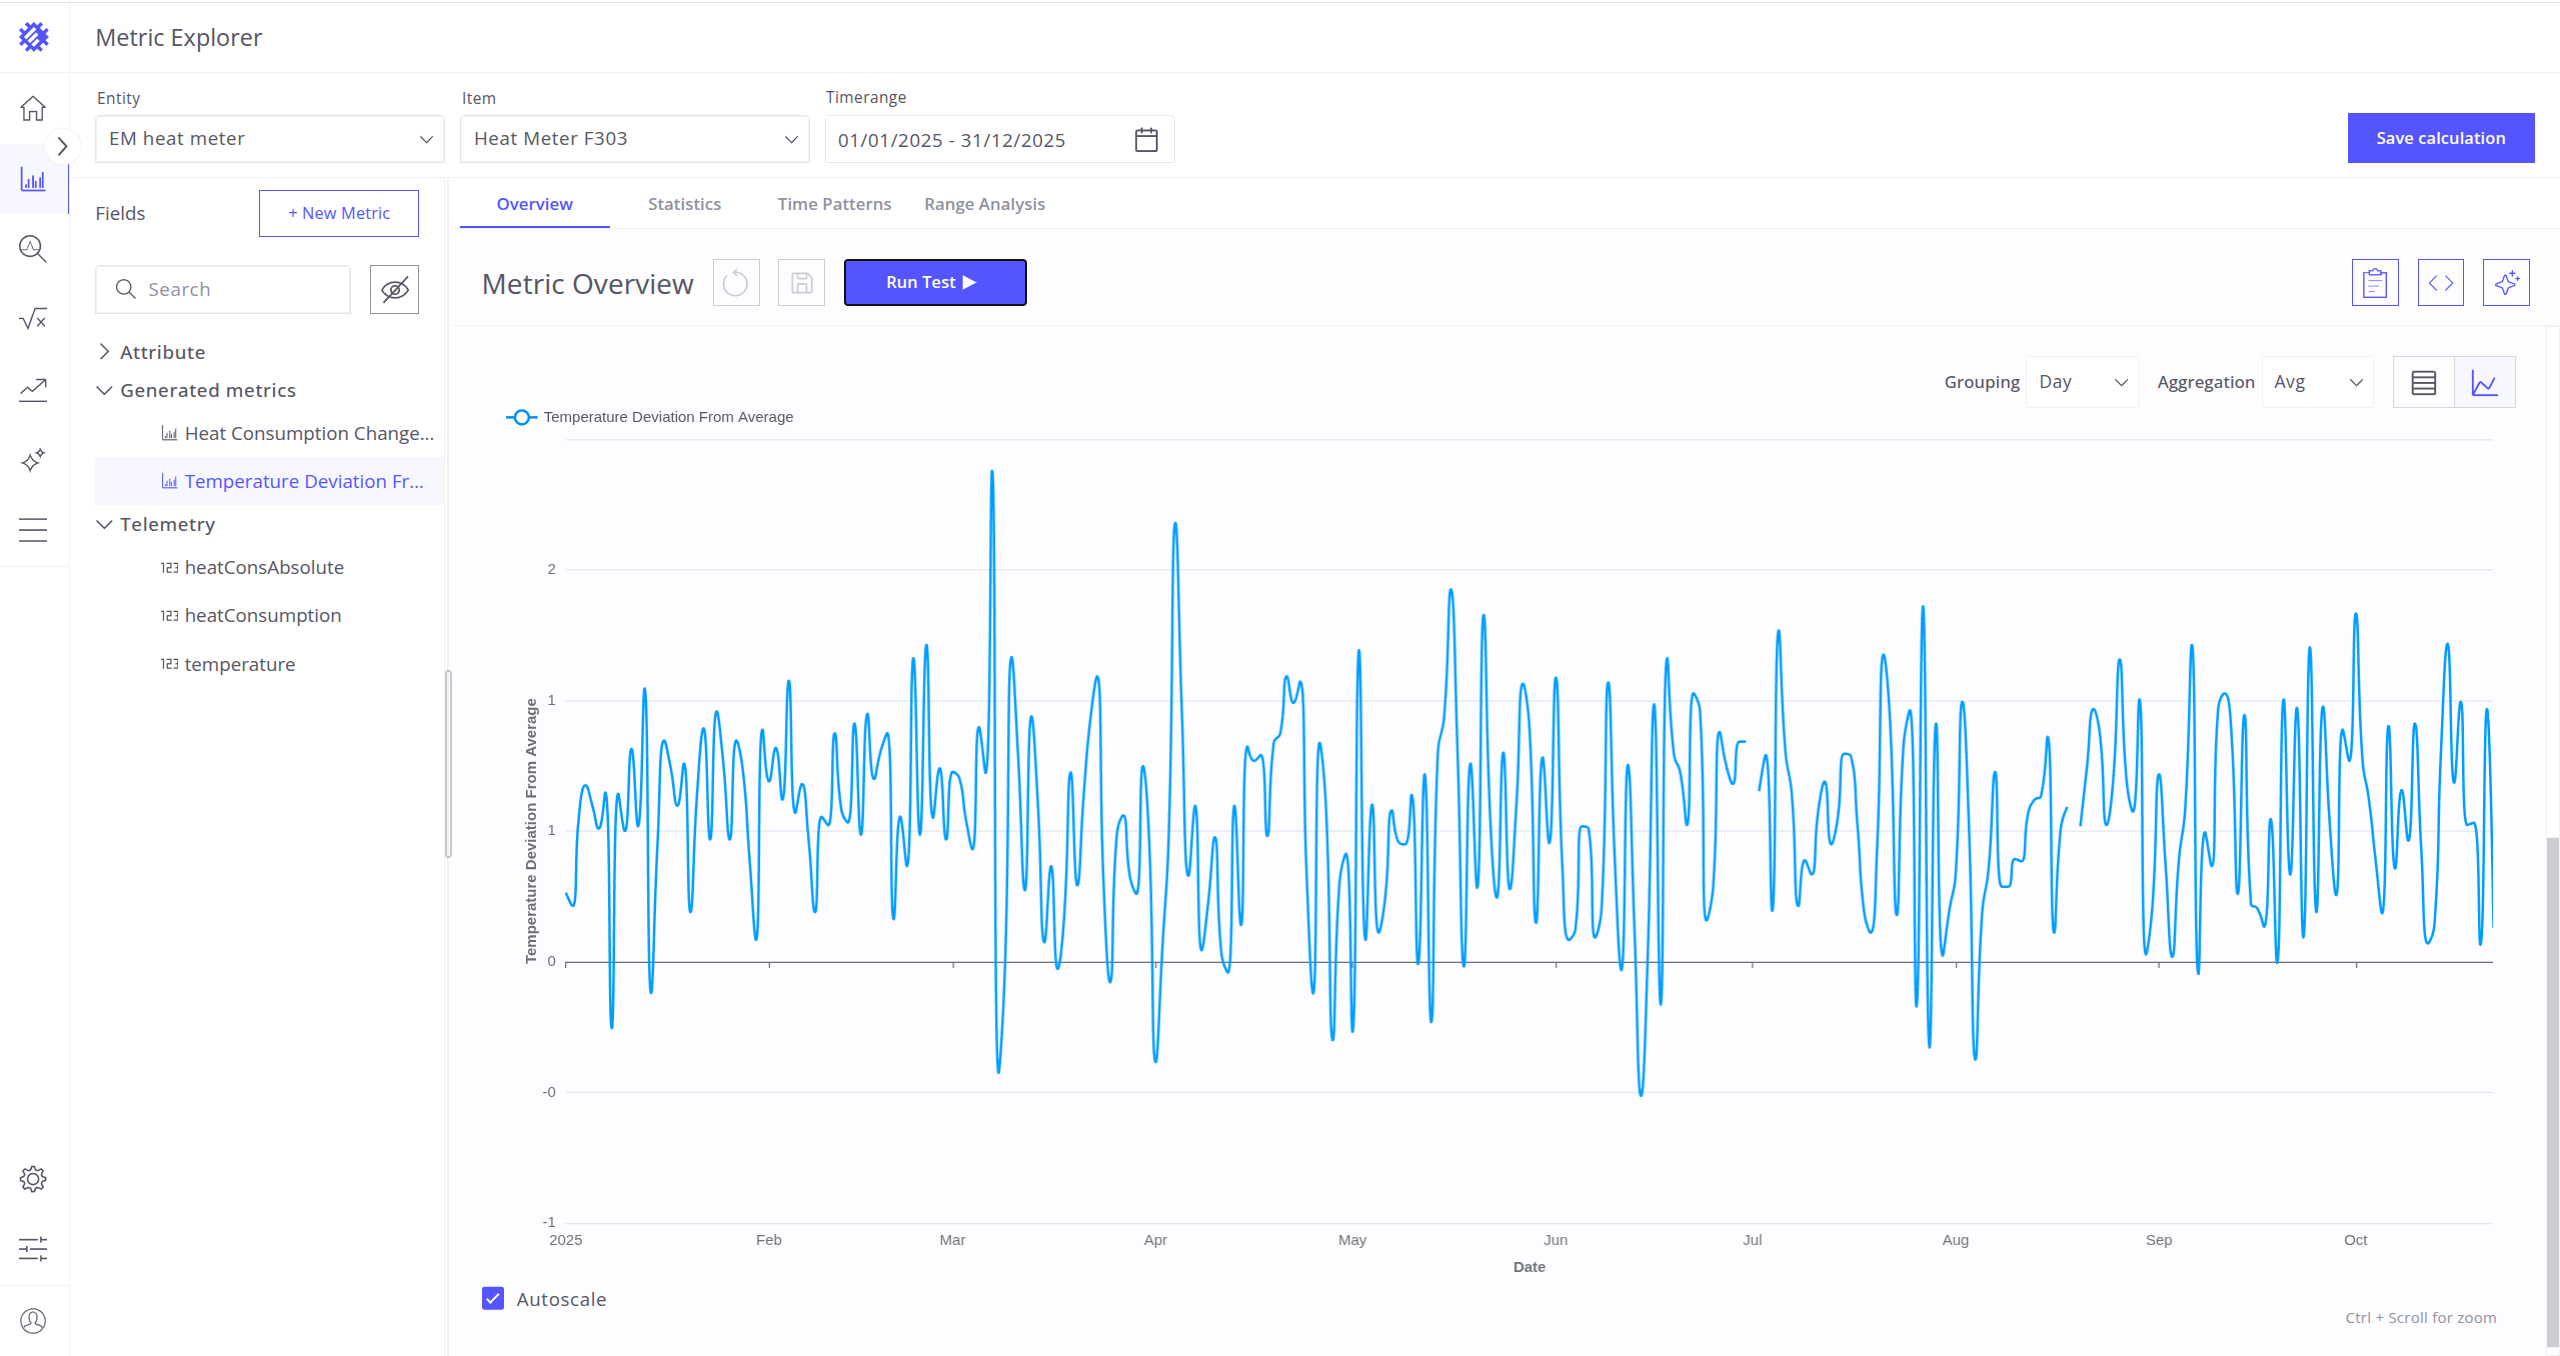
To test code, press the Run Test button. Then you’ll be redirected to the graph. The logic of this graph is the same as in the overview tab of a regular metric. This graph or table will show points that the metric code generates for the chosen item. You can read more about the overview tab here.
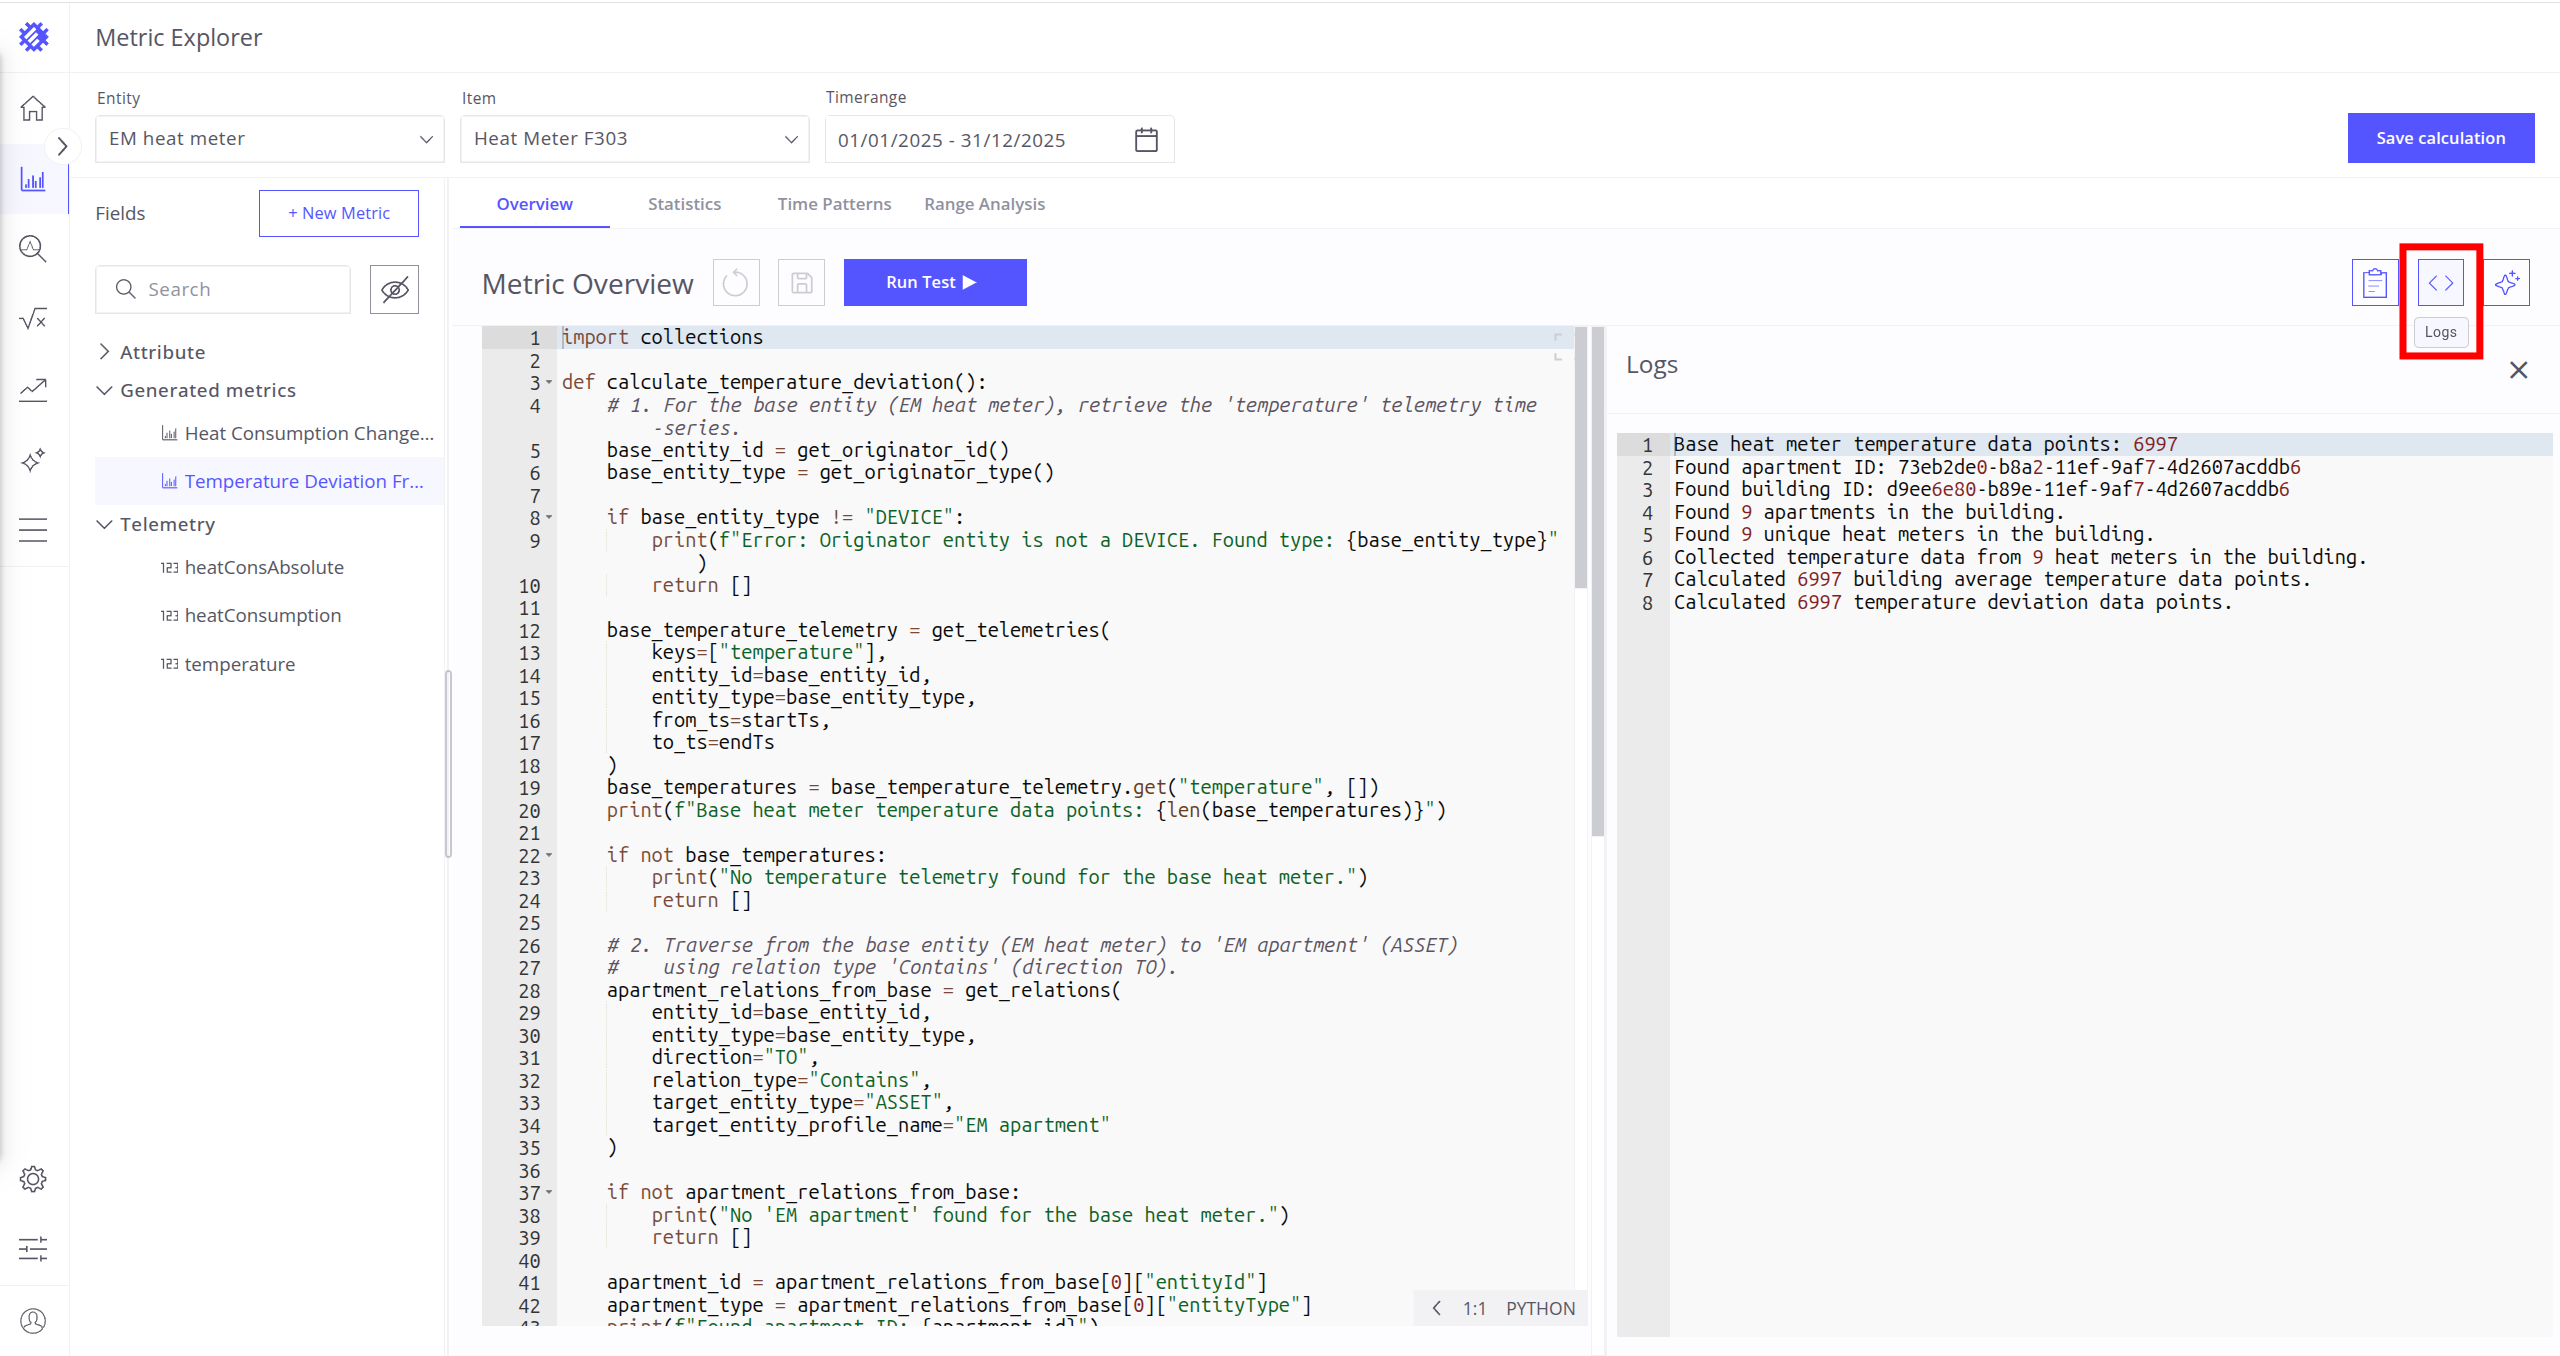
Show Logs
To access the log section, click the Logs button in the upper-left corner of the screen.
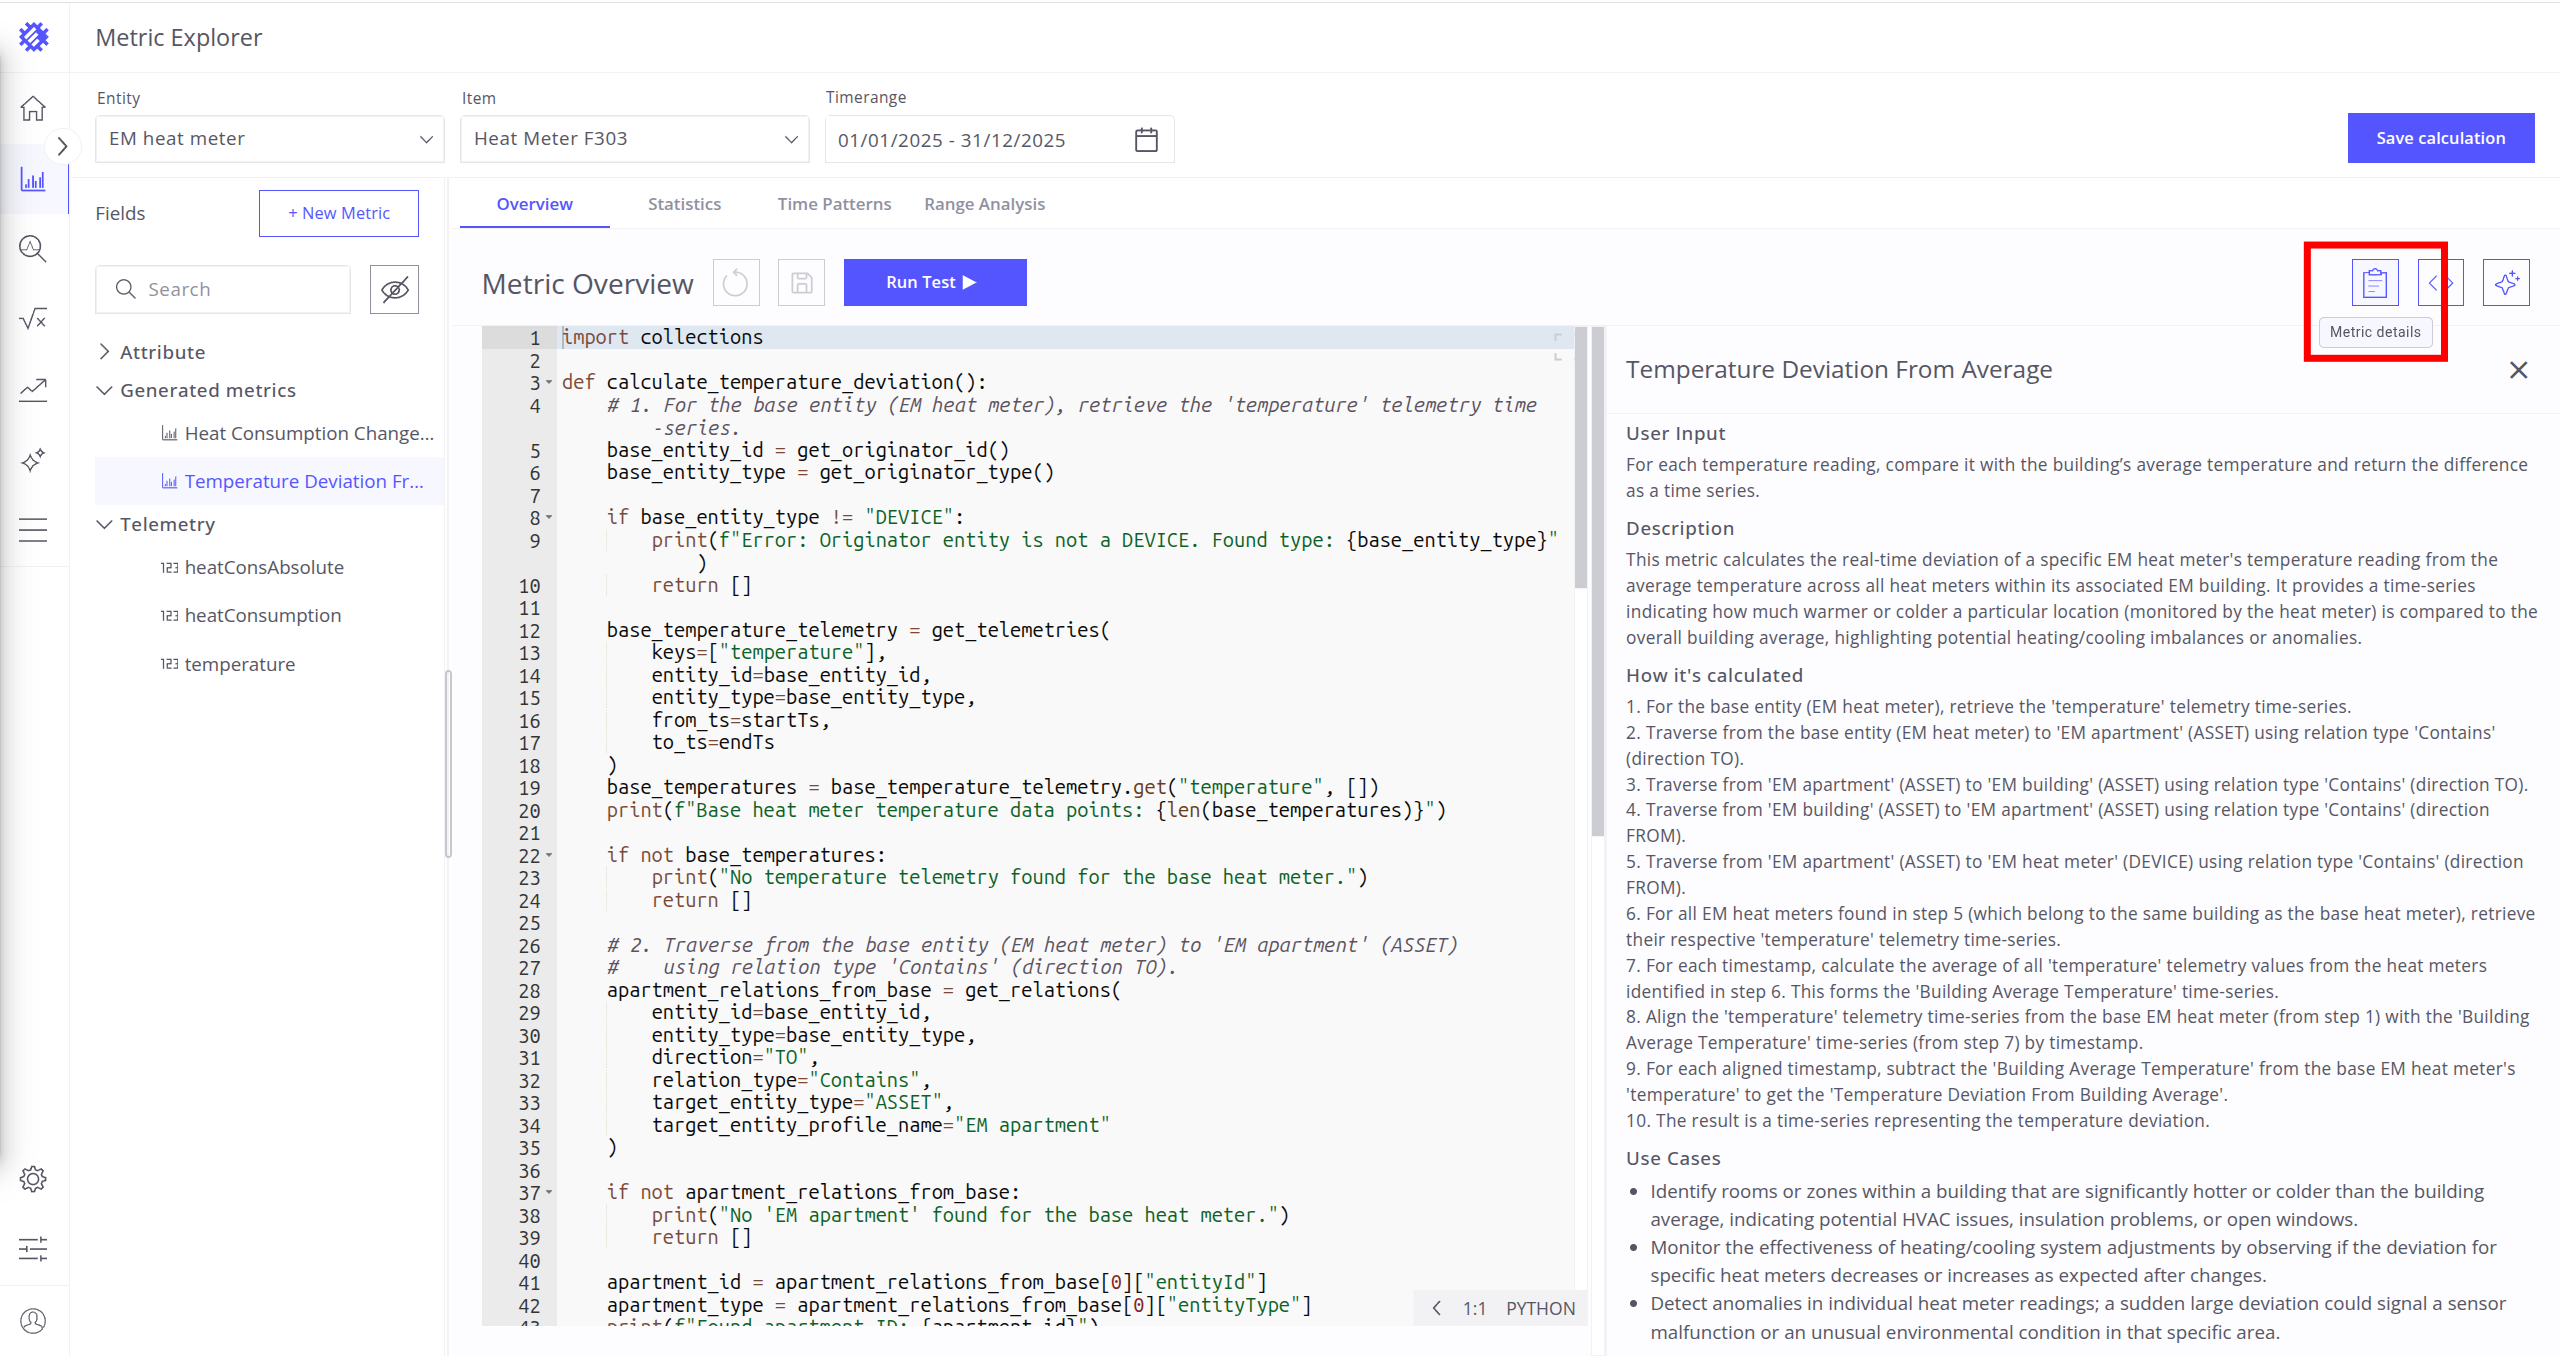
Show Details
To view the Metric Definition from which this metric was created, click the Metric Details button.
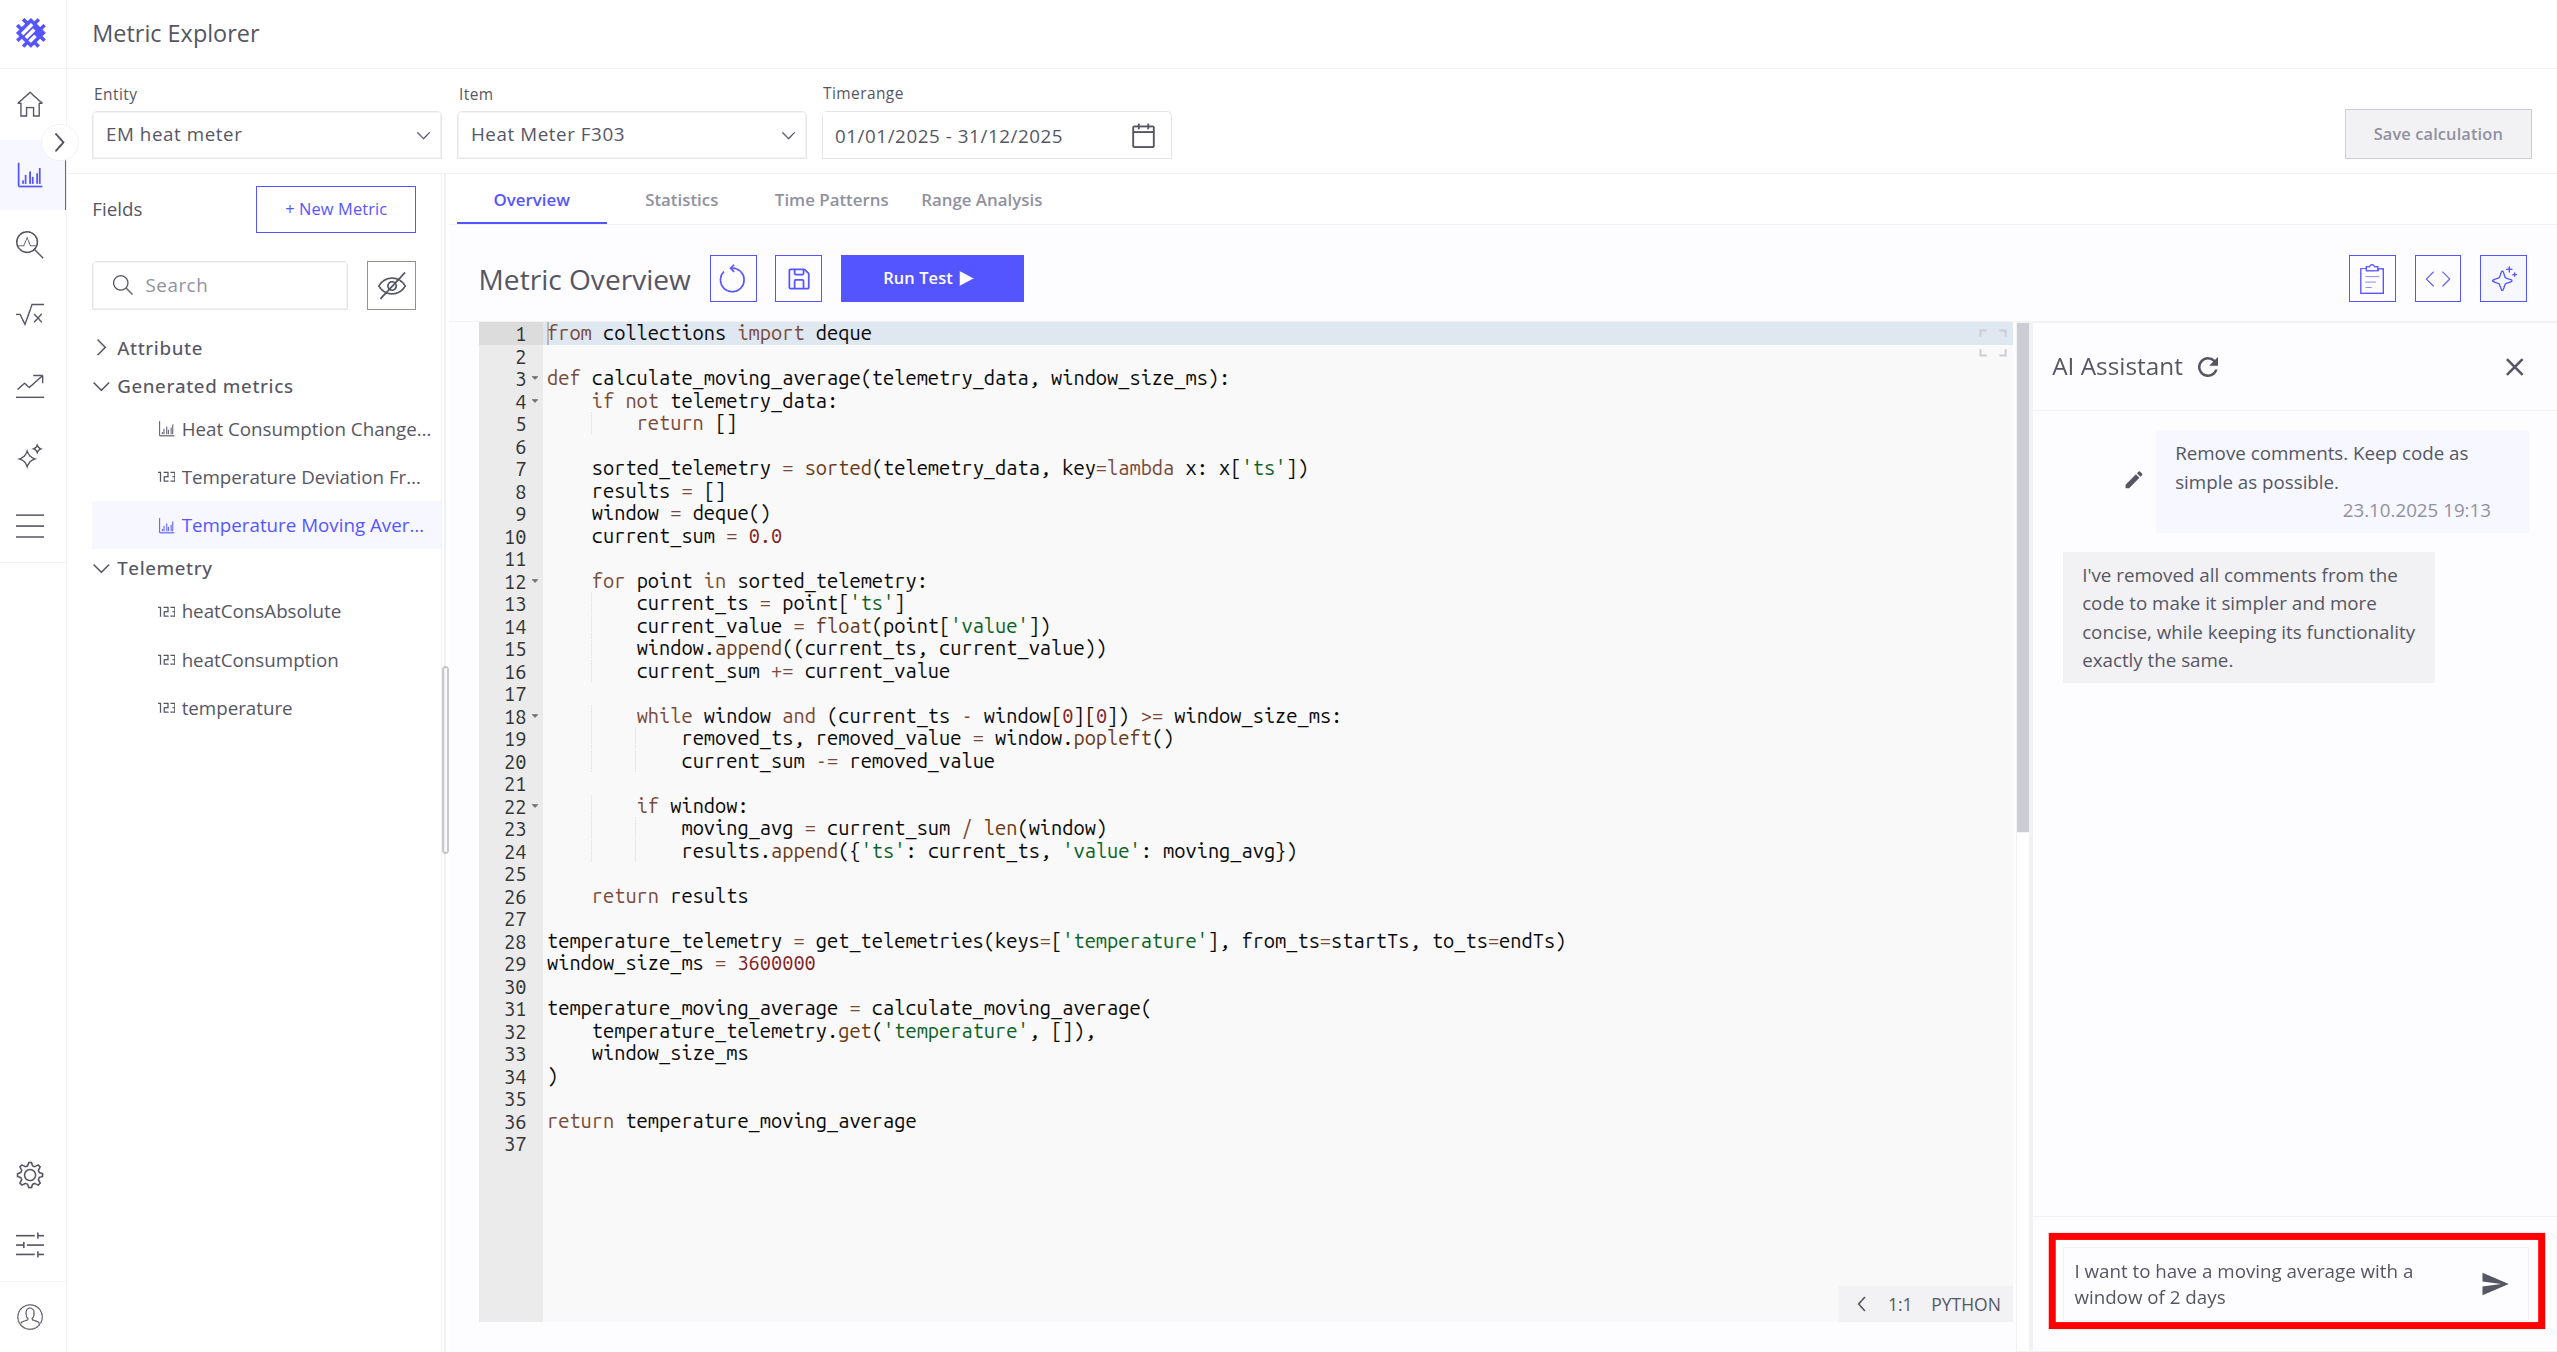
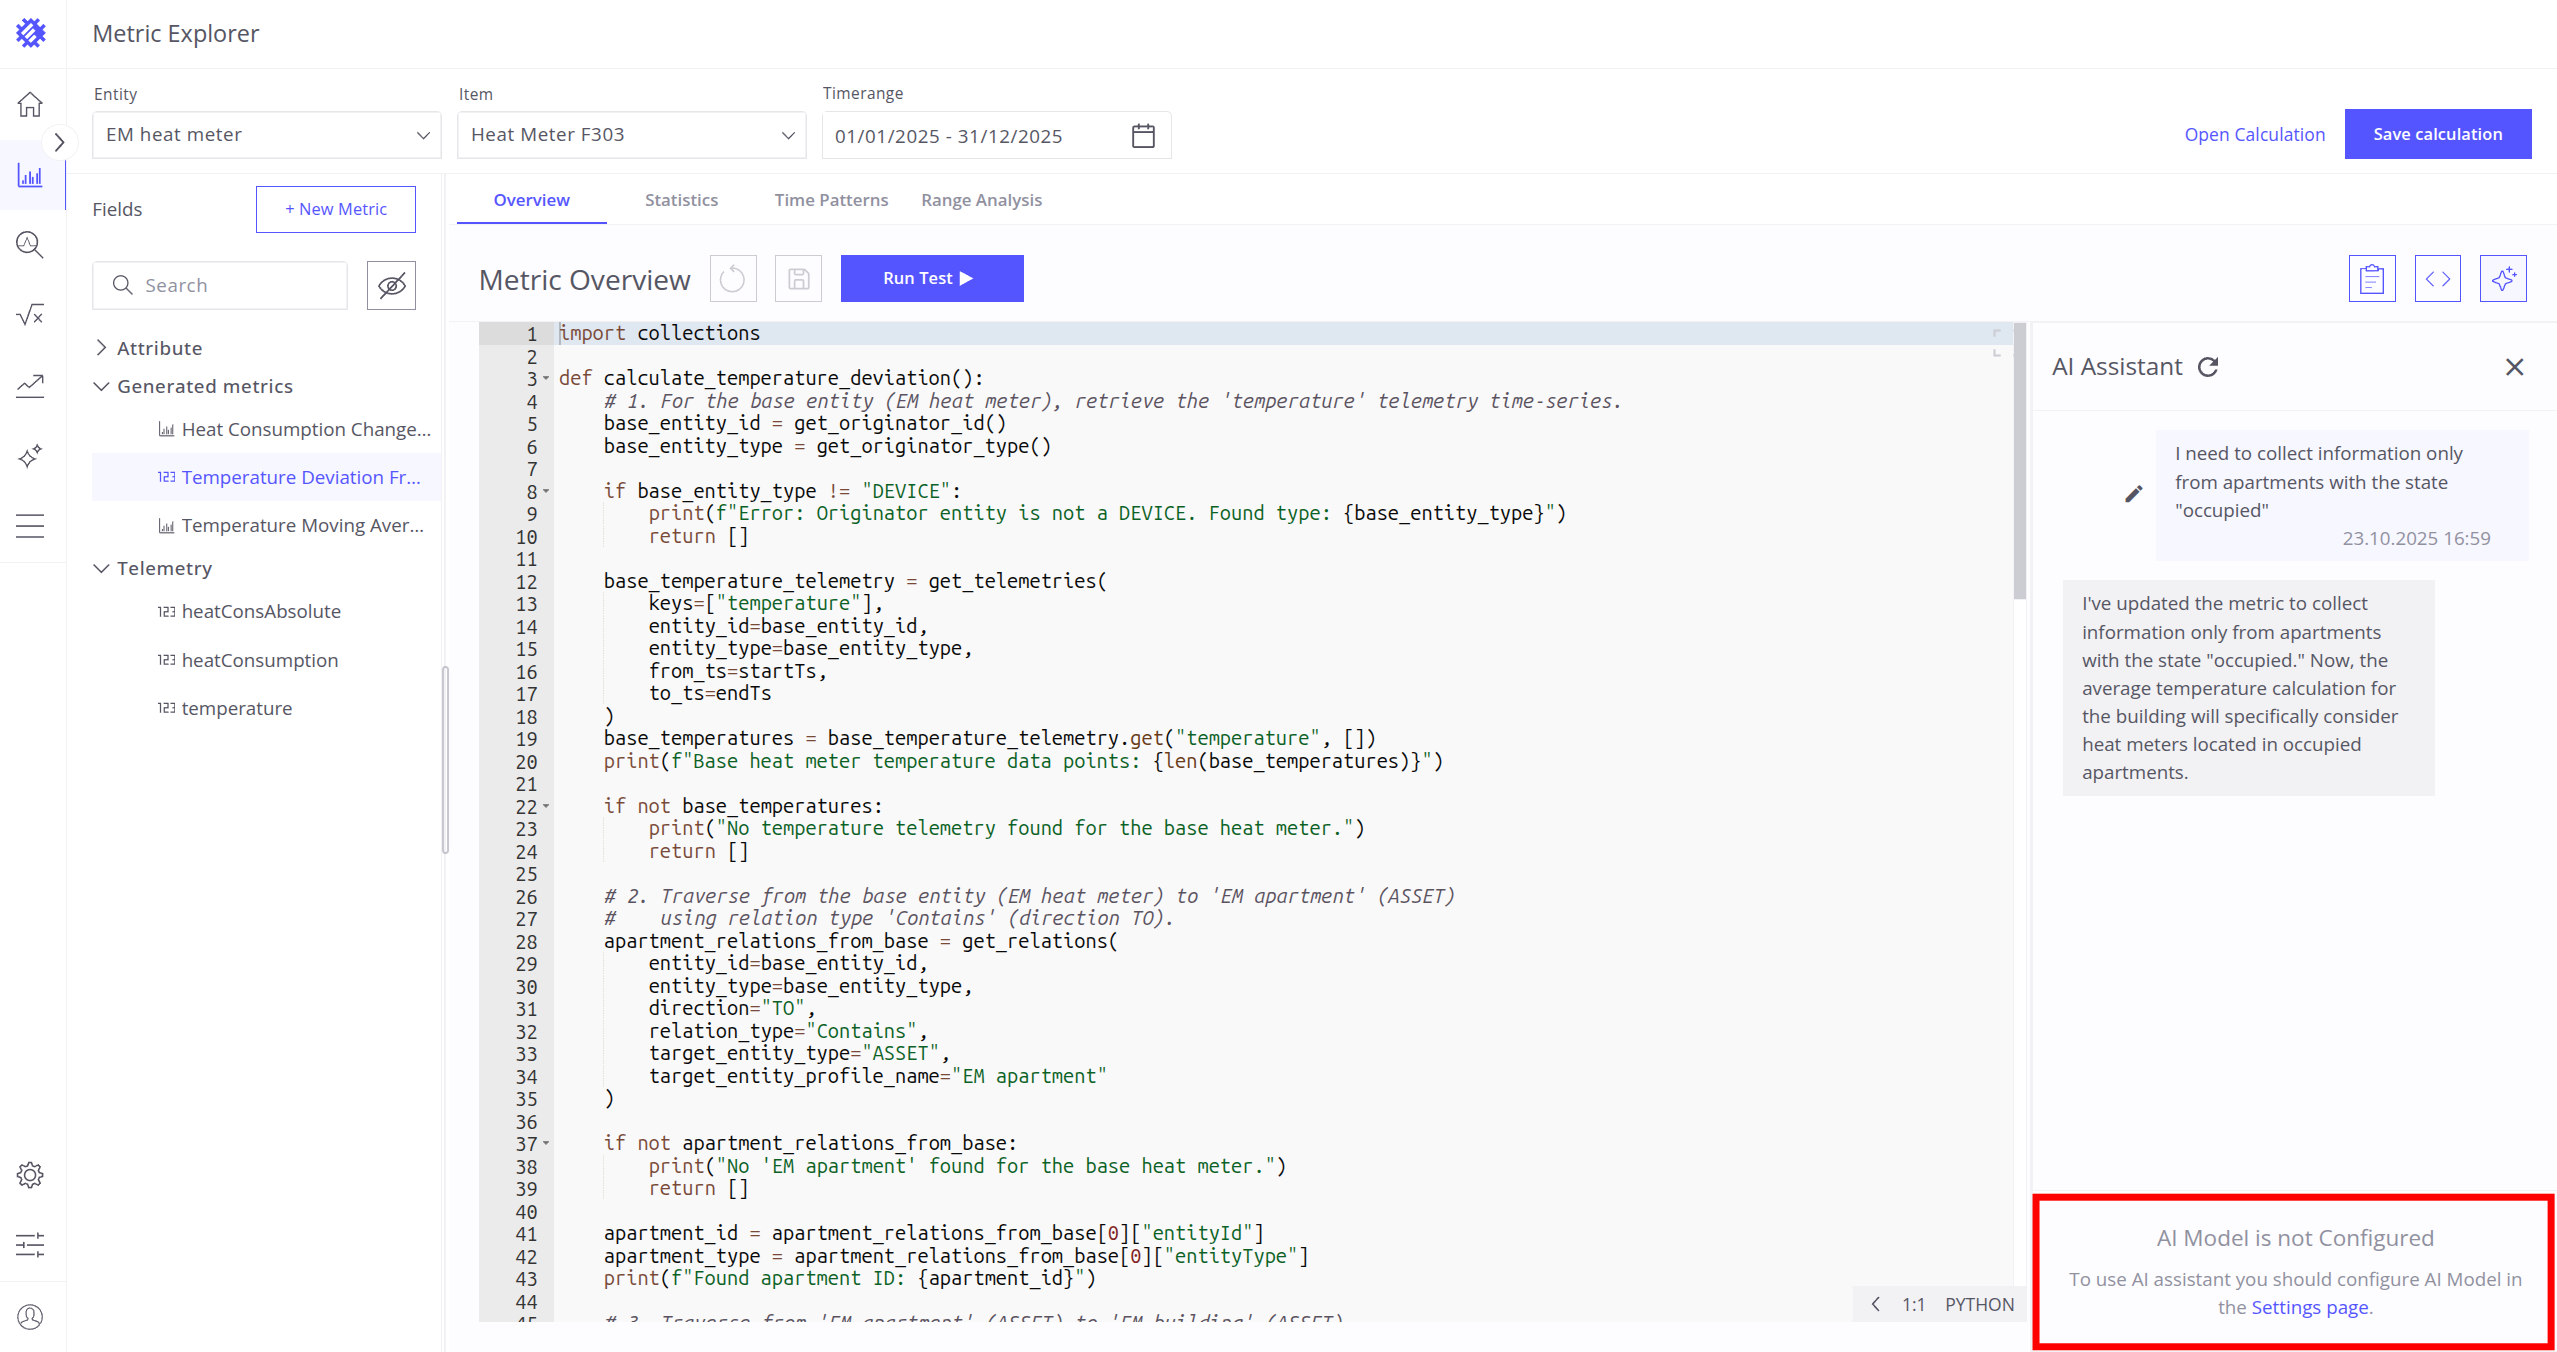
AI Assistant
To interact with AI Assistant, click the Ask AI button. You can:
- Ask questions about your code.
- Request AI to rewrite or refactor code.
- Ask AI to detect and fix bugs.
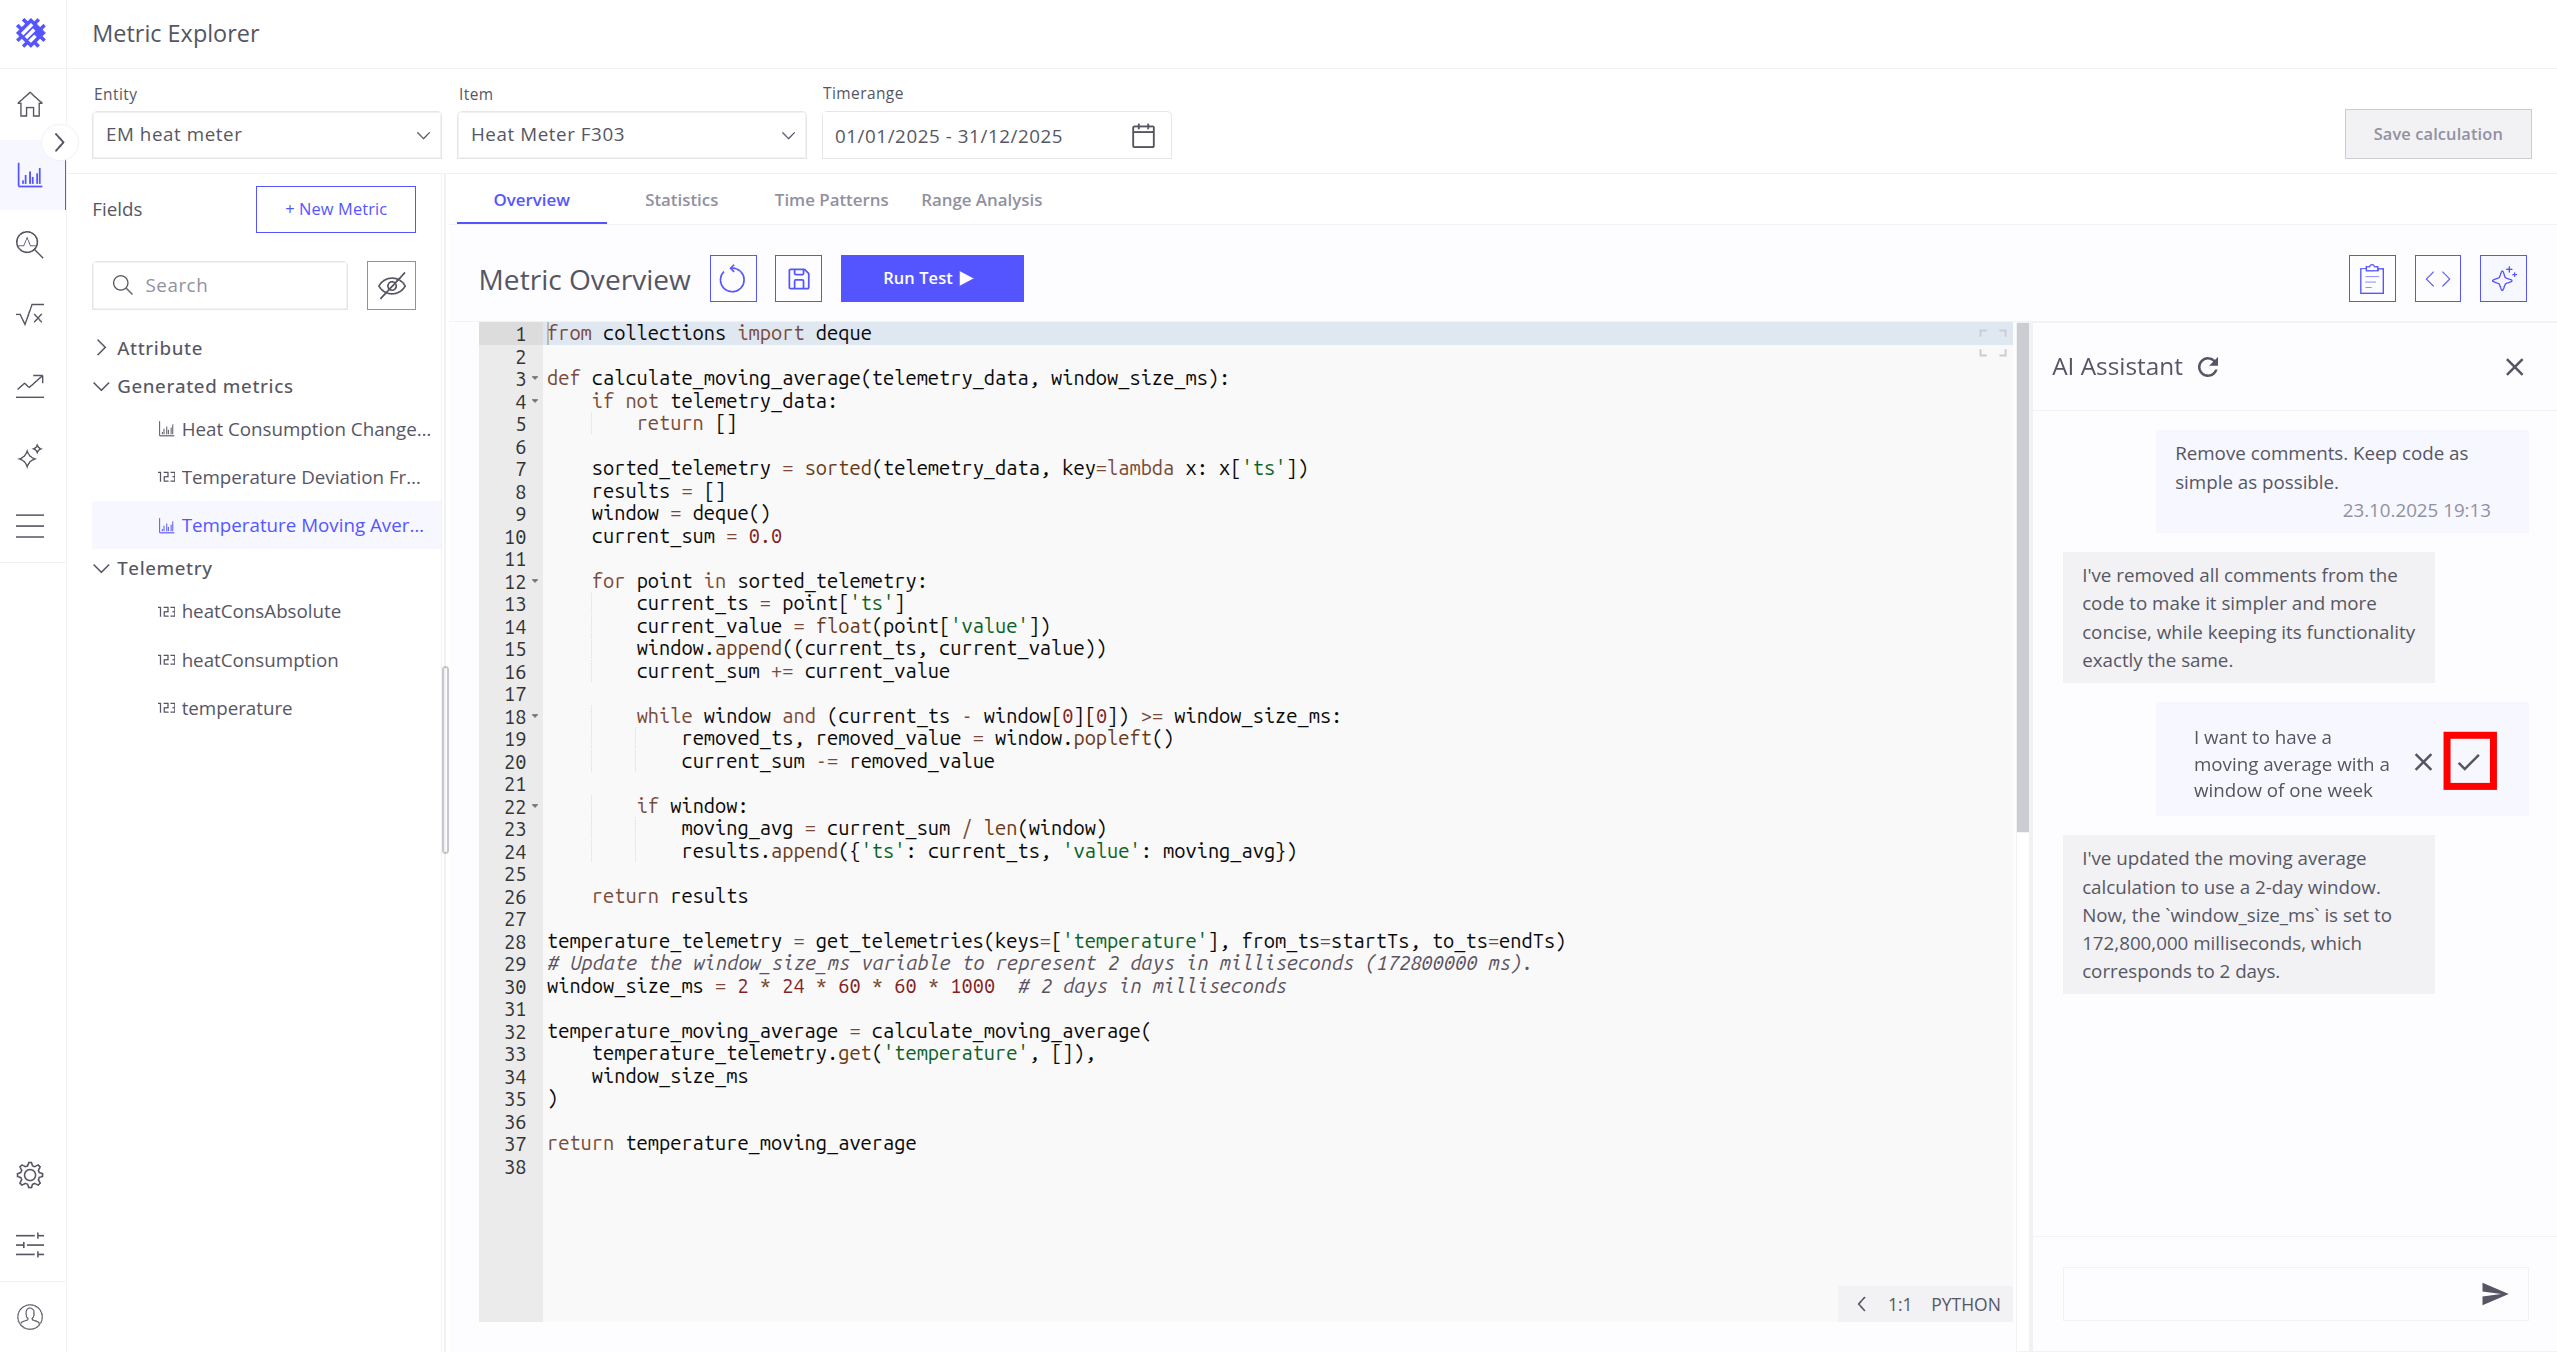
In the chat interface, you can:
Send a new message to the chat:
- Type new message in the text field.
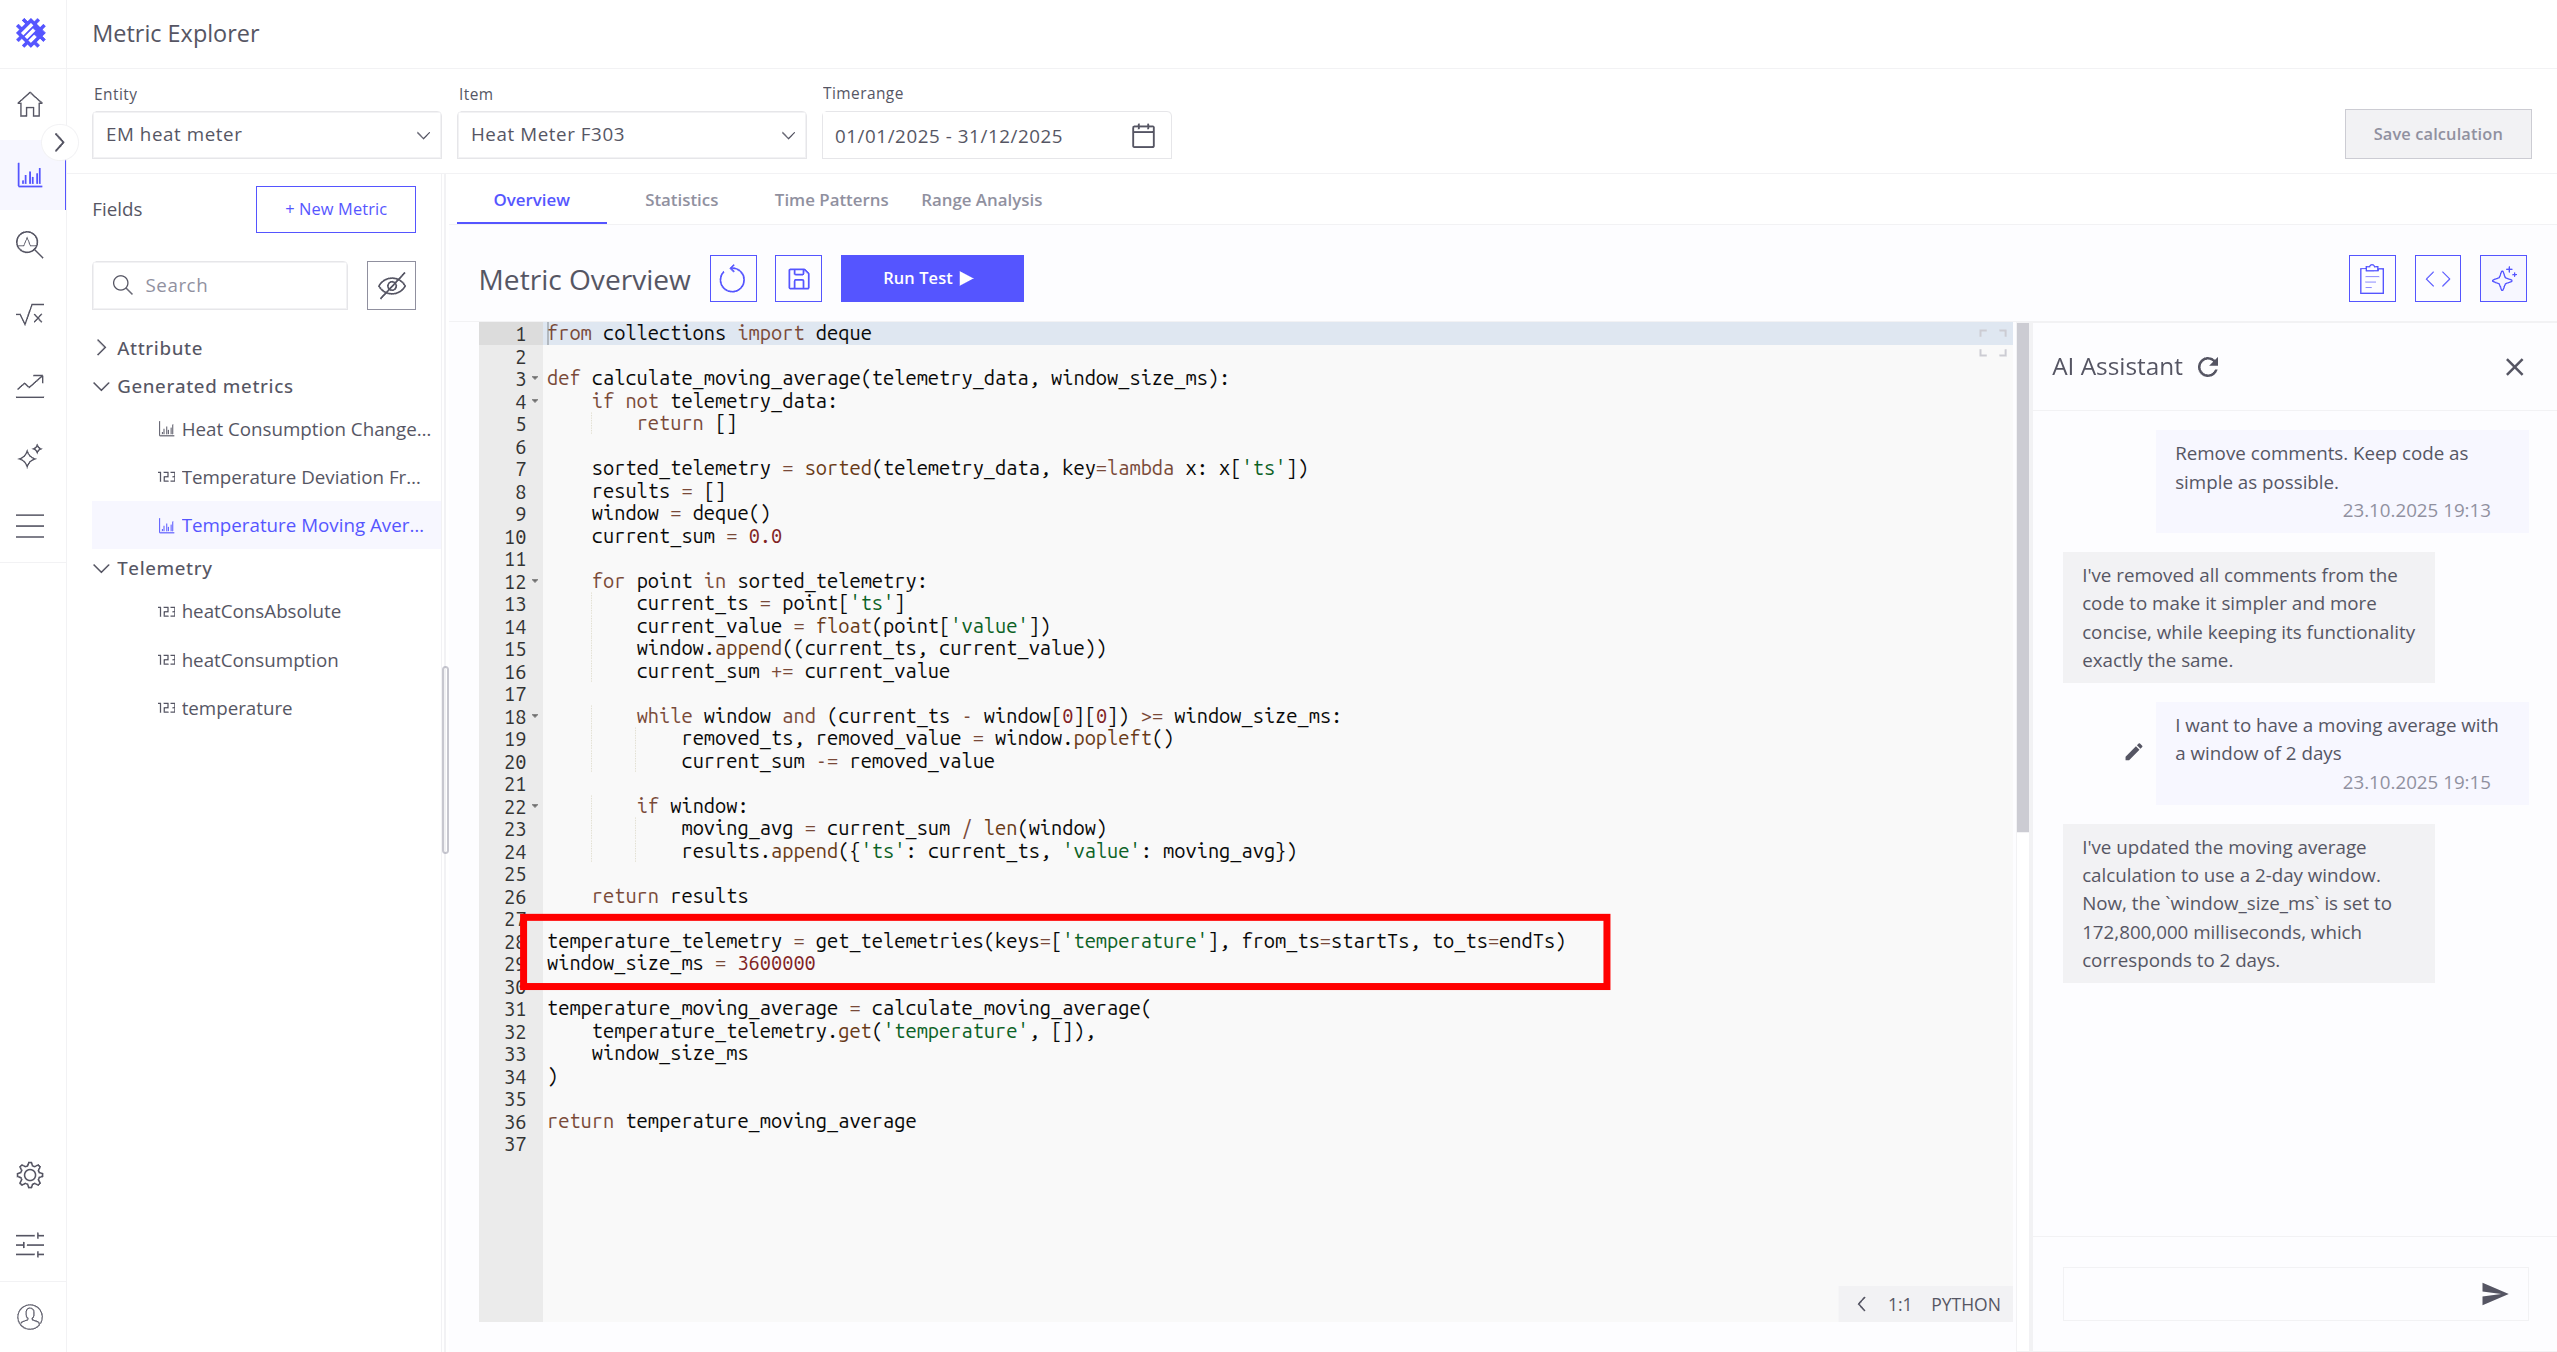
- Review the new generated code with applied by AI changes.
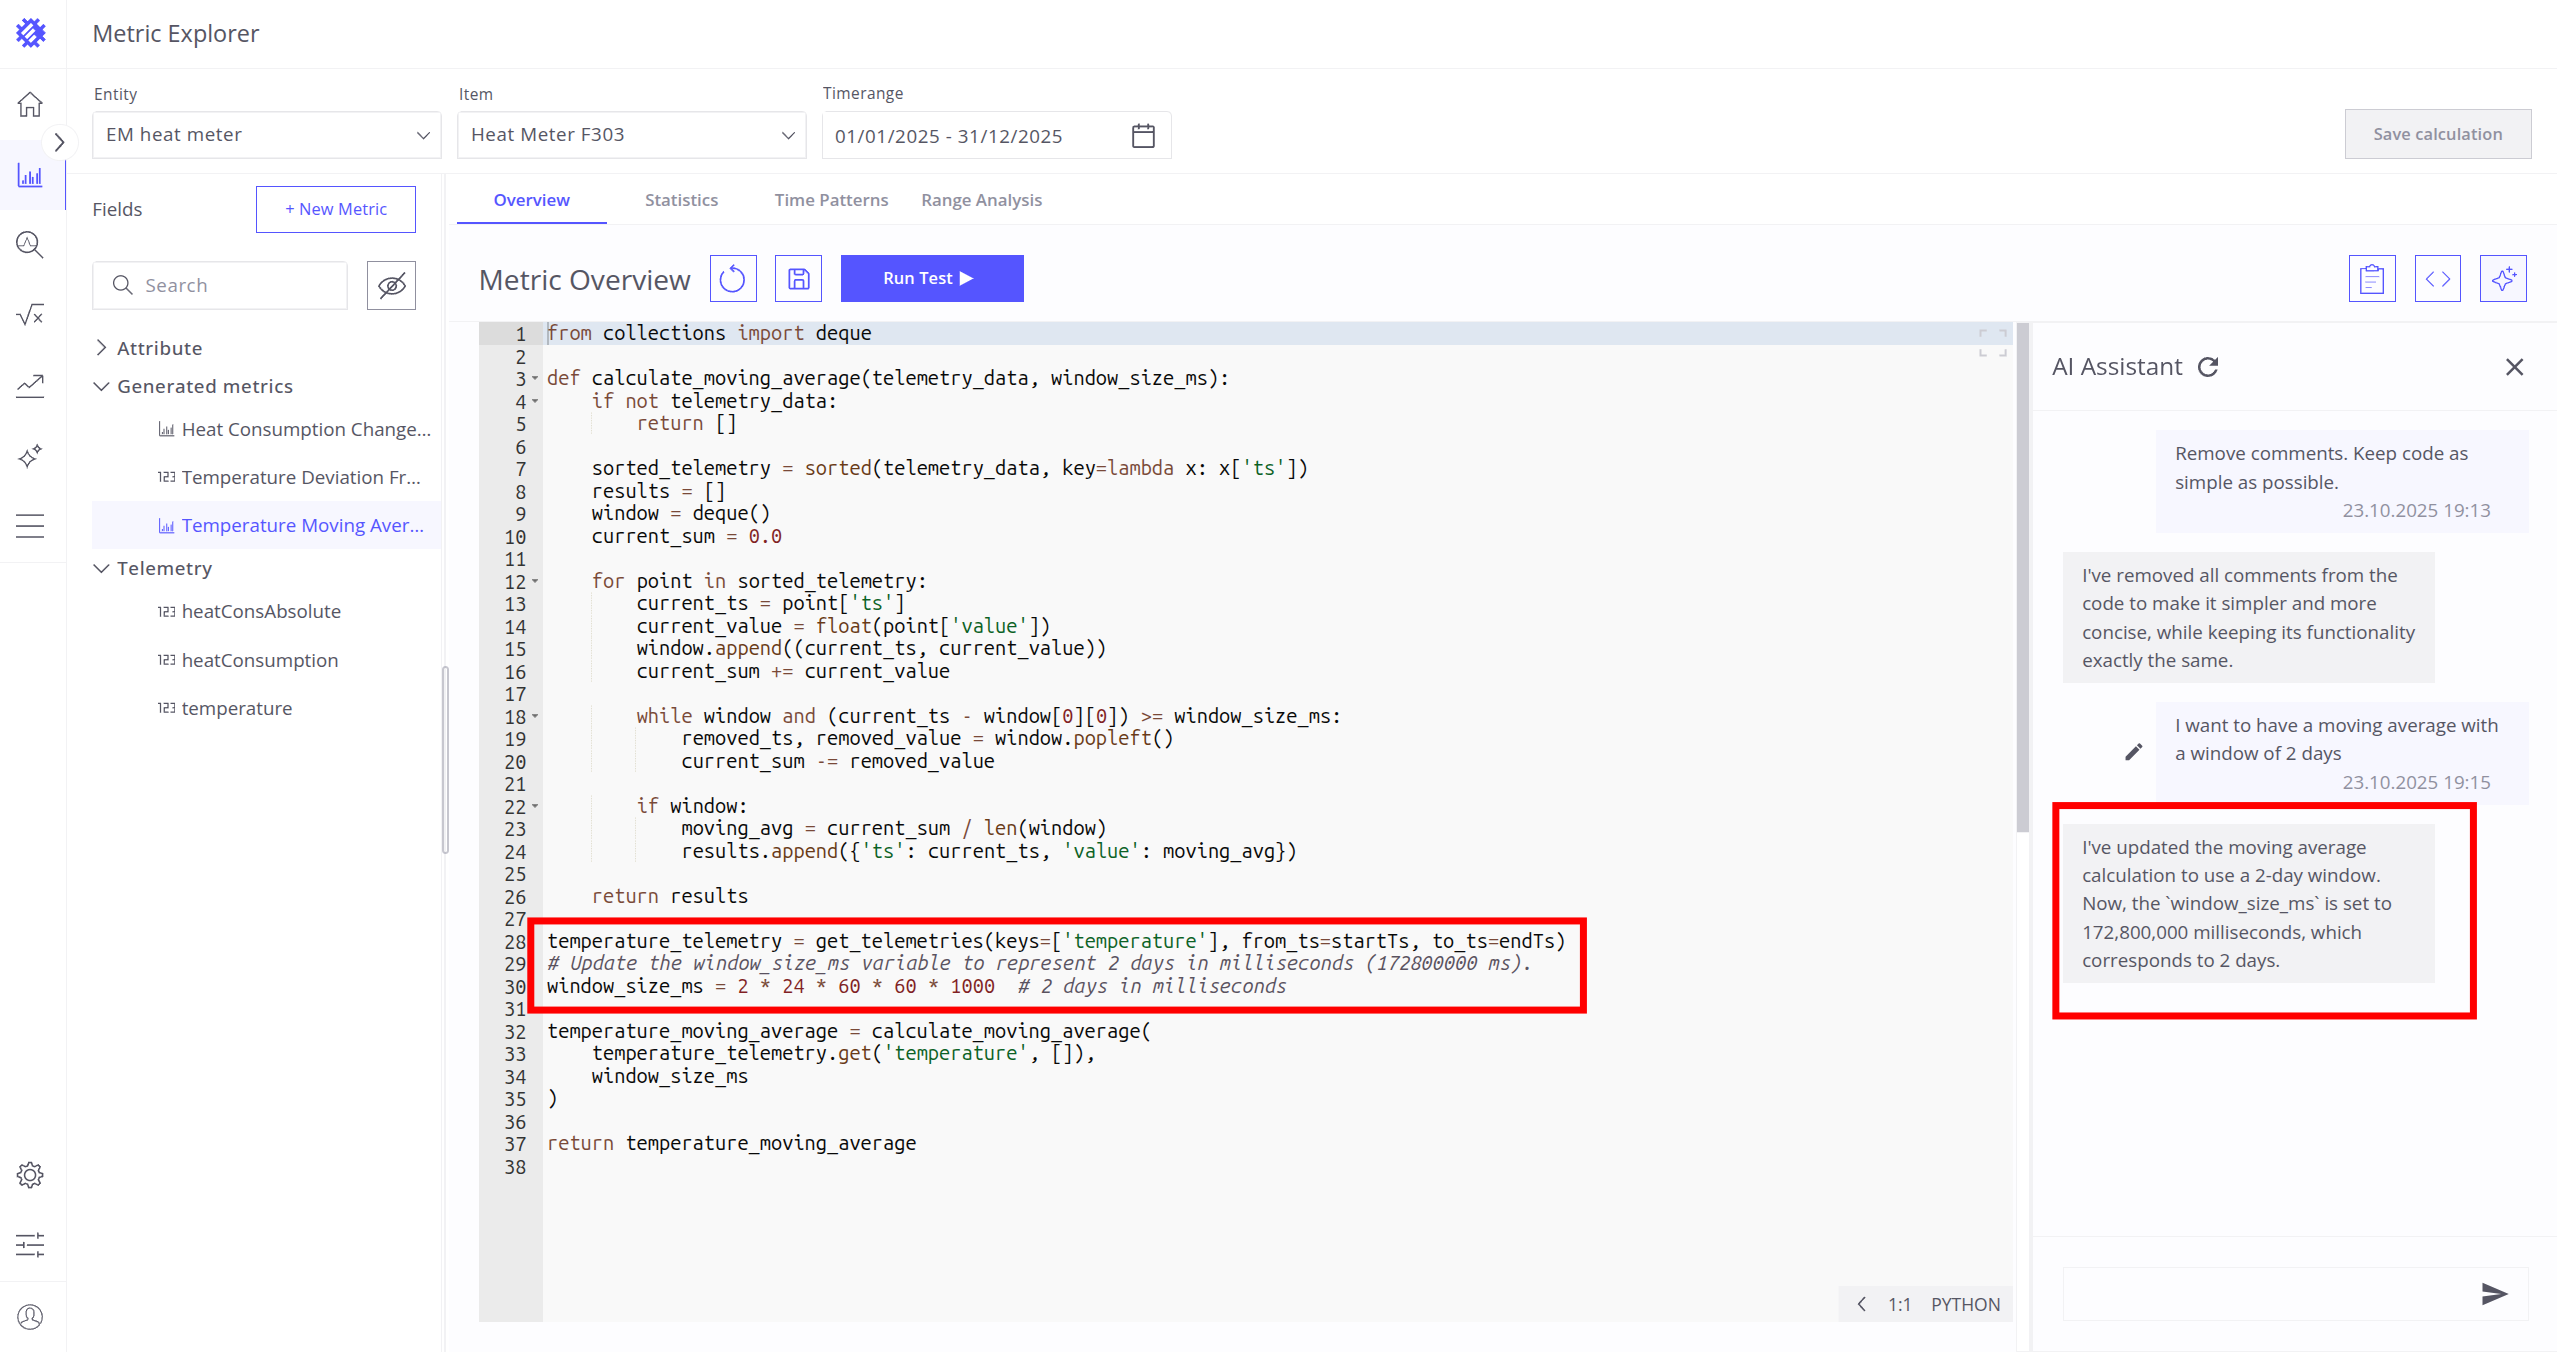
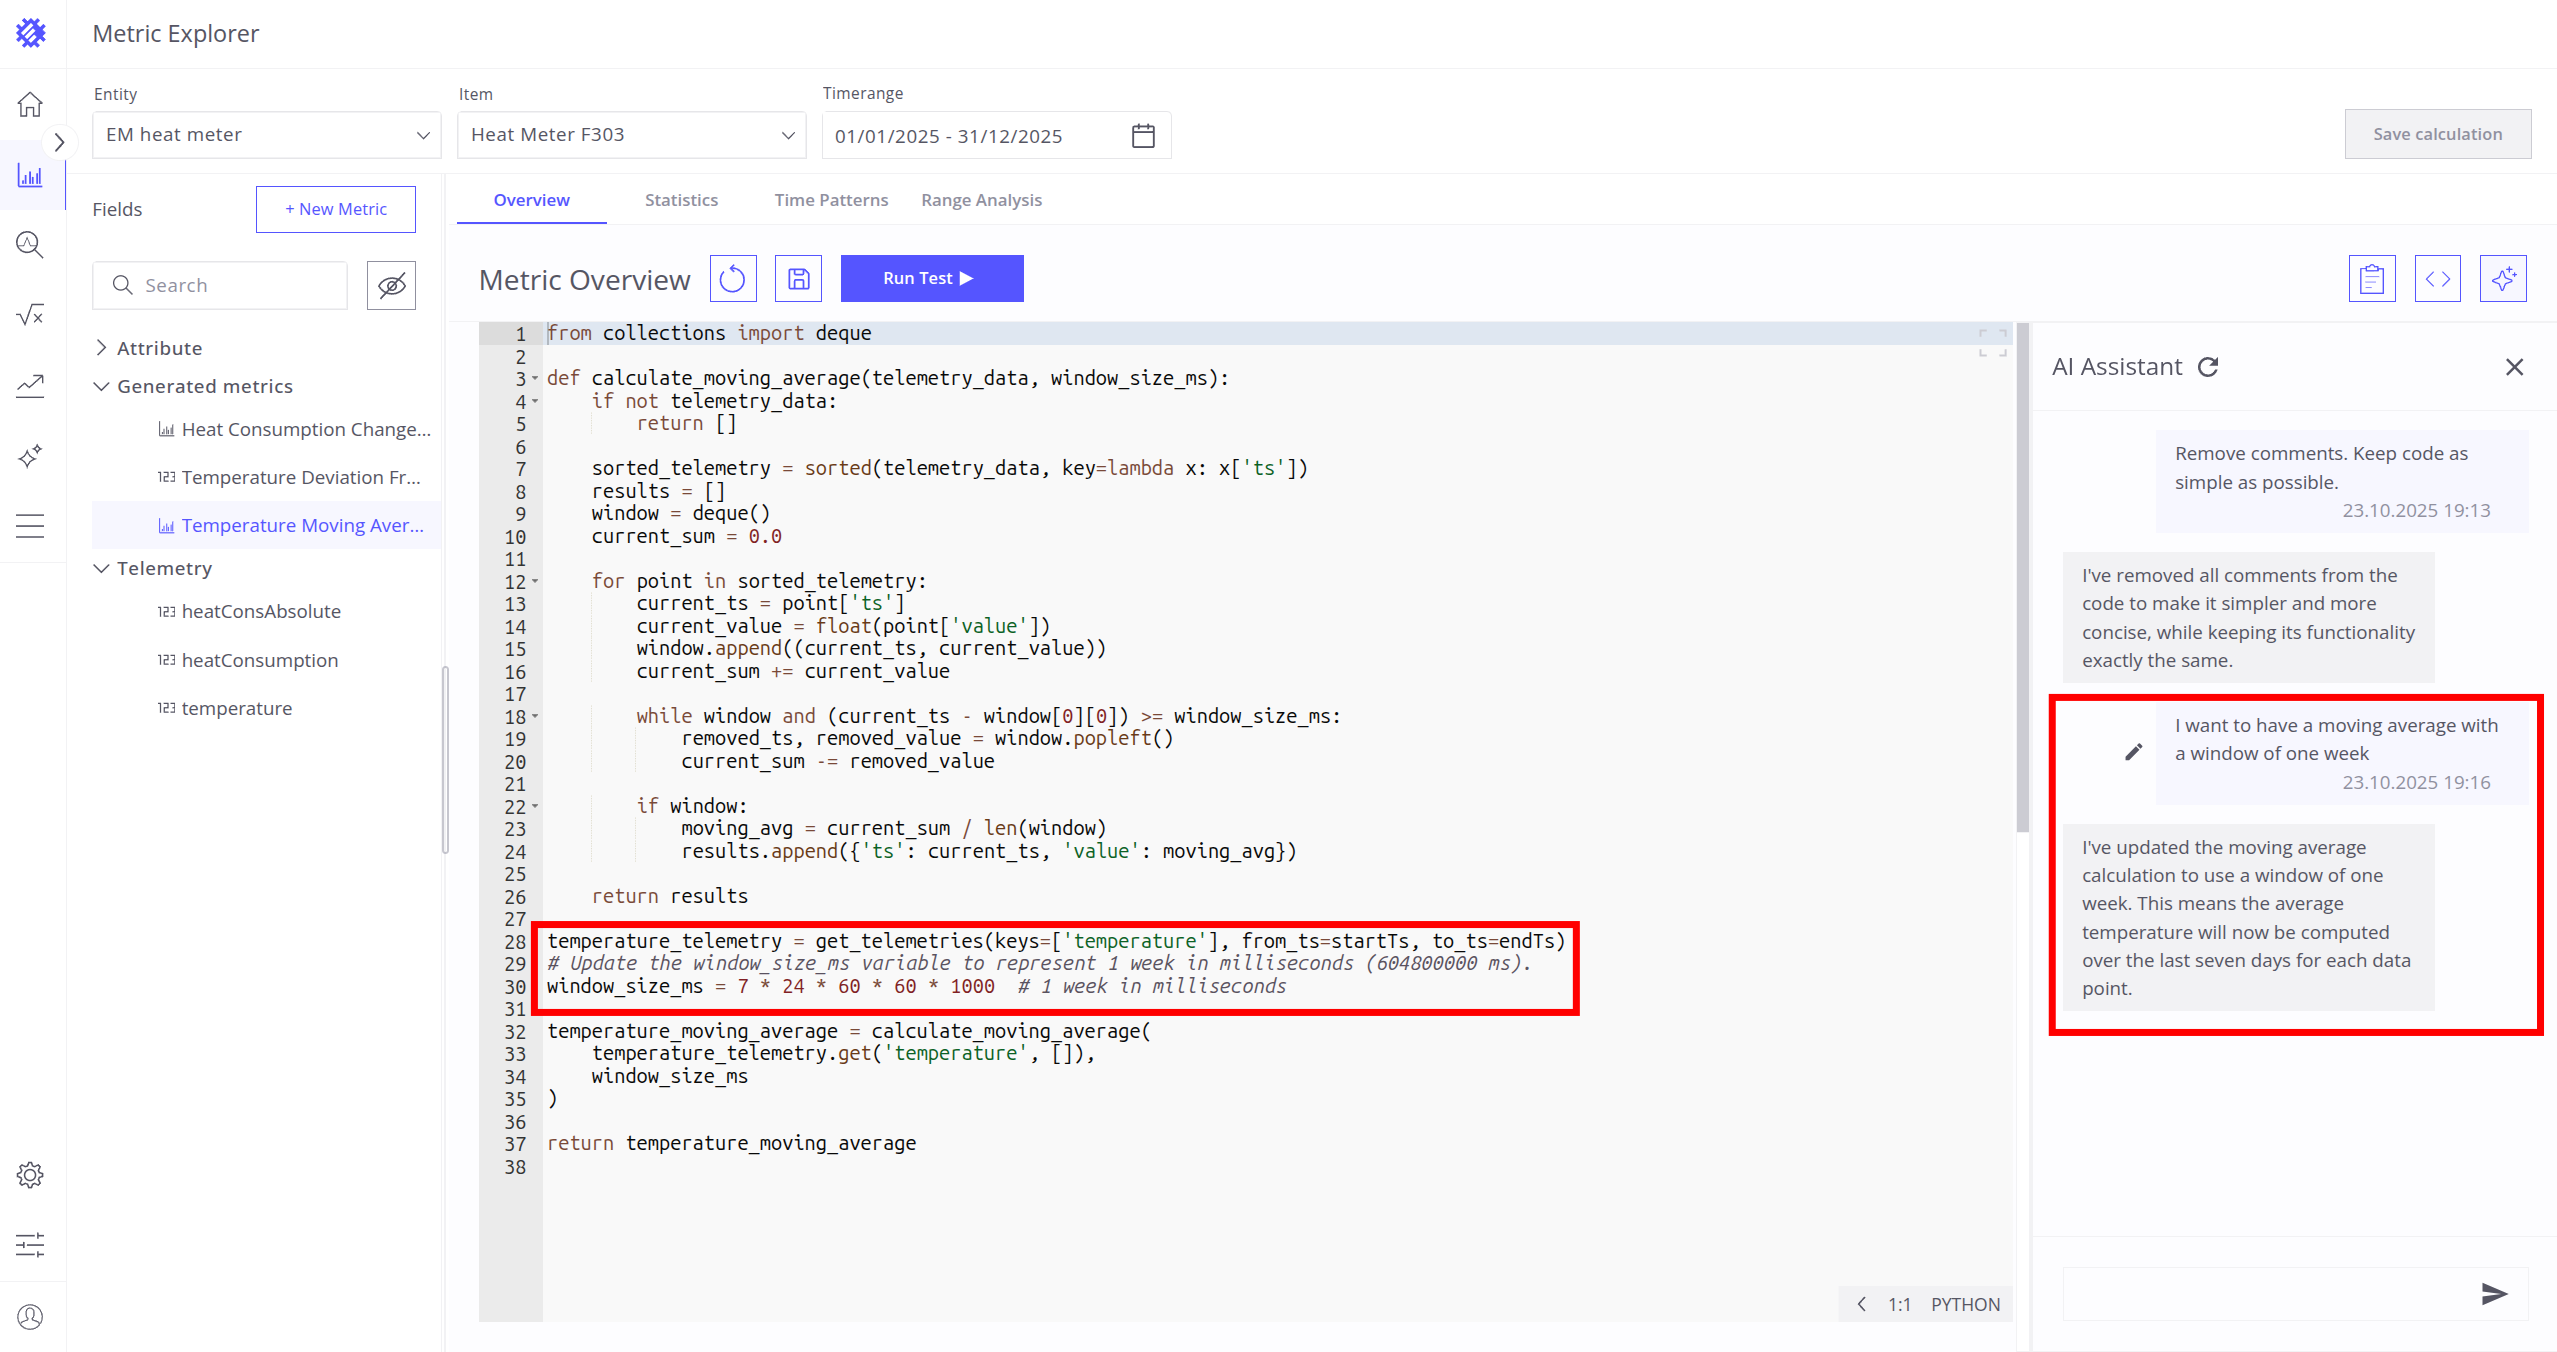
Review code generated in previous interactions:
- Click on your past messages.
- Review the code that was generated by AI after this message.
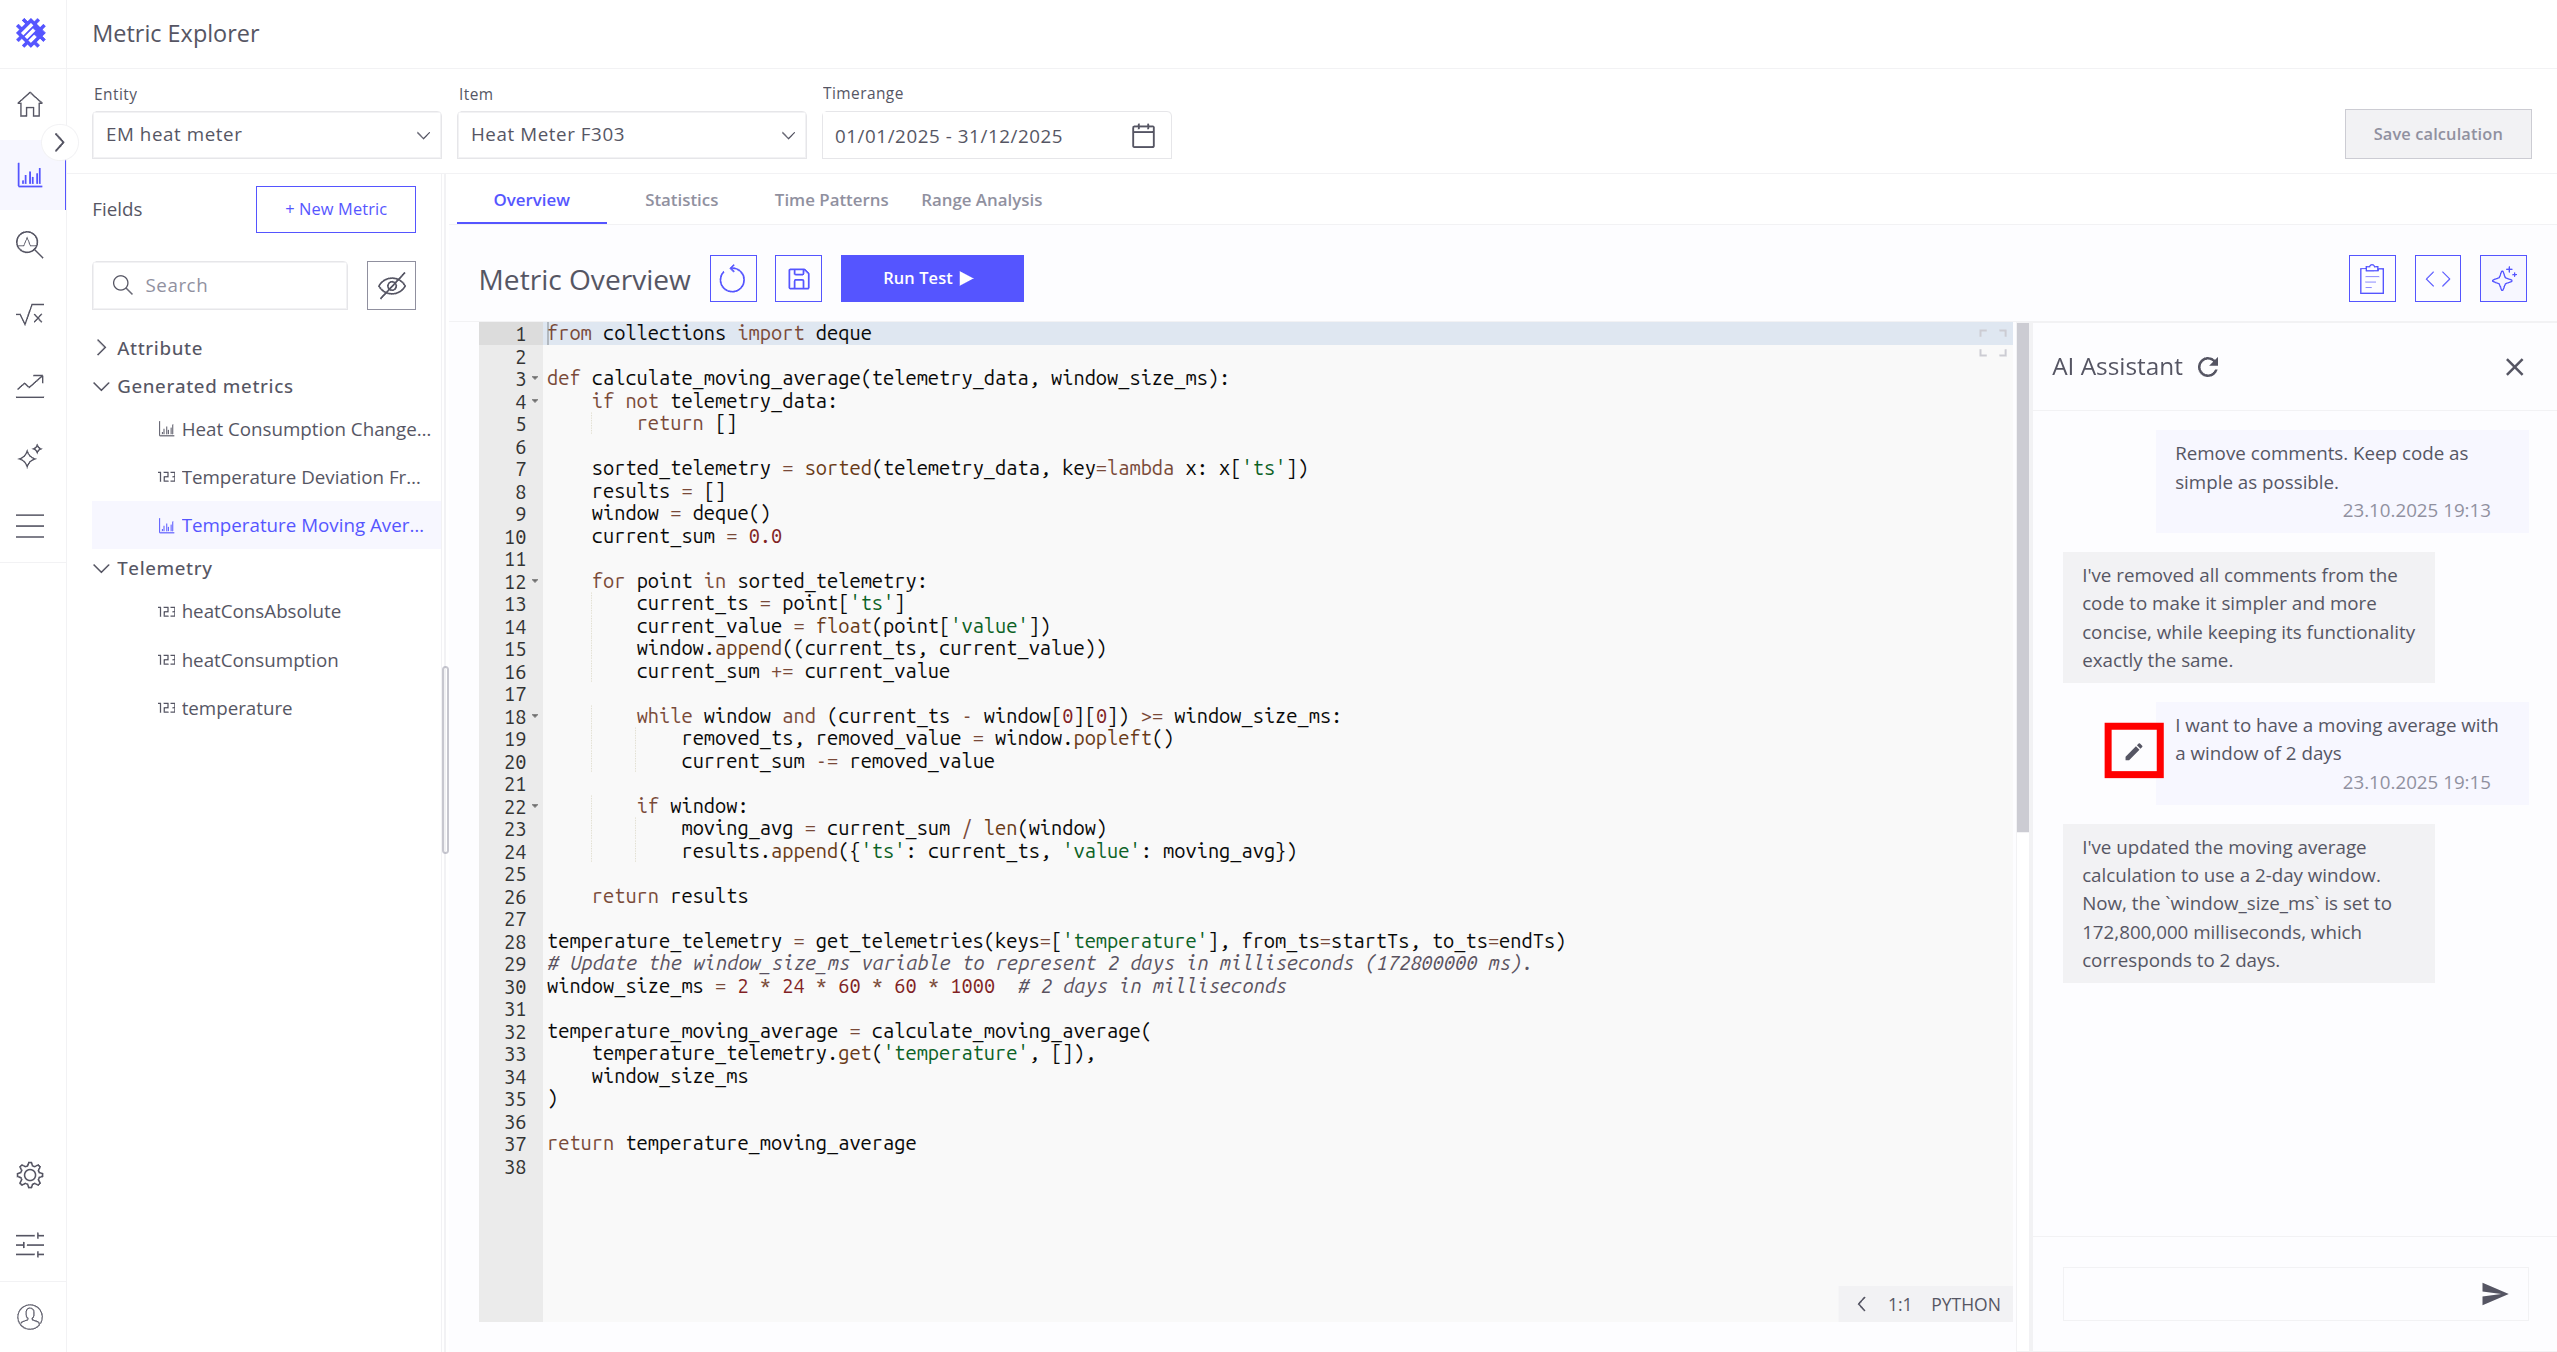
Edit previous messages to rerun them with modifications:
- Click the Edit button next to your message.
- Modify the text and confirm the update.
- Review the new generated code with your applied changes.
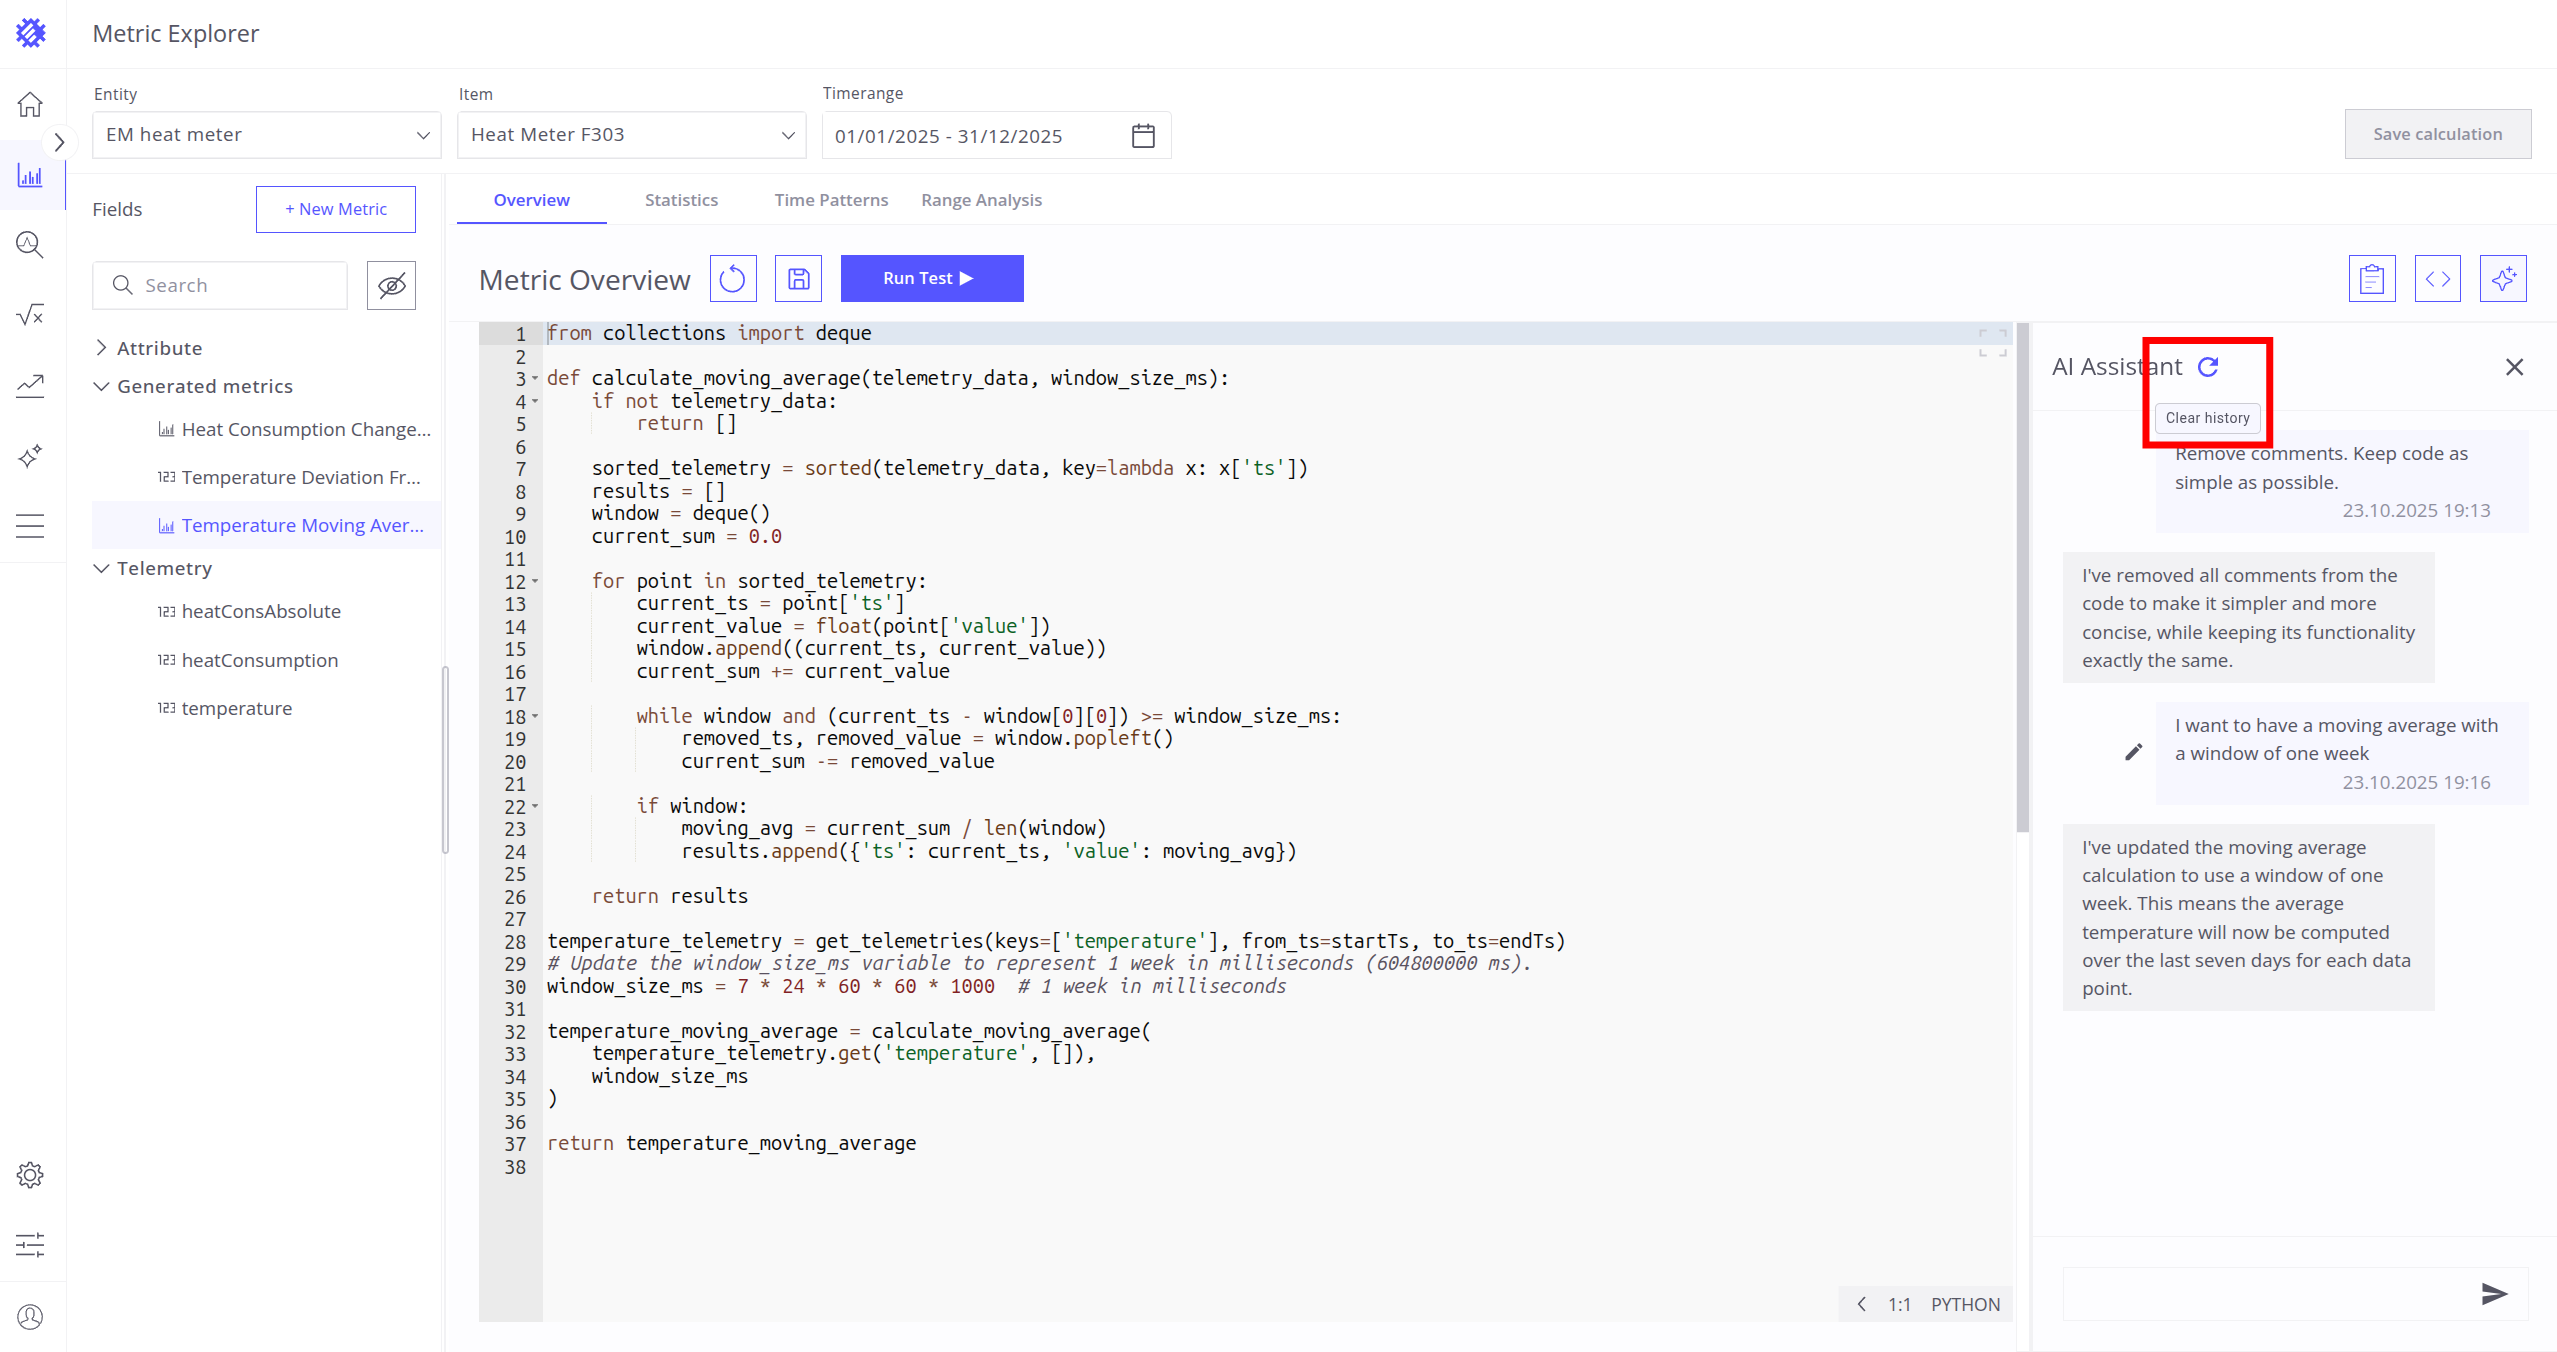
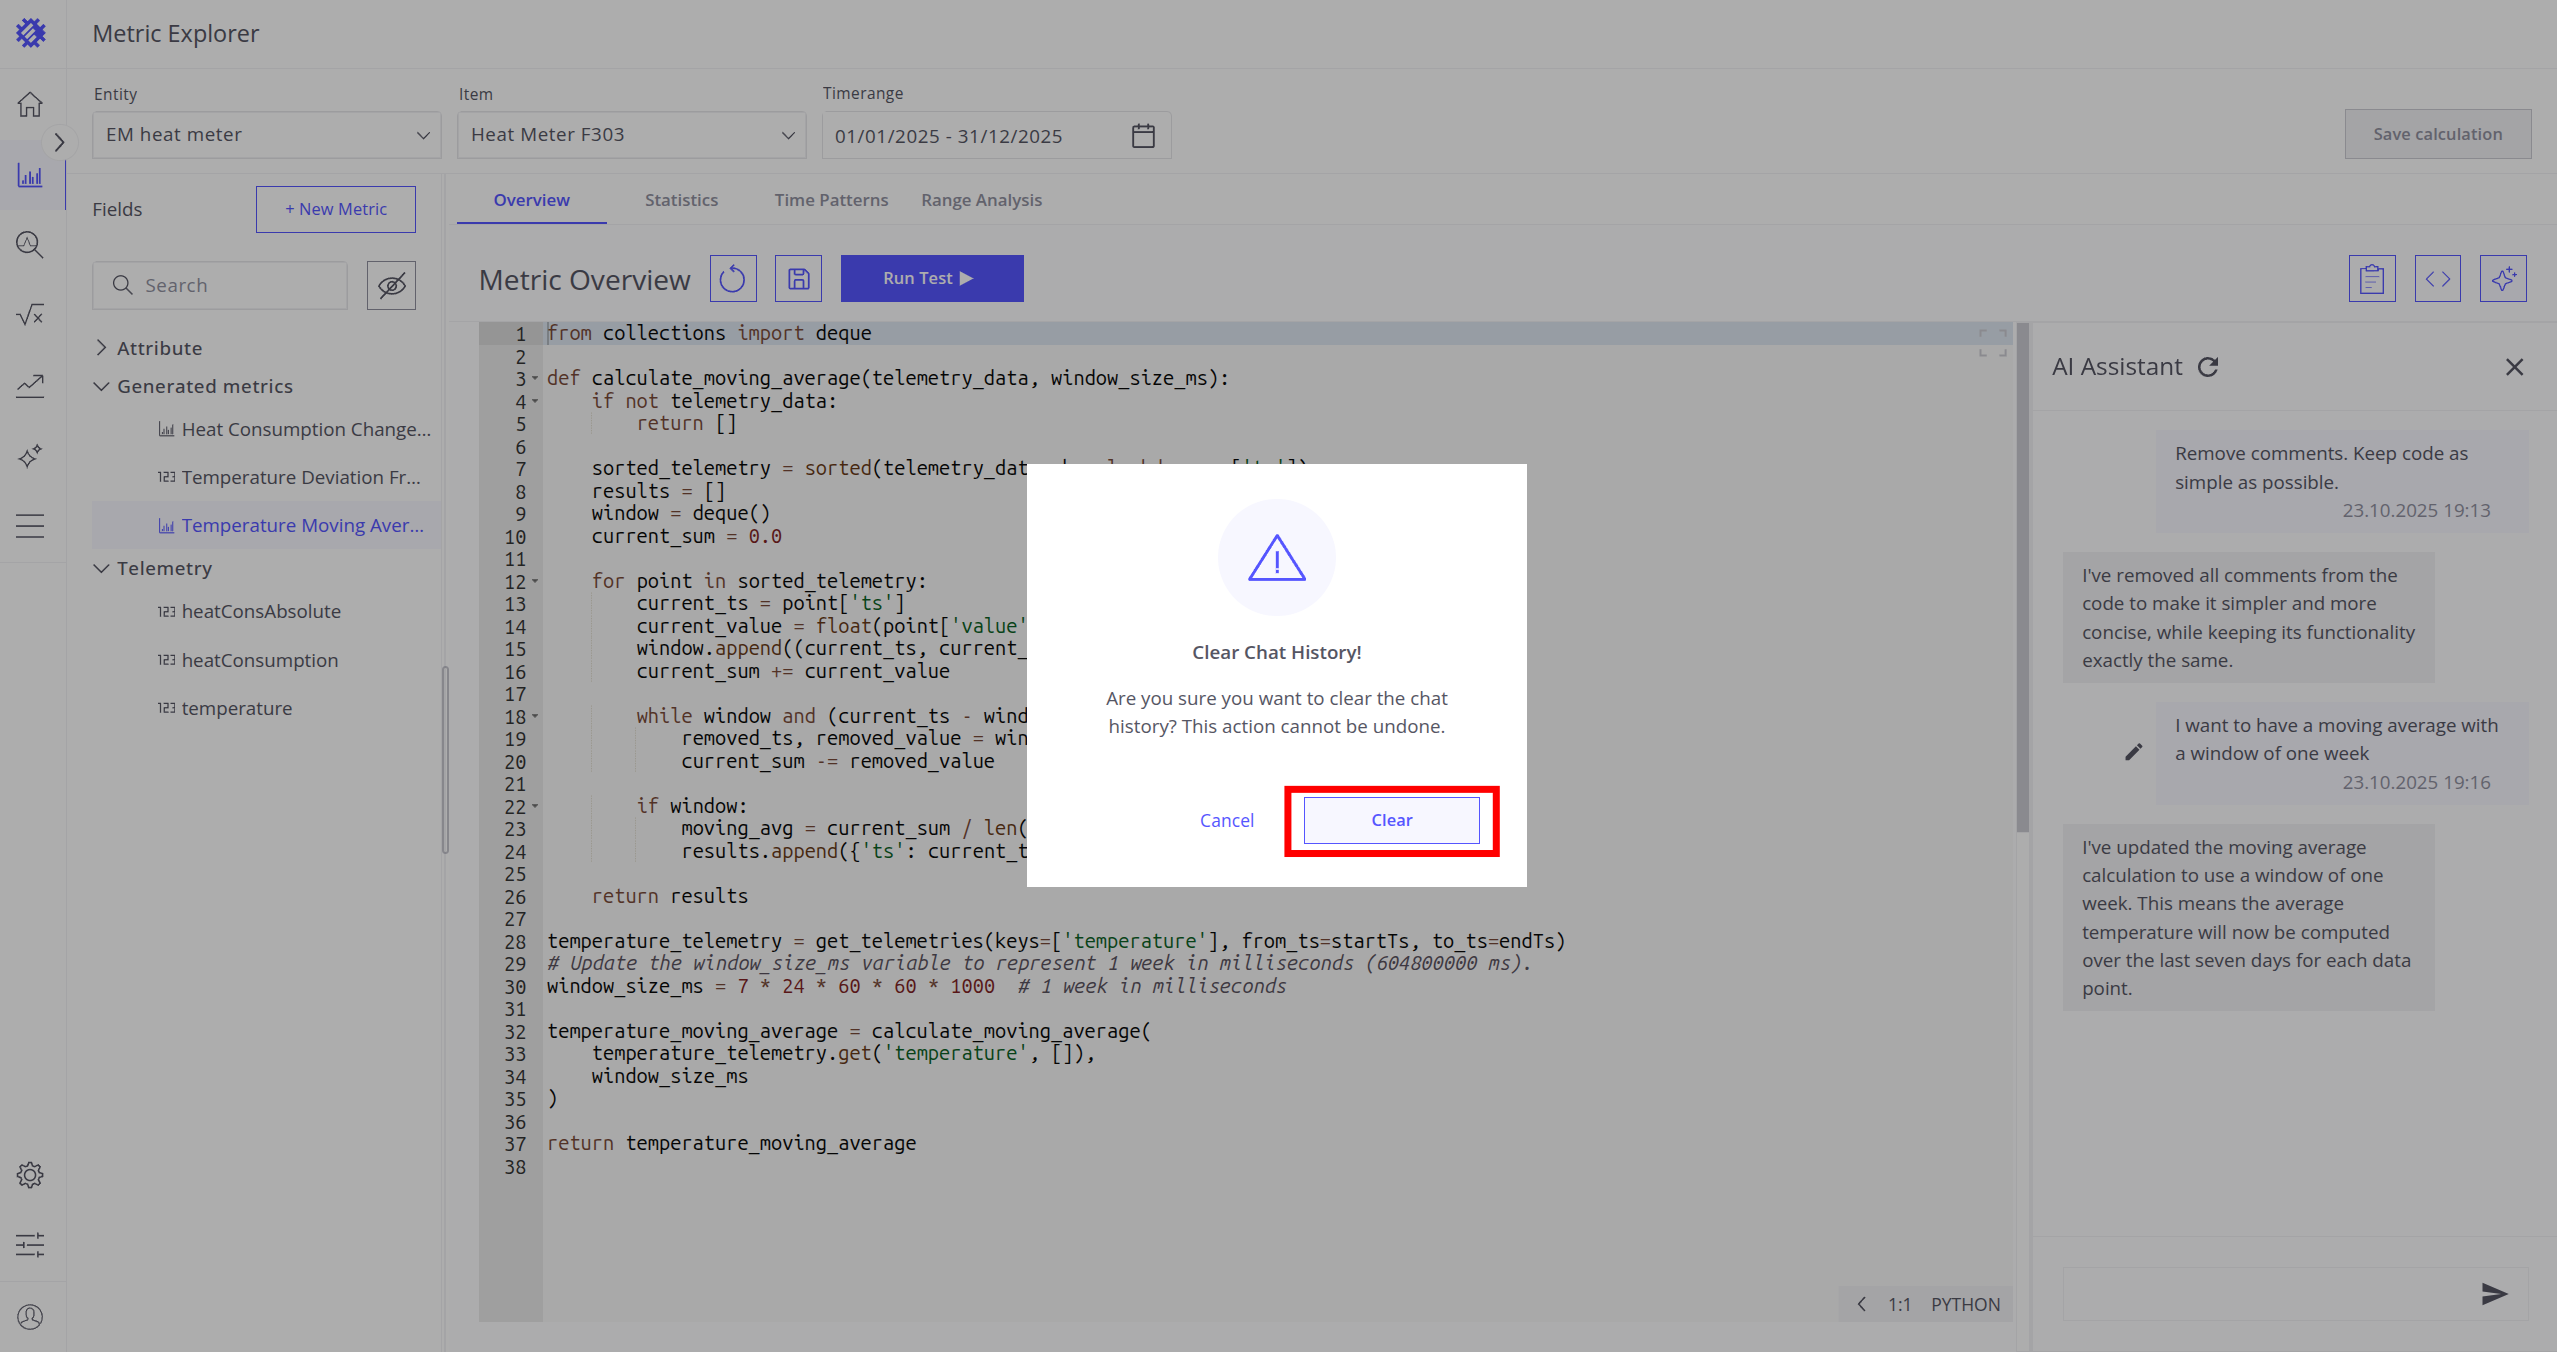
Clear chat history:
- Click the Clear History button.
- Confirm the action by clicking Clear.
Important note: The AI Assistant will only be available if the AI Feature Metric Code Assistant is not enabled. Learn how to enable it here.
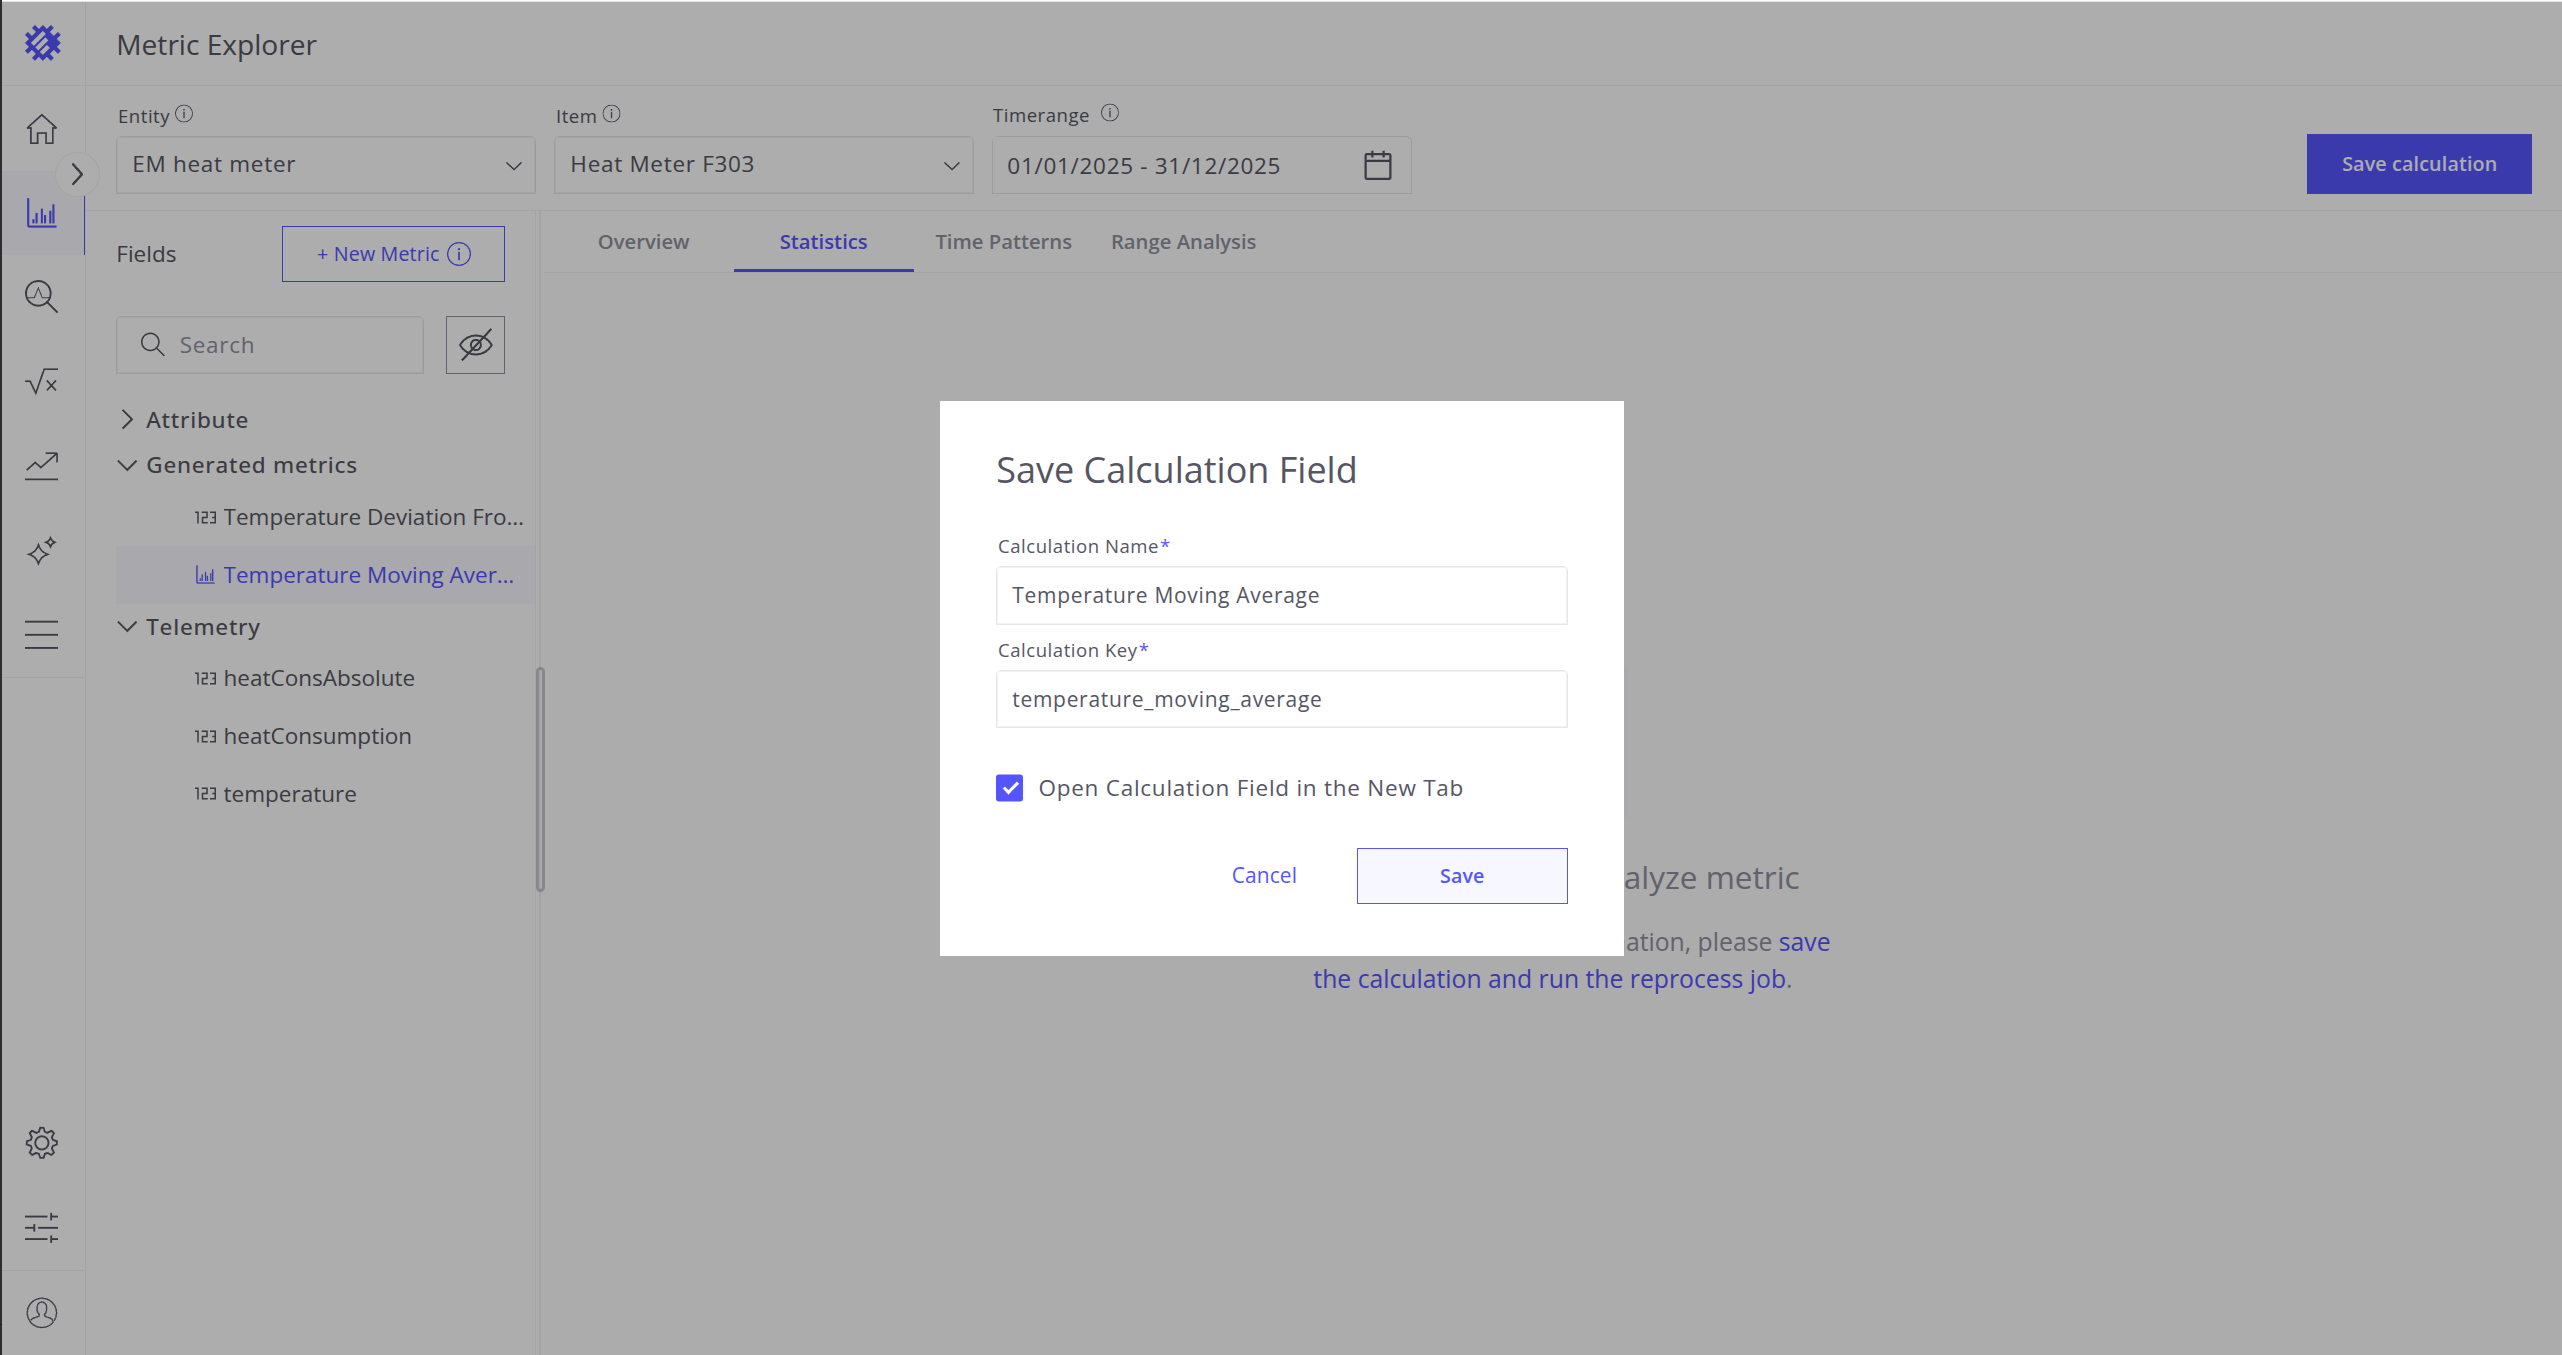
Create Calculation Field
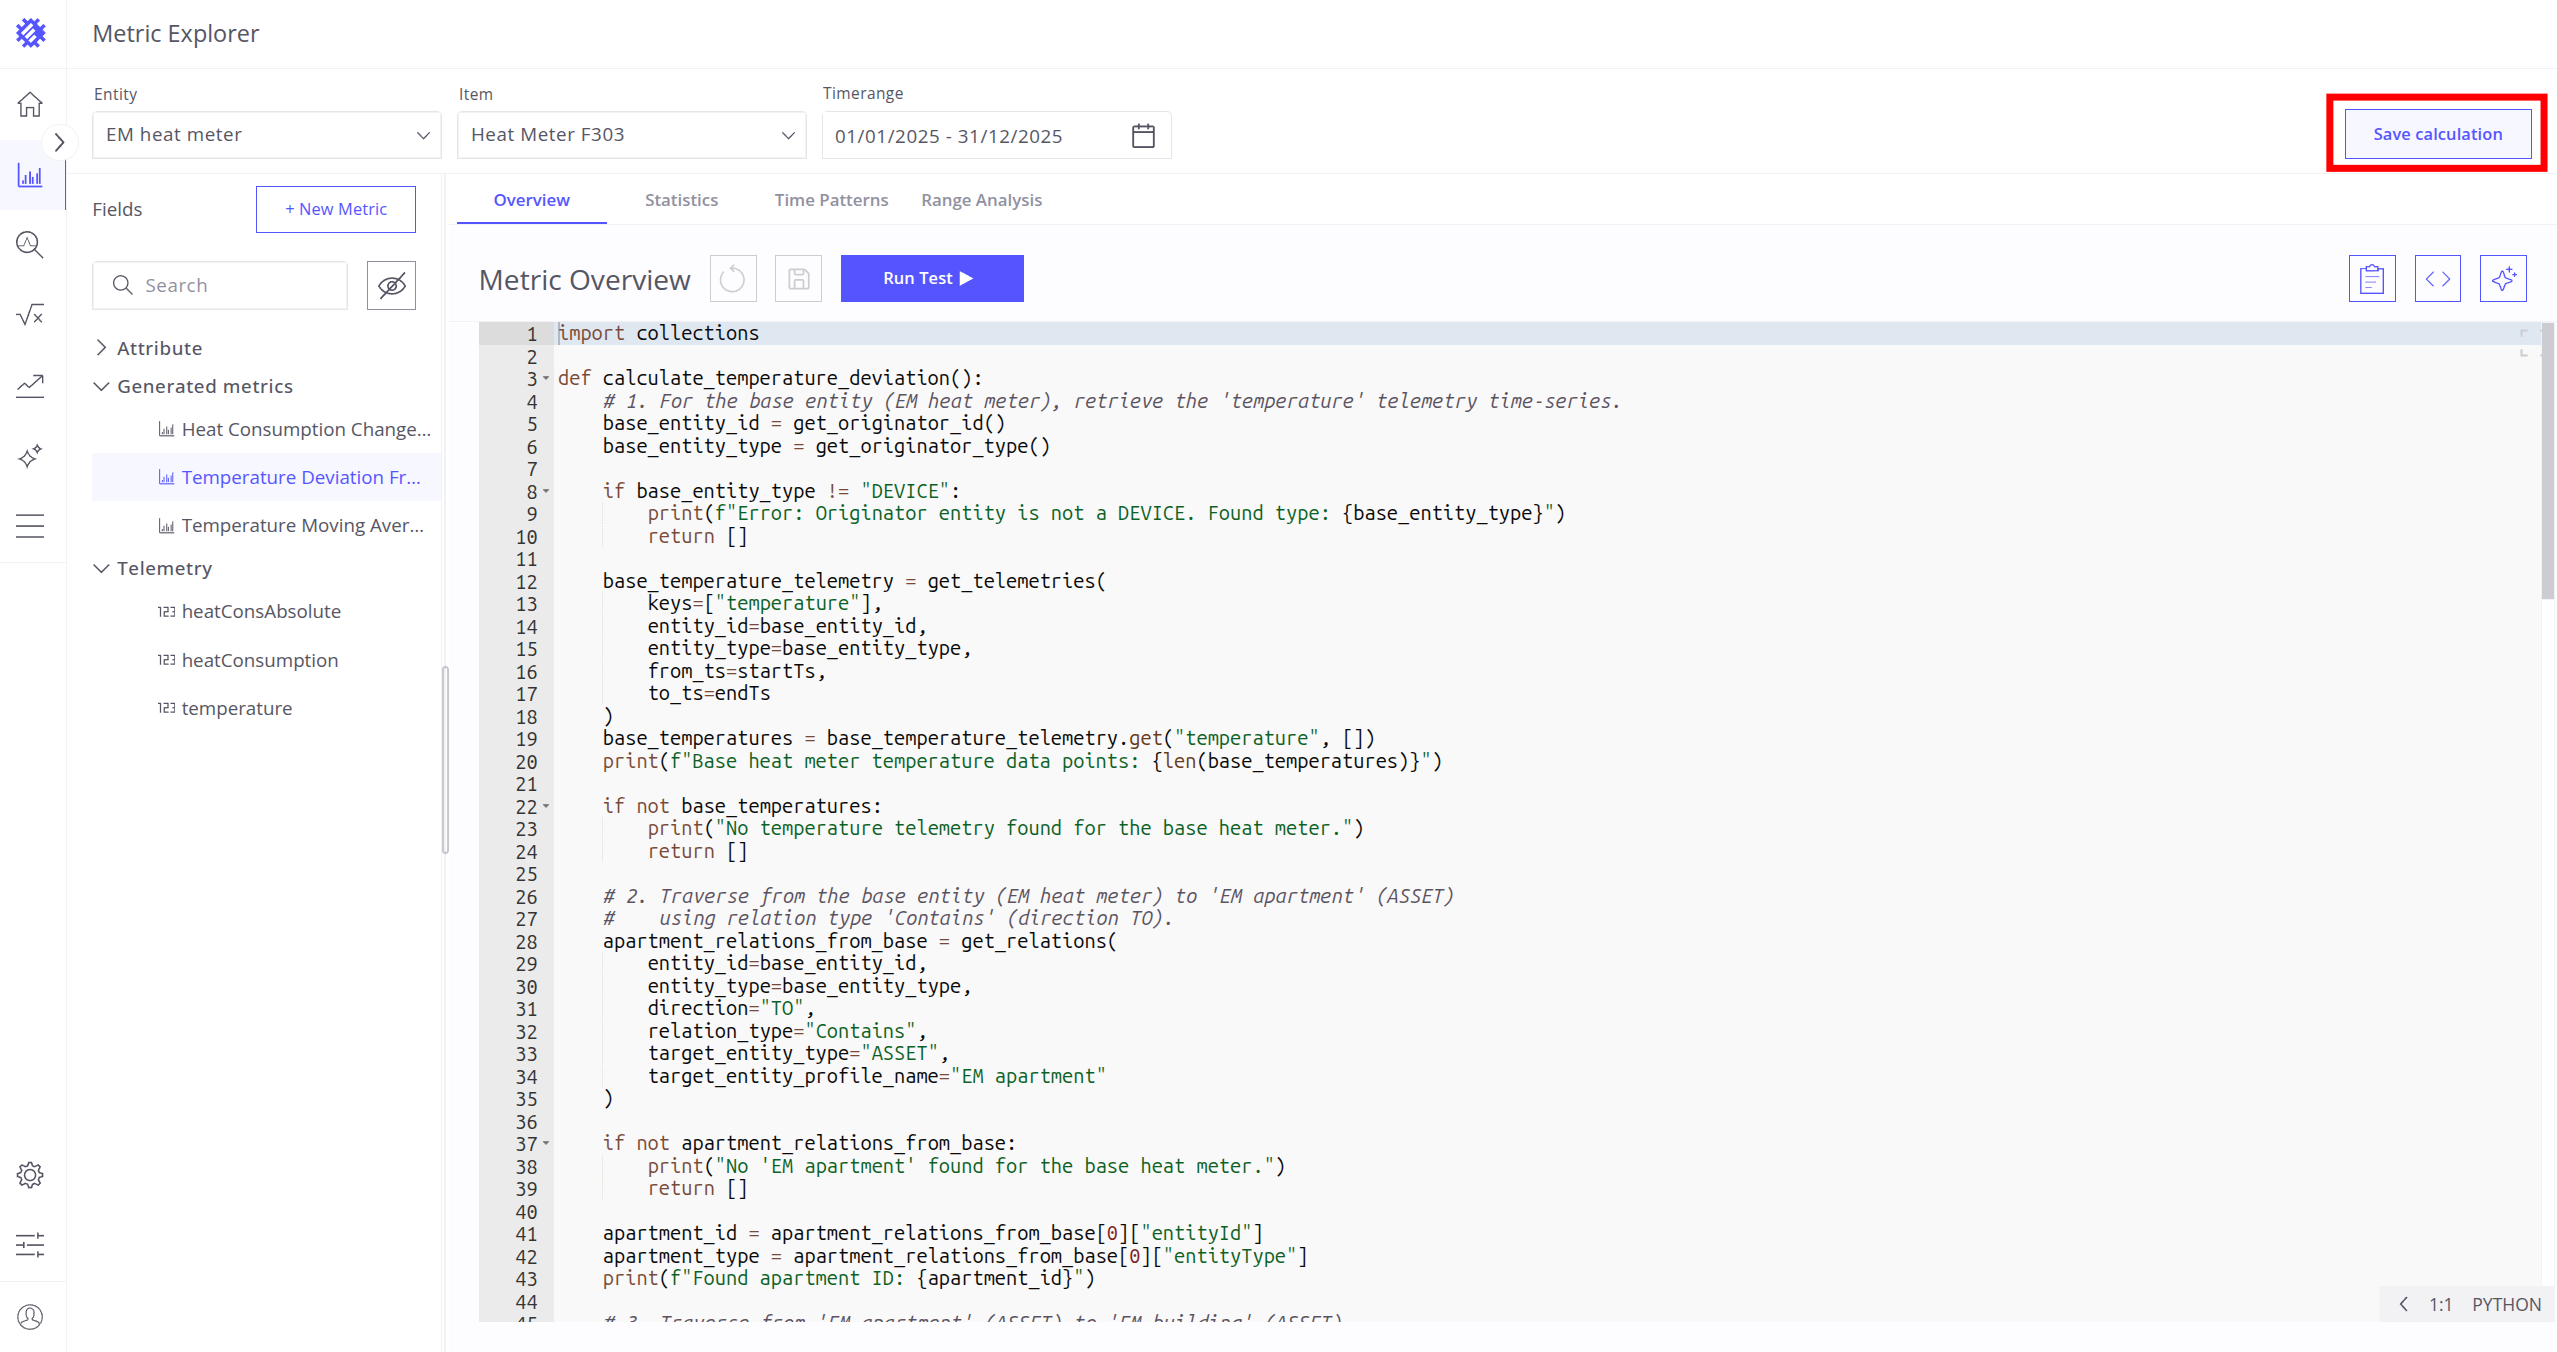
You can use the metric across Trendz and even ThingsBoard by saving it to the Native Calculation. To do this:
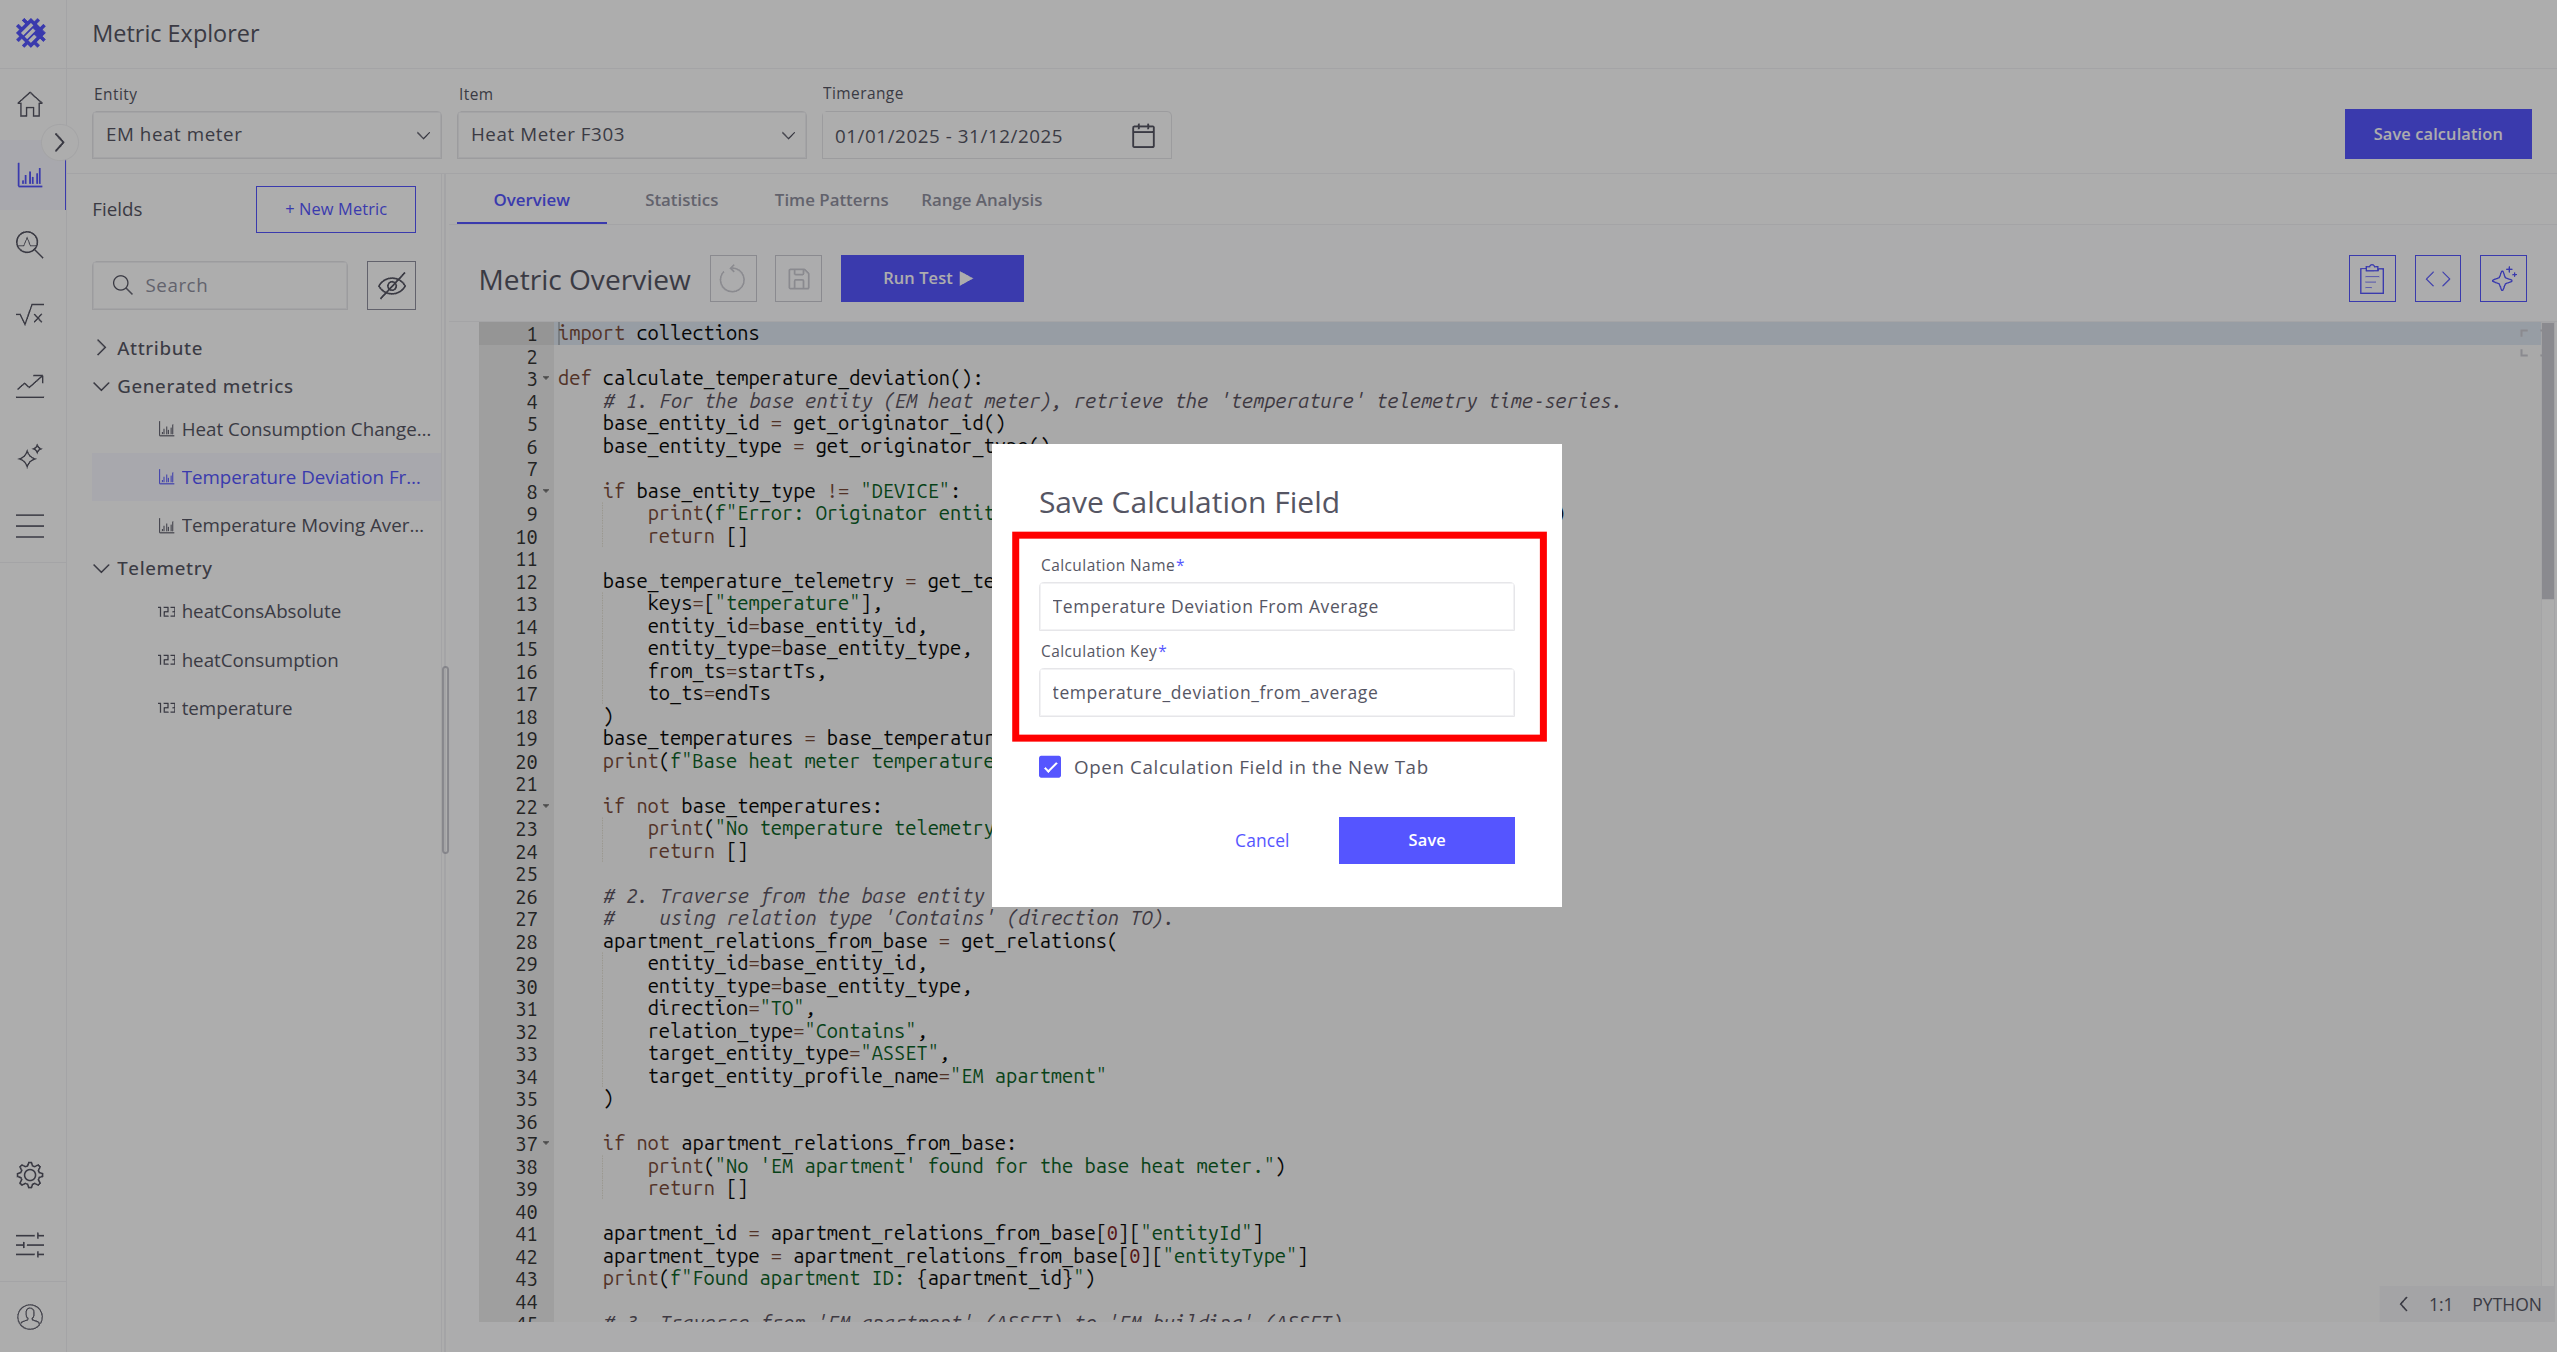
- Click Save Calculation.
- Enter the Calculation Name (shown in Trendz) and Calculation Key (shown in ThingsBoard).
- Click Save.
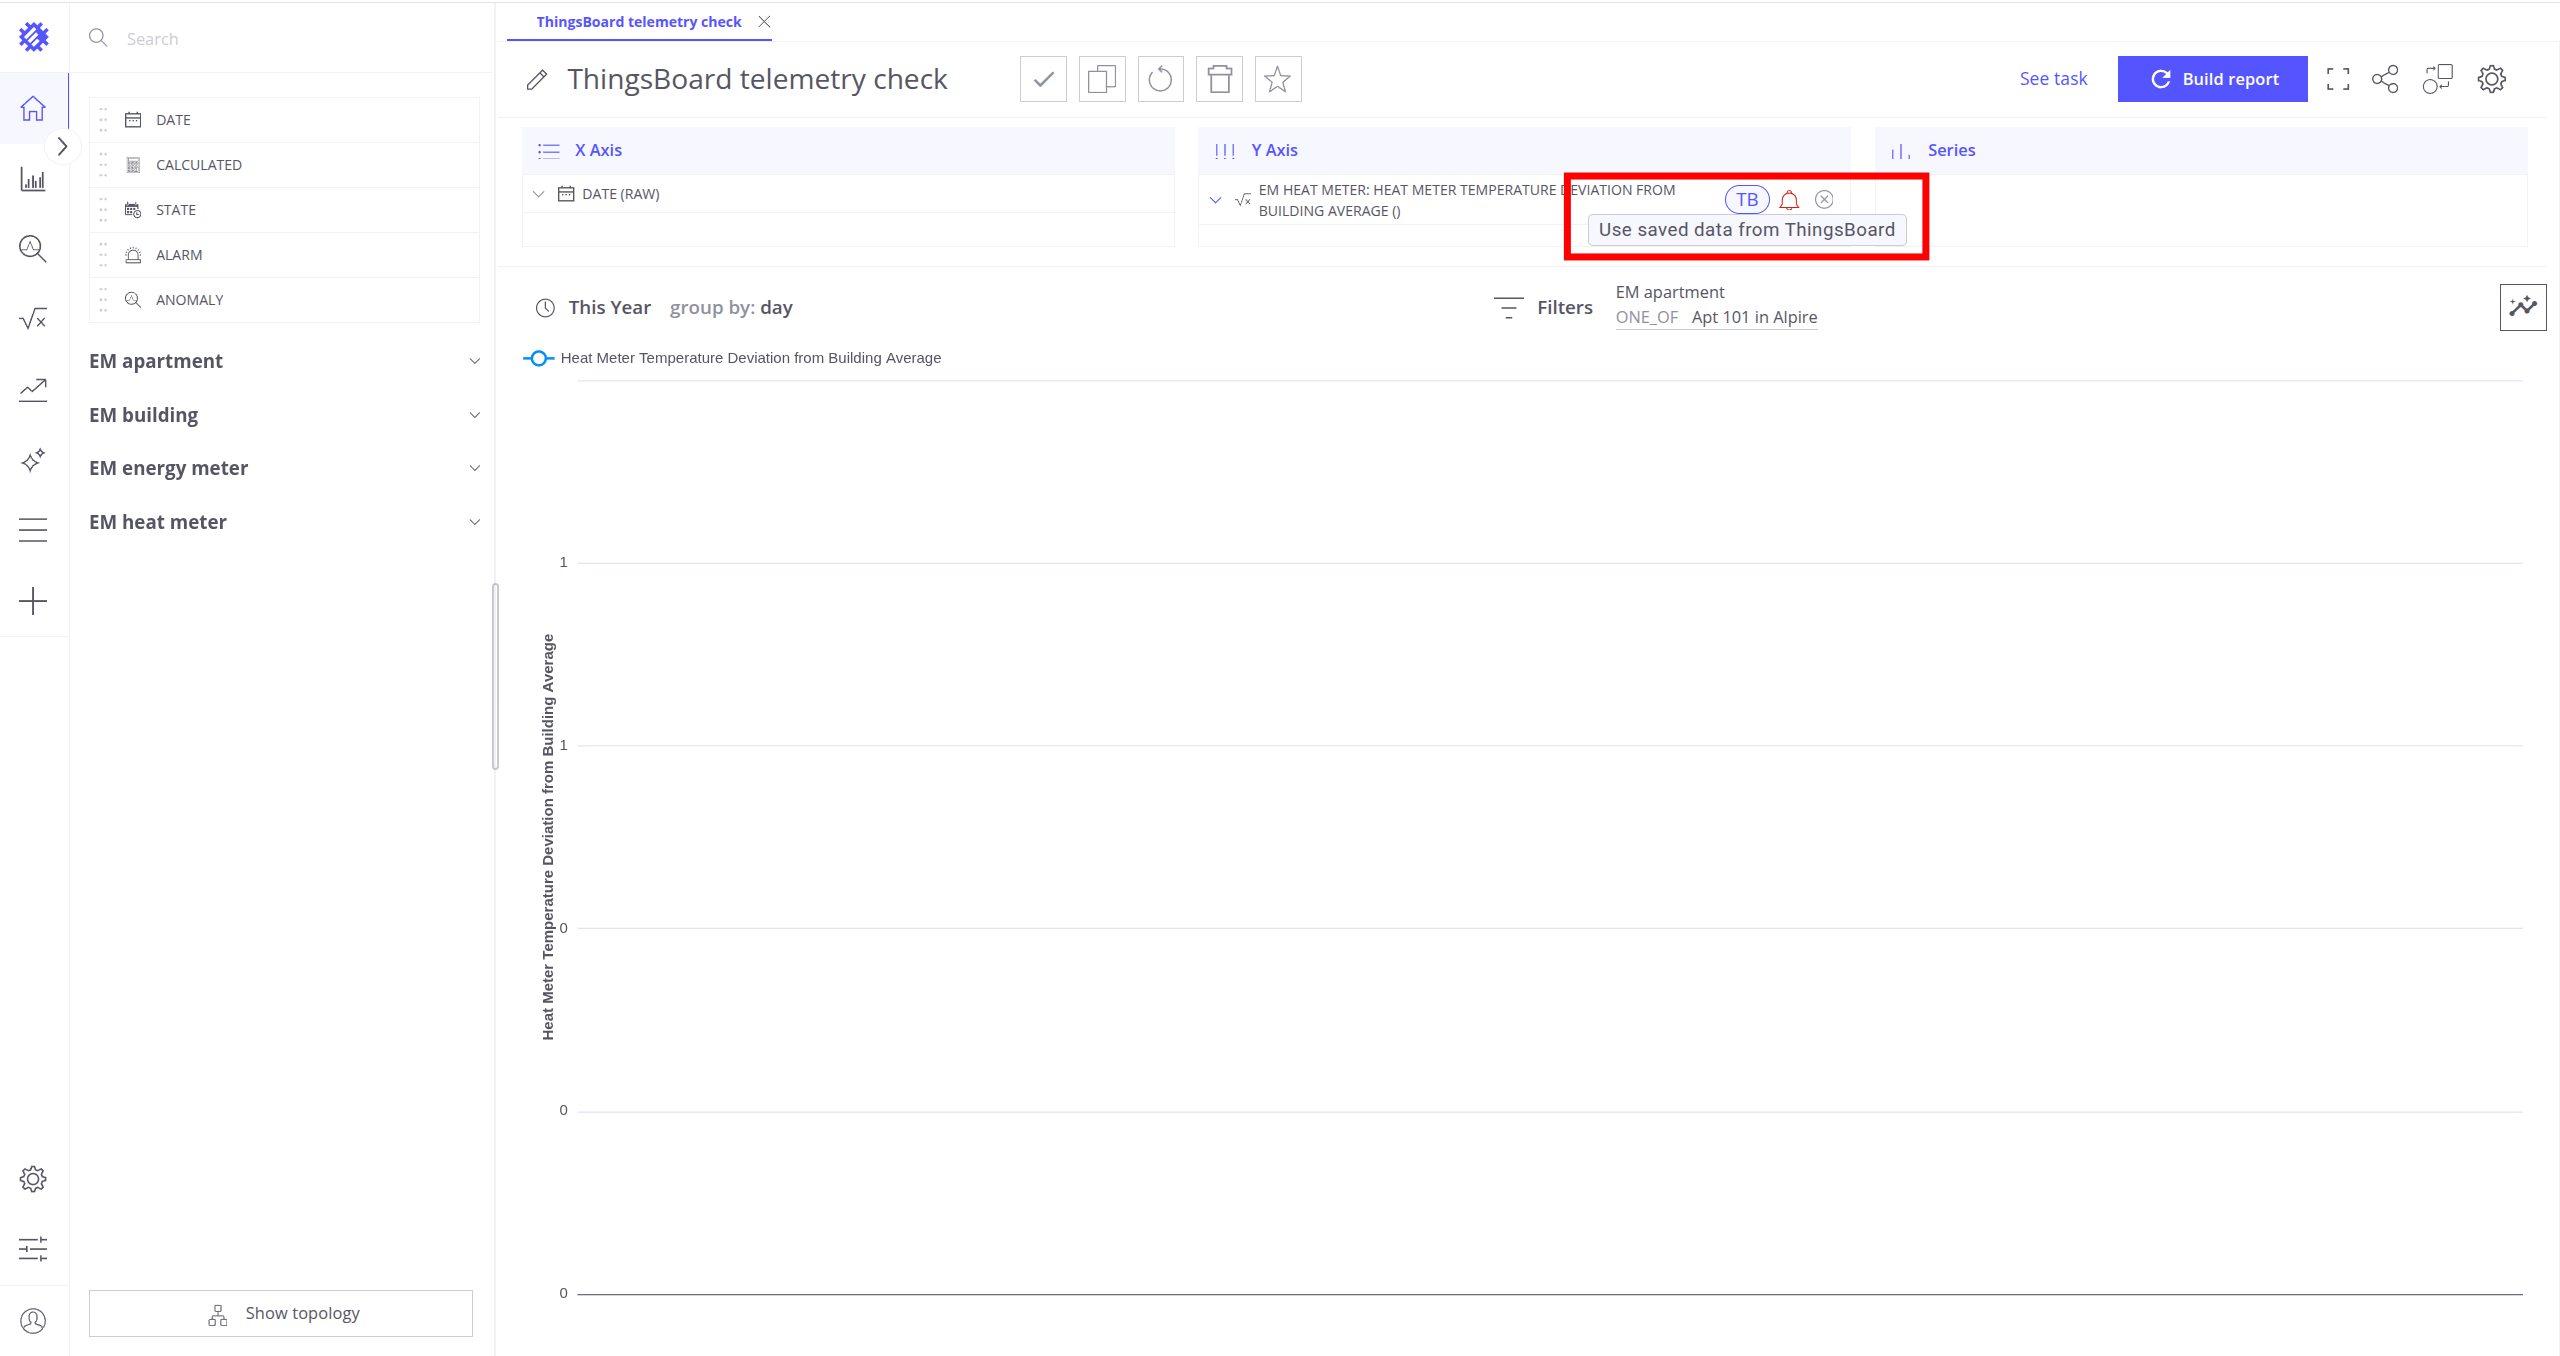
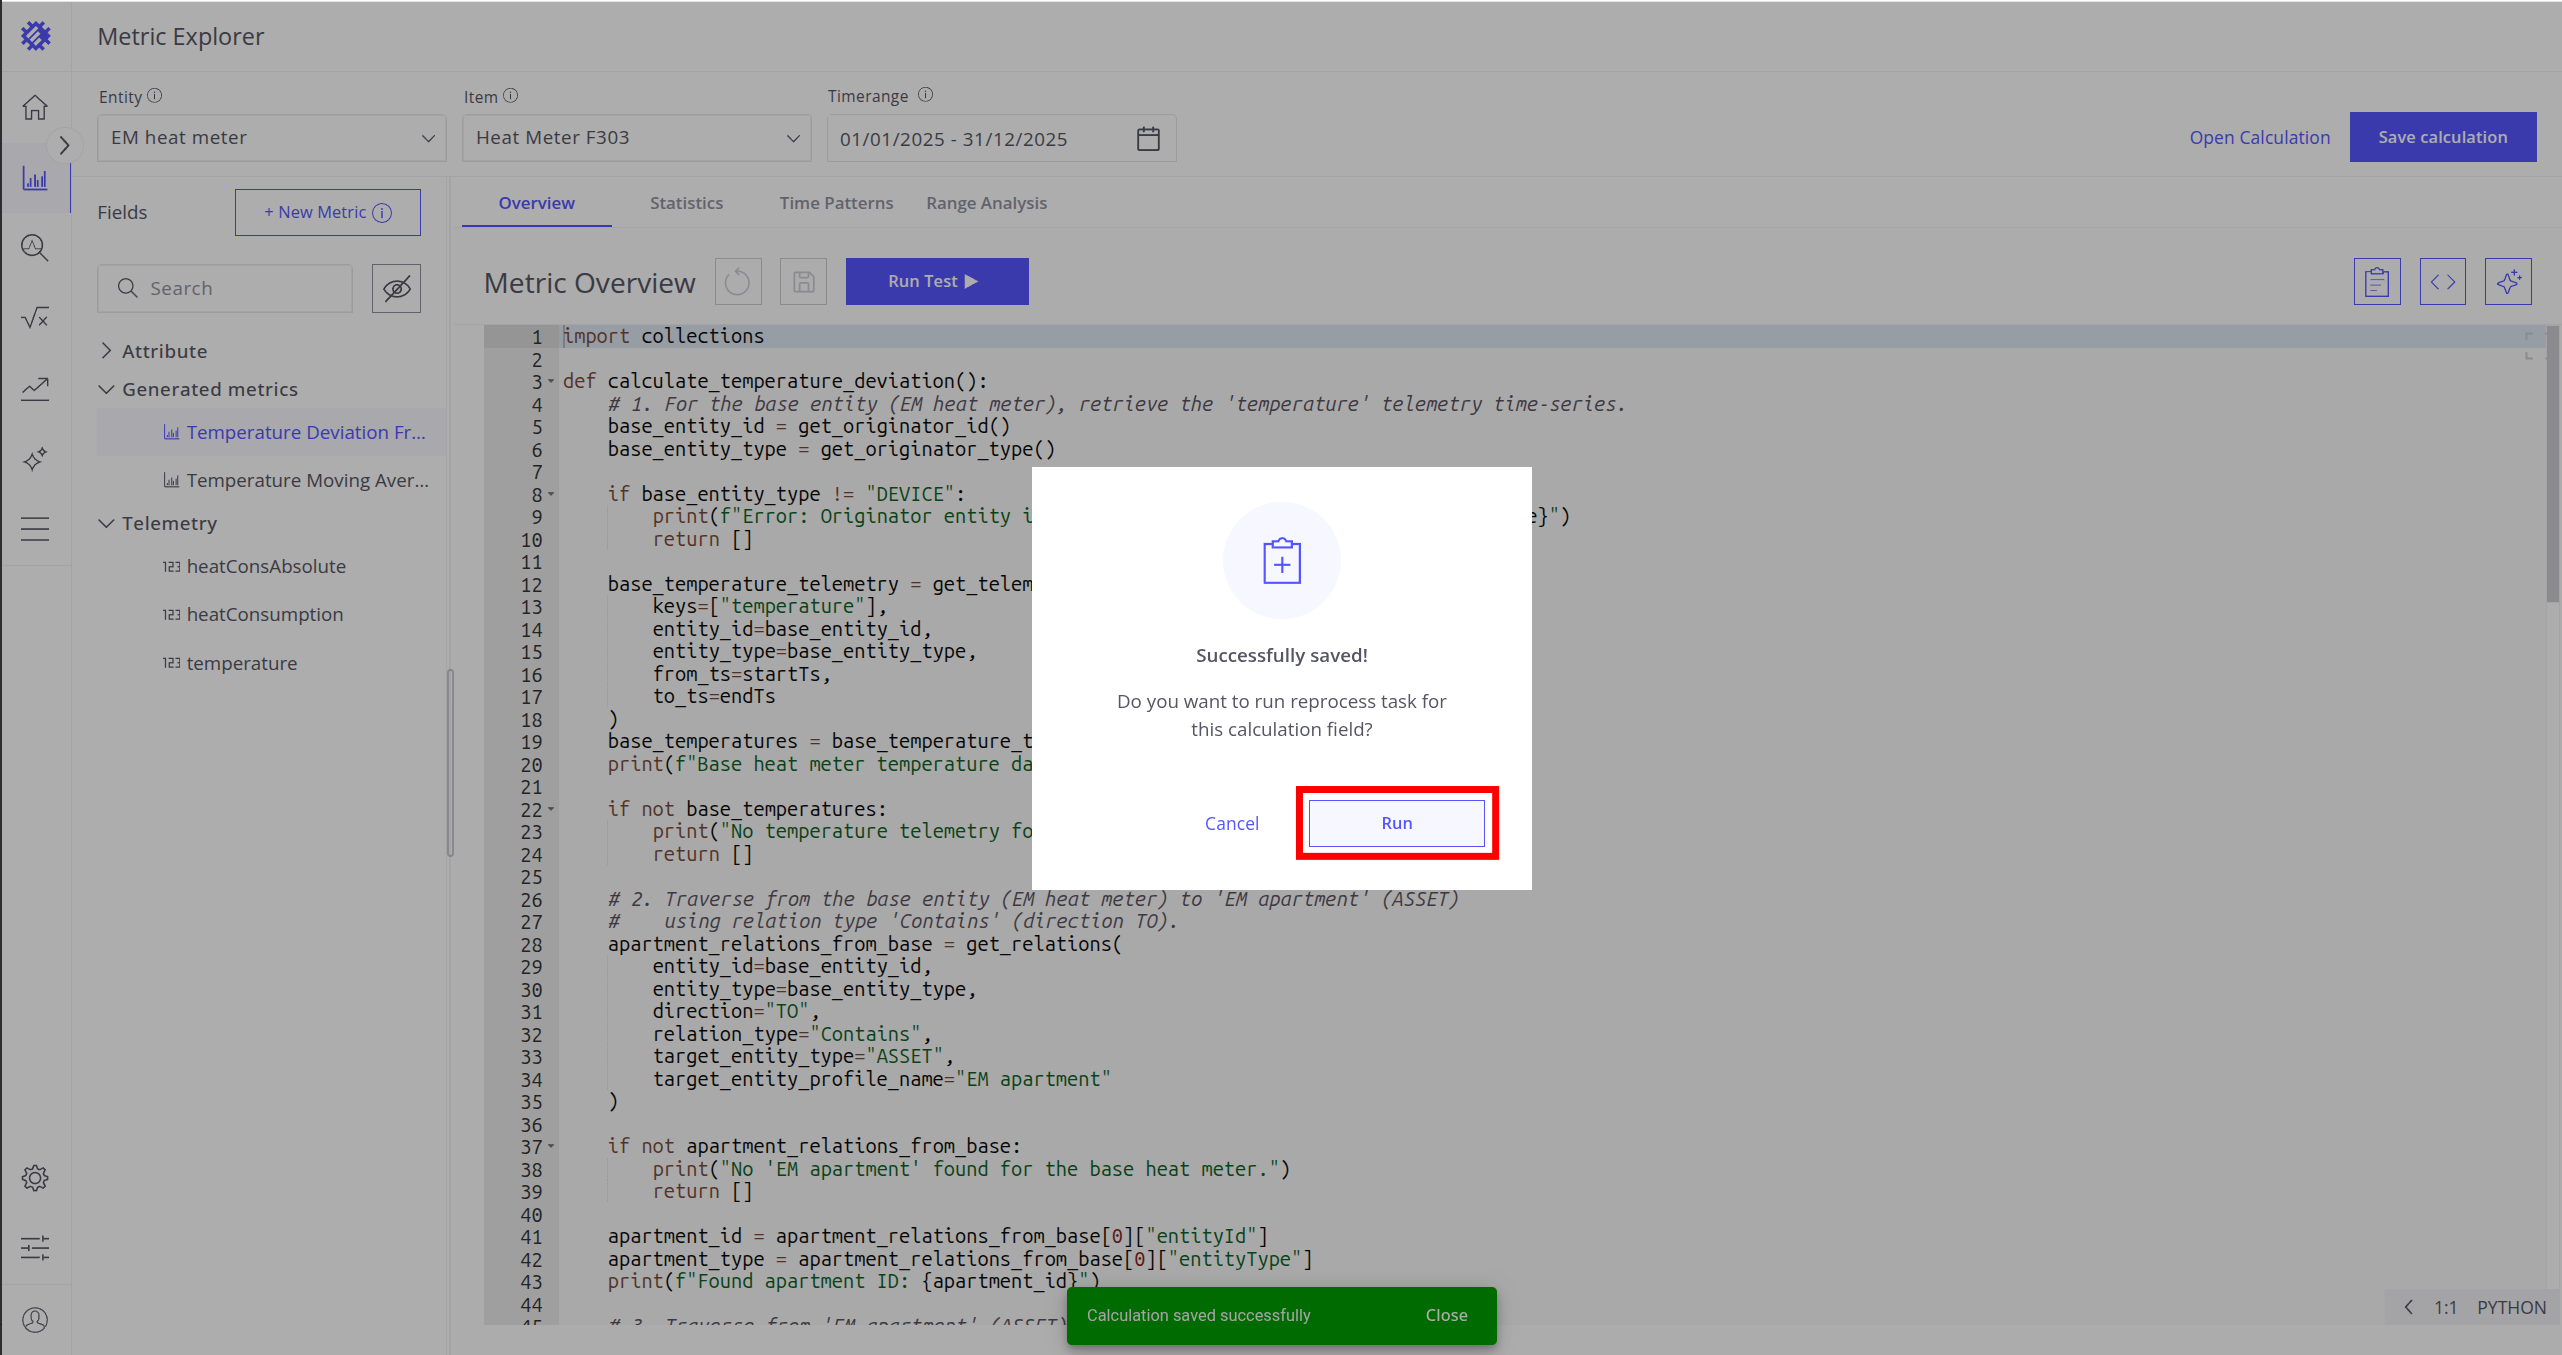
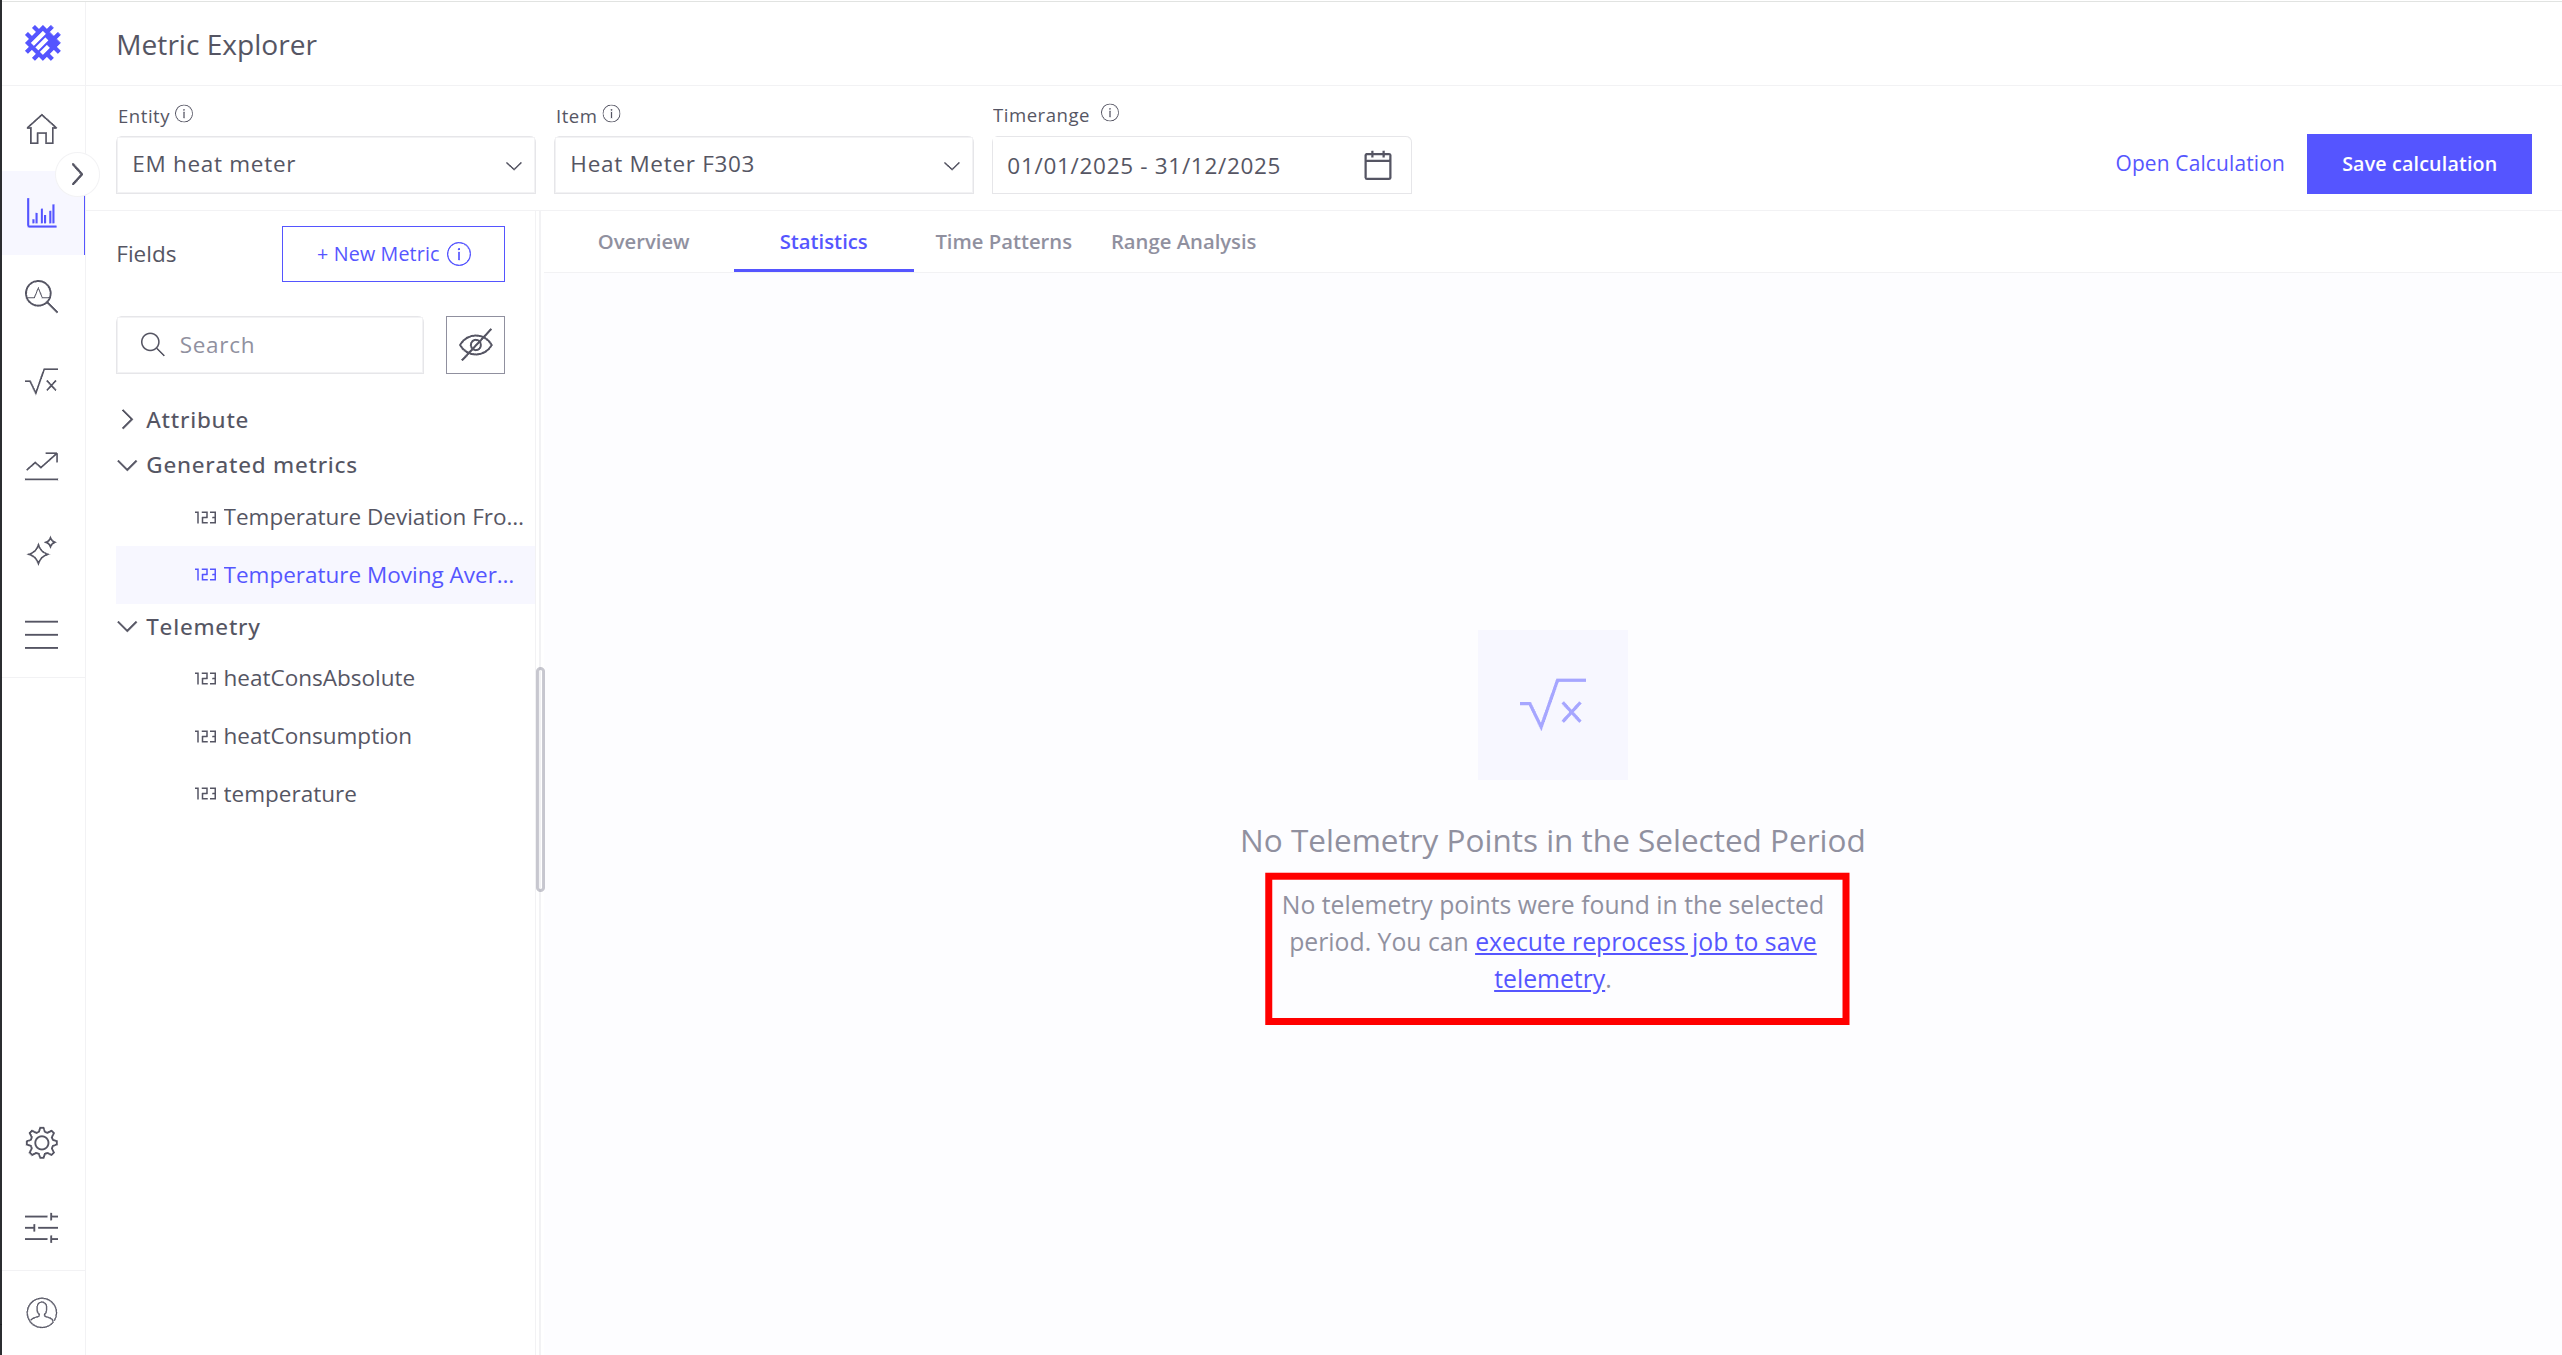
Now the calculation field is saved in Trendz but still does not have telemetry points in ThingsBoard.

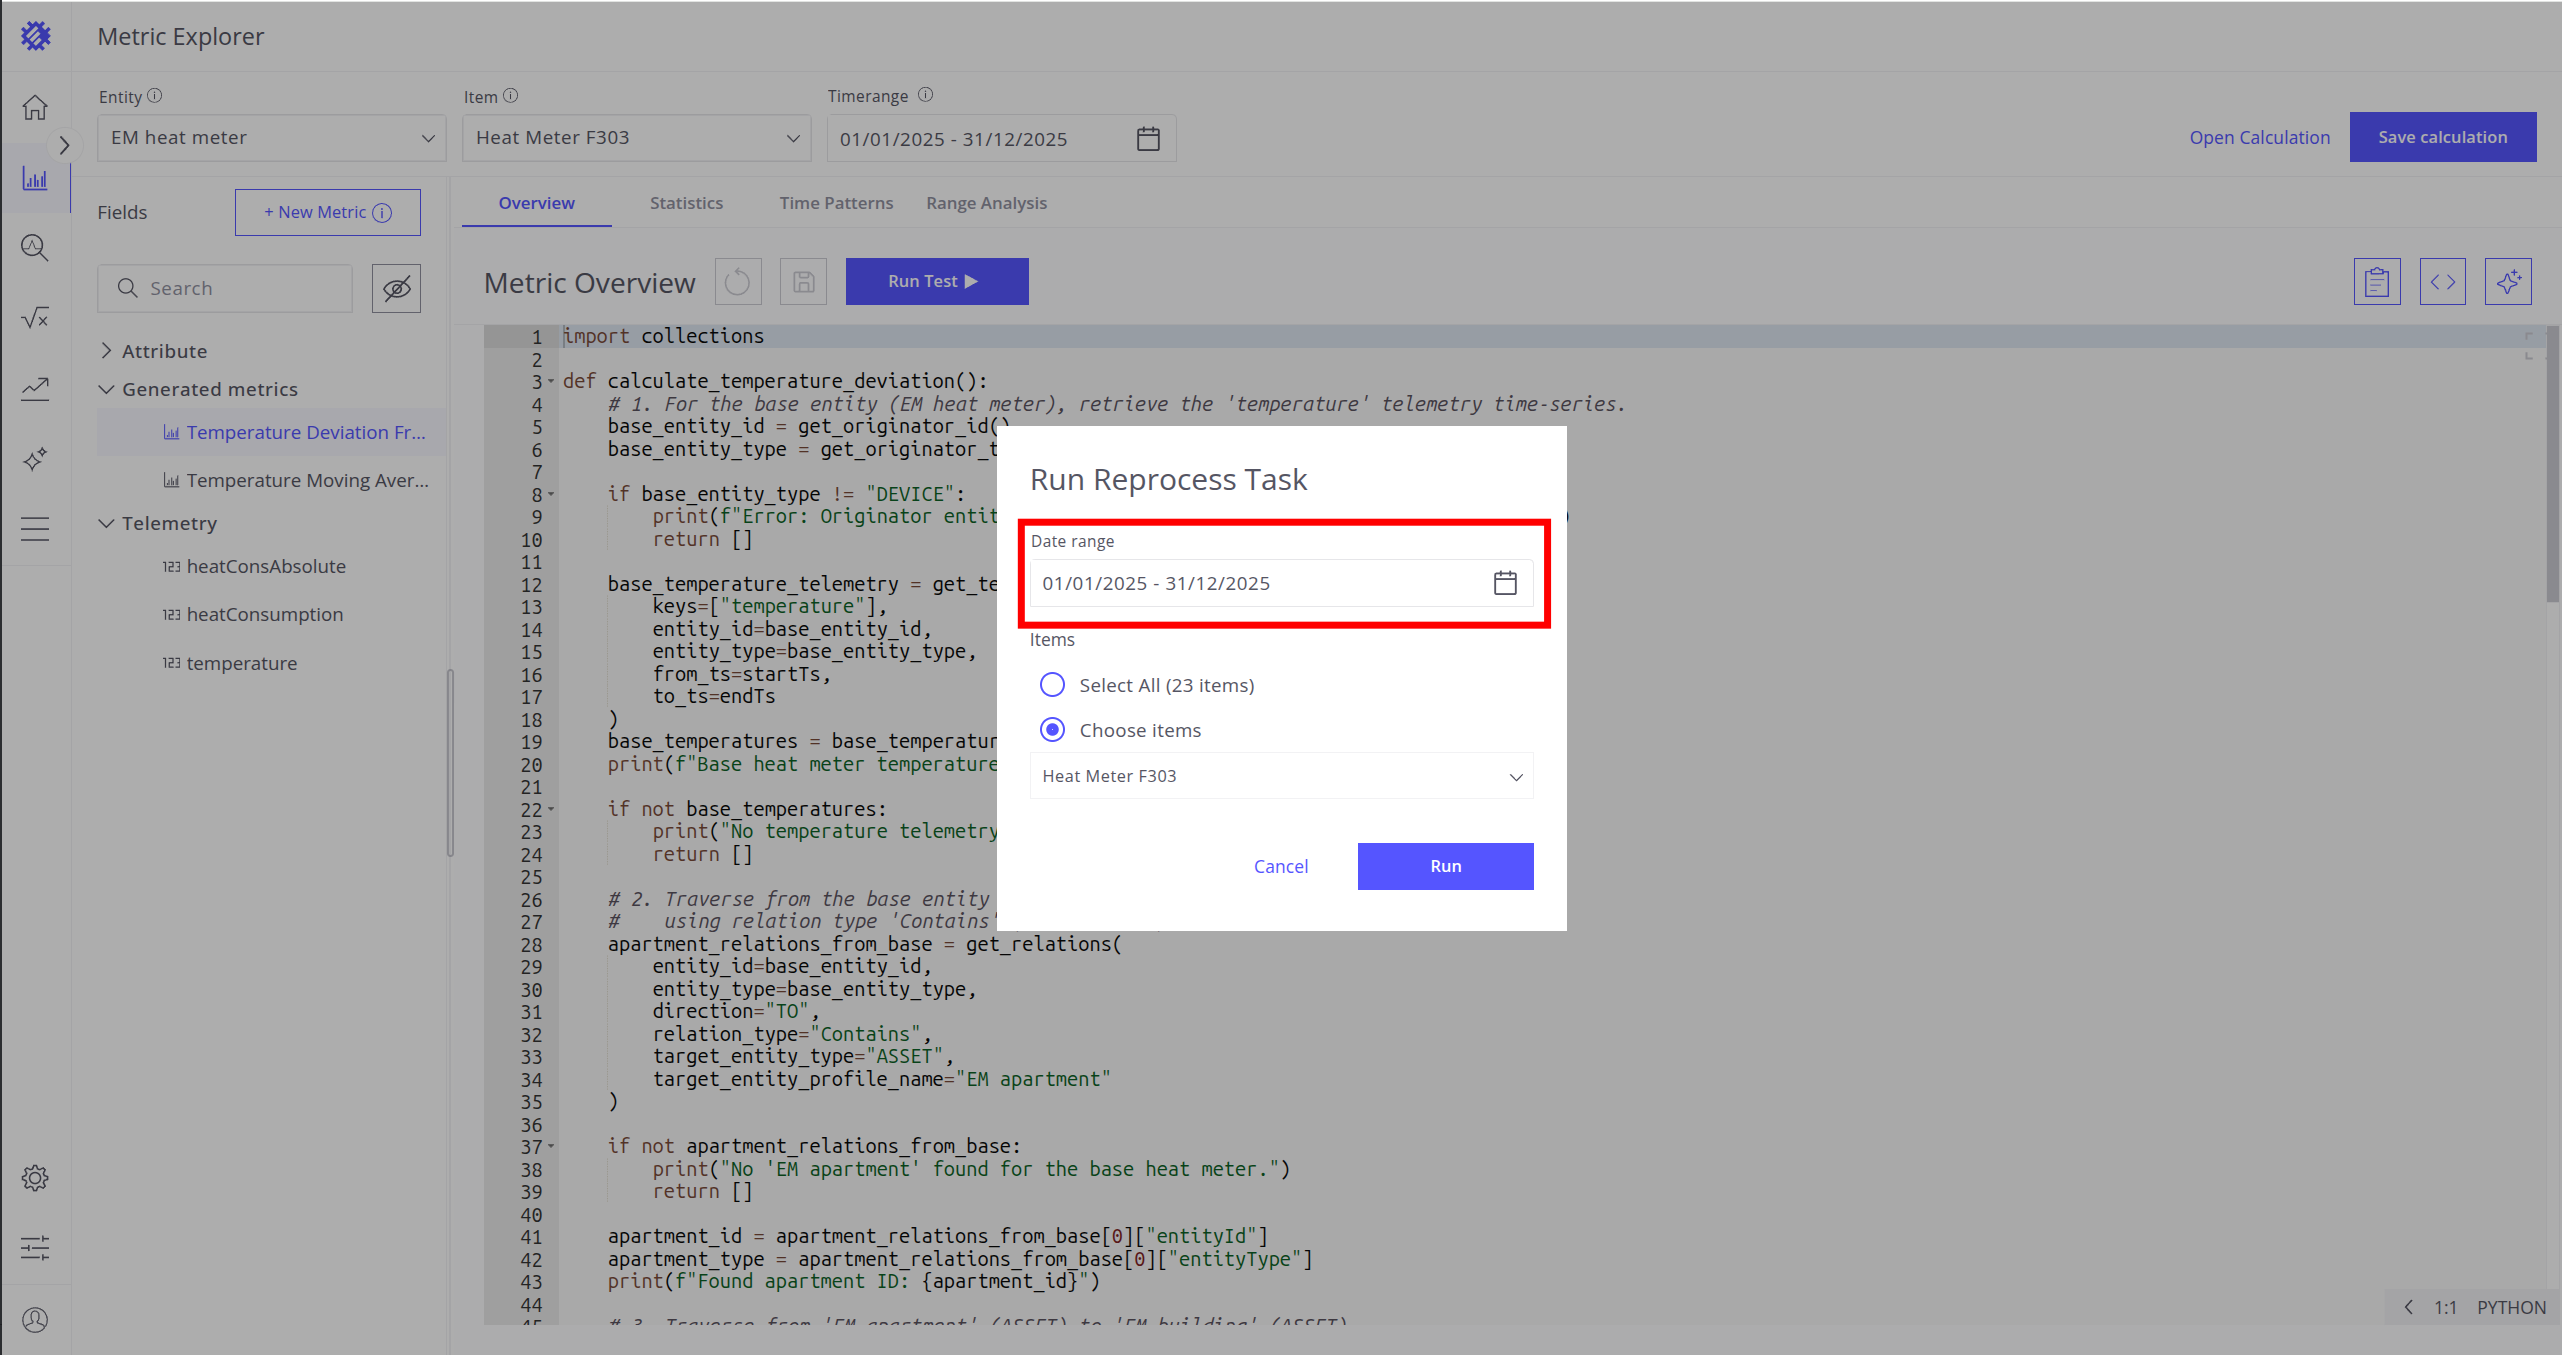
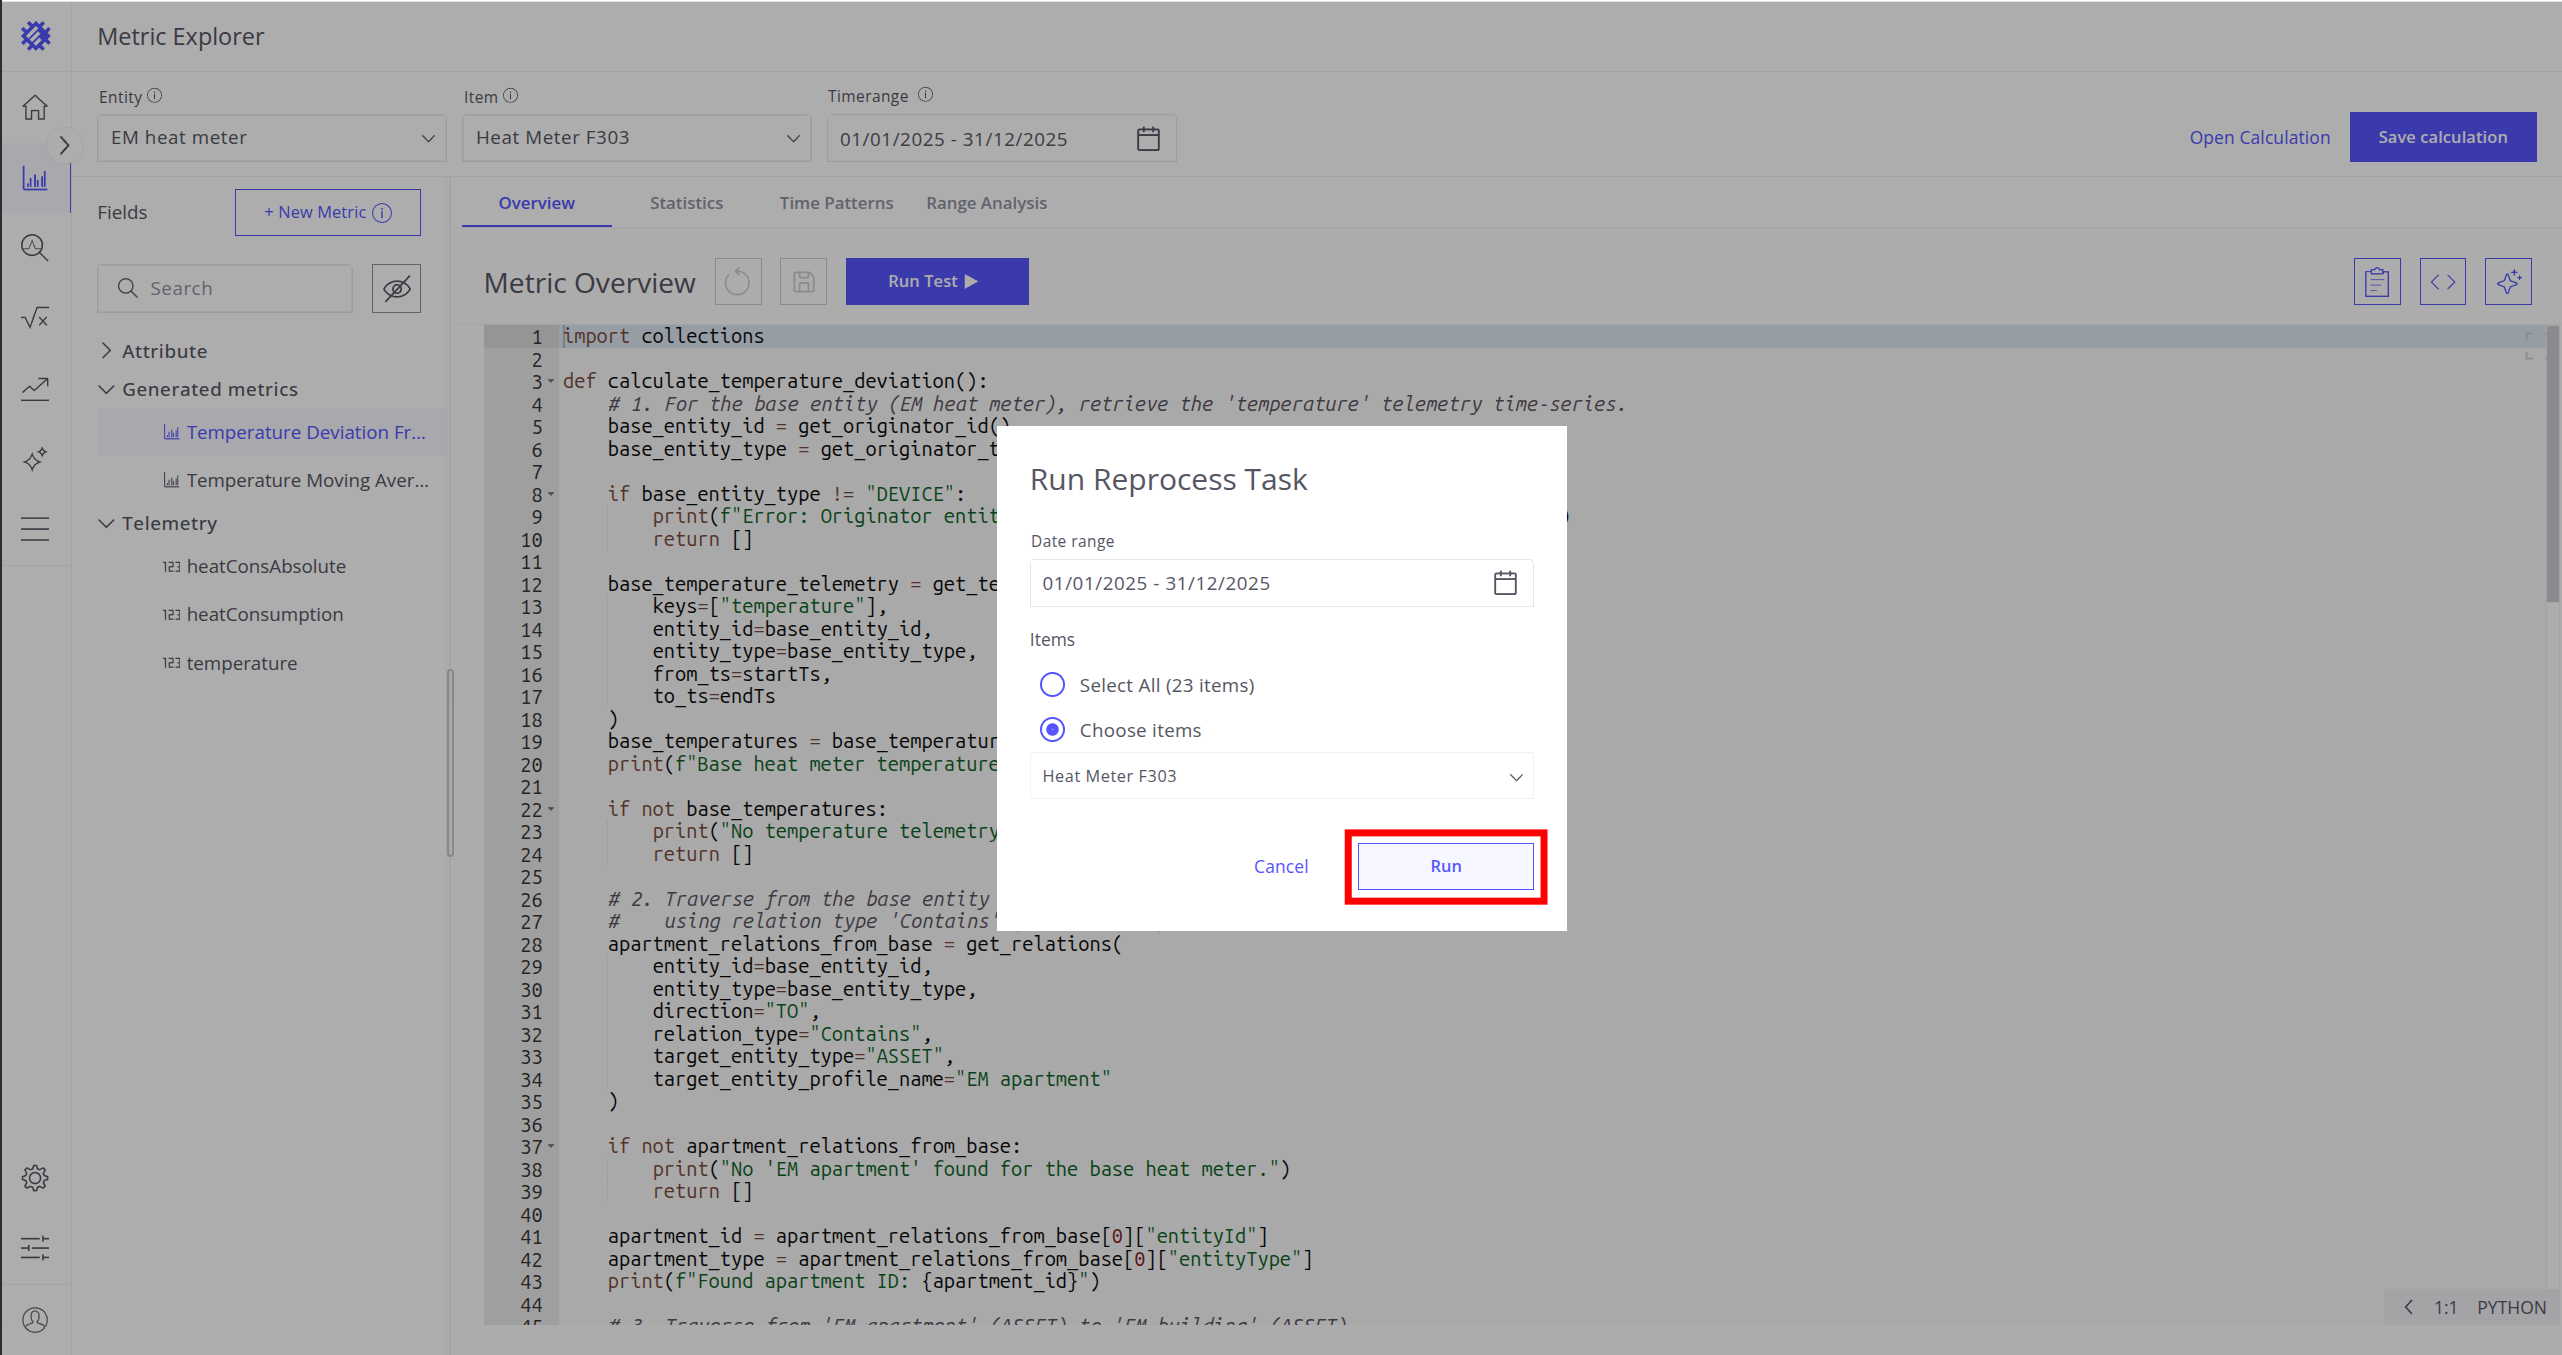
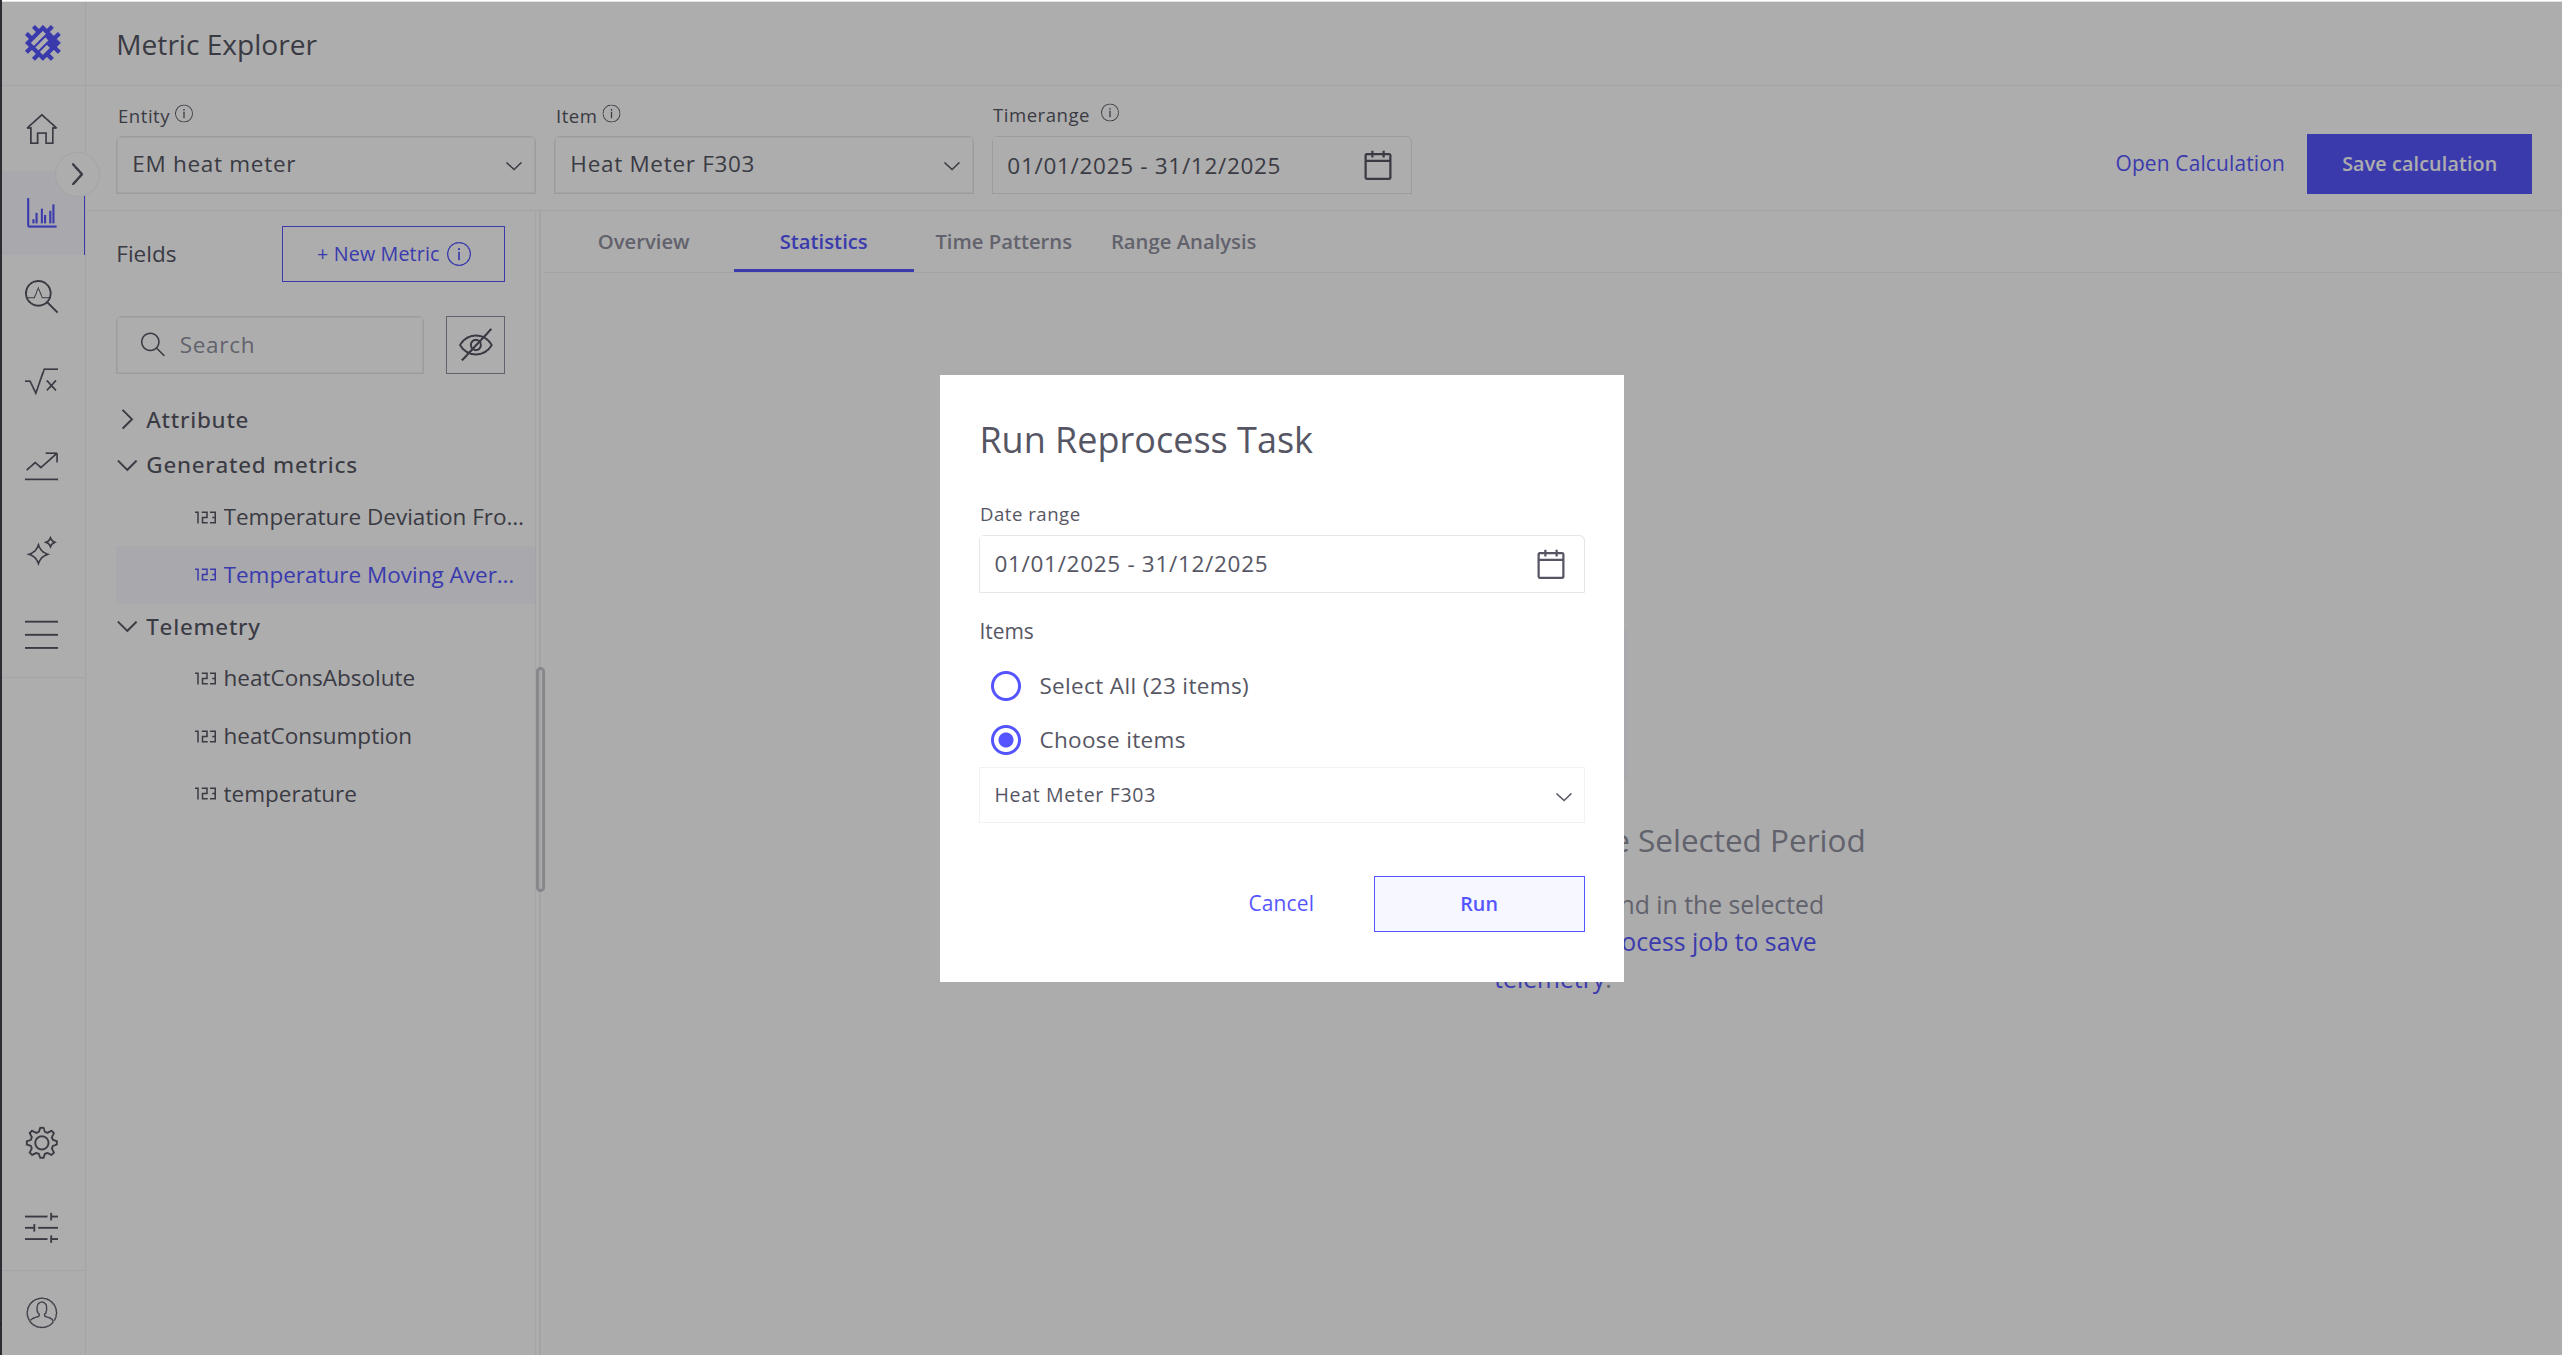
You can also be prompted to run a Reprocess Task that saves data to ThingsBoard:
- Click the Run button to start the process.
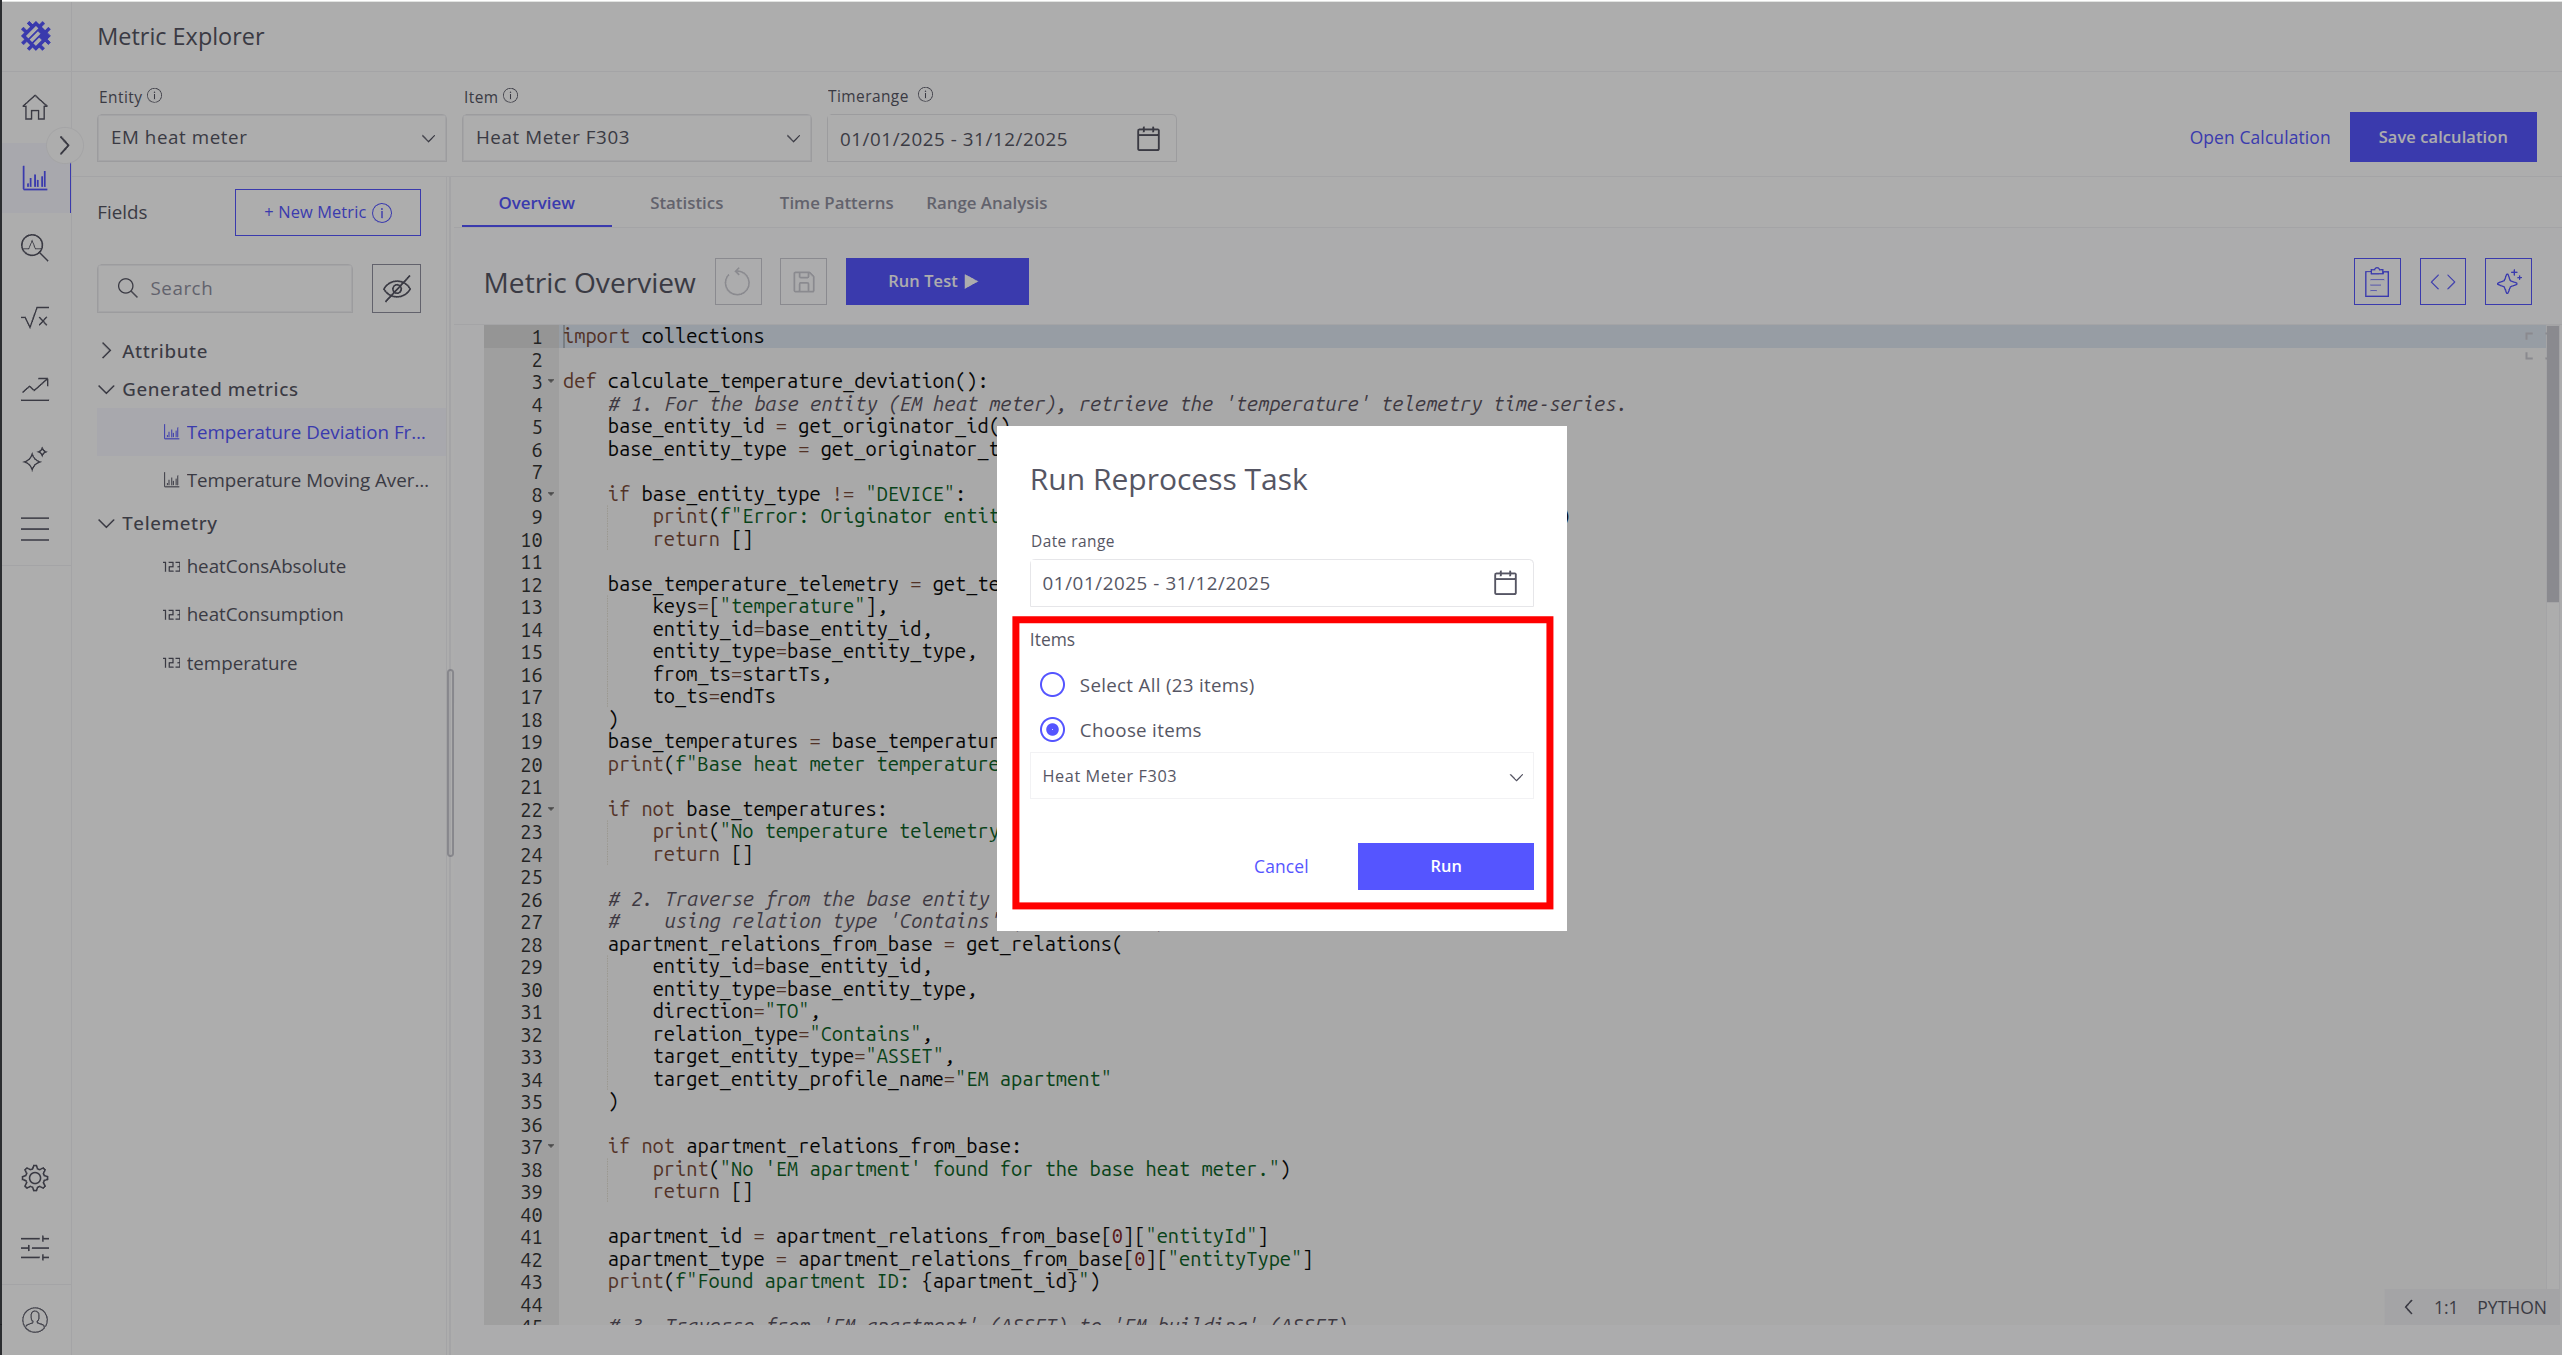
- Select the time range for reprocessing (this defines the period of data to be saved to ThingsBoard).
- Choose the items to include in the save operation (you can select the current item, all items, or a subset of items).
- Click Run to begin the task.
- Wait until the reprocess task completes. You can navigate to other metrics while the process is running.
Once the reprocess task is completed, the telemetry points will be saved to ThingsBoard.
For detailed instructions on saving telemetries to ThingsBoard, follow the guide.
Manage Associated Calculation Field
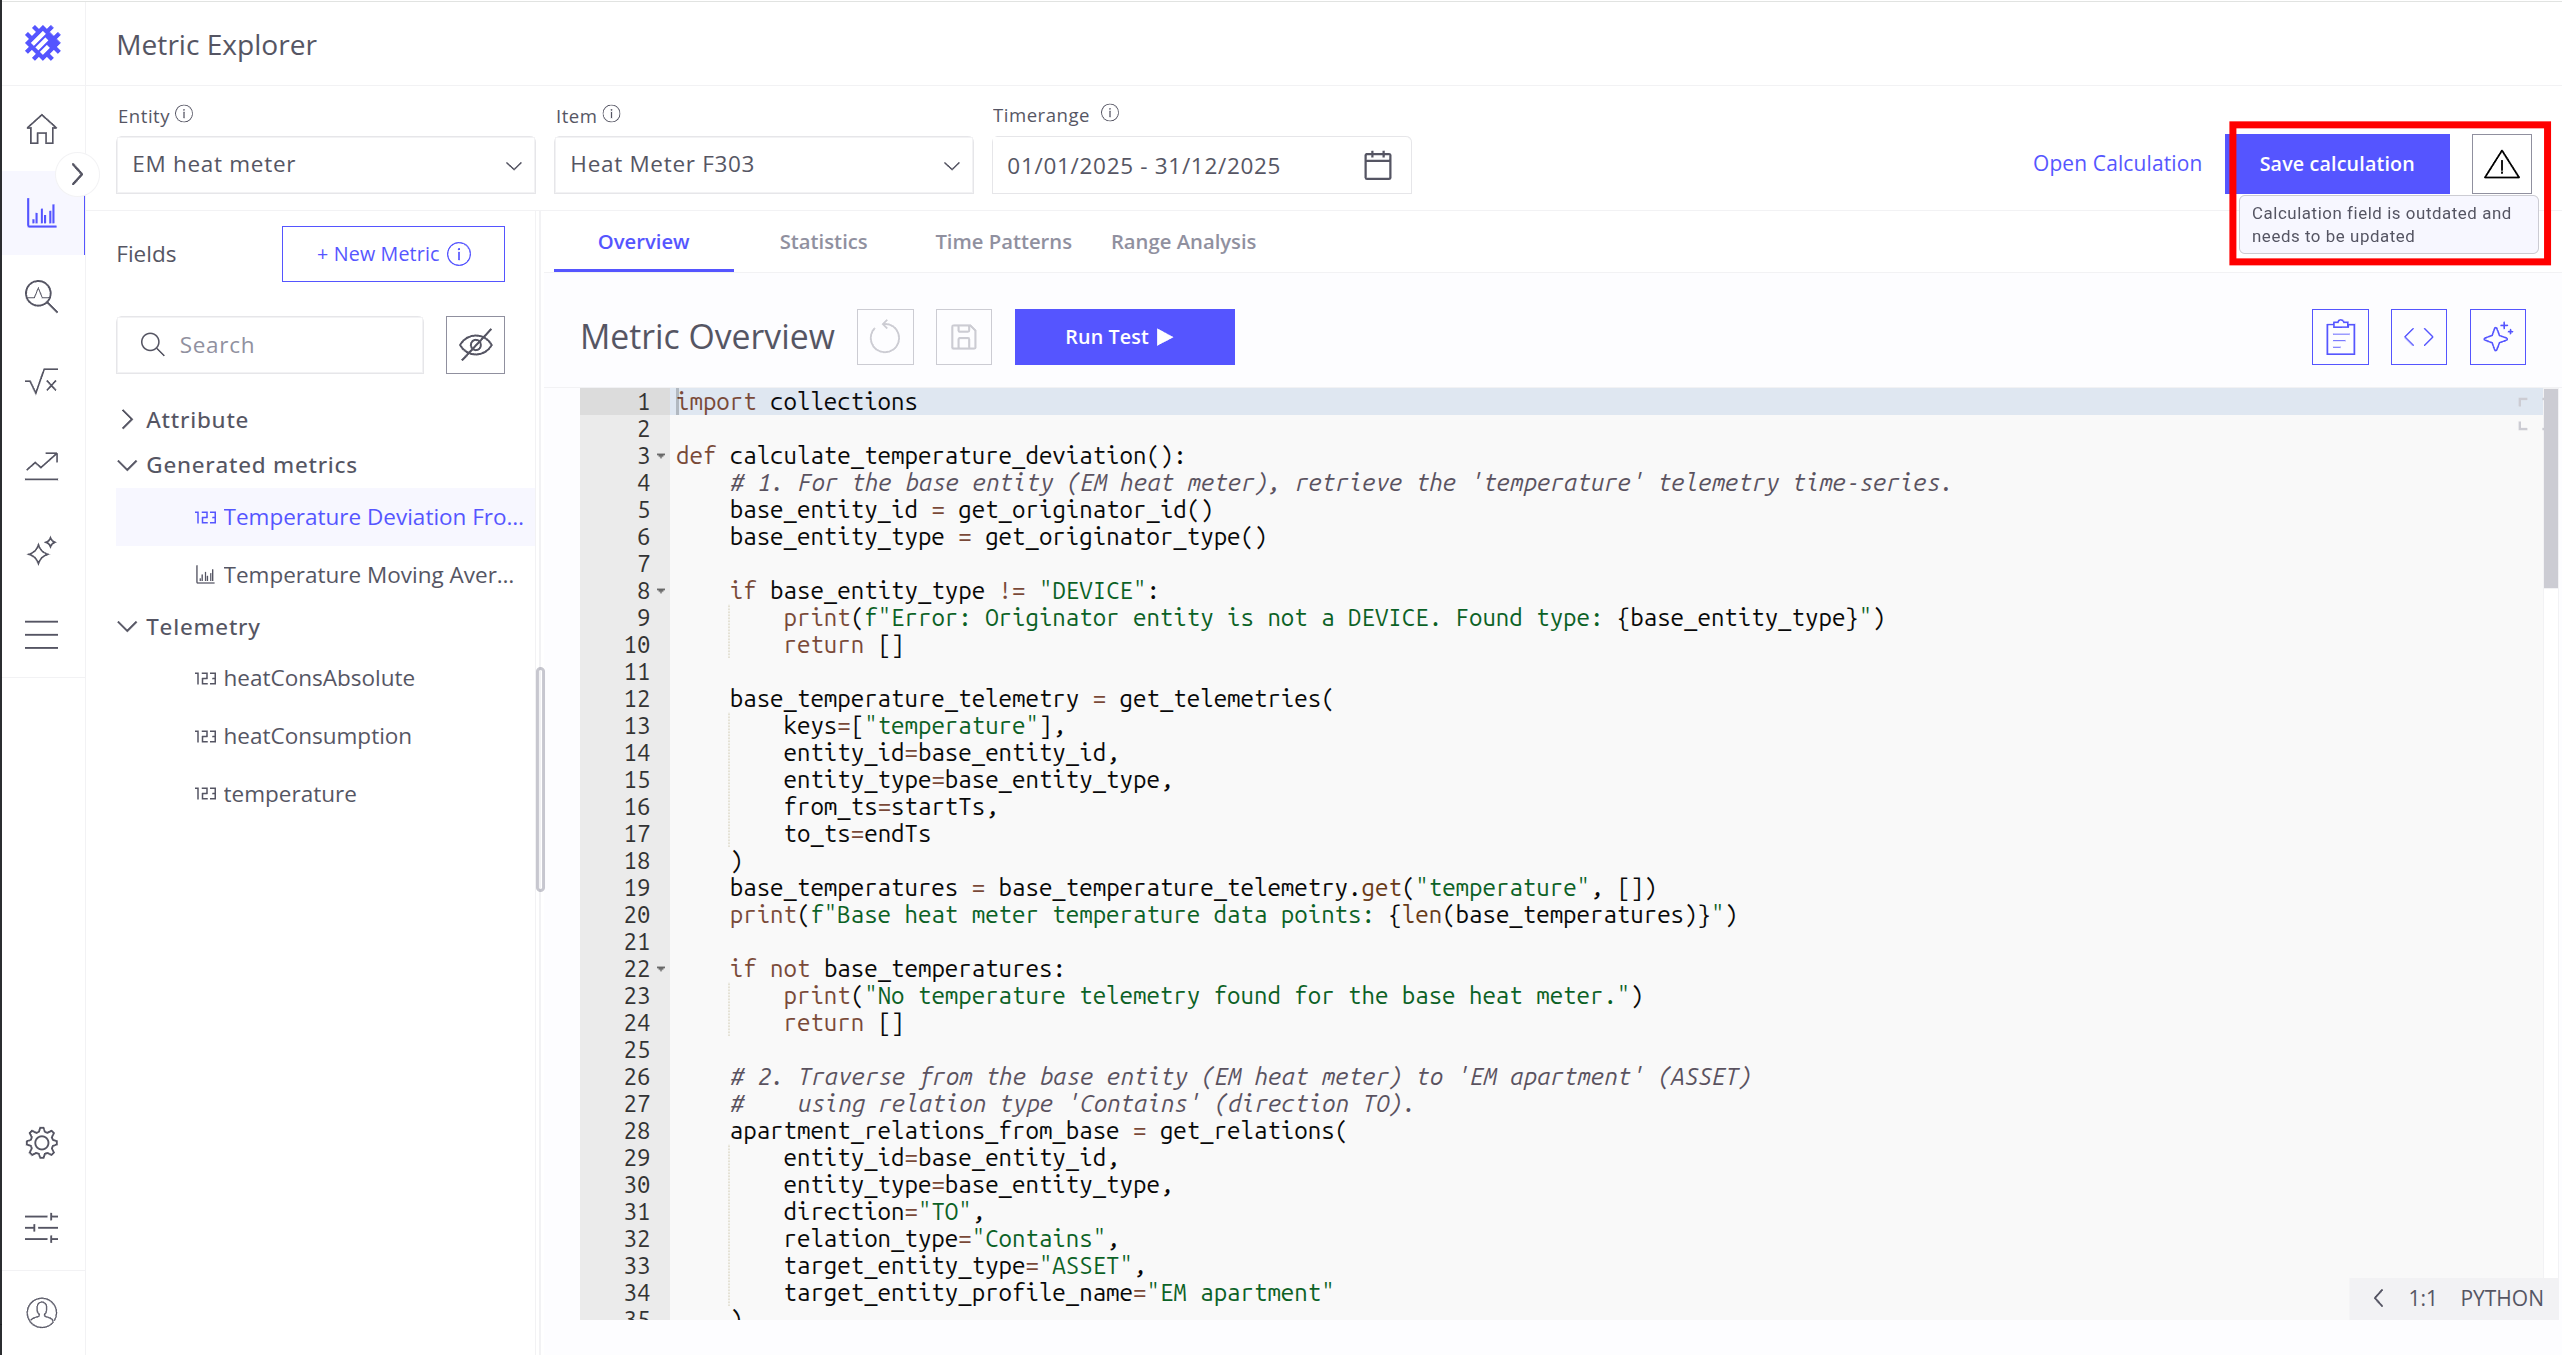
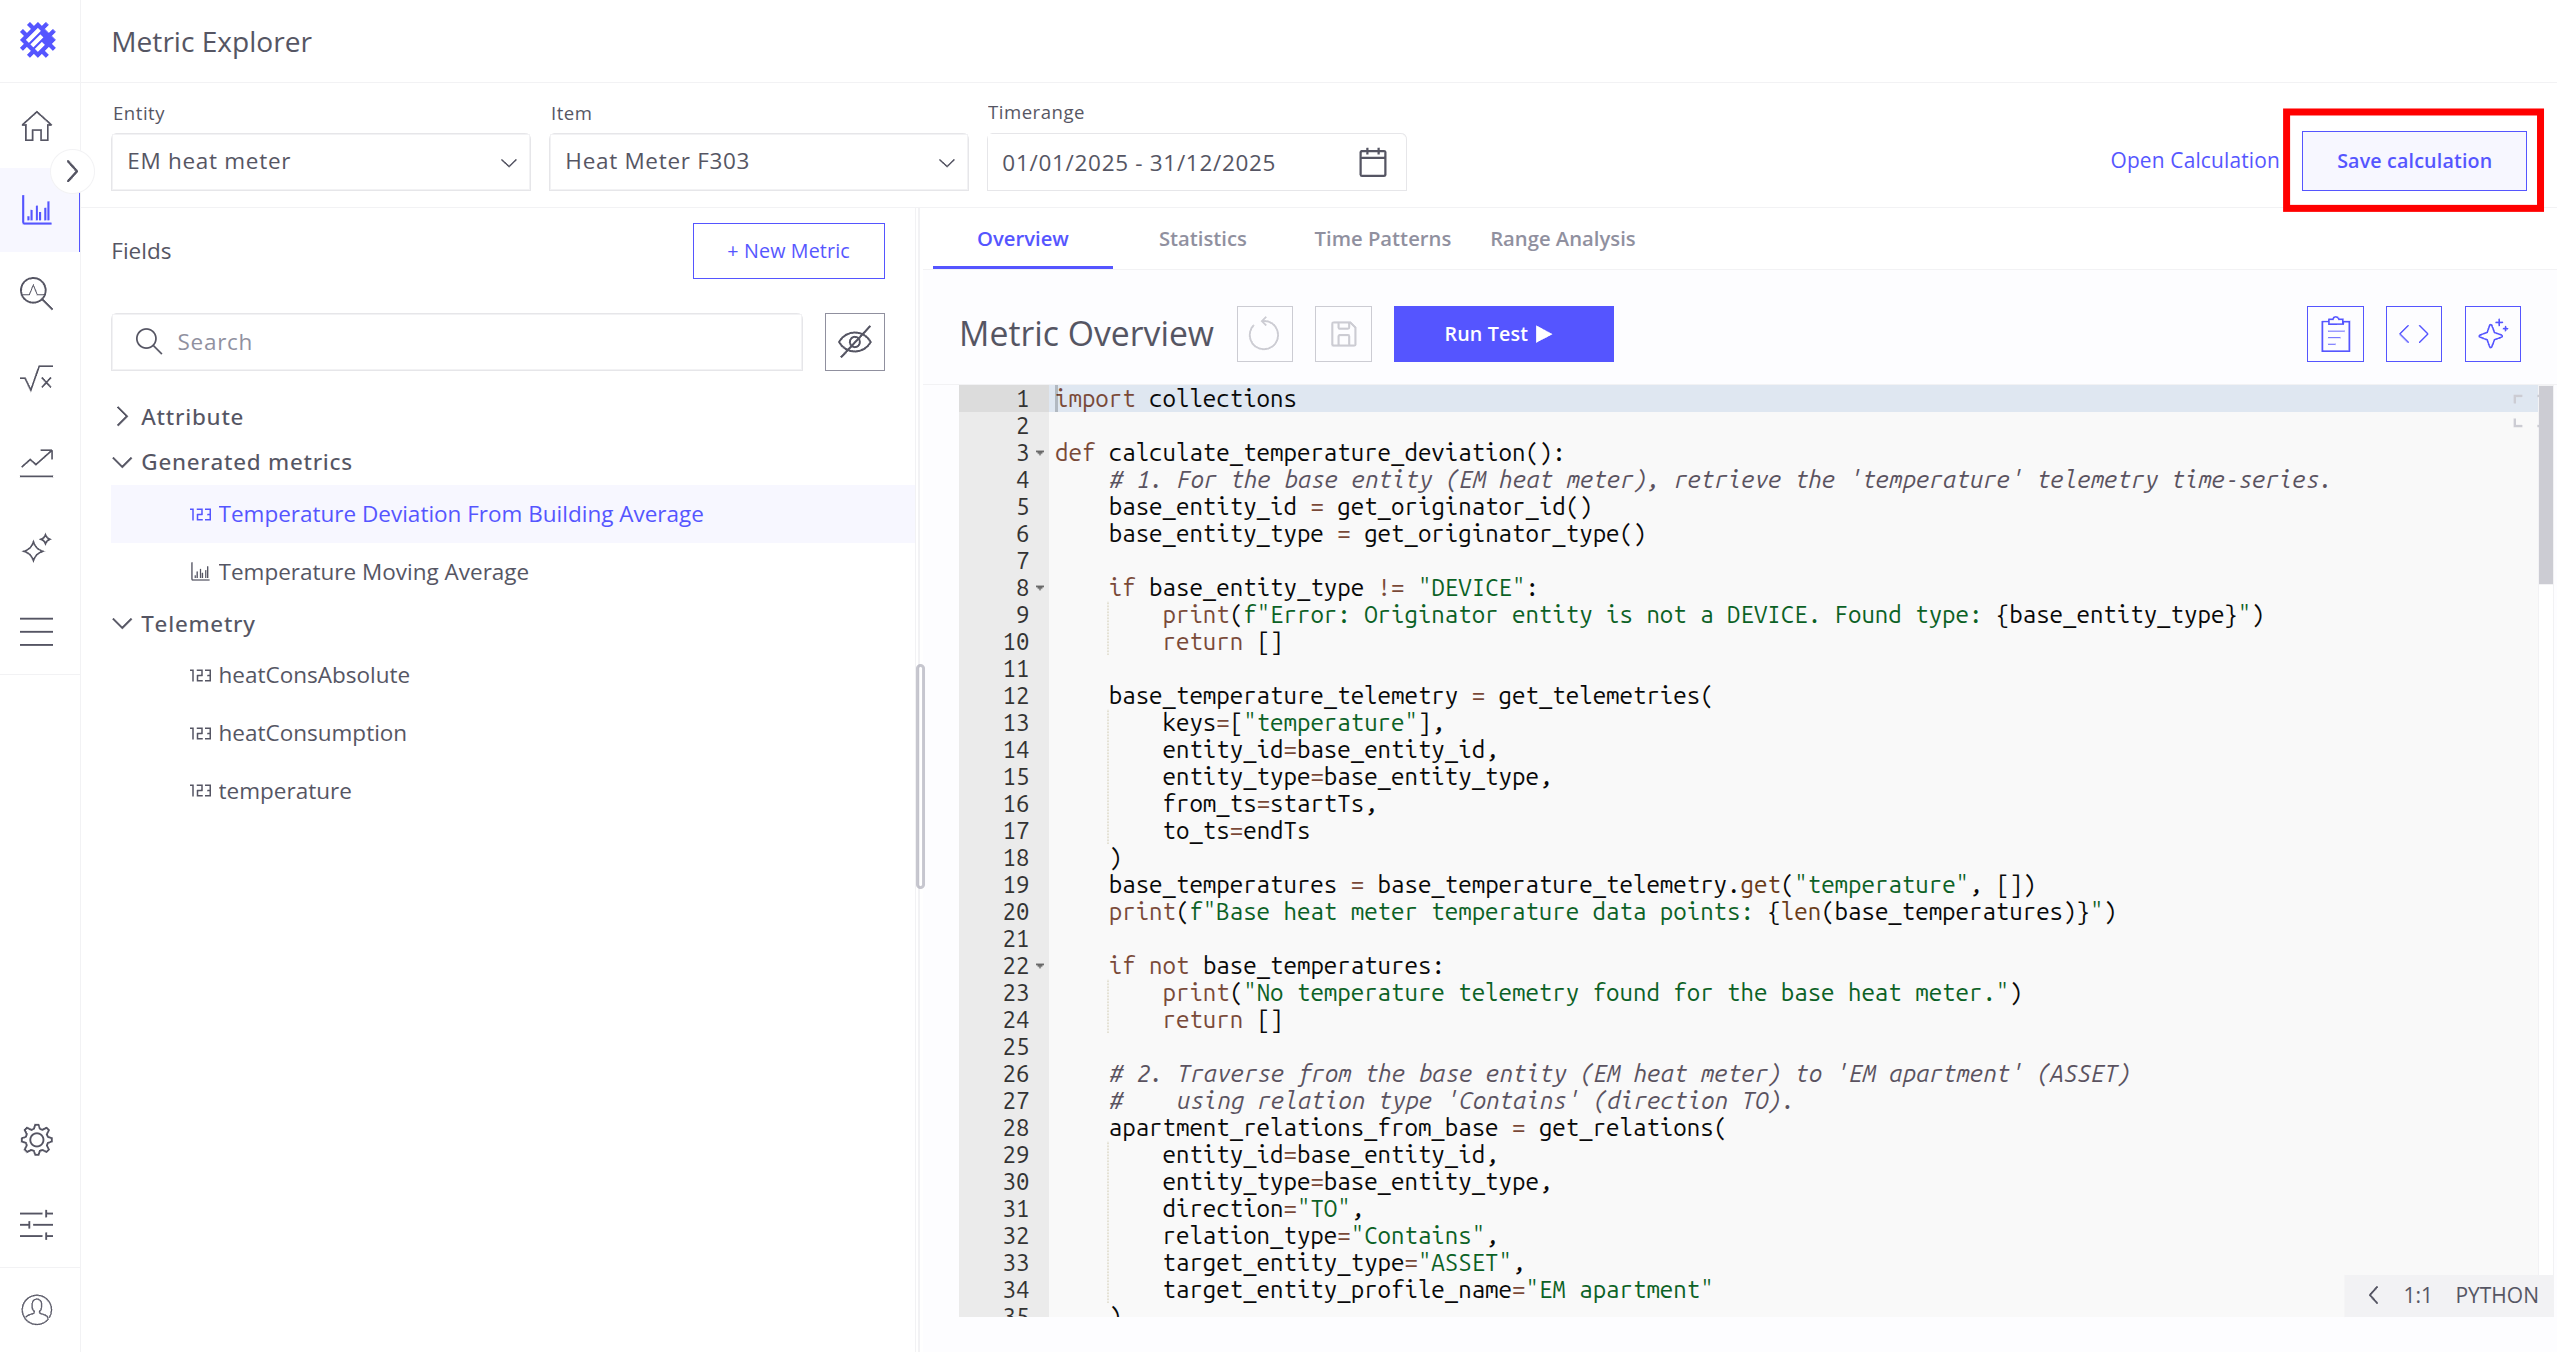
If the metric has an associated Calculation Field, you can open it by clicking the Open Calculation button.
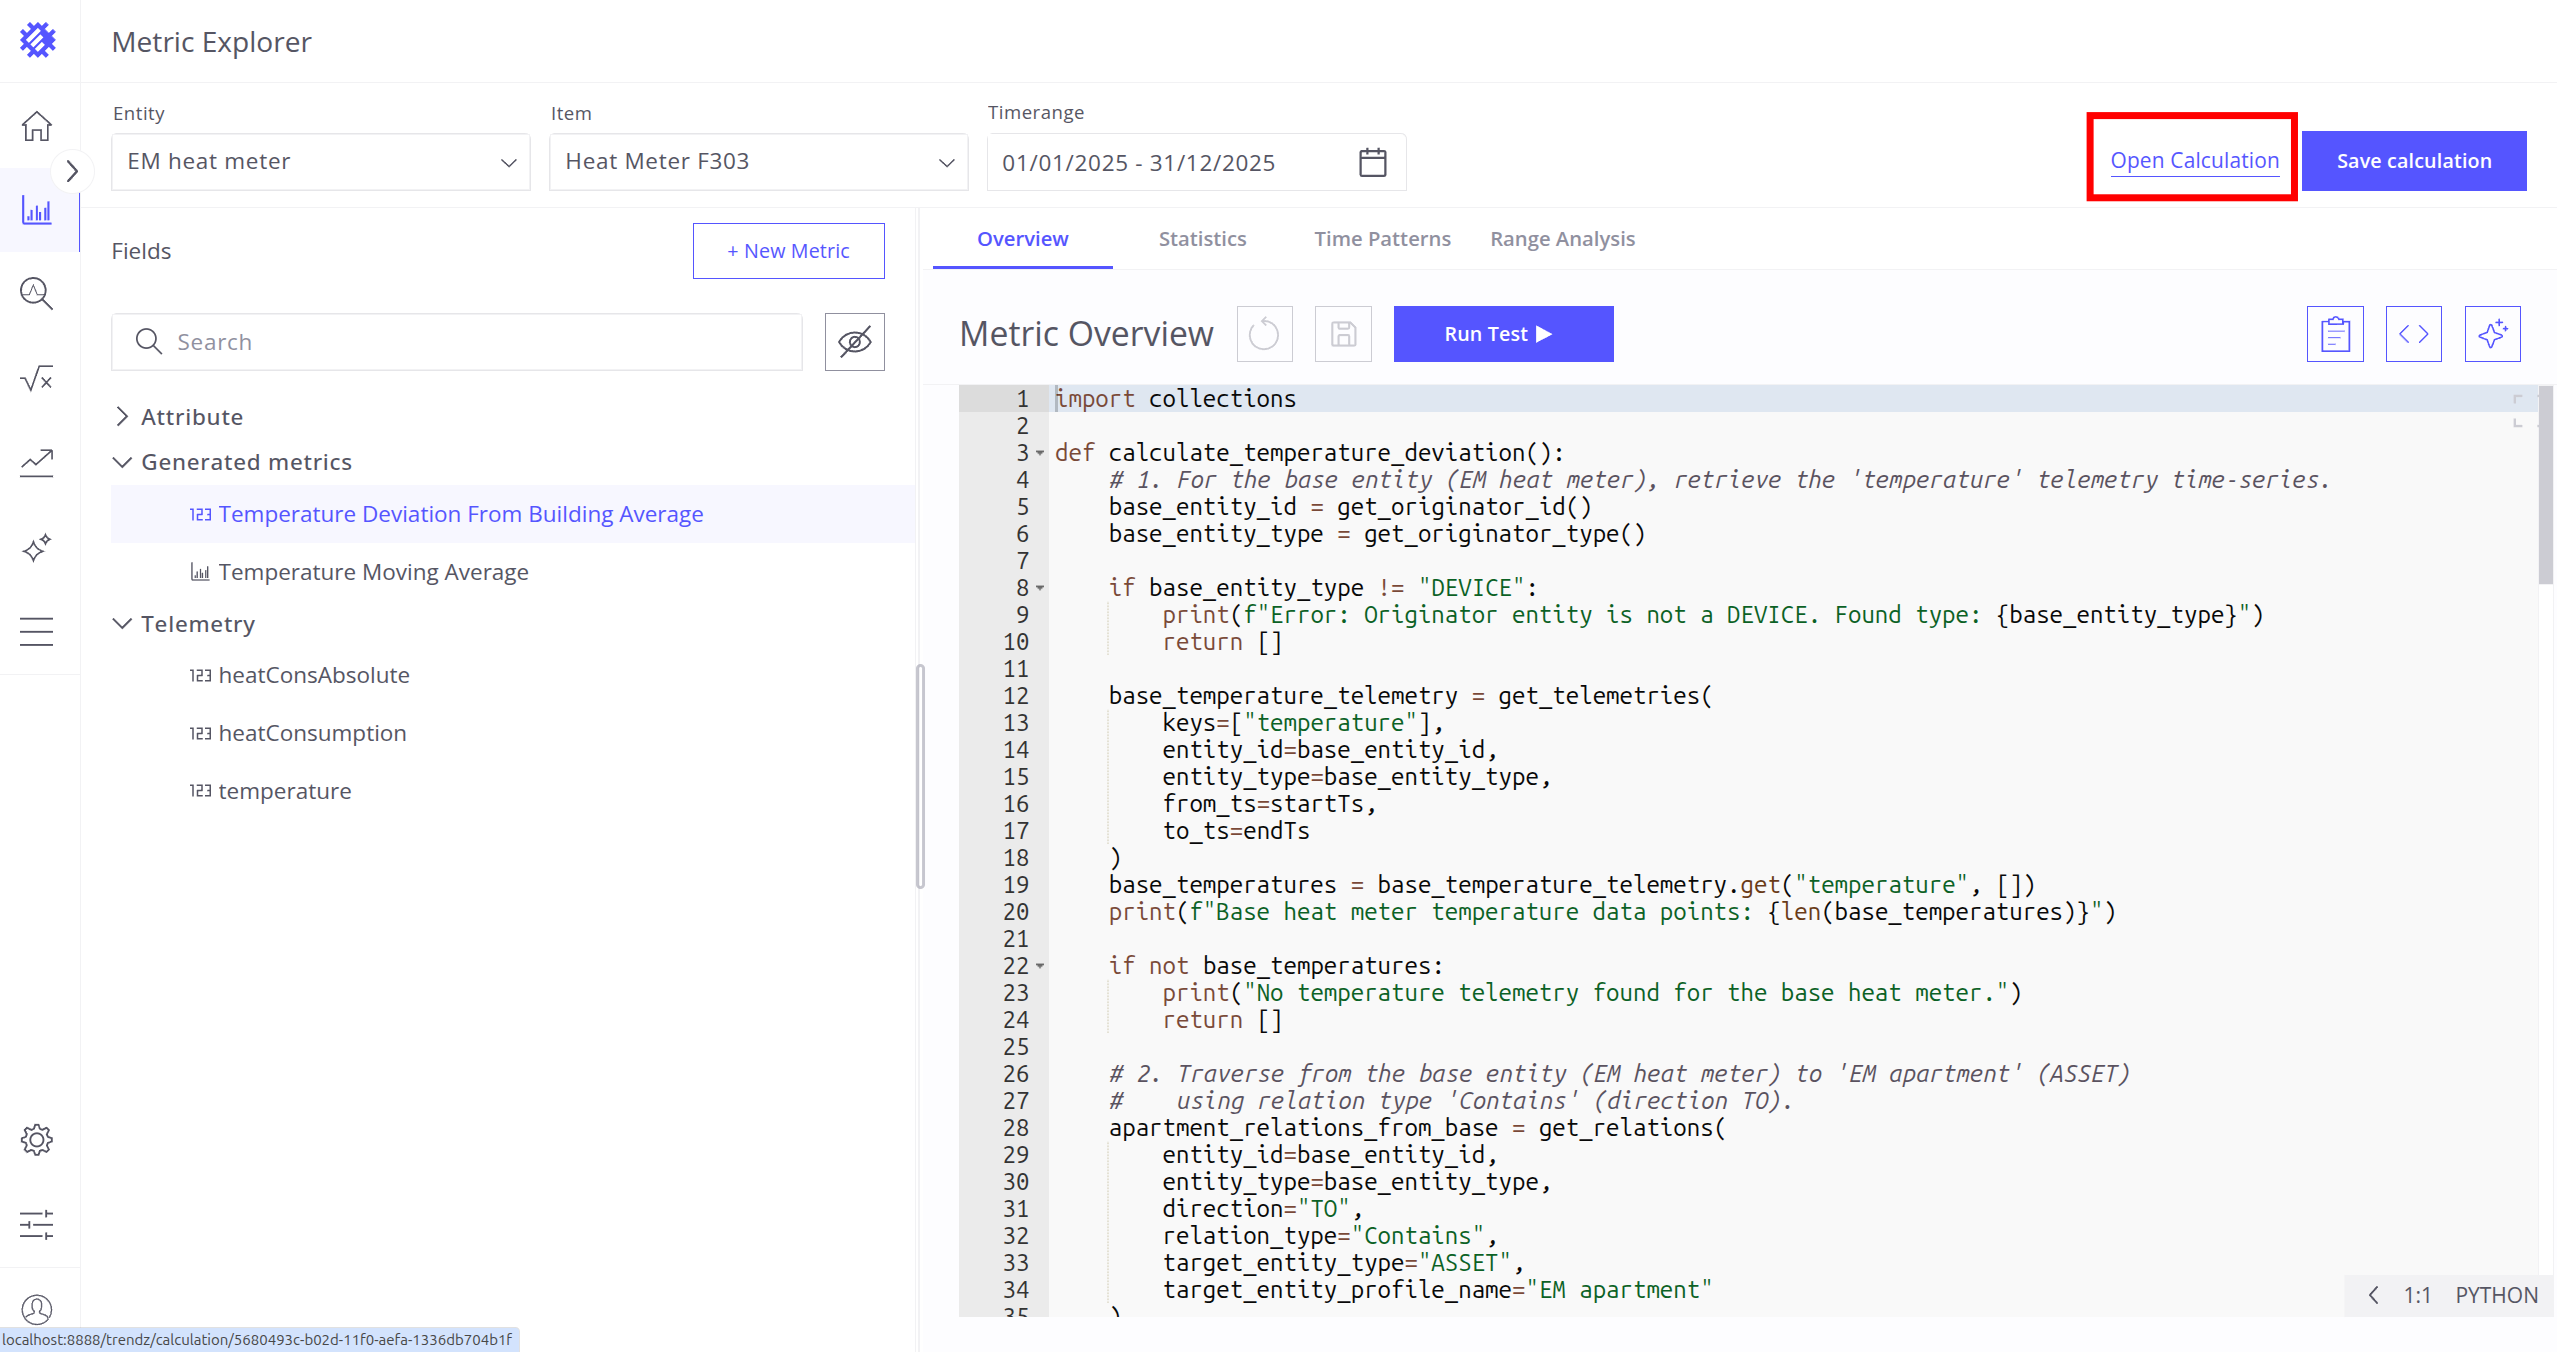
If the code of the associated Calculation Field was modified, you will see the warning “Calculation field is not synced with the metric”. If the metric itself was changed, you will see the warning “Calculation field is outdated and needs to be updated”.

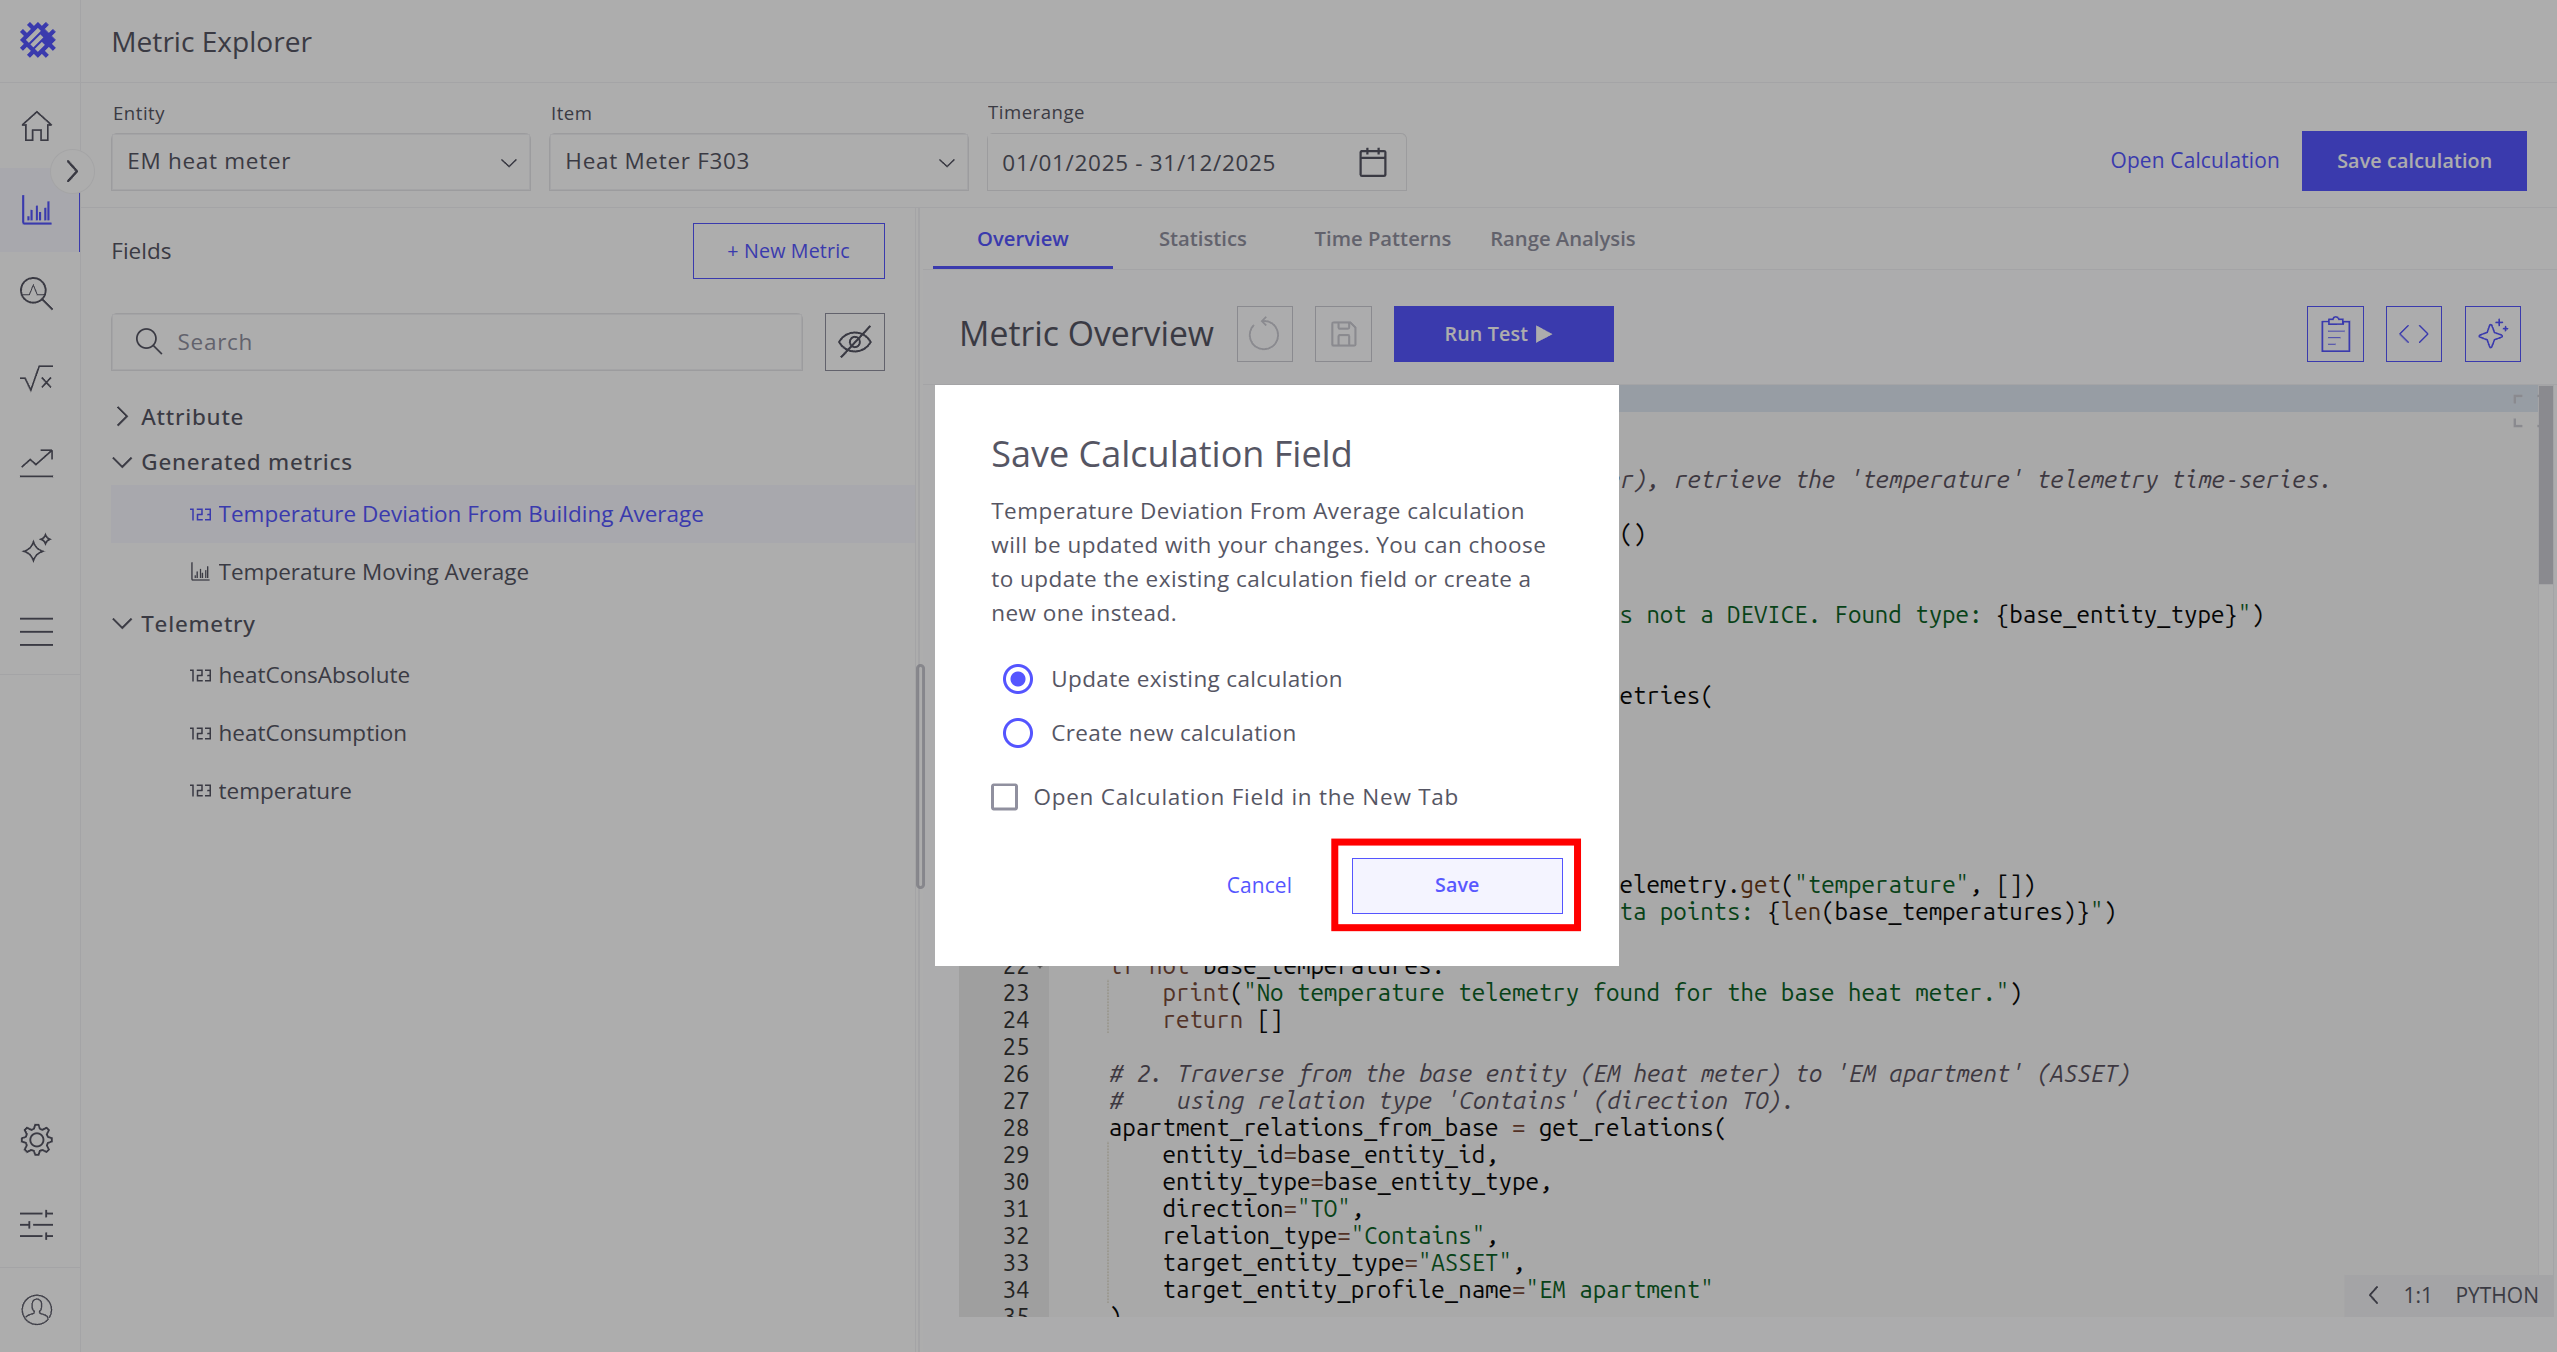
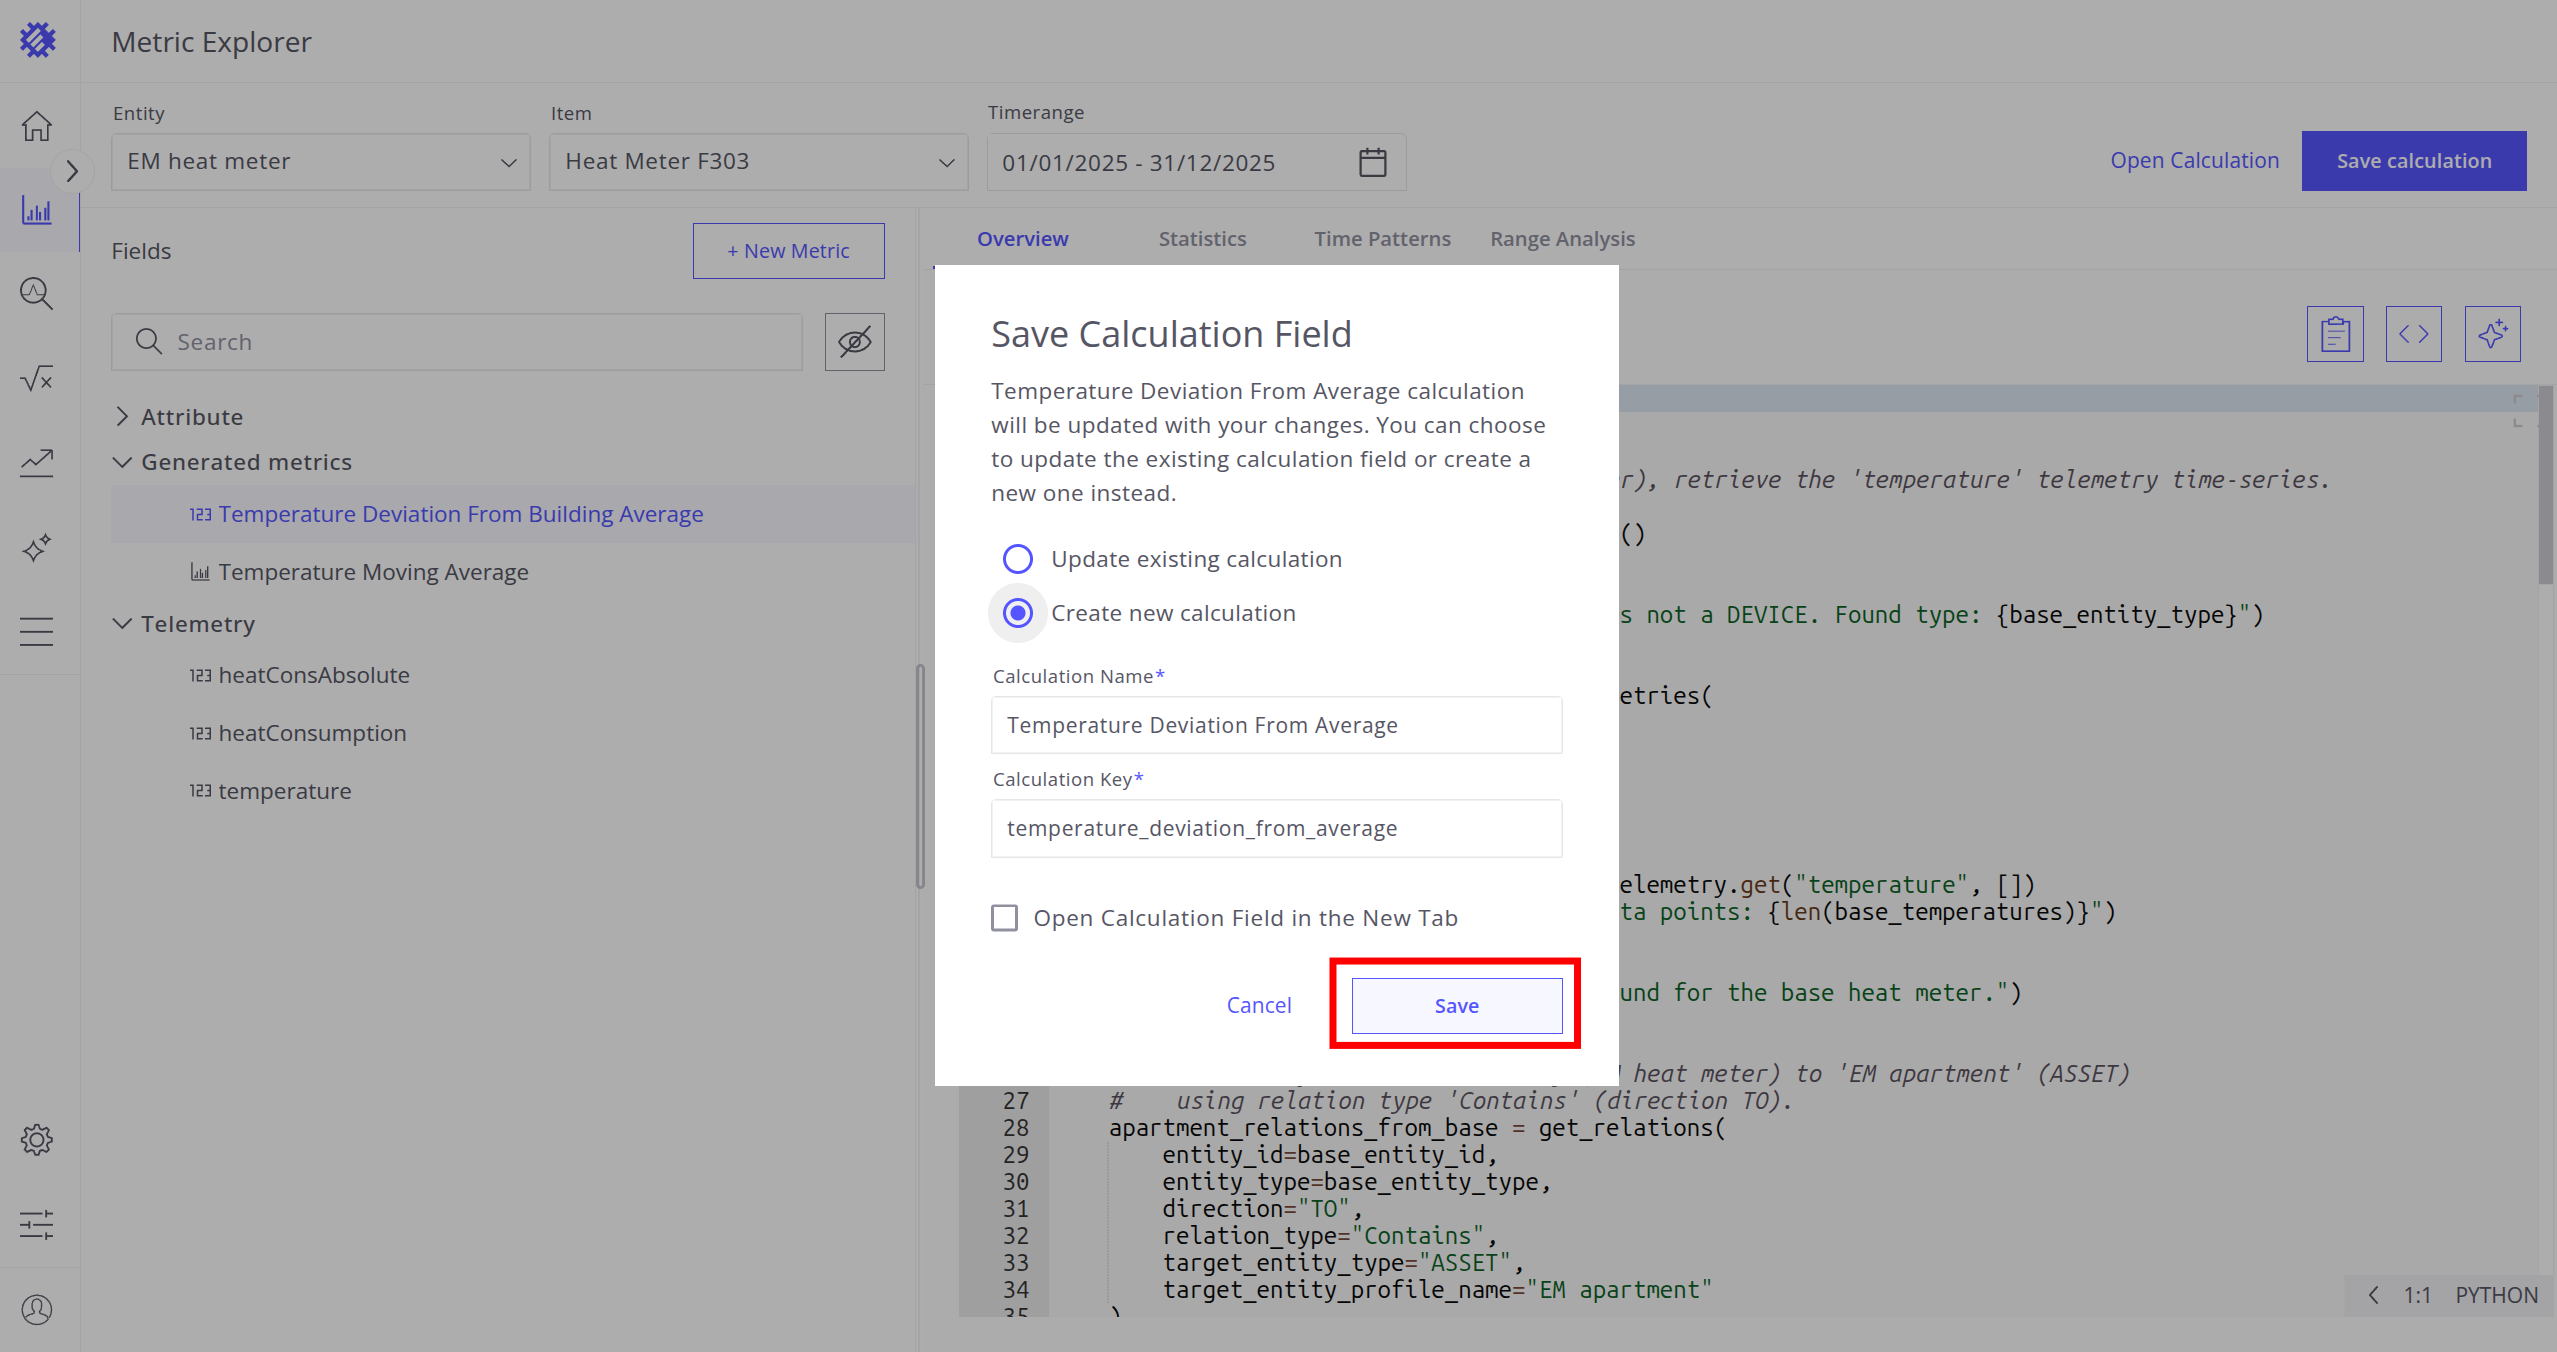
To update the associated Calculation Field or create a new one:
- Click the Save calculation button.
- Choose Update existing calculation and click Save to update the associated Calculation Field.
- Choose Create new calculation and click Save to create a new Calculation Field.
If the Create new calculation option is selected, the metric will now be associated with the newly created Calculation Field.
Other Actions
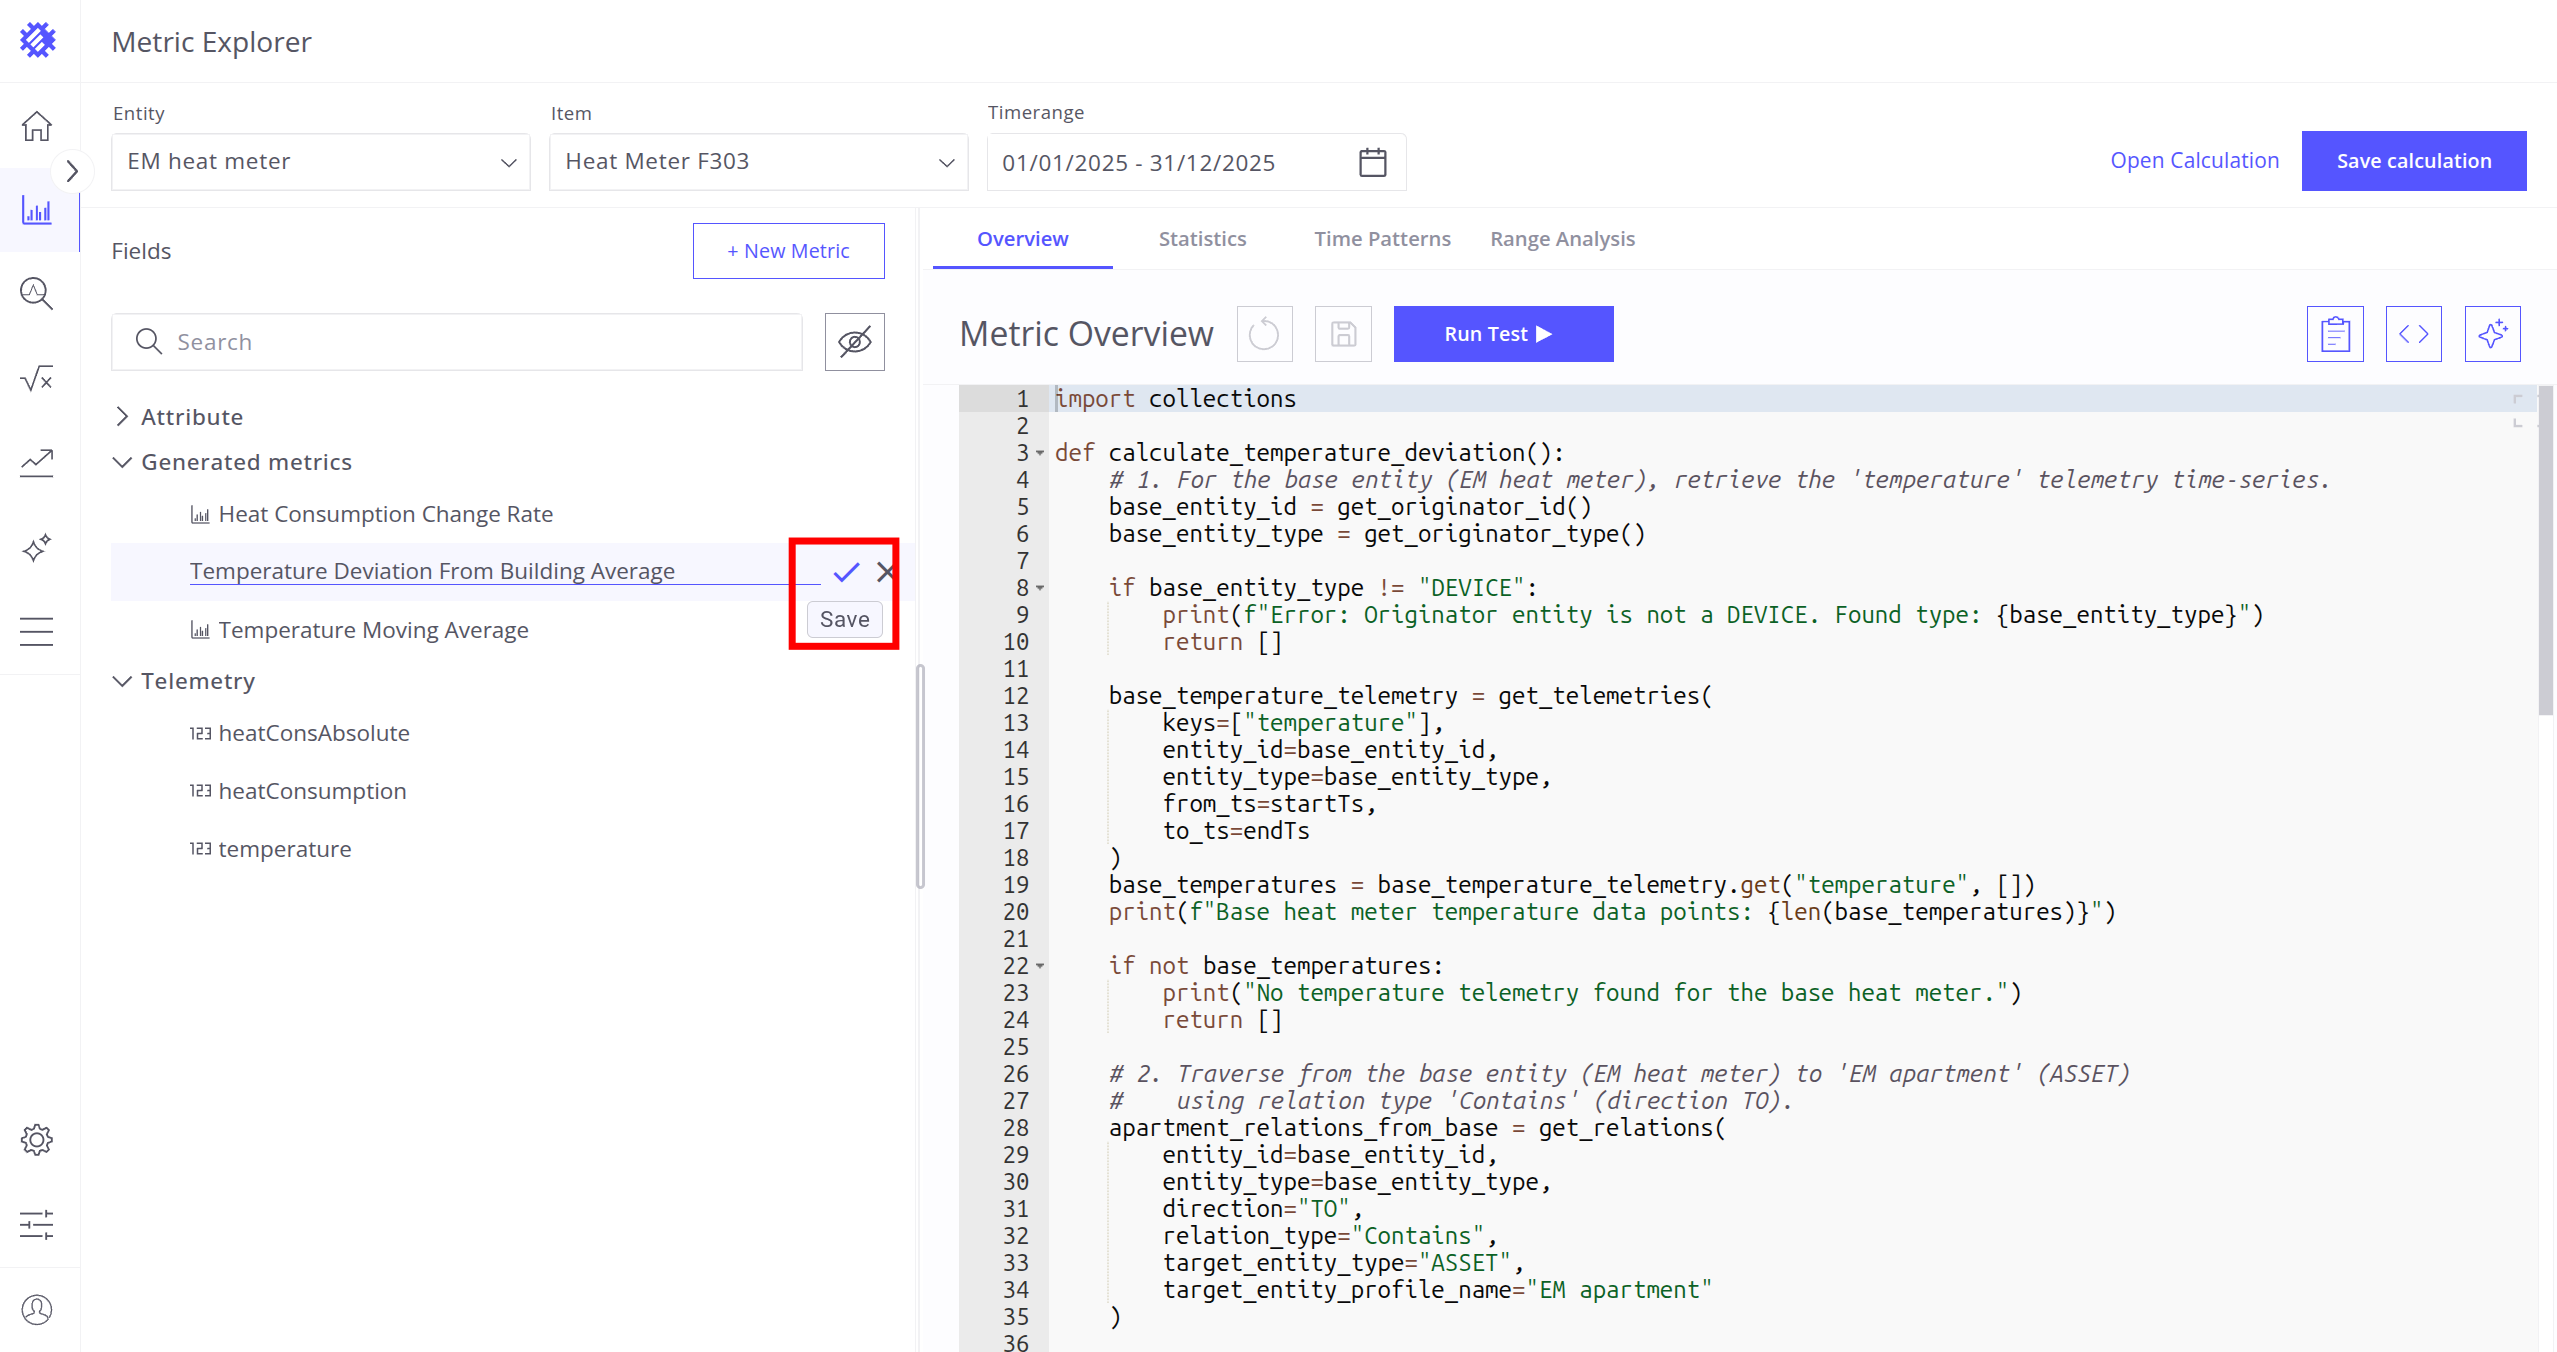
To rename a metric:
- Click the Change Name button next to the metric name.
- Enter a new name.
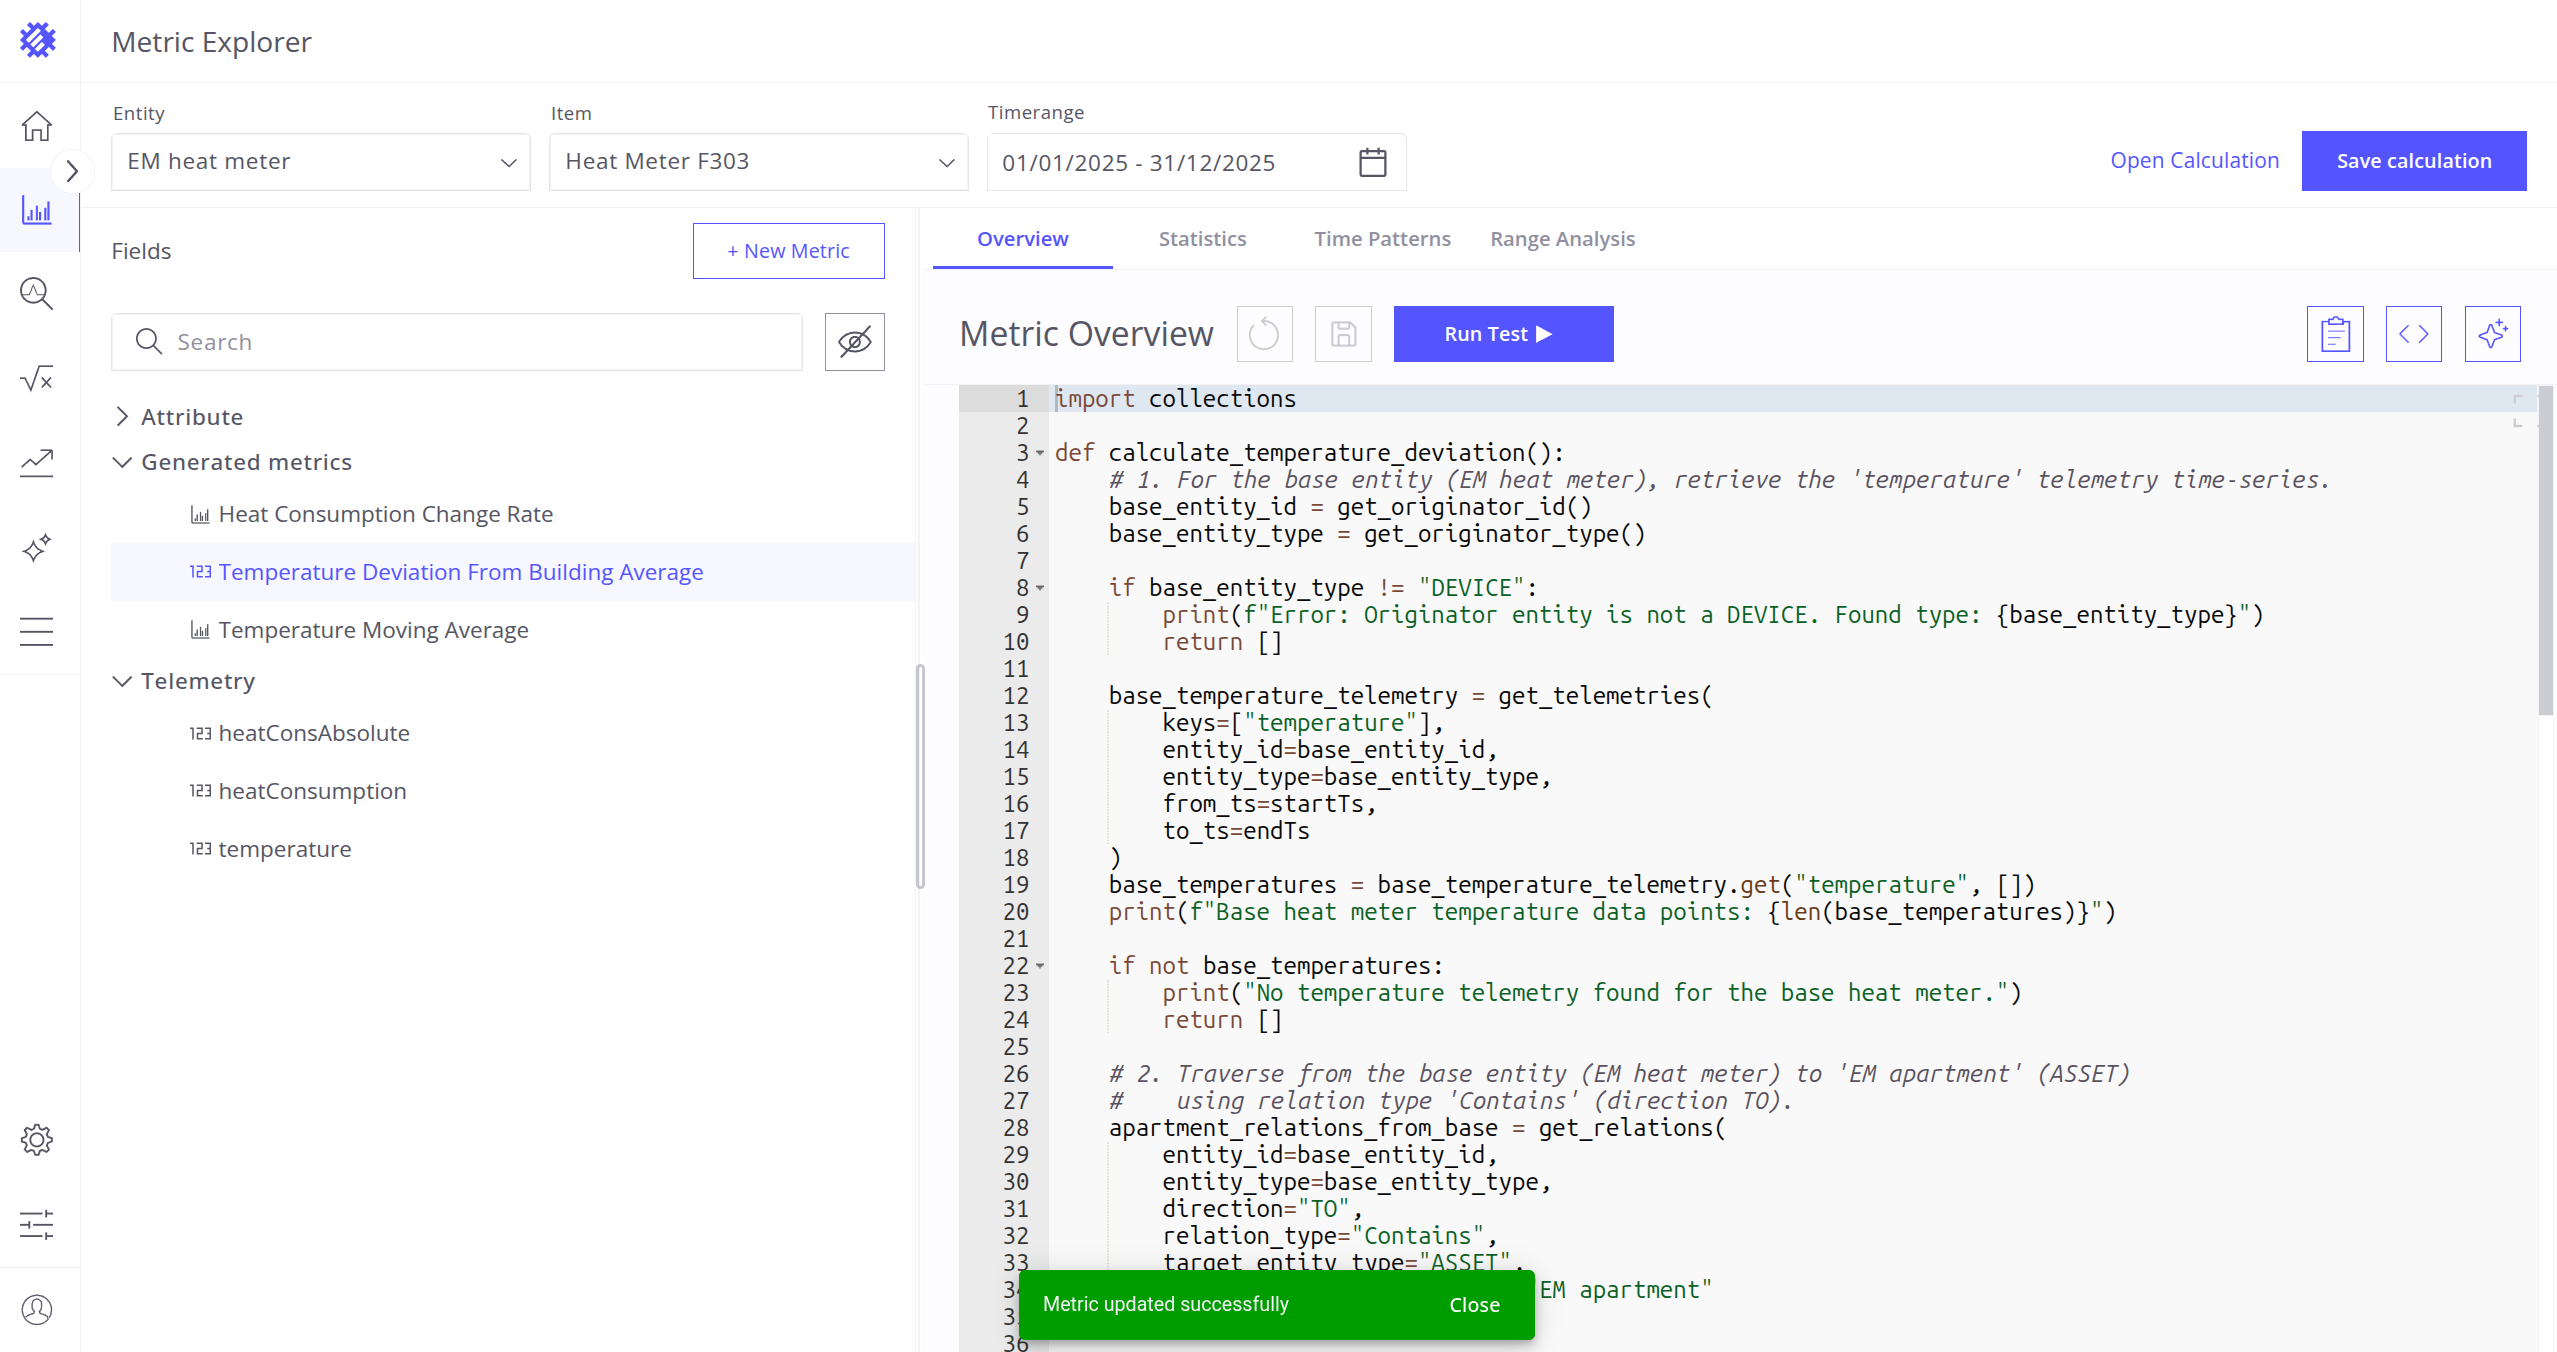
- Click Save.

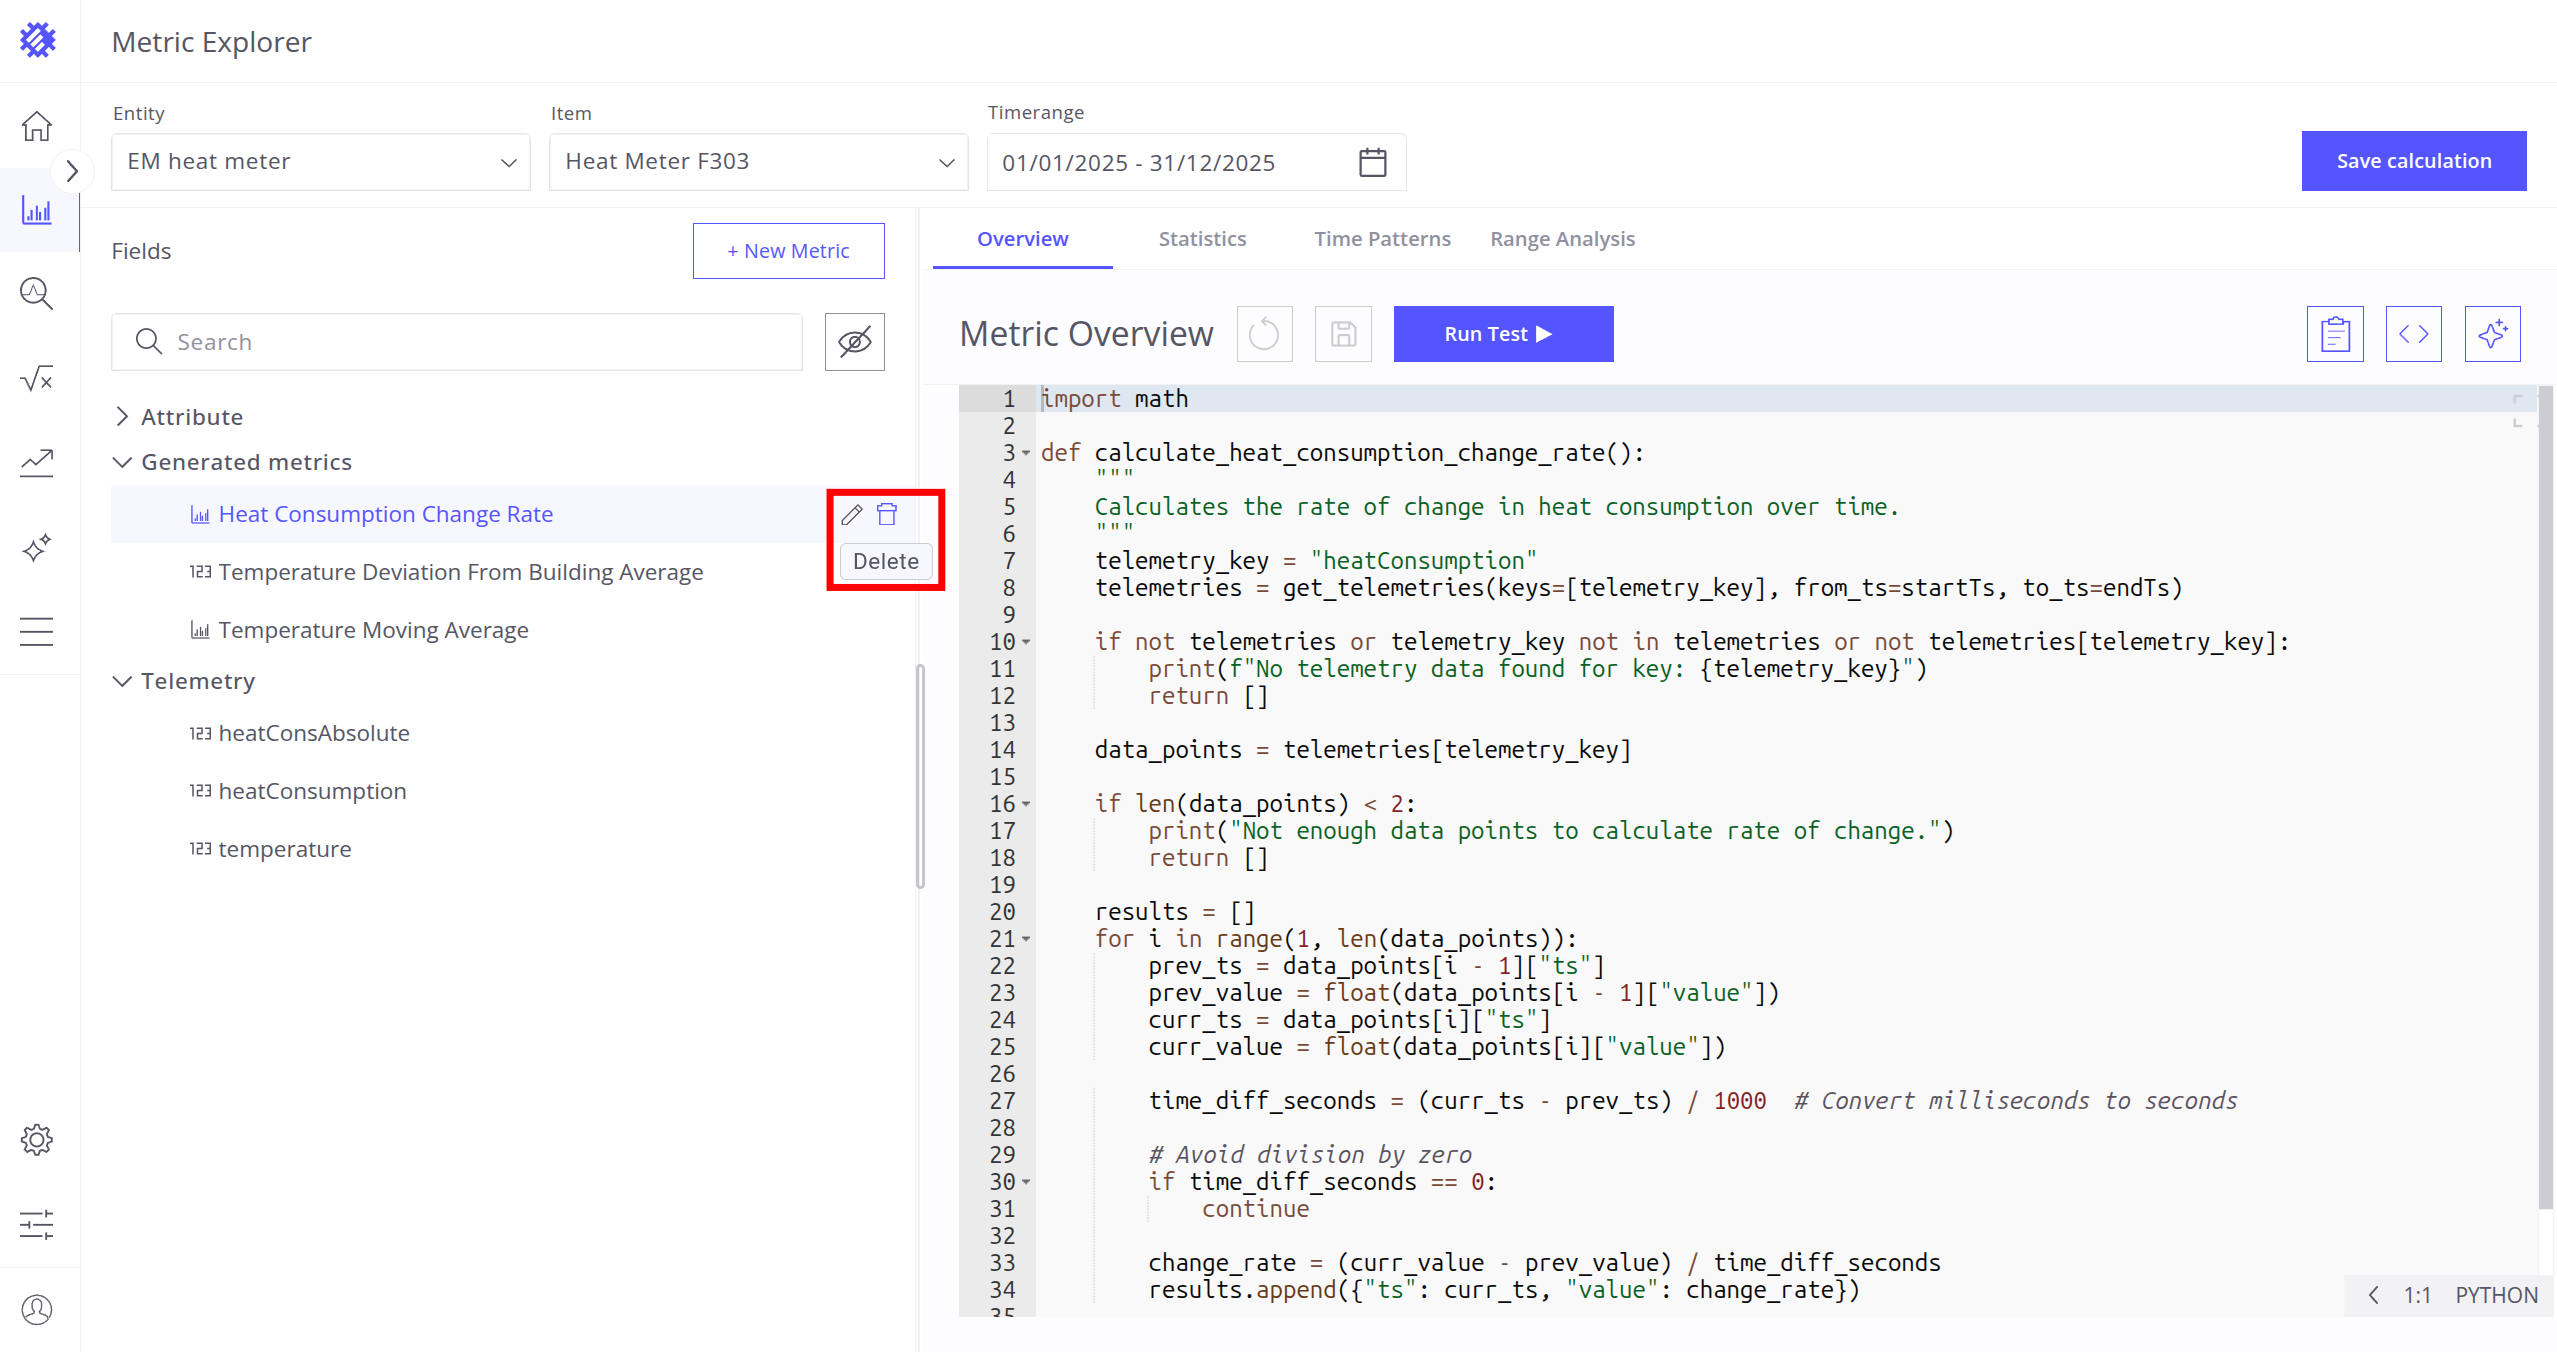
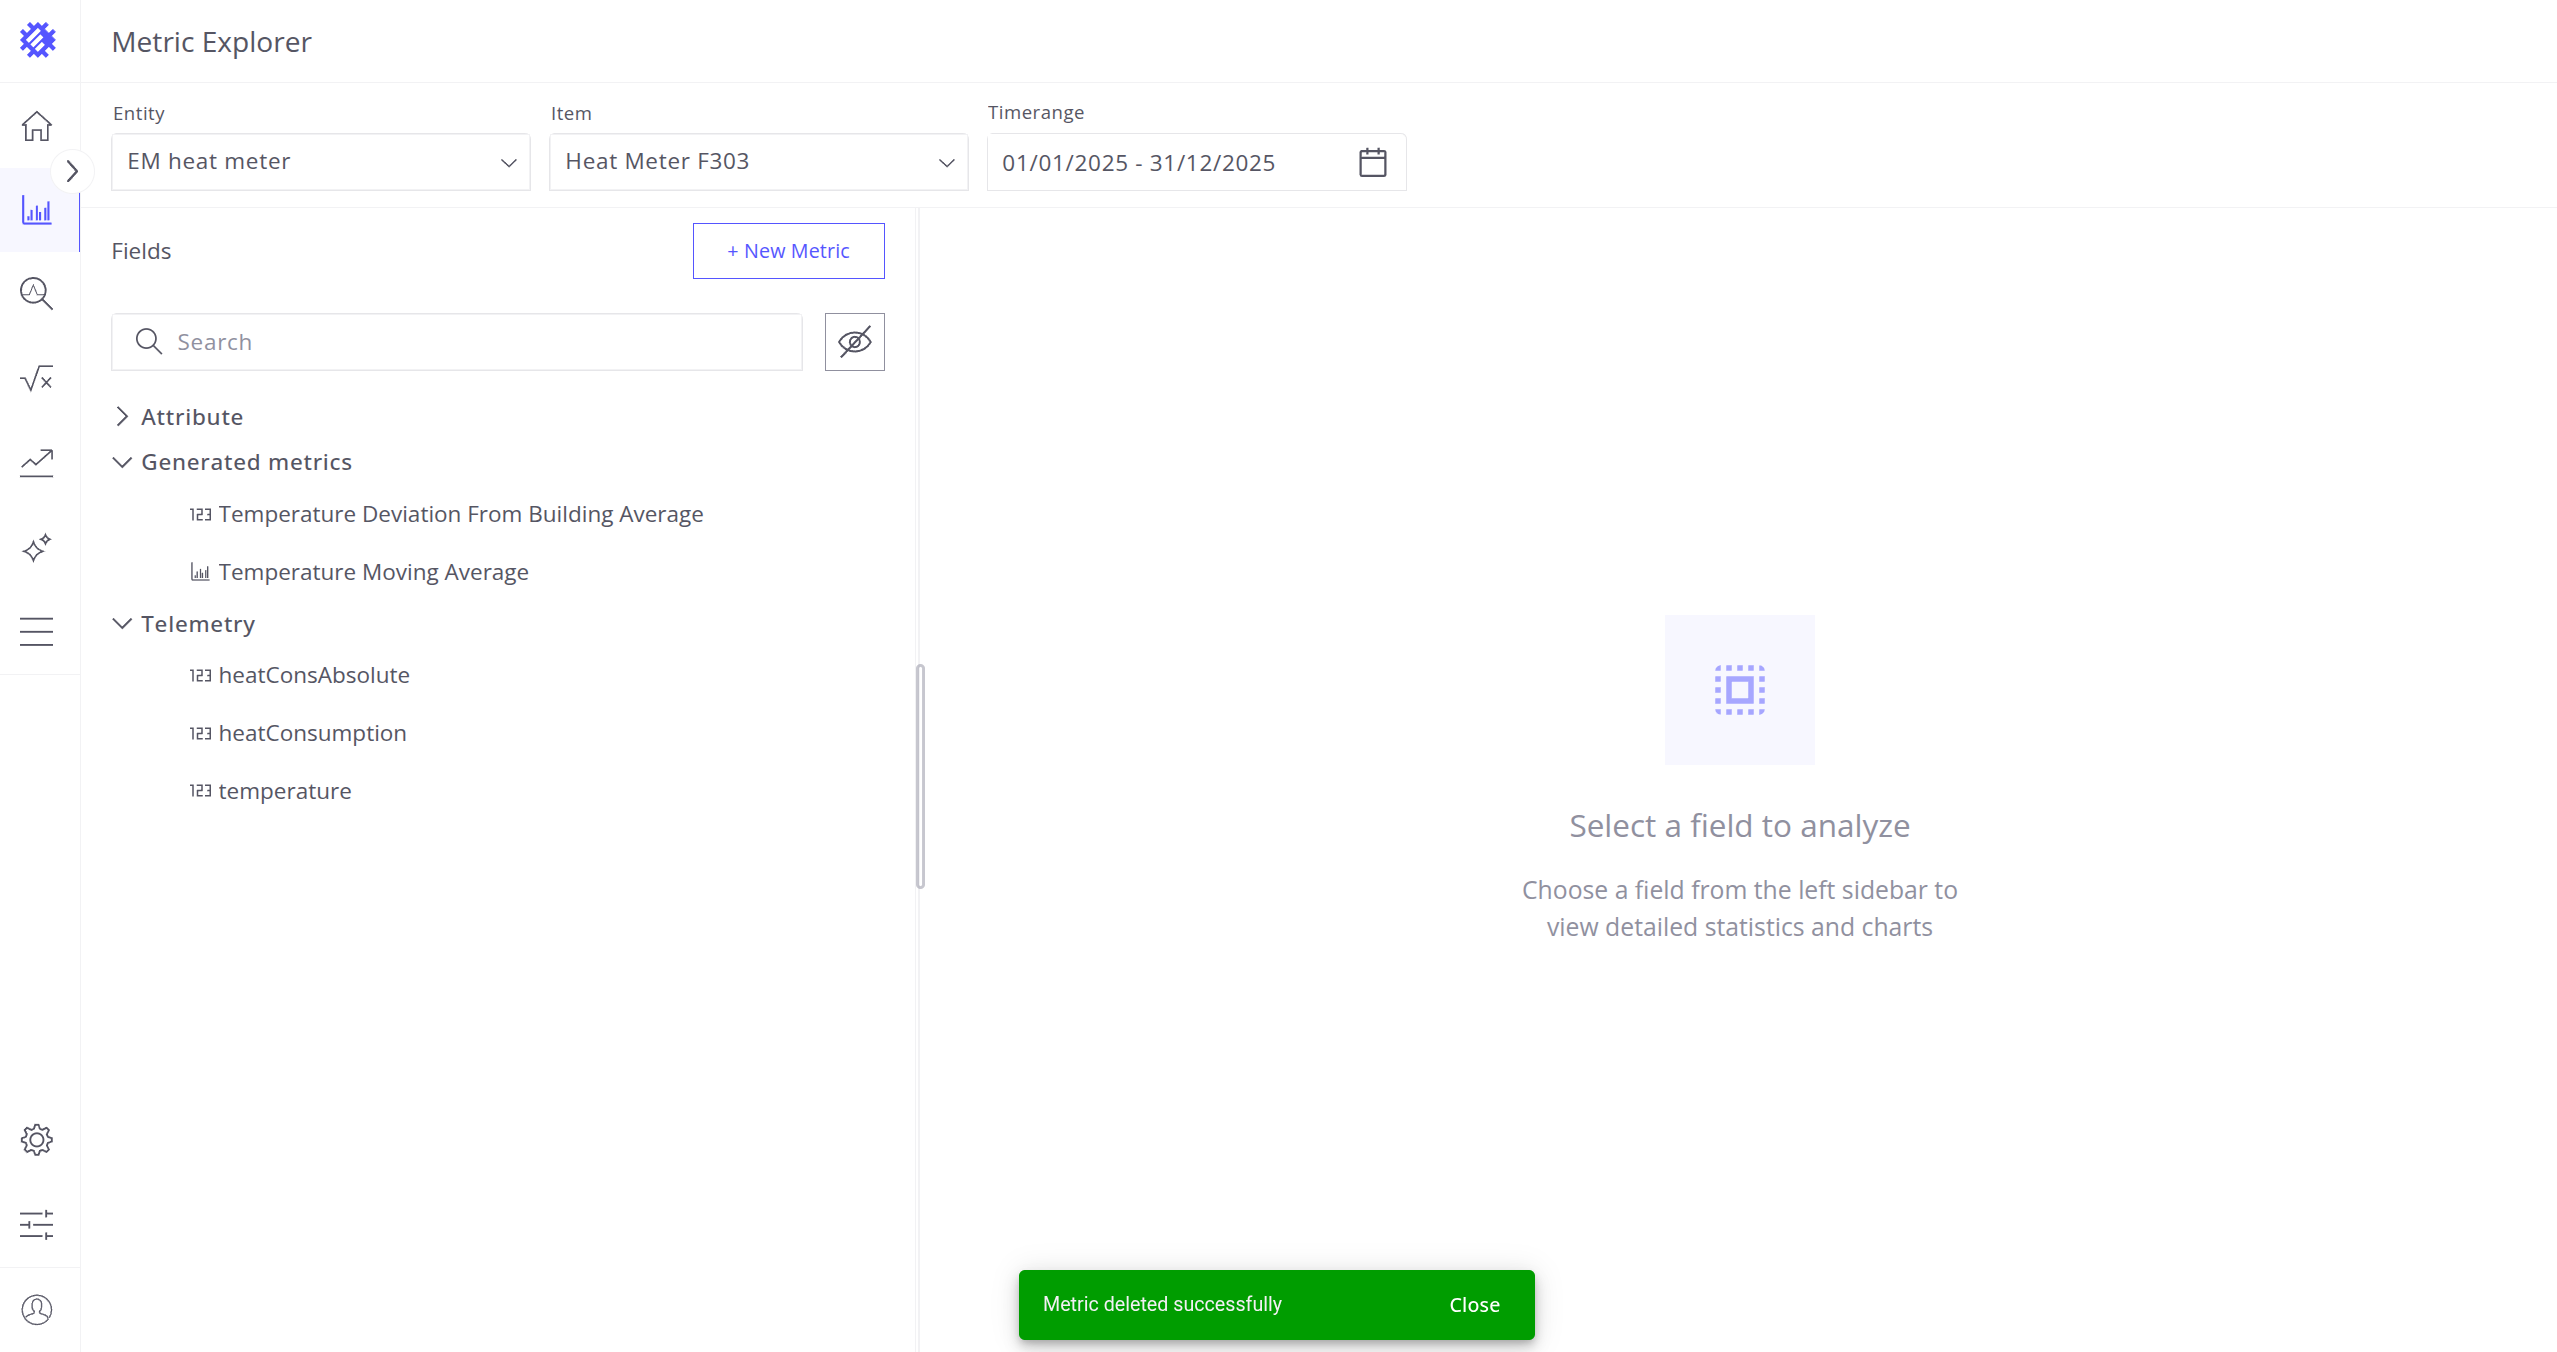
To delete a metric:
- Click the Delete button next to the metric name.
- Click Delete again to confirm.

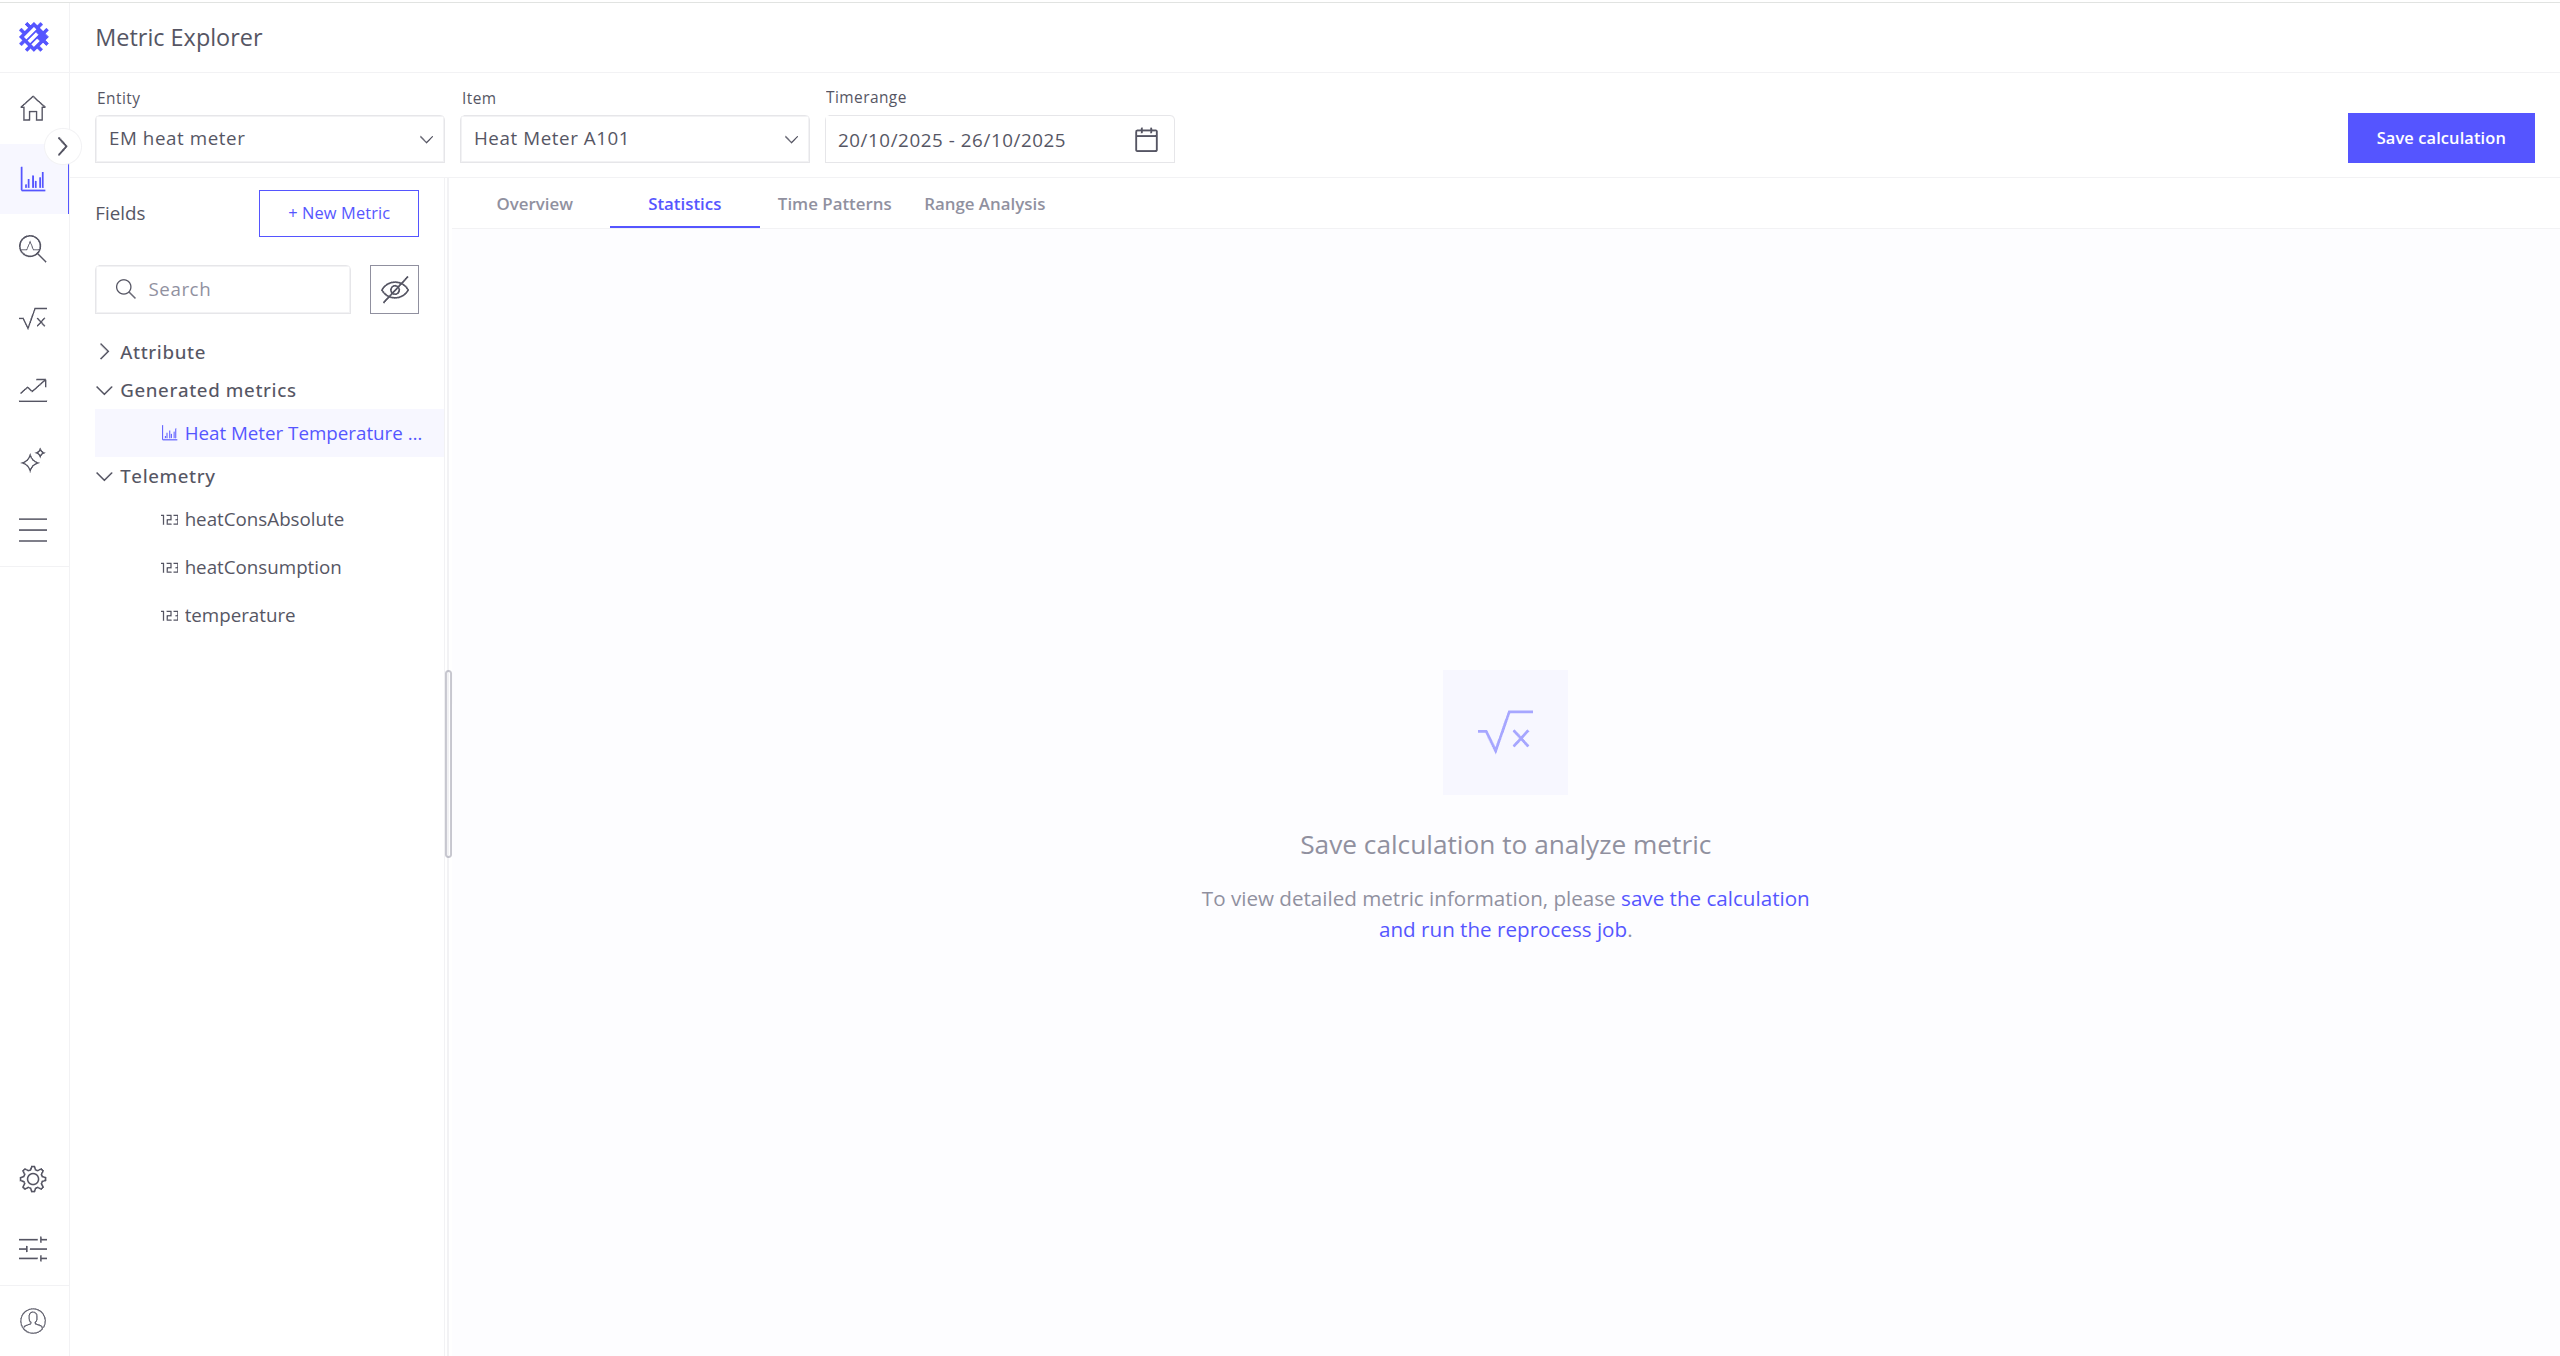
Tabs Section
It’s possible to see Statistics, Time Patterns, and Range Analysis for a generated metric only if it has a corresponding Native Calculation, for which telemetry data is present in ThingsBoard for the chosen time range.
If a Native Calculation isn’t created for the chosen metric, you will be prompted to create a Calculation Field from it.
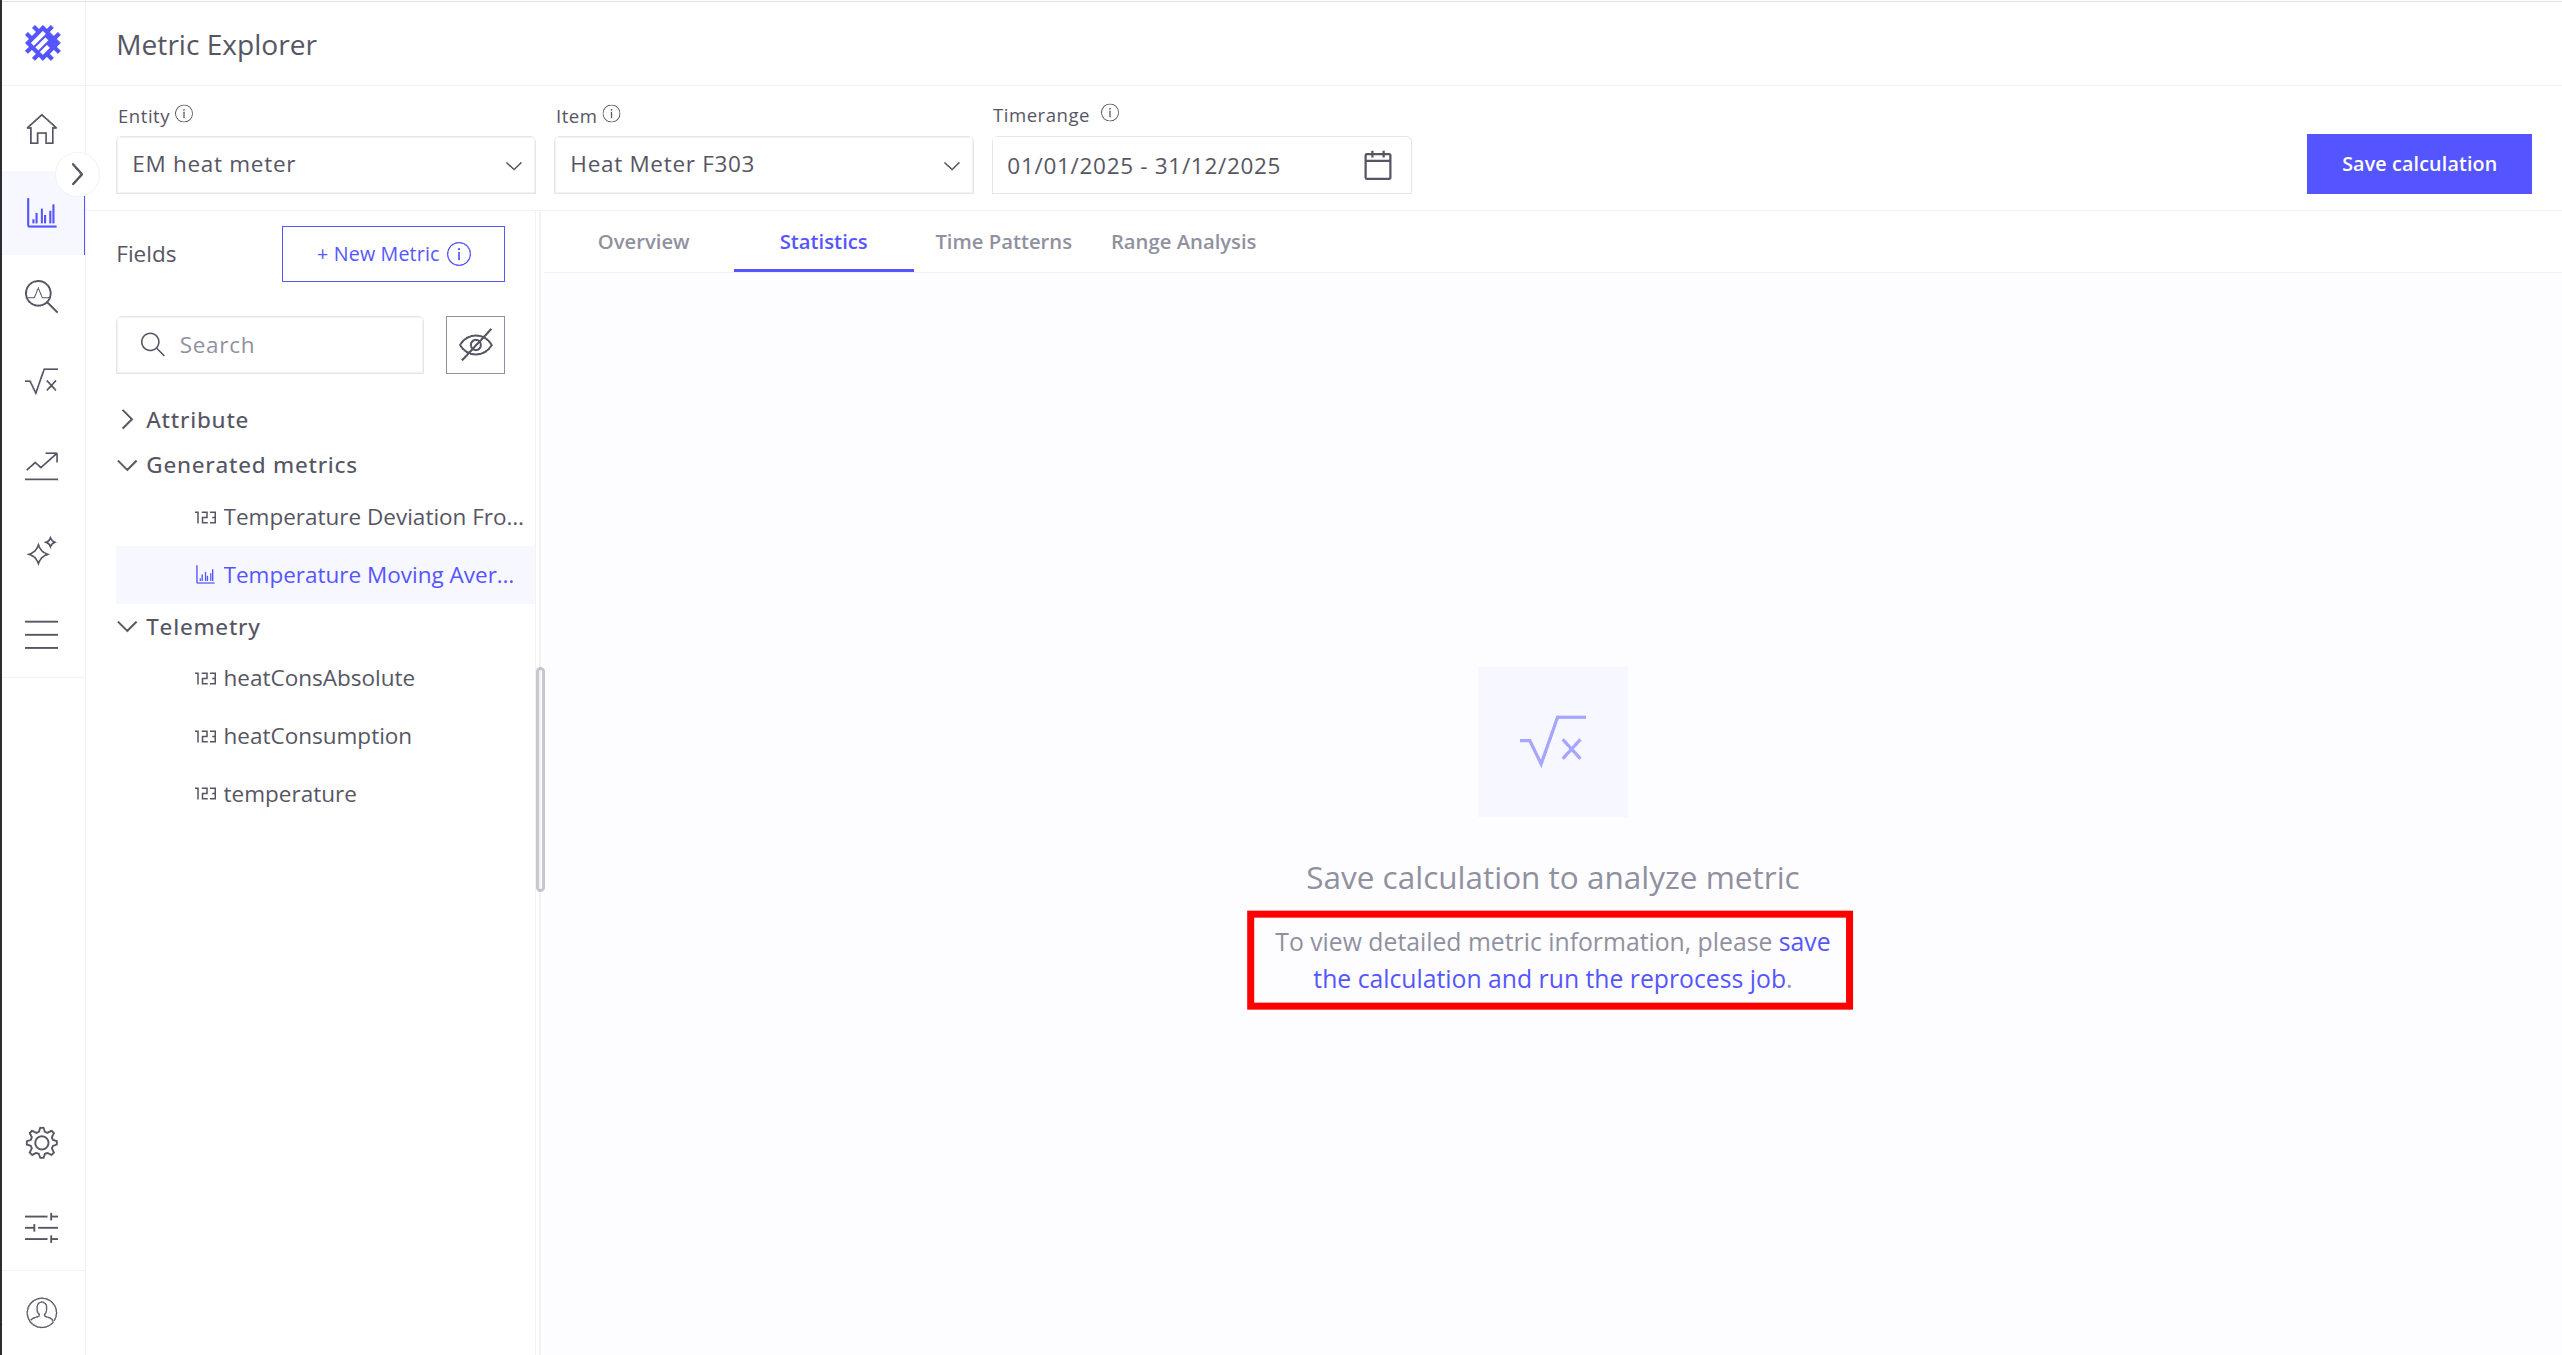
If a Native Calculation was created from the chosen metric but has no points in the selected time range, you will be prompted to run a reprocess job to save data points to ThingsBoard.
Once telemetry is saved to ThingsBoard, you can check the generated data on each tab.

Read more about these tabs here.
For detailed instructions on saving telemetries to ThingsBoard, follow the guide.
Best Practices
- If you need to create a specific metric, use AI to create it in Manual mode.
- If generated code isn’t working: check logs, verify relations.
- If generated code fails by timeout: increase it for the Python Executor or check how often
get_telemetriesis called. If it’s called in a loop, ask AI to call it once per device. This can improve performance. You can also decrease the time range to reduce the number of analyzed points. - Give clear instructions to AI - not just “Fix my code,” but point out the cause of the bug.
- Save your work regularly using the Save button.
- You can ask AI to create code with more comments to explain what each part does or ask it to remove them to make the code more readable. You can also ask it to add more logs for better debugging in the logs section.
Next Steps
-
Getting started guide - These guide provide quick overview of main Trendz features.
-
Installation guides - Learn how to setup ThingsBoard on various available operating systems.
-
Anomaly Detection - Learn how to identify anomalies in the data.
-
Calculated Fields - Learn about Calculated fields and how to use them.
-
States - Learn how to define and analyse states for assets based on raw telemetry.
-
Prediction - Learn how to make forecasts and predict telemetry behavior.
-
Filters - Learn how filter dataset during analysis.
-
Available Visualizations - Learn about visualization widgets available in Trendz and how to configure them.
-
Share and embed Visualizations - Learn how to add Trendz visualizations on ThingsBoard dashboard or 3rd party web pages.
-
AI Assistant - Learn how to utilize Trendz AI capabilities.