- Introduction
- List of hardware
- Wiring
- Device provisioning
- Provision your dashboard
- Creating ESP32 firmware
- Troubleshooting
- Data visualization and GPIO control
- See also
- Your feedback
- Next steps
Introduction
ThingsBoard is an open-source server-side platform that allows you to monitor and control IoT devices. It is free for both personal and commercial usage and you can deploy it anywhere. If this is your first experience with the platform we recommend to review what-is-thingsboard page and getting-started guide.
ESP32 is a series of low-cost, low-power system-on-a-chip microcontrollers with integrated self-contained Wi-Fi and dual-mode Bluetooth. ESP32 is a successor of ESP8266 chip.
This sample application will allow you to control GPIO of your ESP32 device using ThingsBoard web UI and display humidity/temperature data from DHT22 sensor. We will observe GPIO control using LEDs connected to the pins. The purpose of this application is to demonstrate ThingsBoard RPC capabilities and ThingsBoard Telemetry.
The application that is running on ESP32 is written using ThingsBoard Arduino SDK which is quite simple and easy to understand.
Current GPIO state and GPIO control widget is visualized using built-in customizable dashboard.
Once you complete this sample/tutorial, you will see your sensor data on the following dashboard.

List of hardware

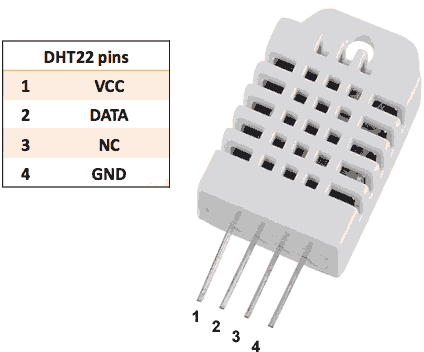
- 6 LEDs
- 6 Resistors in range between 68Ω and 100Ω
- Breadboard
- Micro-USB cable
Wiring
DHT22 connection
| Pin | Connect to |
|---|---|
| DHT22 VCC | Pico 5V |
| DHT22 DATA | Pico 33 |
LEDs connection
| Pin | Connect to |
|---|---|
| LED1 Anode | Pico 32 trough resistor (68Ω - 100Ω) |
| LED2 Anode | Pico 26 trough resistor (68Ω - 100Ω) |
| LED3 Anode | Pico 25 trough resistor (68Ω - 100Ω) |
| LED4 Anode | Pico 19 trough resistor (68Ω - 100Ω) |
| LED5 Anode | Pico 22 trough resistor (68Ω - 100Ω) |
| LED6 Anode | Pico 21 trough resistor (68Ω - 100Ω) |
| All LEDs cathodes | Pico Ground |
Connection diagram
The following picture summarizes the connections for this project:

Device provisioning
This step contains instructions that are necessary to connect your device to ThingsBoard.
Open ThingsBoard Web UI (http://localhost:8080) in browser and login as tenant administrator. If you loaded the demo data during TB installation, the next credentials can be used:
- login: tenant@thingsboard.org
- password: tenant
Go to “Devices” section. Click “+” button and create a device with the name “ESP32 Pico Device”. Set “Device type” to “default”.

Once device created, open its details and click “Manage credentials”.
Copy auto-generated access token from the “Access token” field. Please save this device token. It will be referred to later as $ACCESS_TOKEN.

Provision your dashboard
Download the dashboard file using this link. Use import/export instructions to import the dashboard to your ThingsBoard instance.
Creating ESP32 firmware
Easiest way to program ESP32 Pico Kit is to use Arduino IDE. Following sections are describing that approach.
ESP32 and Arduino IDE setup
First you will need Arduino IDE and all related software installed.
Download and install Arduino IDE.
The Pico board support must be added to Arduino IDE before any program can be built and flashed into ESP32. To do so, install ESP32 package as described below:
-
Open Arduino IDE.
-
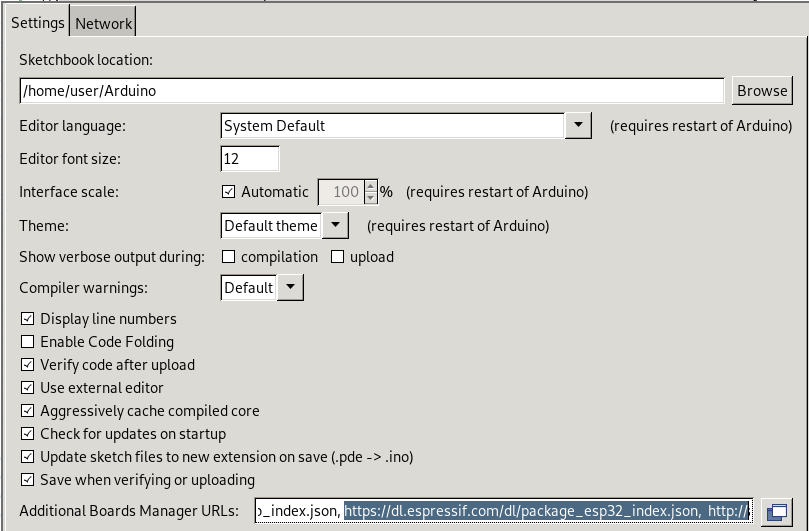
Open File -> Preferences menu, and add a board manager URLs
1
https://dl.espressif.com/dl/package_esp32_index.json,http://arduino.esp8266.com/stable/package_esp8266com_index.json
into Additional Boards Manager URL field, as shown below:
-
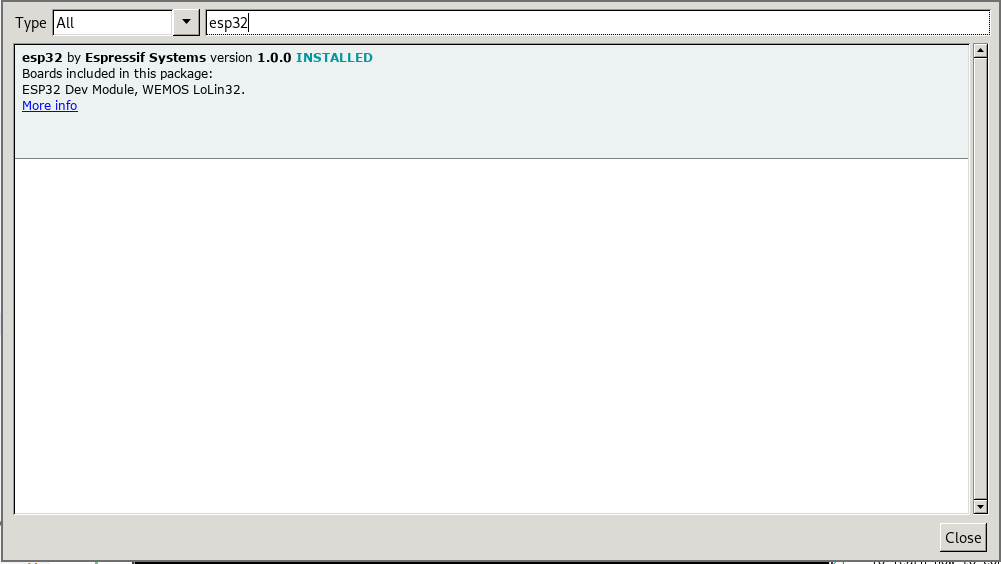
Select Tools -> Board… -> Board manager menu.
-
Enter ESP32 in the search field. Click Install
Install Arduino ThingsBoard SDK
To simplify application development, install the ThingsBoard Arduino SDK and its dependencies from standard Arduino library repository:
-
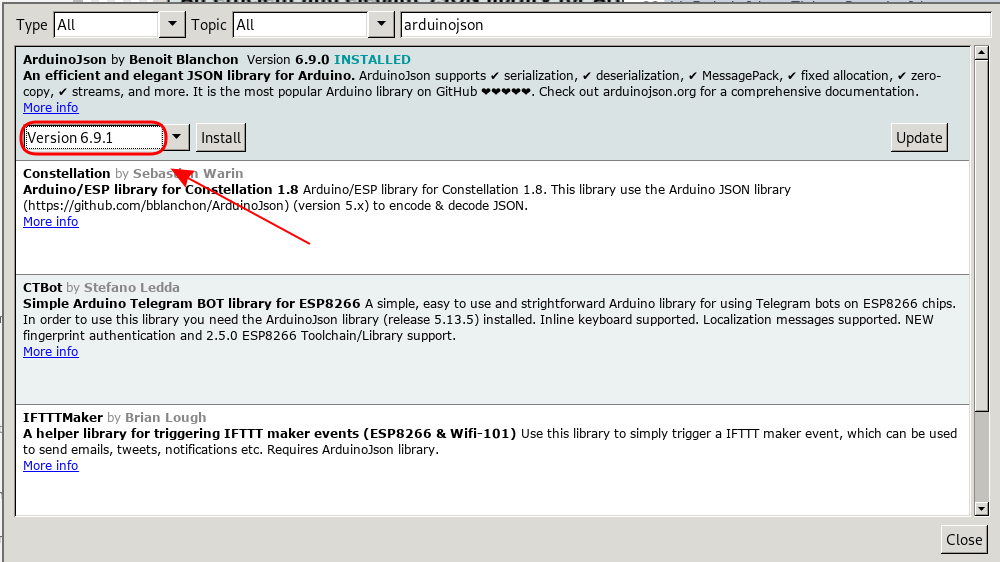
Proceed to Sketch -> Include Library… submenu. Select Manage Libraries.
-
Find and install ThingsBoard Arduino SDK, PubSubClient by Nick O’Leary and ArduinoHttpClient libraries.


-
Install ArduinoJSON library v6.9.1 or higher. Avoid installing beta releases of the ArduinoJson library.
From now on, you can use ThingsBoard SDK right from Arduino IDE.
Install ESP32 DHT22 driver
DHT22 sensor, connected to the ESP32 requires a special driver. To install it, proceed as follows:
-
Click on “Sketch” menu. Open “Include Library…” submenu. Select “Manage Libraries”.
-
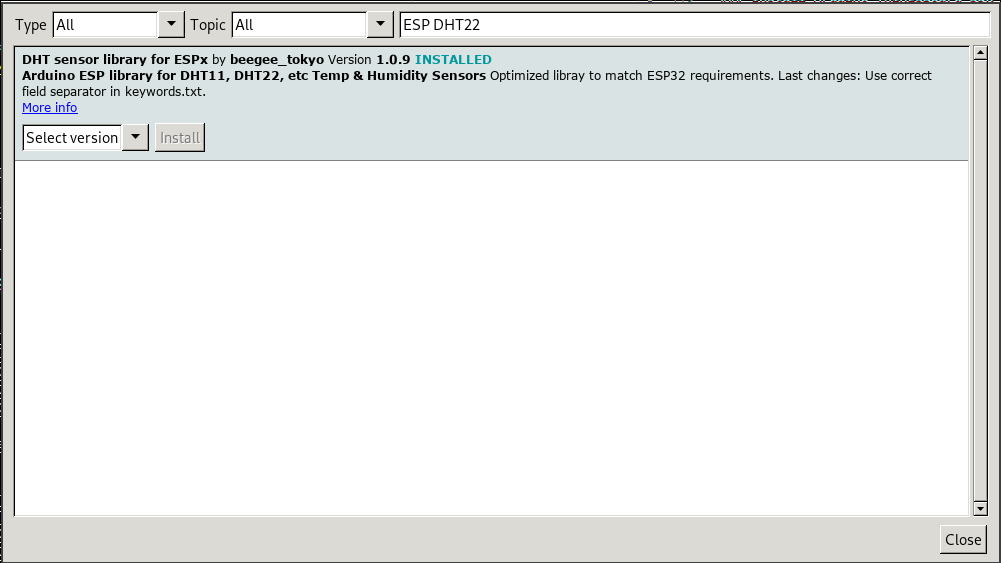
Type “ESP DHT22” in the search field.
-
Click install on “DHT22 Sensor Library for ESPx”, as shown below:
Connect ESP32 Pico to PC
ESP32 Pico Kit does not require a sophisticated connection. Just plug micro-USB cable into PC and Pico, this should be enough.
Prepare and upload sketch
Download and open esp32-dht-gpio.ino sketch.
Note You need to edit following constants and variables in the sketch:
WIFI_AP- name of your access pointWIFI_PASSWORD- access point passwordTOKEN- the $ACCESS_TOKEN from ThingsBoard configuration step.THINGSBOARD_SERVER- ThingsBoard HOST/IP address that is accessible within your wifi network. Specifydemo.thingsboard.ioif you are using live demo server.
|
Troubleshooting
In order to to perform troubleshooting, you must check ESP32 Pico logs. For that, simply open Serial Monitor in the Arduino IDE.
Data visualization and GPIO control
Finally, open ThingsBoard Web UI. You can access this dashboard by logging in as a tenant administrator.
In case of local installation (if the demo data was added during TB installation):
- login: tenant@thingsboard.org
- password: tenant
In case of live-demo server:
- login: your live-demo username (email)
- password: your live-demo password
See live-demo page for more details how to get your account.
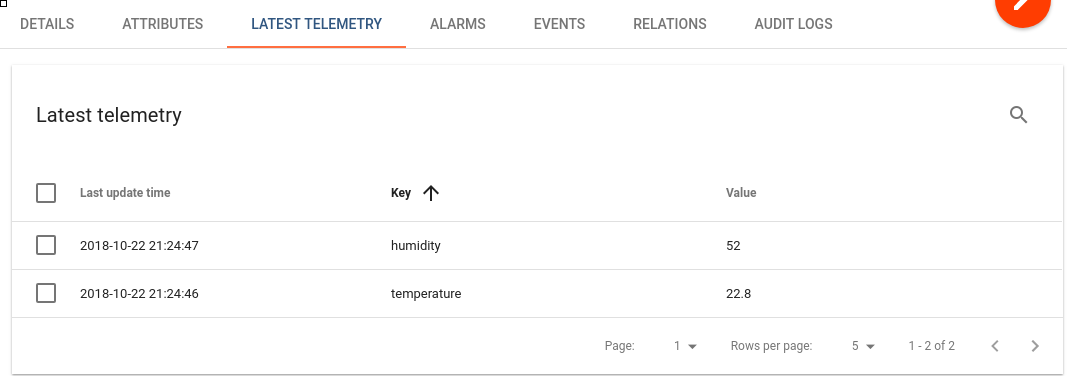
Go to “Devices” section and locate “ESP32 Pico Device”, open device details and switch to “Latest telemetry” tab. If all is configured correctly you should be able to see latest values of “temperature” and “humidity” in the table.
After, open “Dashboards” section then locate and open “ESP32 Pico Dashboard”. As a result, you will see a time-series chart displaying temperature and humidity level (similar to dashboard image in the introduction).
You should also observe a GPIO control for your device. It consists of two widgets: one is for controlling LED blink speed (in milliseconds) and second for turning individual LEDs on and off.
You can switch status of GPIOs using control panel. As a result, you will see LEDs status change on the device. To control LED blink speed, simply turn a knob and observe a speed change.
See also
Browse other samples or explore guides related to main ThingsBoard features:
- Device attributes - how to use device attributes.
- Telemetry data collection - how to collect telemetry data.
- Using RPC capabilities - how to send commands to/from devices.
- Rule Engine - how to use rule engine to analyze data from devices.
- Data Visualization - how to visualize collected data.
Your feedback
Don’t hesitate to star ThingsBoard on github to help us spread the word. If you have any questions about this sample - post it on the issues.
Next steps
-
Getting started guides - These guides provide quick overview of main ThingsBoard features. Designed to be completed in 15-30 minutes.
-
Connect your device - Learn how to connect devices based on your connectivity technology or solution.
-
Data visualization - These guides contain instructions on how to configure complex ThingsBoard dashboards.
-
Data processing & actions - Learn how to use ThingsBoard Rule Engine.
-
IoT Data analytics - Learn how to use rule engine to perform basic analytics tasks.
-
Advanced features - Learn about advanced ThingsBoard features.
-
Contribution and Development - Learn about contribution and development in ThingsBoard.