Only Professional Edition supports Platform Integrations feature.
Use ThingsBoard Cloud or install your own platform instance.
- Prerequisites
- Install smart device control application
- Tuya cloud configuration
- ThingsBoard integration configuration
- Rule Chain configuration
- Uplink message
- Tuya Smart Plug Dashboard
- Next steps
Tuya is an IoT platform that enables device manufacturers and solution providers to connect, manage, and control smart devices through the Tuya Cloud.
The Tuya Cloud Integration in ThingsBoard allows you to:
- Connect Tuya-managed devices to ThingsBoard
- Receive telemetry and device state updates
- Send control commands from ThingsBoard to Tuya devices
- Visualize device data and manage devices centrally
This guide describes how to configure an end-to-end integration using a real device - Tuya Smart Plug.
Also, you can use a virtual Tuya device for testing.
Prerequisites
Before starting, ensure you have:
- A ThingsBoard account with permission to create integrations
- A Tuya IoT Platform account
- At least one Tuya device (physical or virtual)
- Tuya Smart App installed and logged in
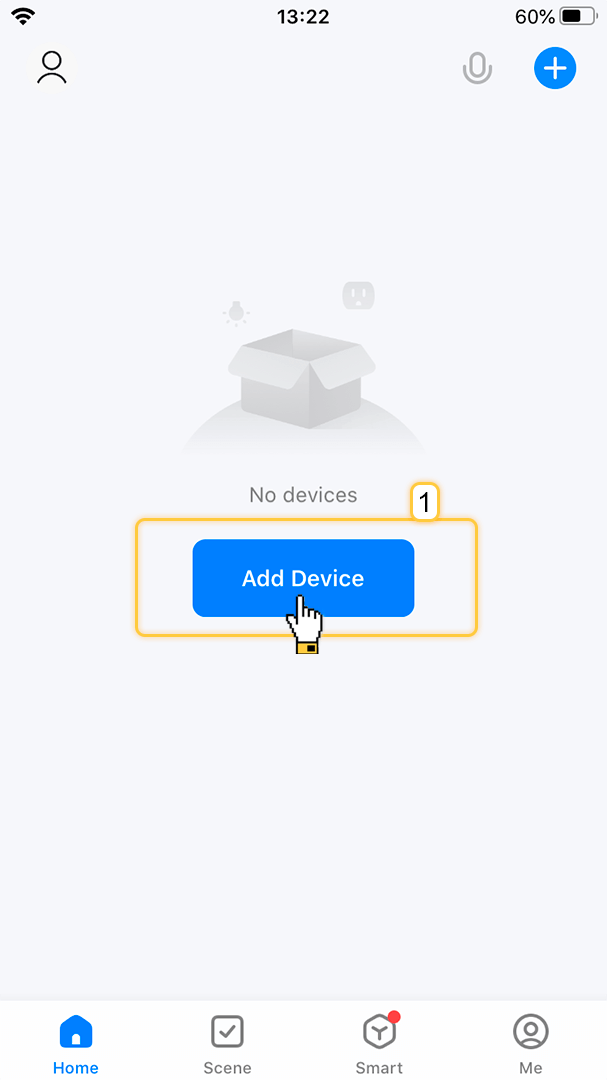
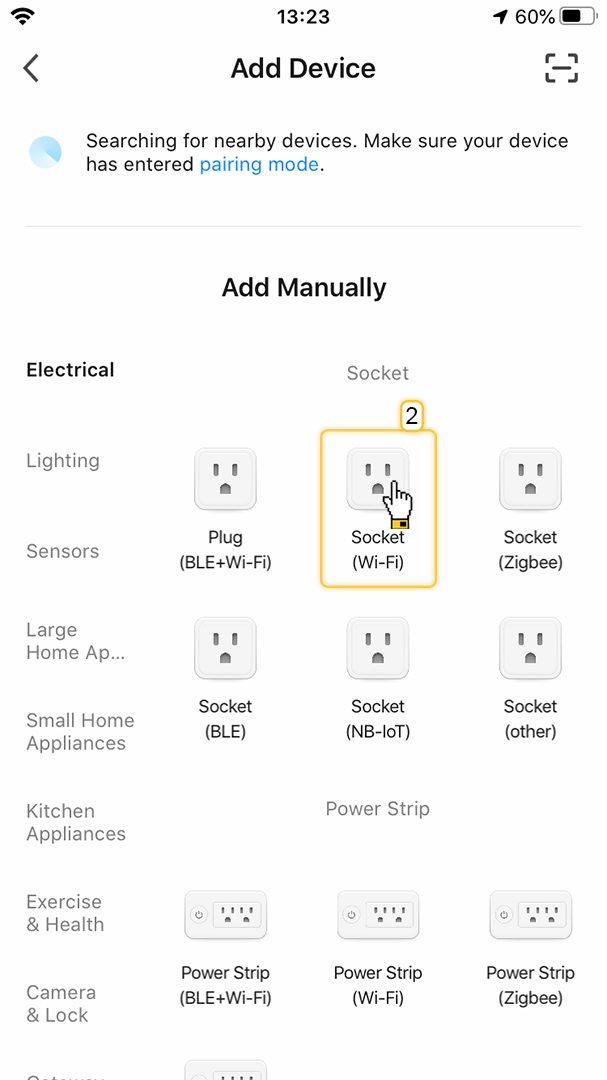
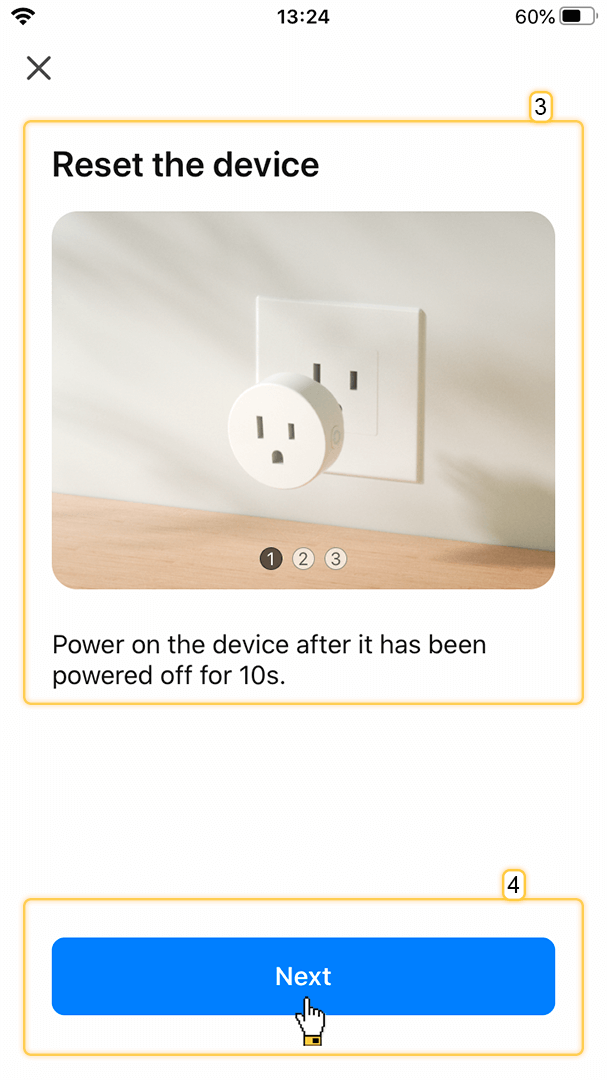
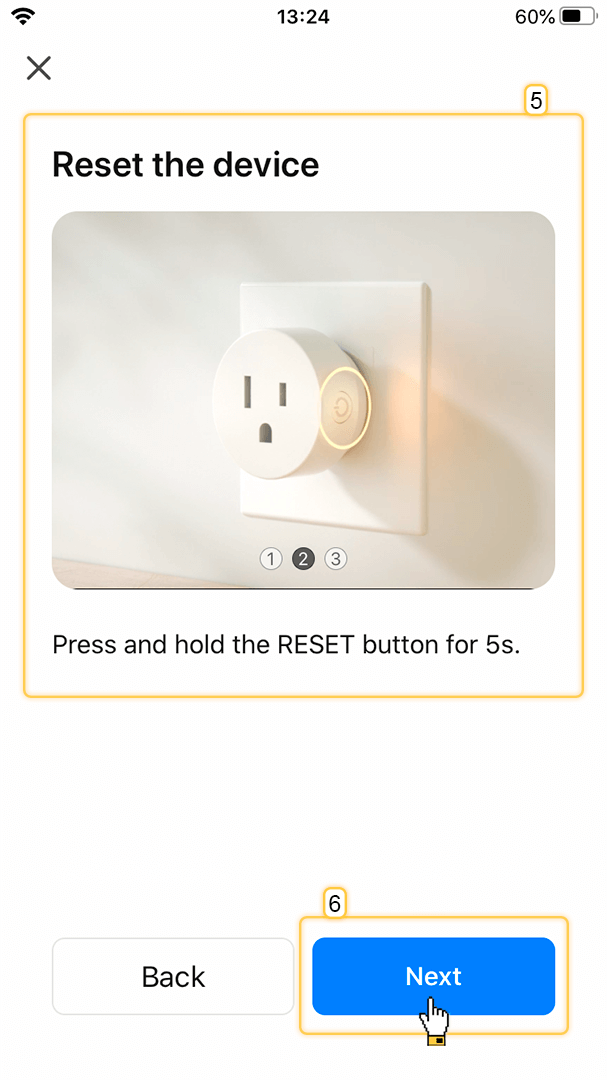
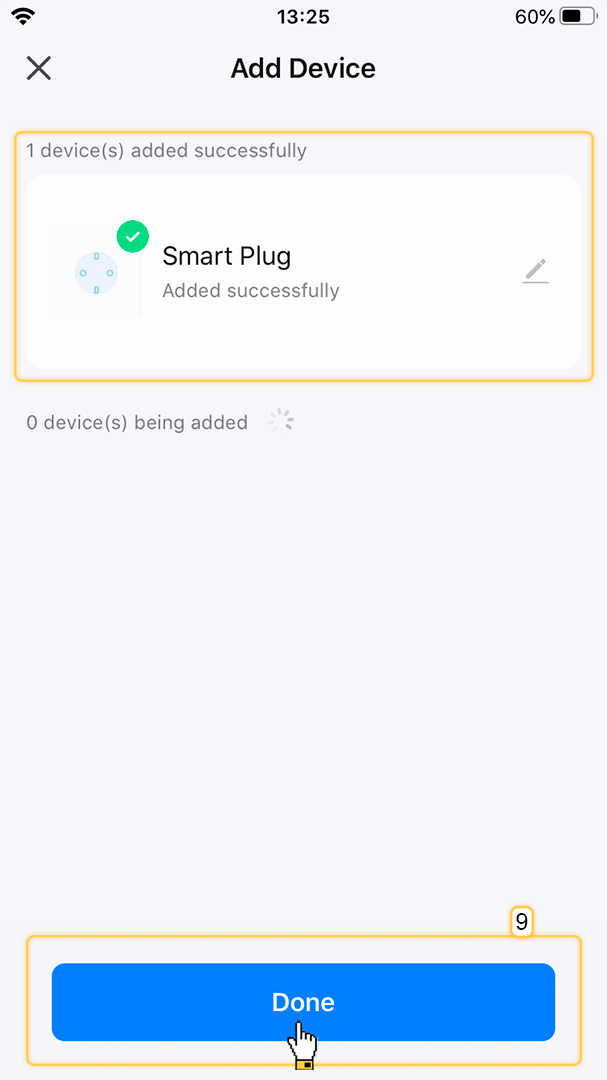
Install smart device control application
The first step is to install the smart device control application (Smart Life, Tuya Smart, or other) on your mobile device and register your Smart Plug device in the application.


Tuya cloud configuration
Create cloud project
The next step is to register an account on Tuya and create cloud project.
- Go to the Cloud tab ⇾ Project Management. Click the Create Cloud Project button.
- In a pop-up window, fill required fields and click “Create”.
- Make additional settings in the Authorize API Services window and click Authorize.
- Now your cloud project is created. In this window, remember the Access ID/Client ID and Access Secret/Client Secret values. These values will be needed during the Tuya Integration setup.
Enable Tuya message service
Enable the message service to timely receive messages about device registration, data reporting, and status change.
- Go to the Message Service tab.
- Toggle to enable Message Service.
- In the pop-up window, set up the messaging service. Configure the settings for Message Service Type and Alert Contact. Click Ok.
- Message Service enabled.
Link Tuya App account
You need to link your devices to this project using your Smart Life app account.
- Go to Cloud tab -> Project management. Select your project.
- Navigate to the Devices tab -> select the Link App Account tab. Click Add App Account.
- Select Tuya Account Authorization option.
- Scan the QR code with Smart Life App to authorize.
- In the pop-up window, select Automatic Link and Click Ok.
- Now your devices under the mobile app account have been added to the project.
- Navigate to the “All Devices” tab. You can see your device added to the project.
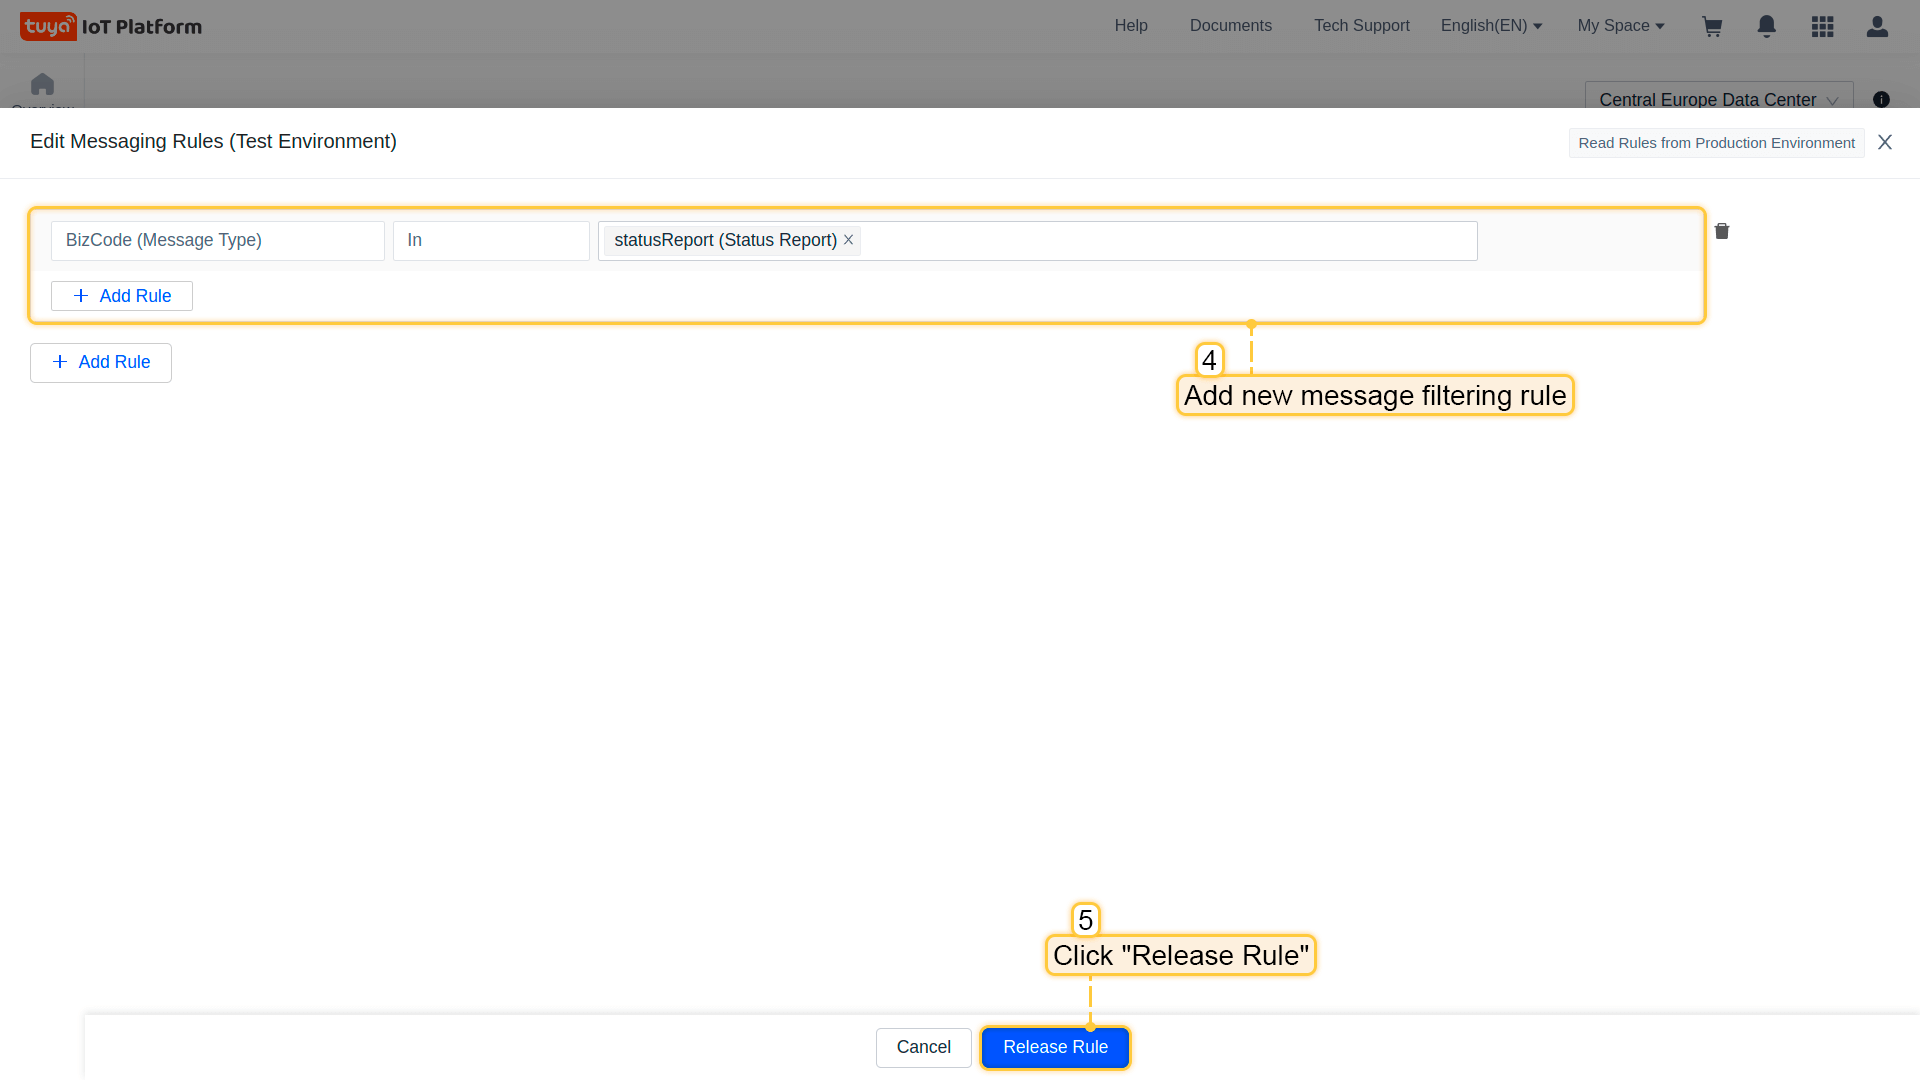
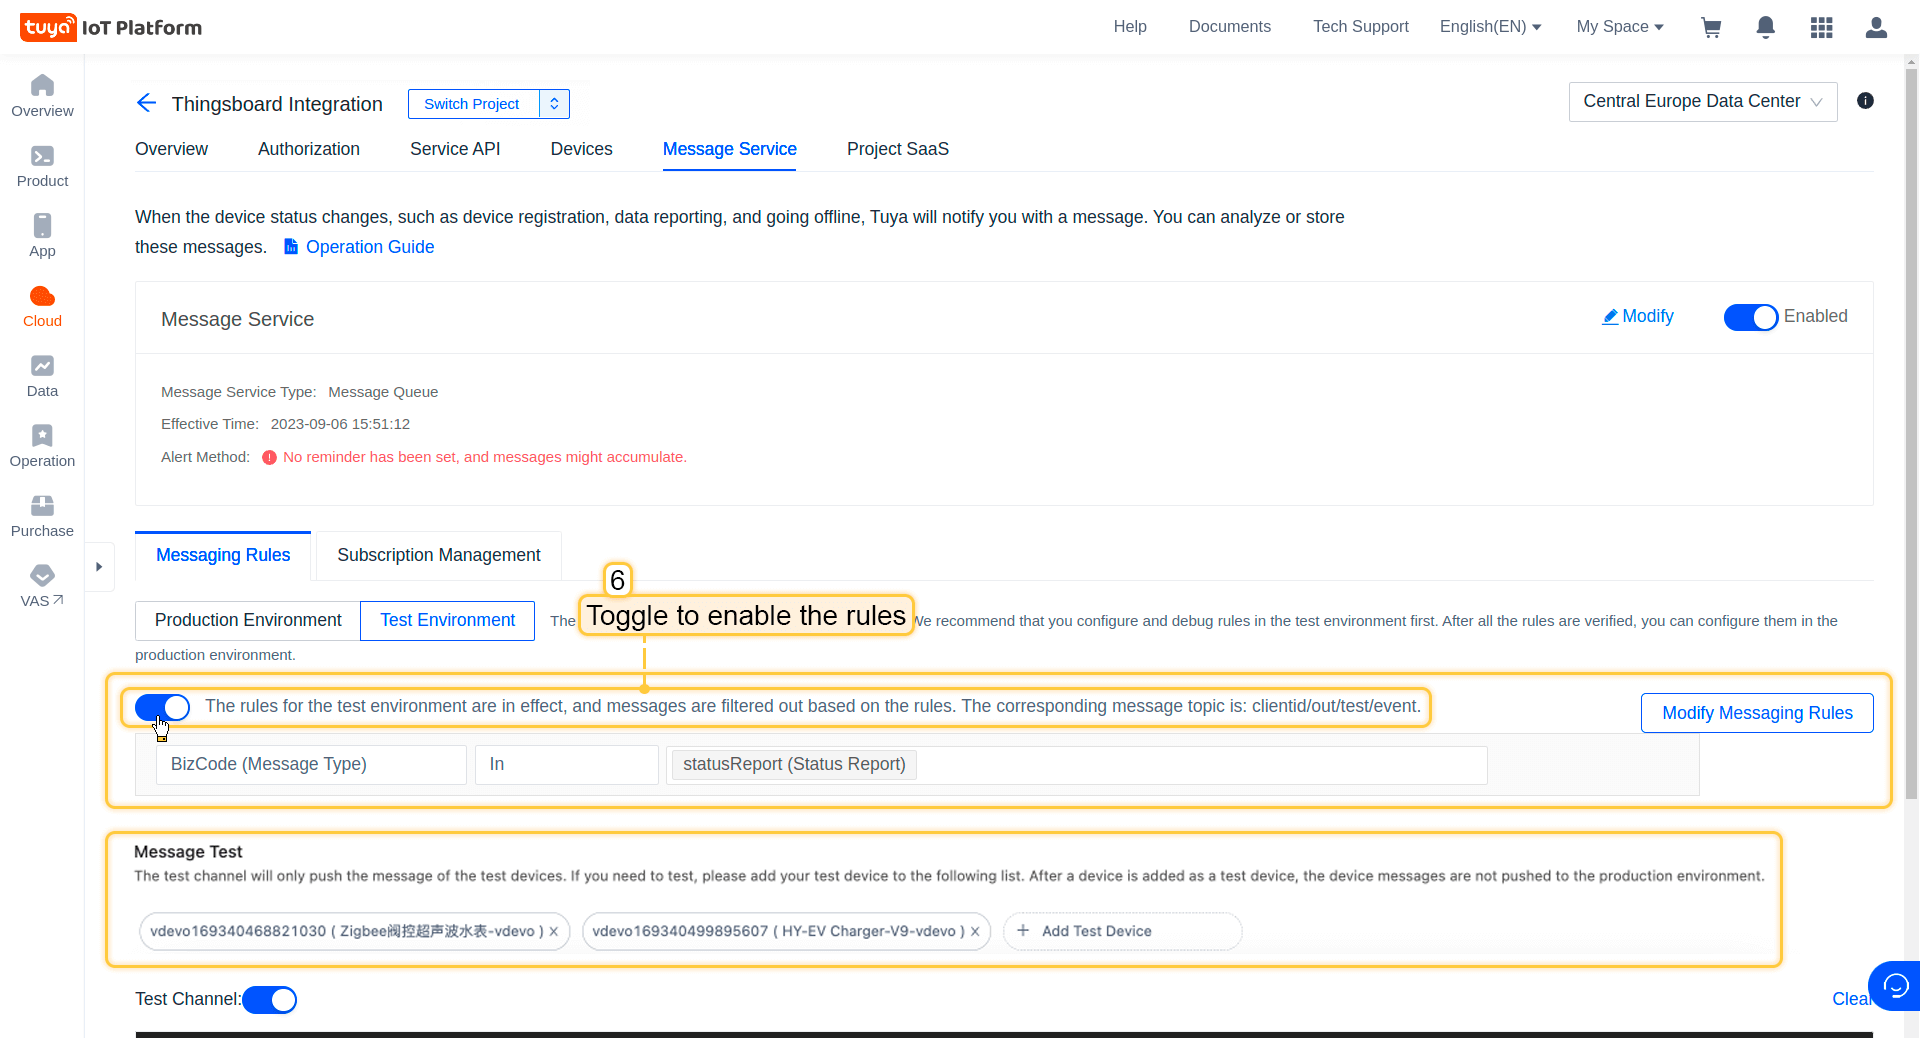
Make sure you enabled Messaging rule (filter) to receive uplinks. The very basic filter (statusReport) should be sufficient for testing purposes:
- Navigate to the "Message Service" tab. Click the "Create Messaging Rules" button;
- Click the "Add Message Filtering Rule" button;
- Select "statusReport" and click "Release Rule" button;
- Enable the messaging rule.


ThingsBoard integration configuration
Let's move on to setting up the integration between the ThingsBoard platform and Tuya.
1. Basic settings
- Log in to your ThingsBoard account.
- Go to the Integrations center ⇾ Integrations.
- Click + (plus) button.
- From the list, select Tuya integration type.
- If you'd like to monitor events and troubleshoot, enable debug mode.
Enabling debug mode allows you to track events, states, and potential errors related to the execution of . This greatly simplifies development and troubleshooting.
- Click Next.
2. Uplink data converter
Uplink is necessary in order to convert the incoming data from the device into the required format for displaying them in ThingsBoard.
- Enter a name for the converter. It must be unique.
- To view the events, enable debug mode.
- In the Main decoding configuration section, provide your own script or use the script below.
One can use either TBEL (ThingsBoard expression language) or JavaScript to develop user defined functions. We recommend utilizing TBEL as it’s execution in ThingsBoard is much more efficient compared to JS.
- Once the uplink converter is set up, click Next.
3. Downlink data converter
The Downlink converter transforming outgoing RPC message and then the Integration sends it to your device.
You can use our example of Downlink Converter, or write your own according to your configuration:
|
|
- Click Next.
4. Connection
In the last step, fill in the following fields:
- Region - specify your region;
- Environment:
- Choose PROD for real devices.
- Select TEST if you want to connect a virtual device to Thingsboard and test its operation before you buy it.
- Access Id and Access Key is an authorization certificate distributed by Tuya. Paste previously copied Access Id and Access Key into the integration.
- Click Add to create an integration.
Rule Chain configuration
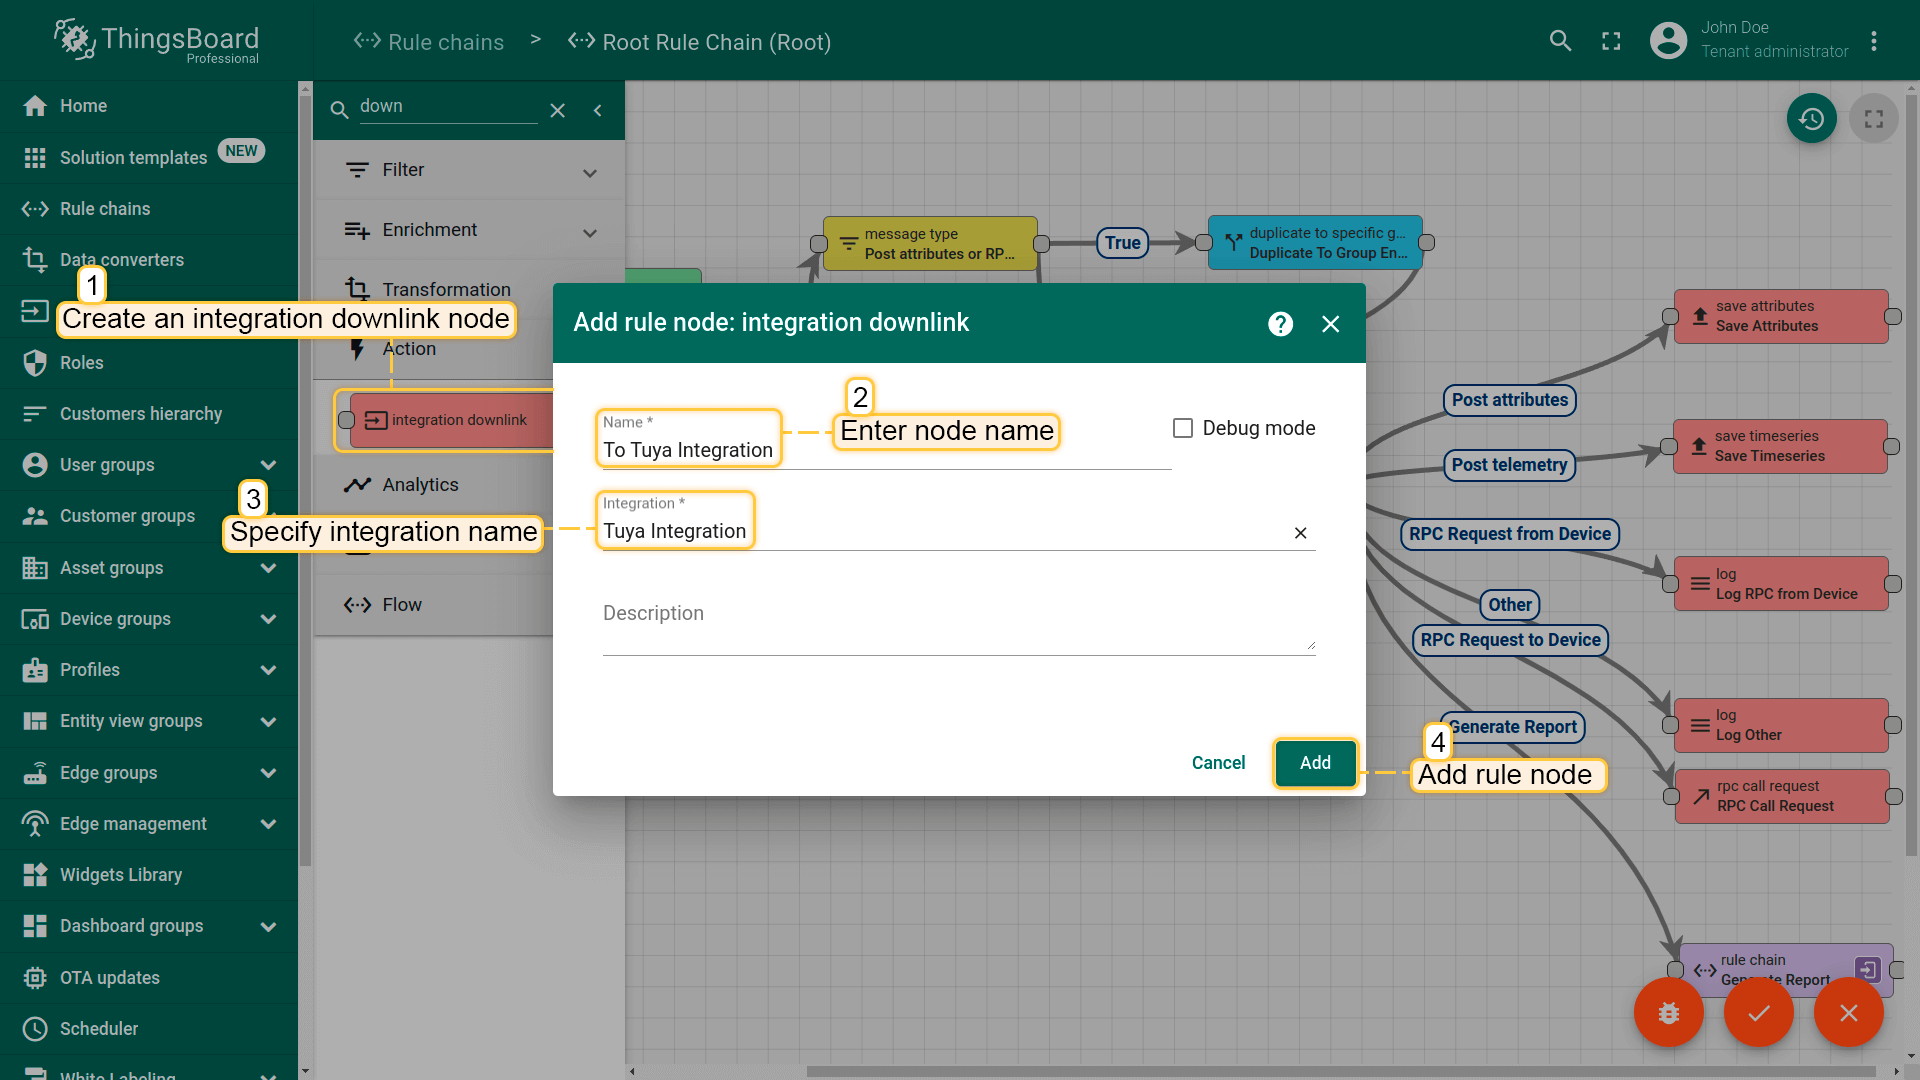
When integration configured and ready to use, we need to go to Rule Chains, choose “Root Rule Chain” and here create rule node Integration Downlink. Input some name here, choose earlier created Tuya integration, and tap Add.
After these steps, we need to tap on a right grey circle of rule node message type switch and drag this circle to left side of Integration Downlink. In pop-up window add “RPC Request to Device” link, and tap Add. Save the Root Rule Chain.

Uplink message
Once ThingsBoard Tuya Integration has been created, you must disconnect Smart Plug from power and reconnect. The device will send an uplink message with telemetry and attributes to the integration.
Go to Entities ⇾ Devices. You should find your device provisioned by the Integration.
In my case it is - SmartPlug268970.
Tuya Smart Plug Dashboard
To visualize the Smart Plug data and test RPC commands, we will create the Tuya Smart Plug dashboard.
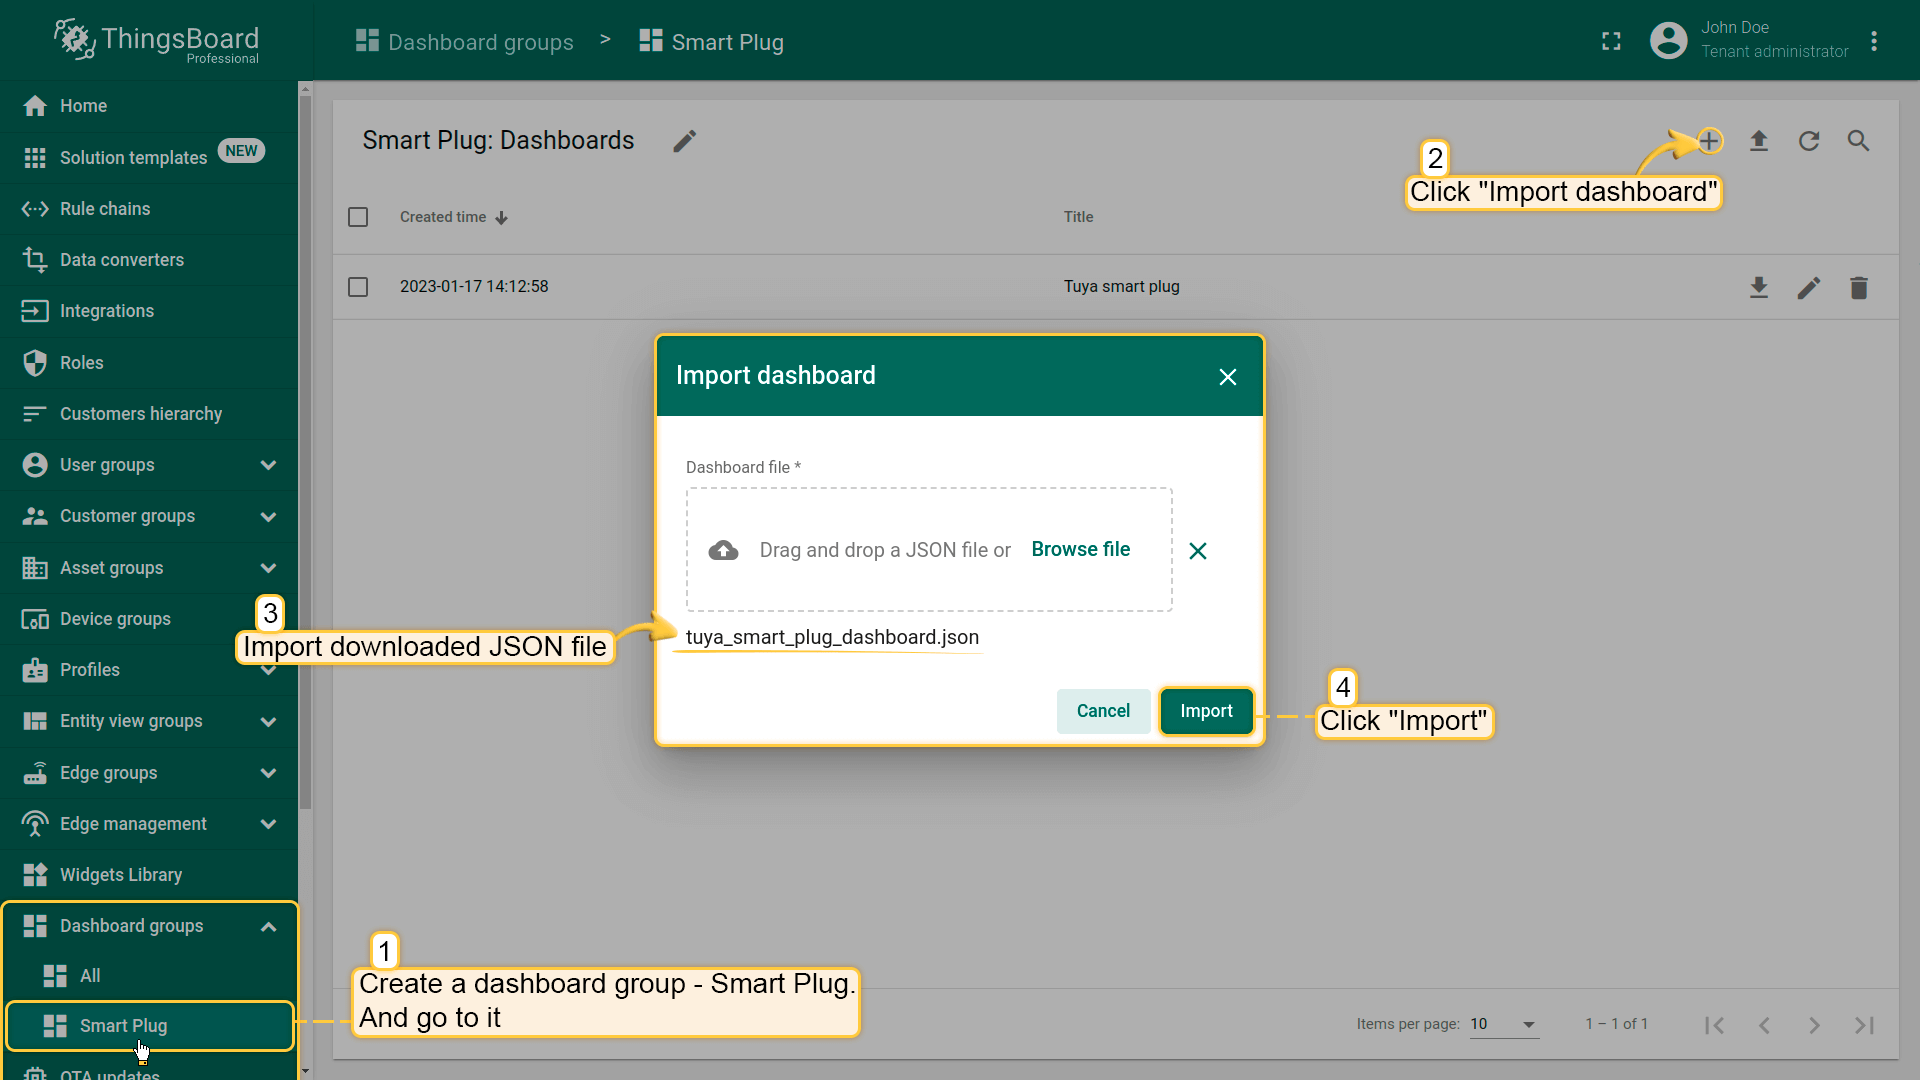
- Download the tuya_smart_plug_dashboard.json file.
- Go to the Dashboards.
- Click the + (plus) icon at the upper right corner of the table, and select Import dashboard.
- Drag the previously downloaded JSON file into the window.
- Tap Import.
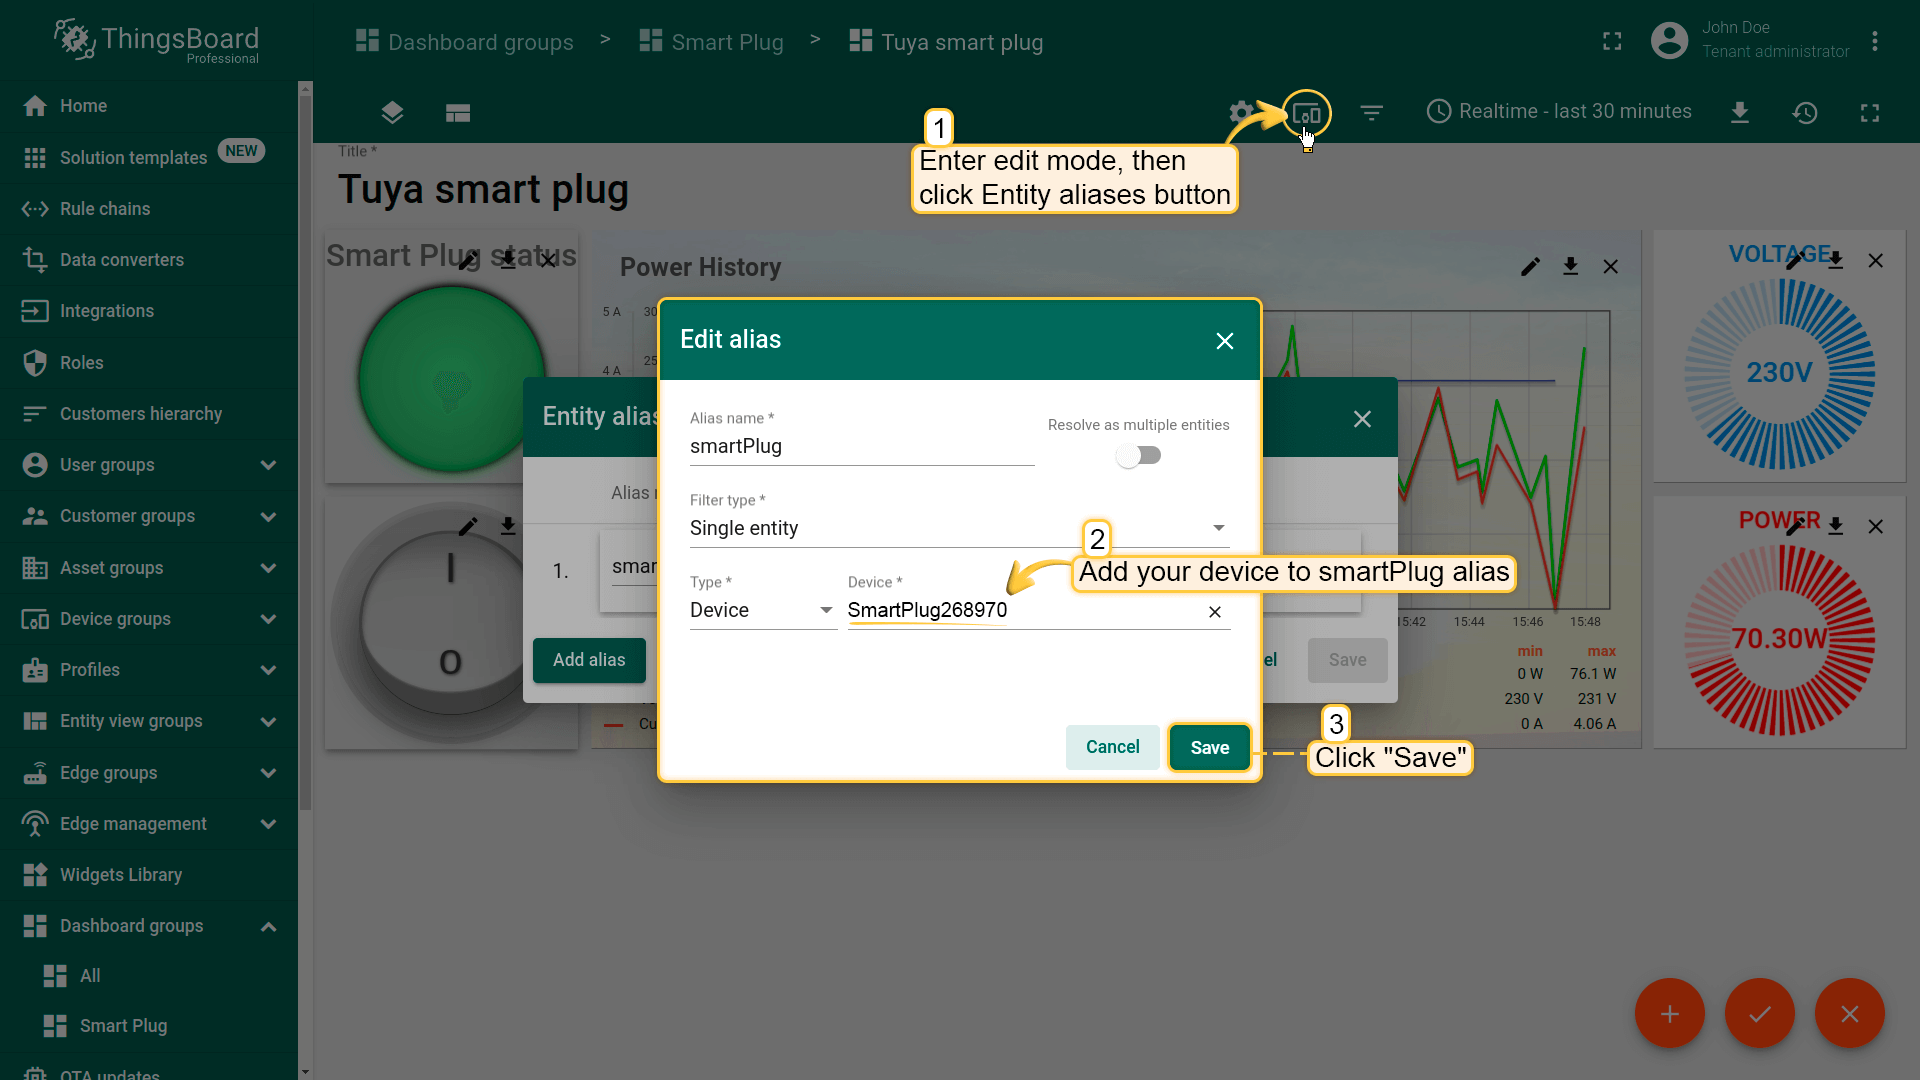
- Open the Tuya Smart Plug dashboard.
- Enter Edit mode, and update Entity aliases - specify your device as target device in the smartPlug alias
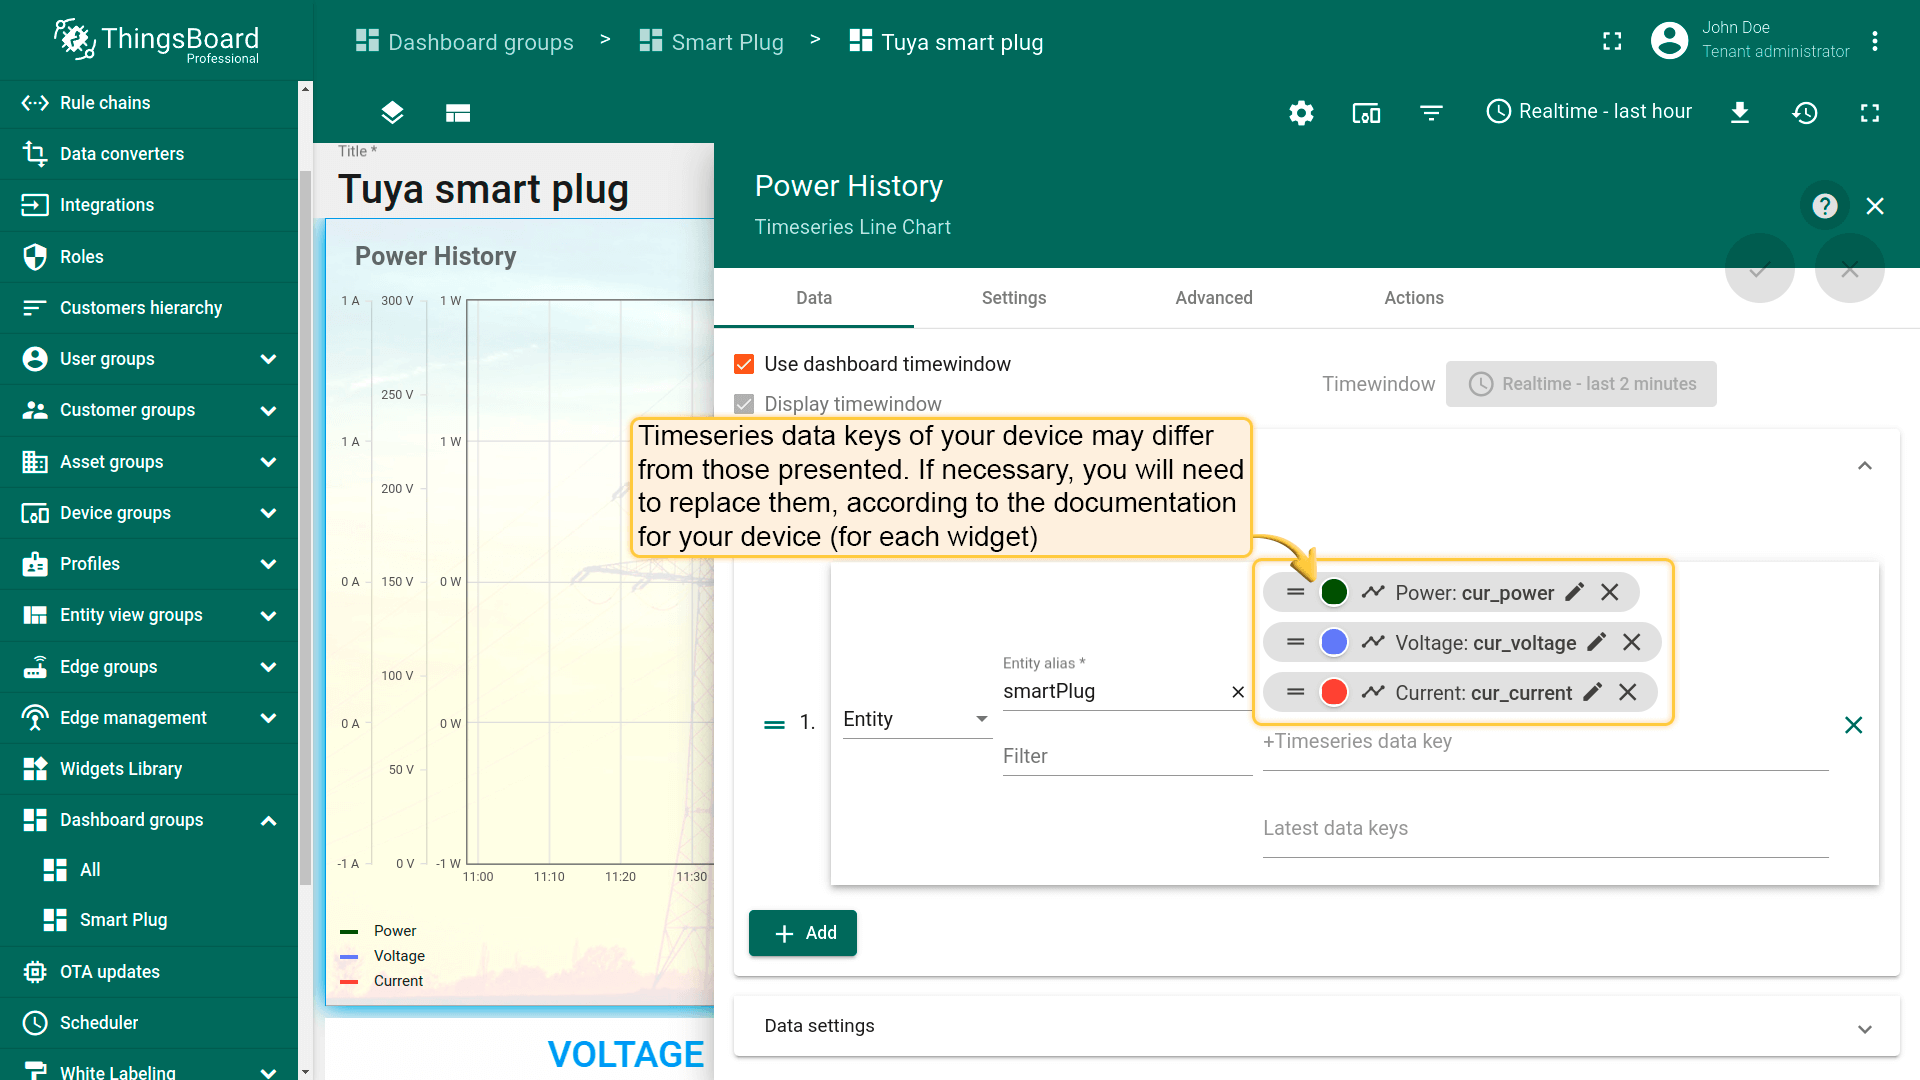
NOTE: Time series data keys of your device may differ from those presented. If necessary, you will need to replace them, according to the documentation for your device (for each widget).
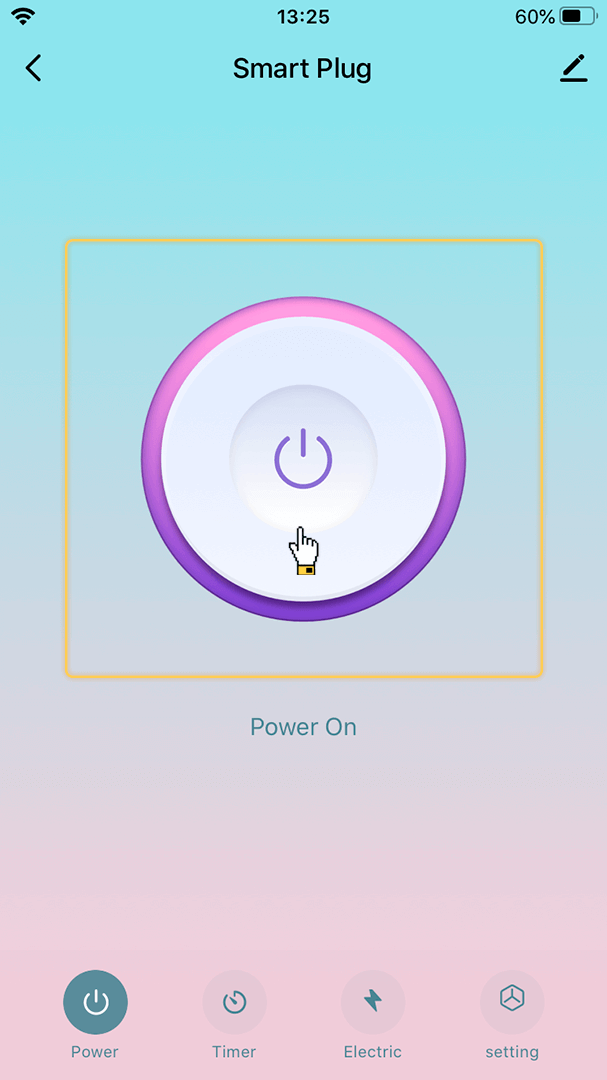
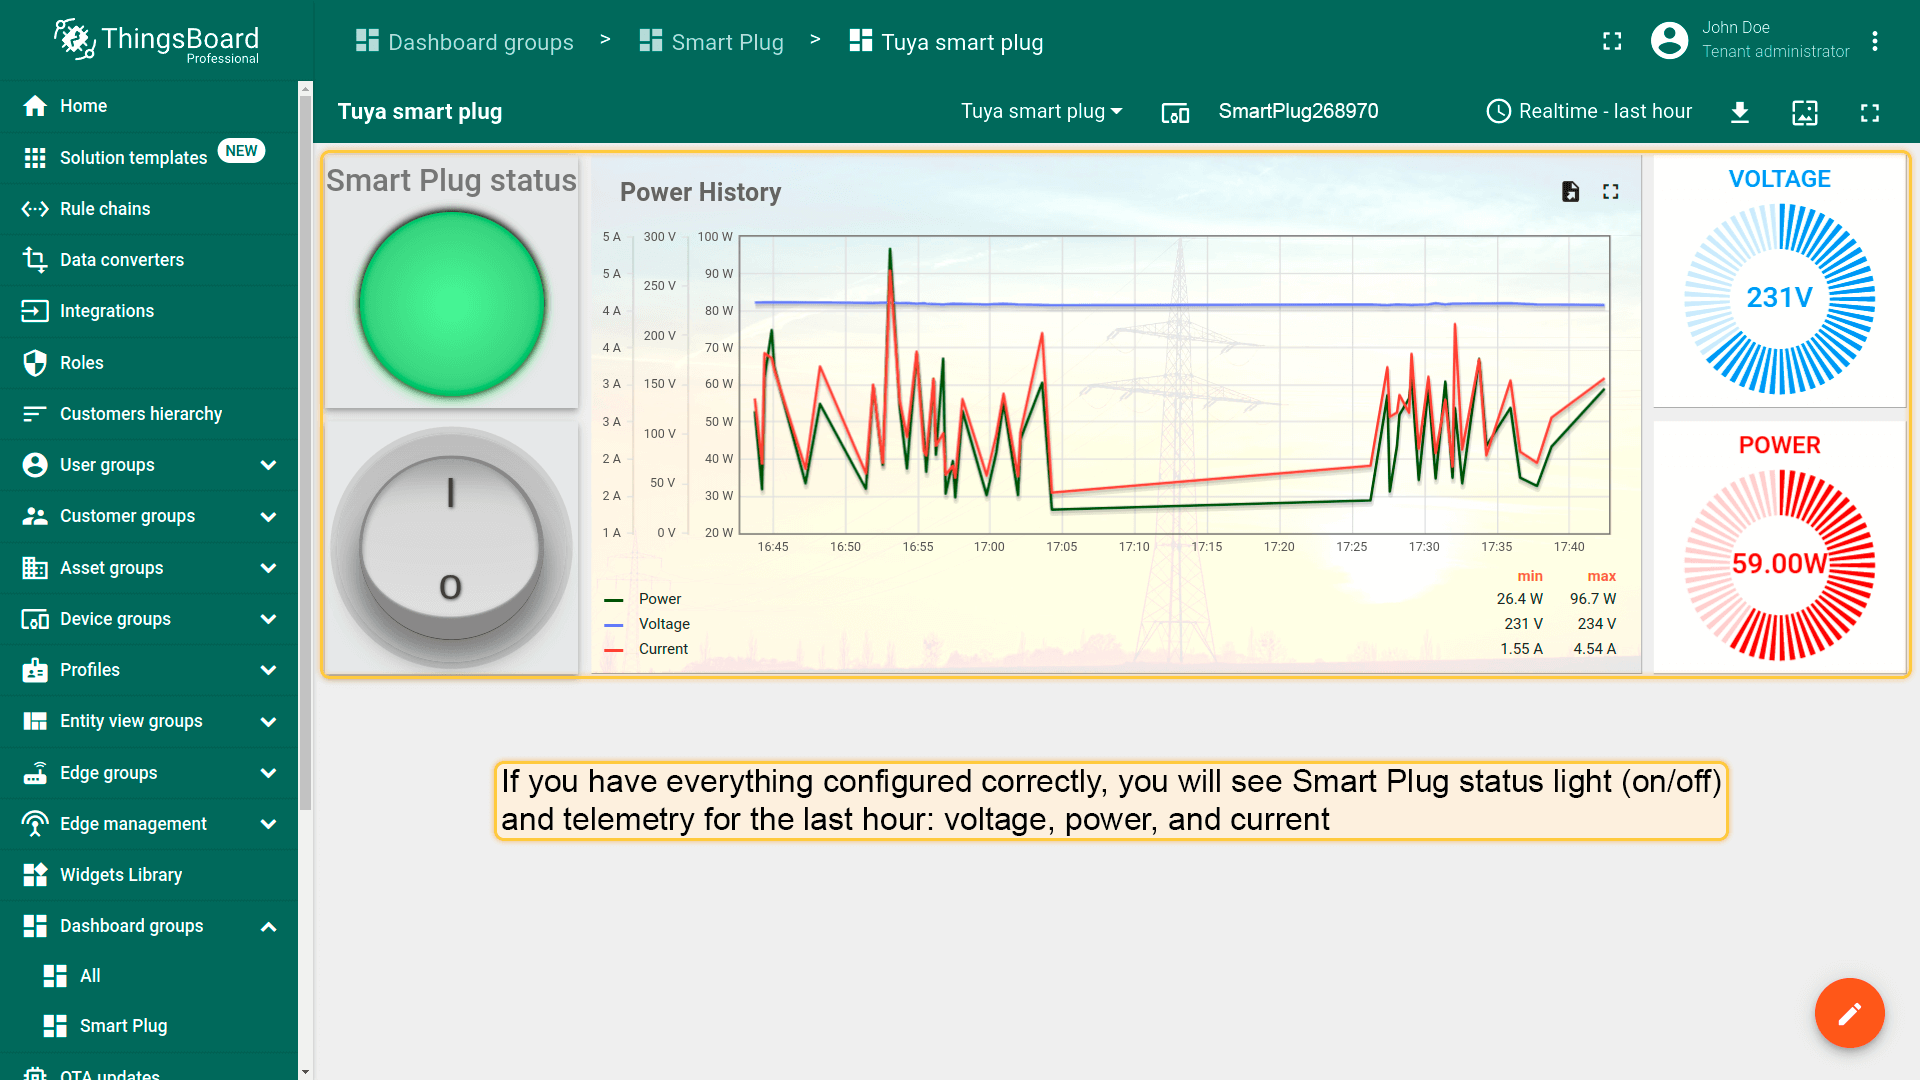
If you have everything configured correctly, you will see Smart Plug status light (on/off) and telemetry for the last hour: voltage, power, and current.
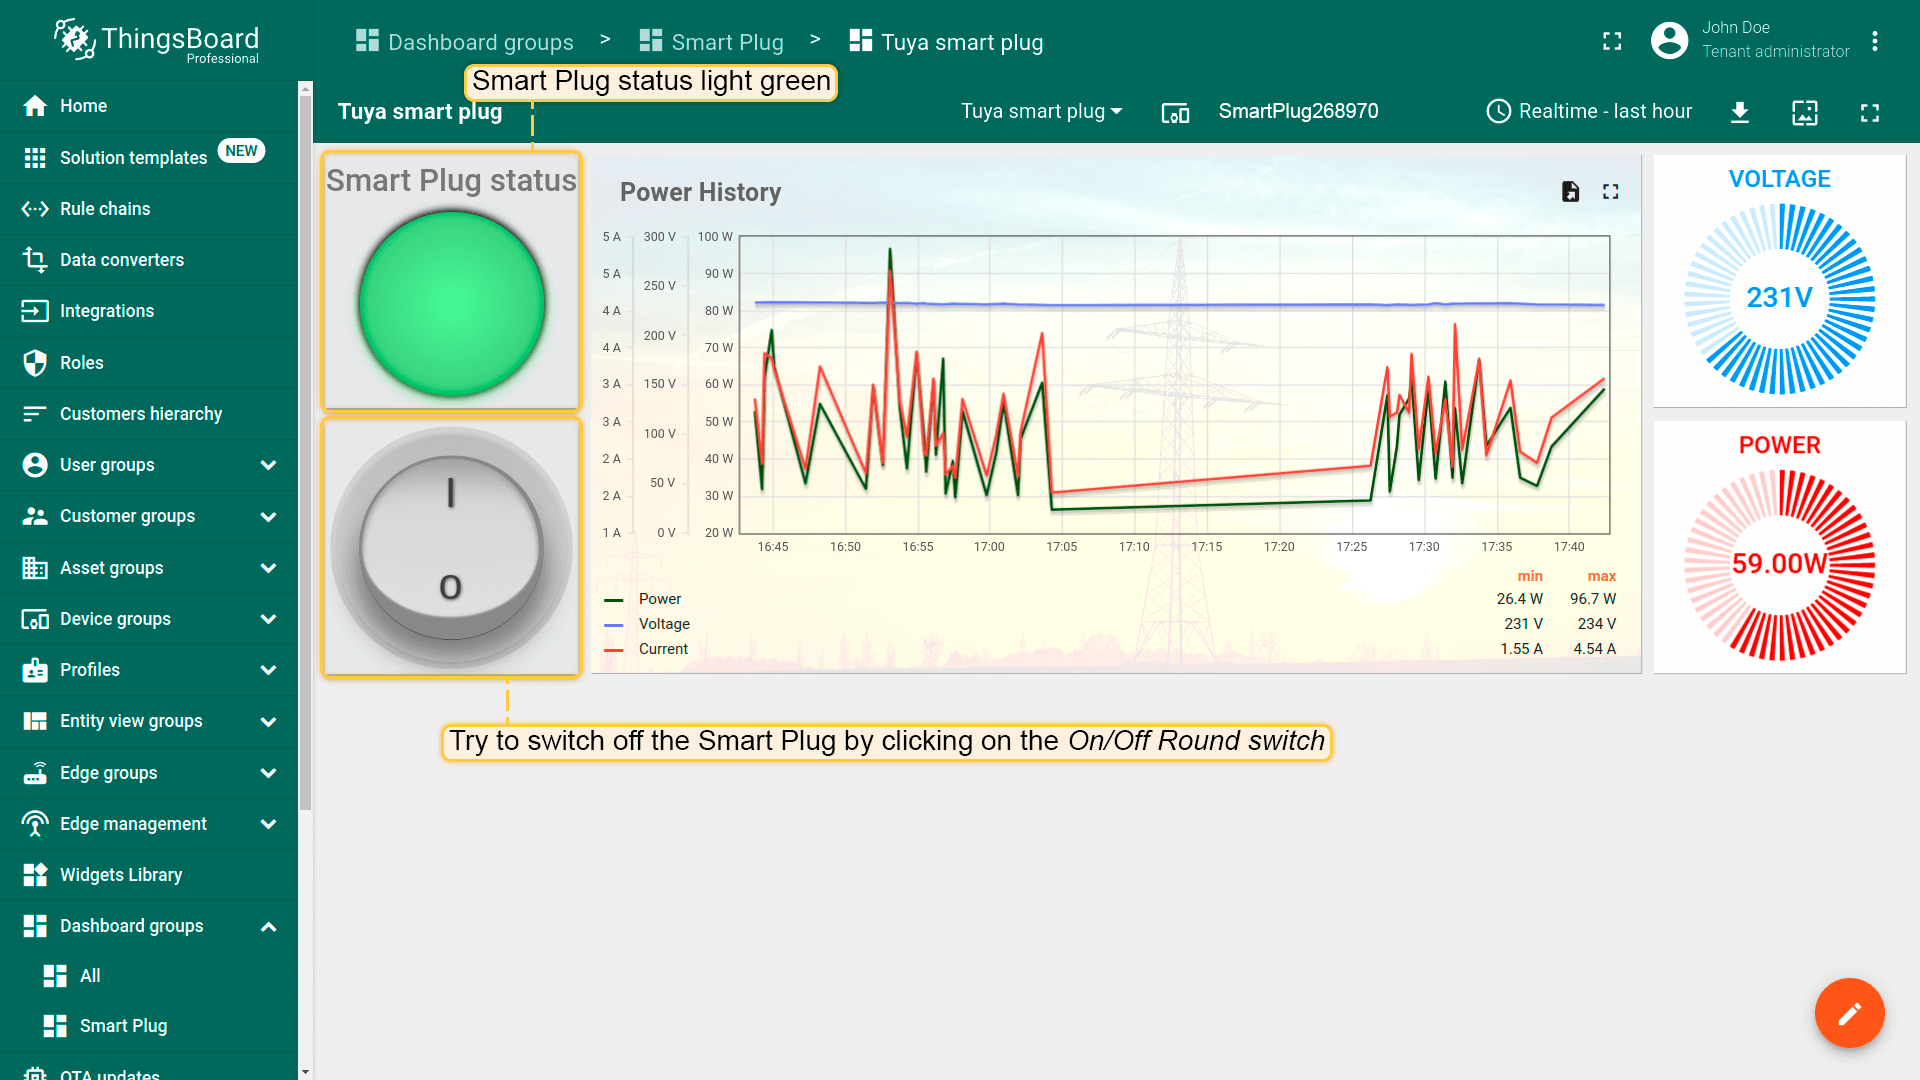
Smart Plug status light is green. Try to switch off the Smart Plug by clicking on the On/Off Round switch
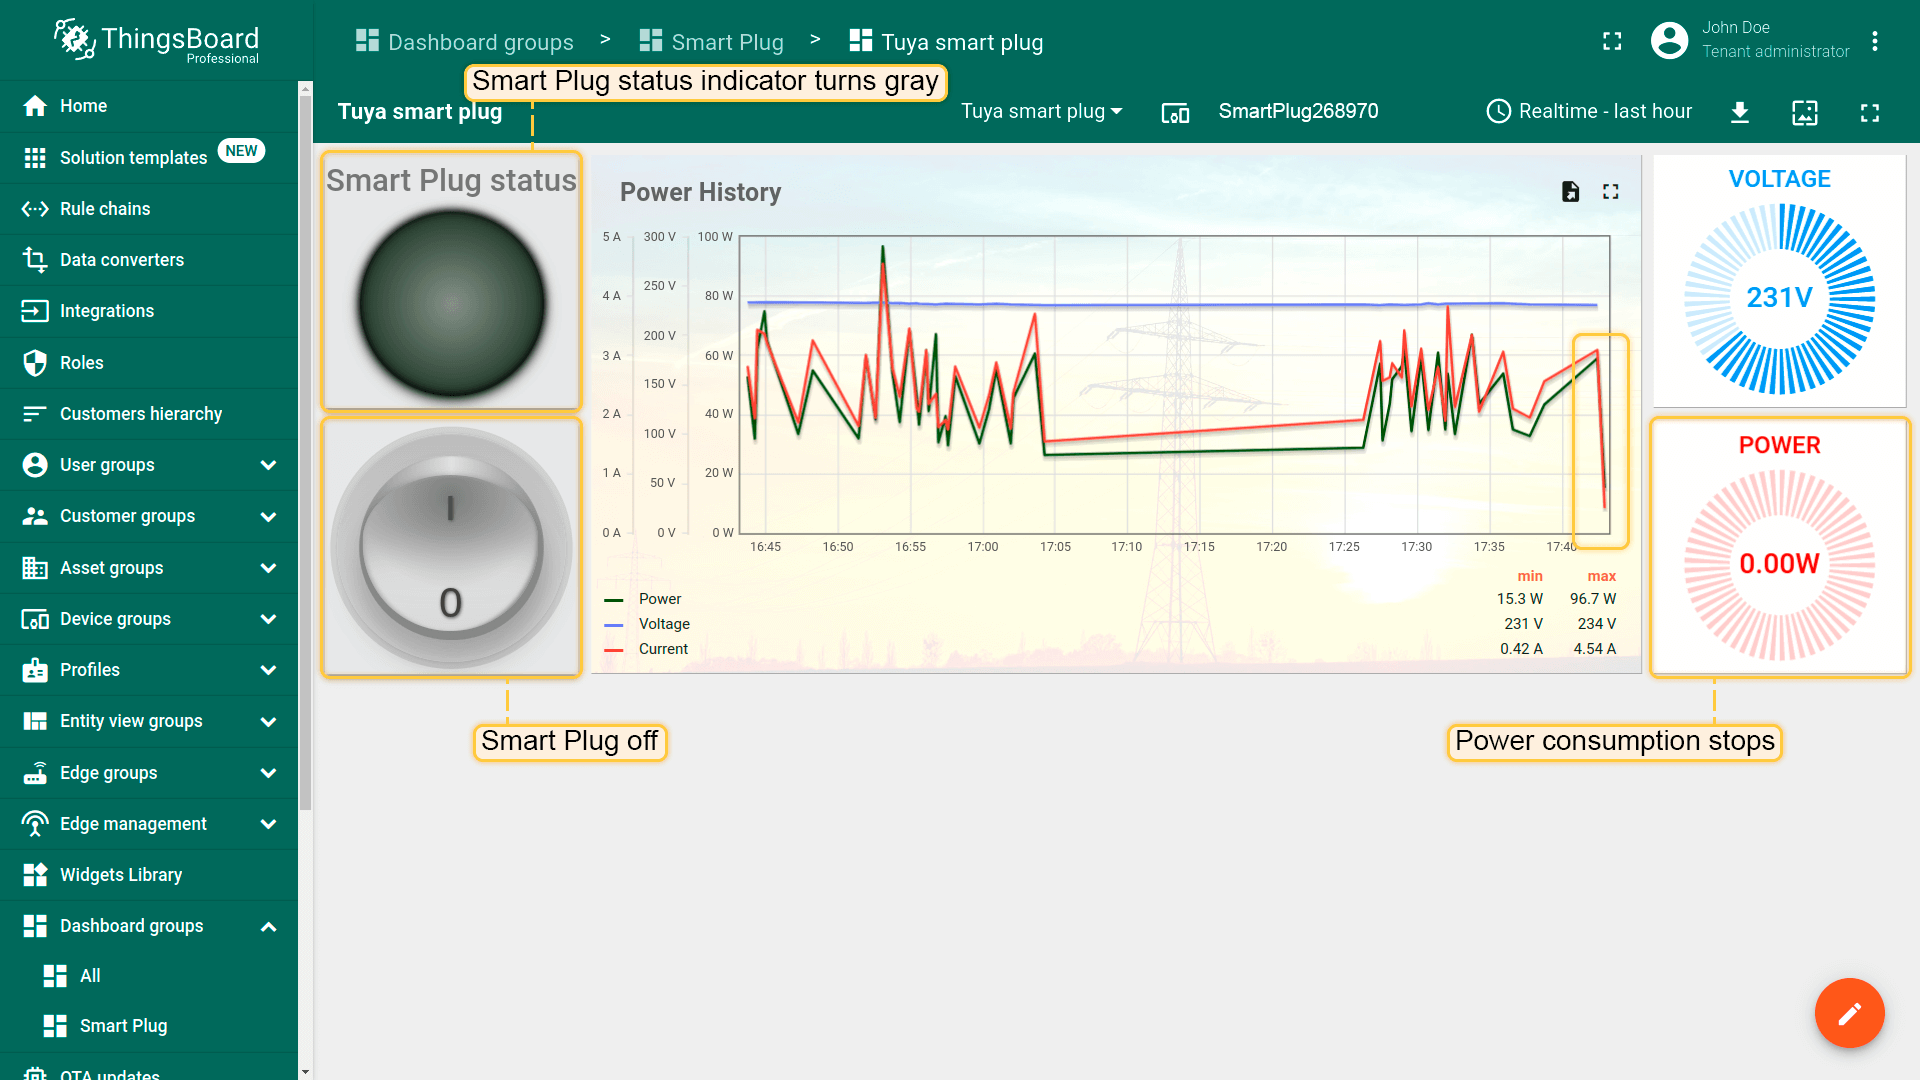
The Smart Plug status indicator turns grey. Power consumption stops.
Next steps
-
Getting started guides - These guides provide quick overview of main ThingsBoard features. Designed to be completed in 15-30 minutes.
-
Data visualization - These guides contain instructions on how to configure complex ThingsBoard dashboards.
-
Data processing & actions - Learn how to use ThingsBoard Rule Engine.
-
IoT Data analytics - Learn how to use rule engine to perform basic analytics tasks.
-
Advanced features - Learn about advanced ThingsBoard features.