Overview
Particle is a cloud platform that connects a range of devices via the IoT.
After integrating Particle with the ThingsBoard, you can connect, manage, communicate, process, and visualize data from your devices in the ThingsBoard IoT platform.
Particle Integration Tutorial
In this tutorial, we will use a development board Particle Photon.
You can use any other Particle device to connect it to Particle and get the data in ThingsBoard.
Prerequisites
- To get data, we will need an account in Particle Console.
- To send downlinks we will also need a Particle CLI to generate access token.
Particle Photon setup
At first, we need to connect device to Particle Console to get any data from it.
To do this, we need to the following steps from official guide:
- Power On Your Device:
Plug the USB cable into your power source. (Your computer works perfectly for this purpose.) Your Particle device does not need your computer to connect to Wi-Fi.
You could just as easily power your device with a power brick, a battery shield, or another power source wired to the VIN pin.
As soon as it is plugged in, the RGB LED on your device should begin blinking blue.
If your device is not blinking blue, hold down the SETUP button. - Connect your Photon to the Internet using the setup web application:
- Go to setup.particle.io
- Click on Setup a Photon
- After clicking on NEXT, you should be presented with a file (photonsetup.html)
- Open the file
After connecting the device, it will become visible on the Particle console. This will allow you to create an integration to receive data on ThingsBoard.

ThingsBoard Integration Configuration
To receive data from Particle Console, we need to create an integration on ThingsBoard and get a URL for Particle Integration.
Uplink Converter
Before setting up a Particle integration, you need to create an Uplink Converter, a script for parsing and transforming the data received by Particle integration to a format that ThingsBoard can consume.
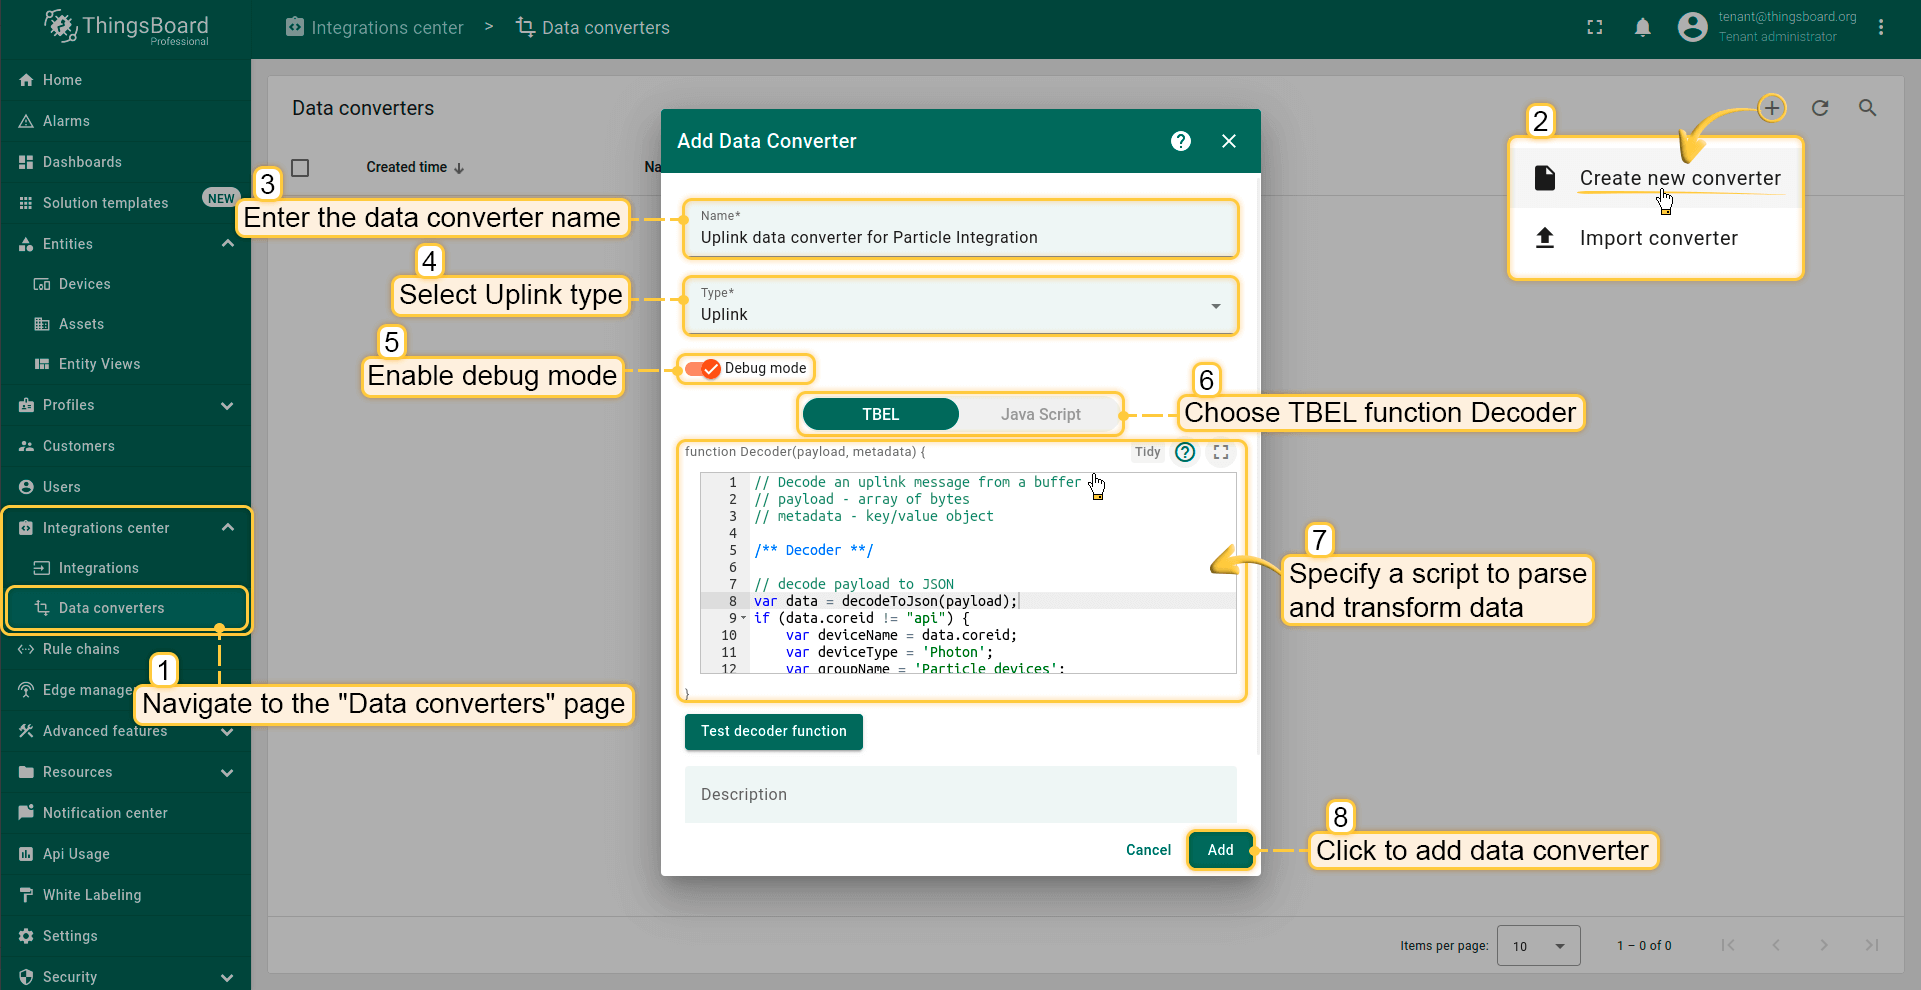
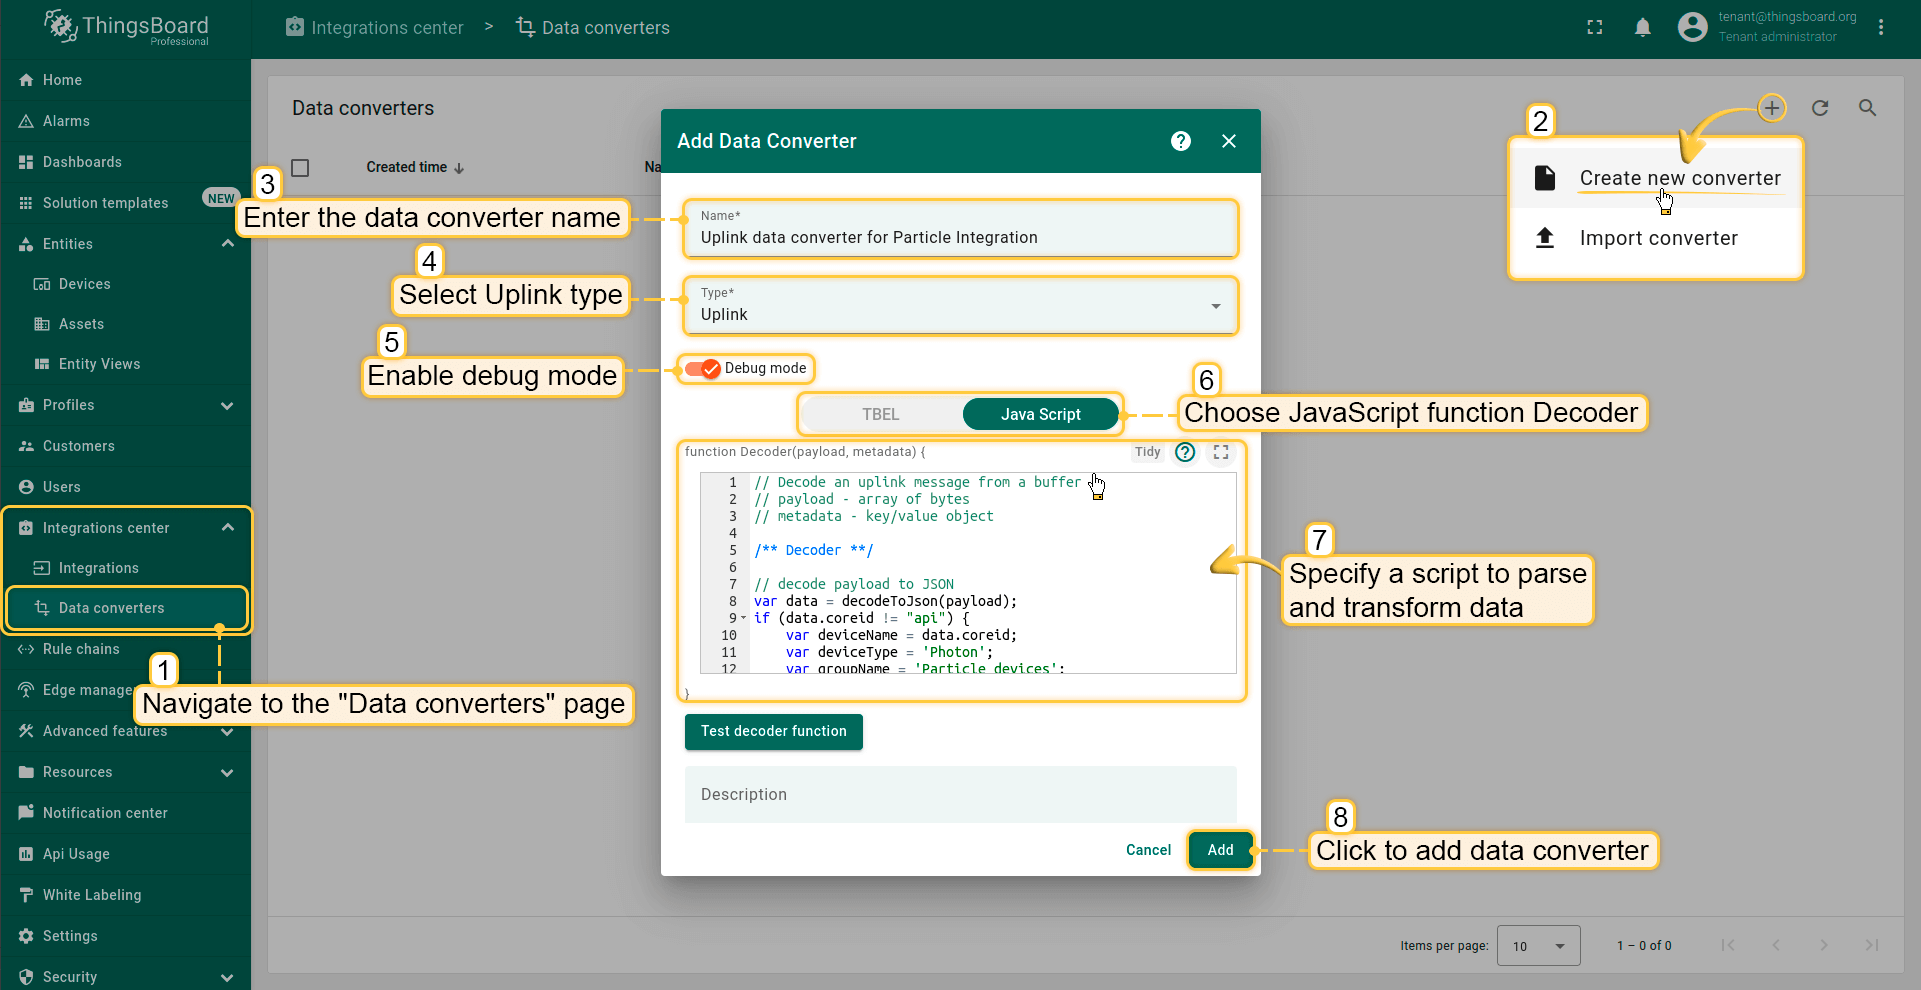
To create an Uplink Converter, go to the Data Converters section and click Add new data converter -> Create new converter, name it “Uplink data converter for Particle Integration” and select type Uplink. Use debug mode for now.
Debug mode
Enabling debug mode allows you to track events, states, and potential errors related to the execution of integrations. This greatly simplifies development and troubleshooting.
Debug mode settings can be combined or disabled entirely.
One can use either TBEL (ThingsBoard expression language) or JavaScript to develop user defined functions. We recommend utilizing TBEL as it’s execution in ThingsBoard is much more efficient compared to JS.
Downlink Configuration (Optional)
Create downlink converter
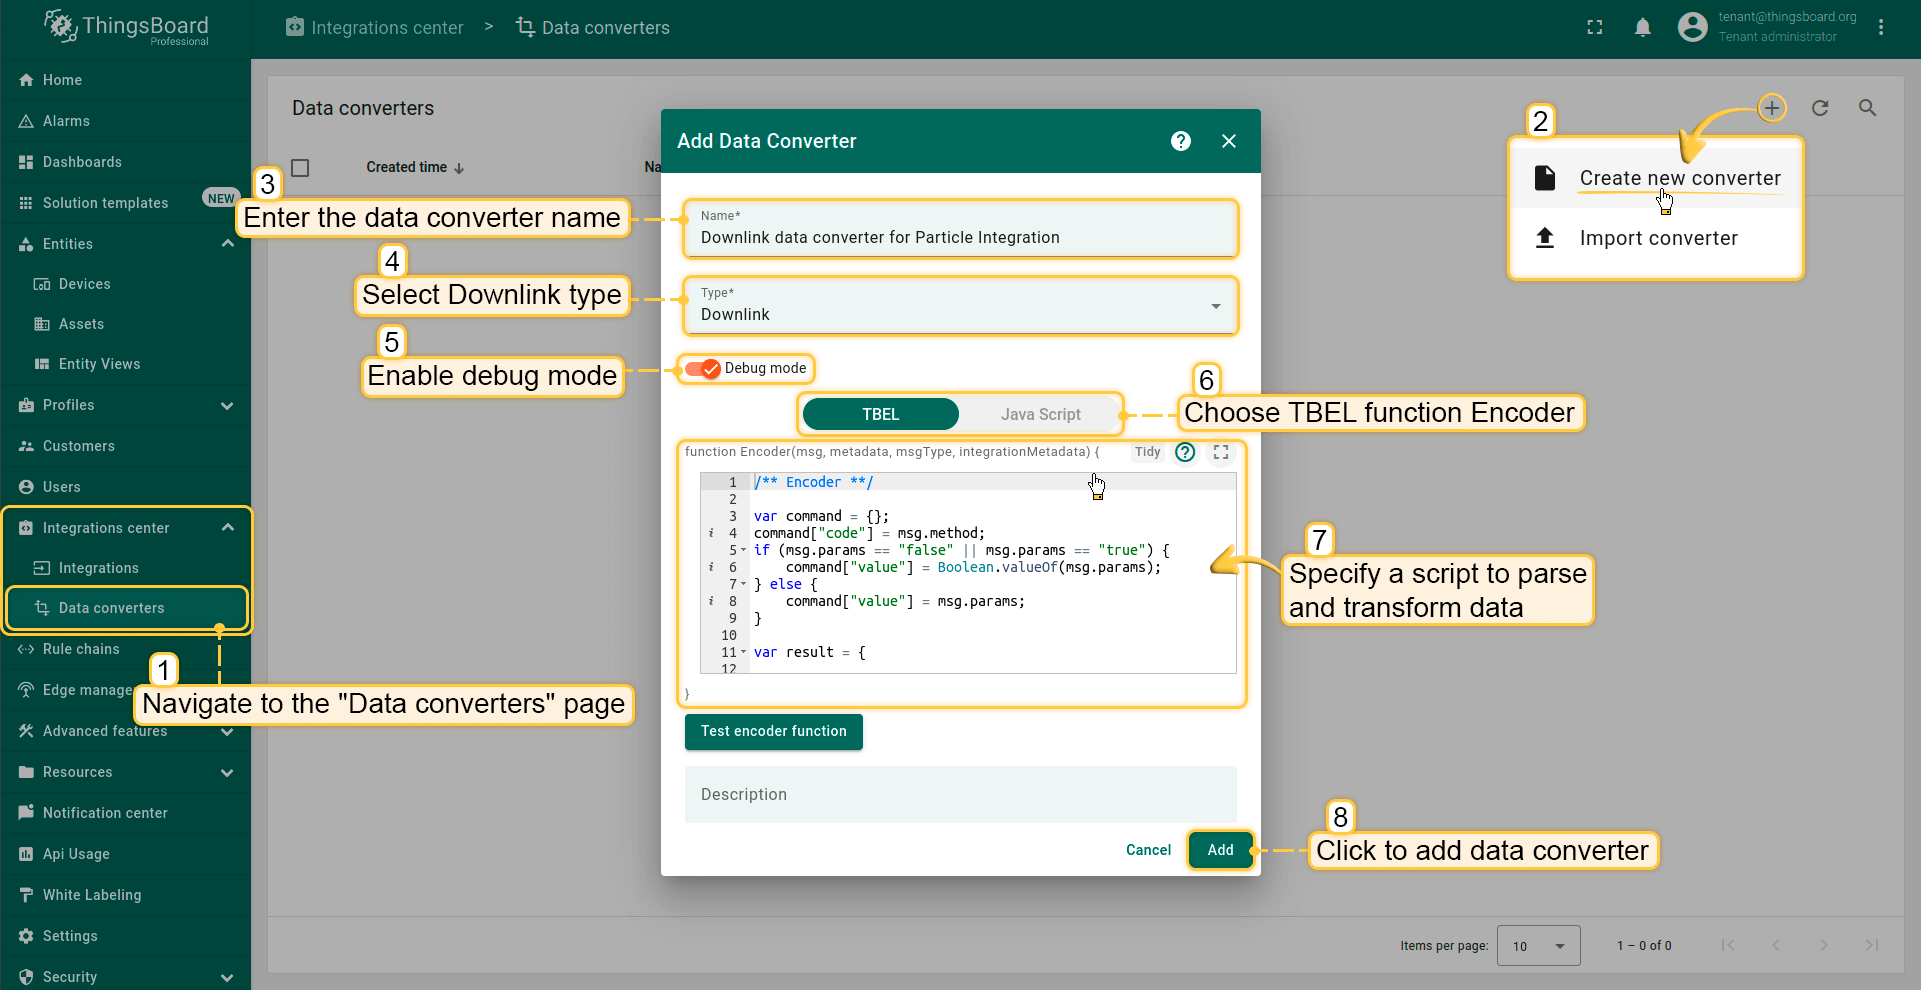
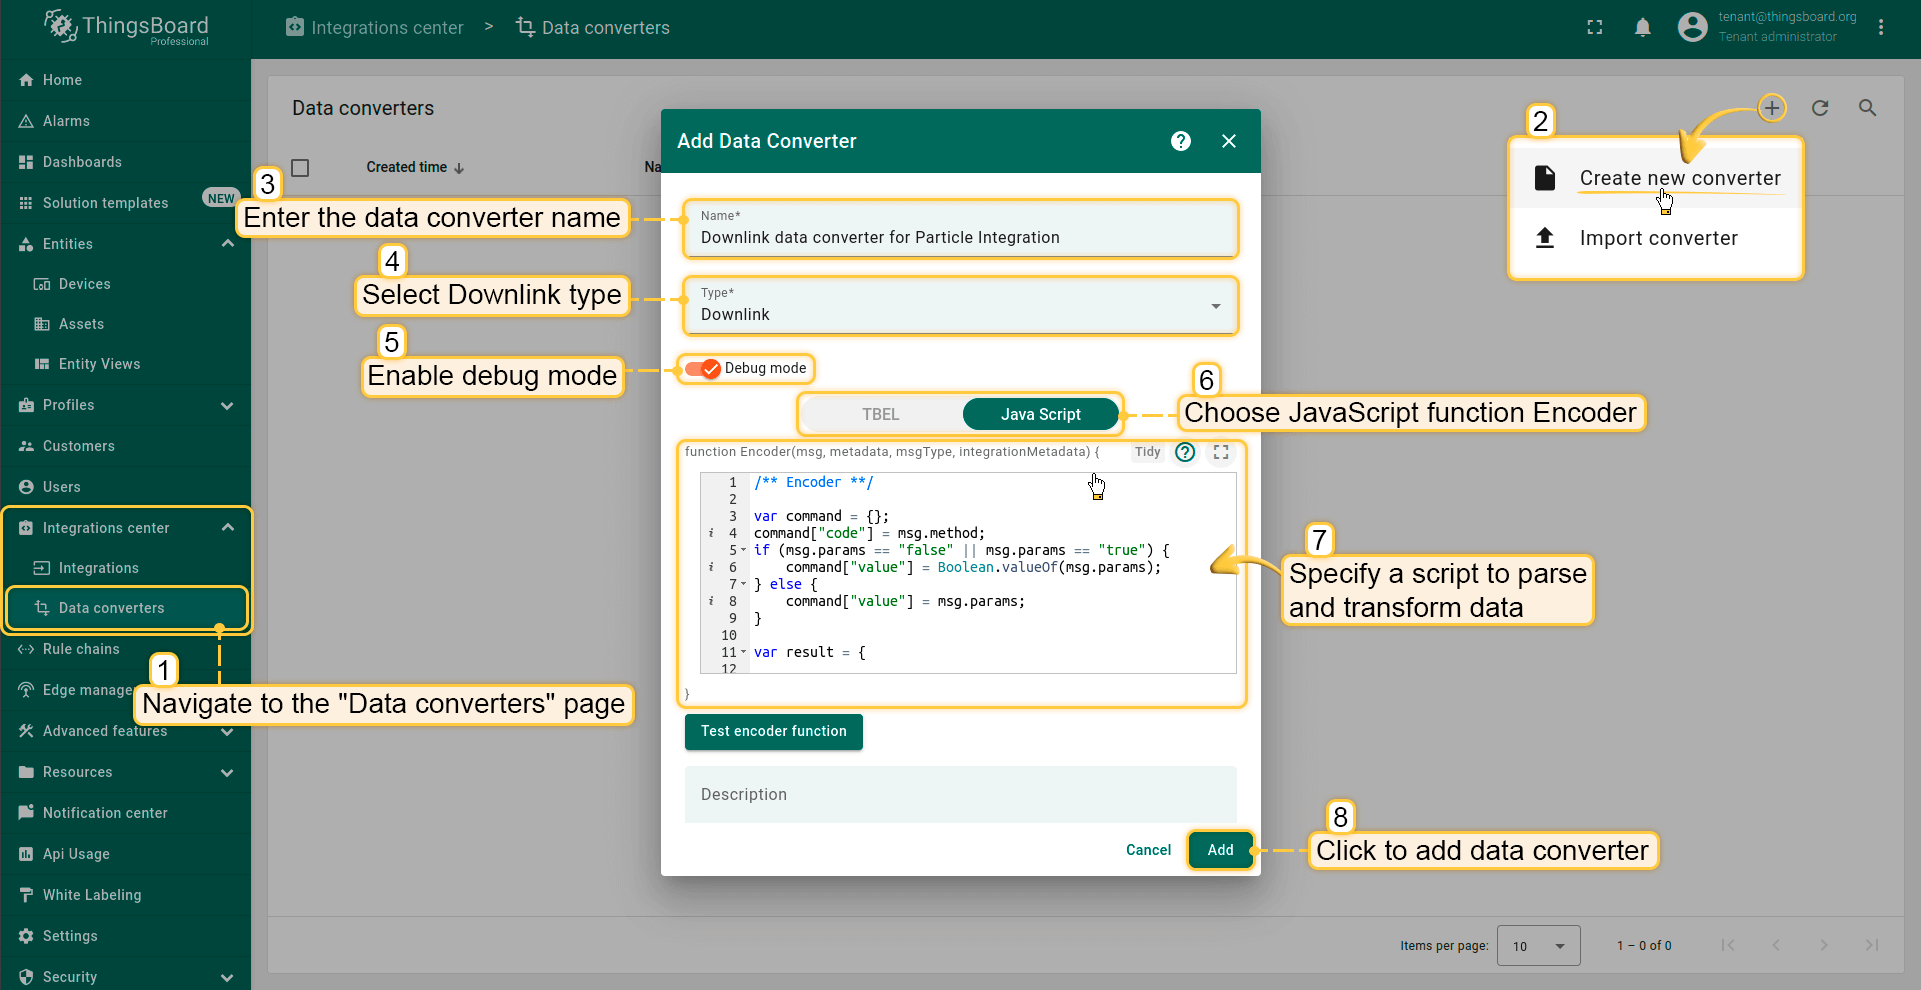
The Downlink converter transforms outgoing RPC message, and then the Integration sends it to your device.
Create another converter named “Downlink data converter for Particle Integration”, and type Downlink. To see events - enable Debug.
Create access token in Particle CLI
To send message to a device, we will need an access token. To create it, you can use Particle CLI.
To install it, you can use the following command:
1
bash <( curl -sL https://particle.io/install-cli )
Then, according to official documentation, you will need to login using the following command:
1
particle login

After logging in, you will need to create an access token.
You can do this using one of the following commands:
- Create token that will never be expired (Useful for integration) -
1
particle token create --never-expires - Create token with default expiration time (90 days) -
1
particle token create
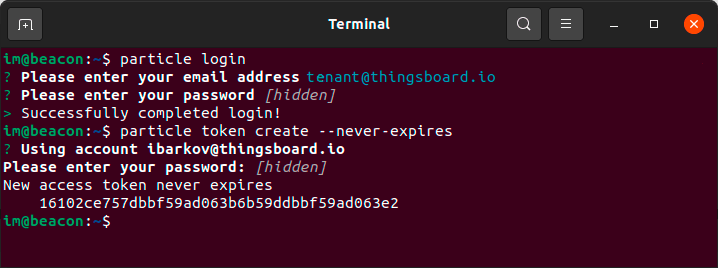
Save created token, we will need it in the next step.
Particle Integration Setup
Now, we should create an integration in ThingsBoard. To do this, you can follow next steps:
-
Go to Integrations section and click Add new integration button. Name it Particle Integration, and select type Particle.
-
Now, you can select the recently created Uplink data Converter for Particle Integration. Click Next.
-
If you added a downlink converter, select it. Click Next.
-
If you added a downlink converter and created a token - toggle Allow downlink and paste your access token. Click Add to create integration.
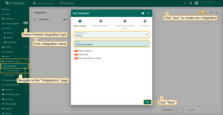
Go to Integrations section and click Add new integration button. Name it Particle Integration, and select type Particle.
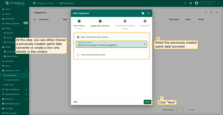
Now, you can select the recently created Uplink data Converter for Particle Integration. Click Next.
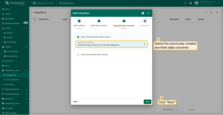
If you added a downlink converter, select it. Click Next.
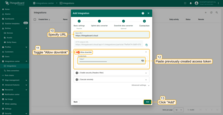
If you added a downlink converter and created a token - toggle Allow downlink and paste your access token. Click Add to create integration.
Integration on particle.io
To receive incoming data from Particle cloud, we need to configure an integration on Particle CLI.
To do this, please follow next steps:
-
Go to Integrations section and click “Add new integration” button.
-
Click on the Webhook.
-
Fill in all required fields. Then click Create webhook.
-
Your integration was created successfully.
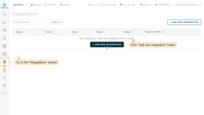
Go to Integrations section and click “Add new integration” button.
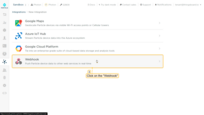
Click on the Webhook.
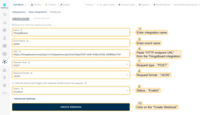
Fill in all required fields. Then click Create webhook.
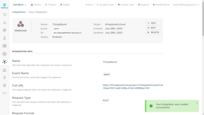
Your integration was created successfully.
Uplink message
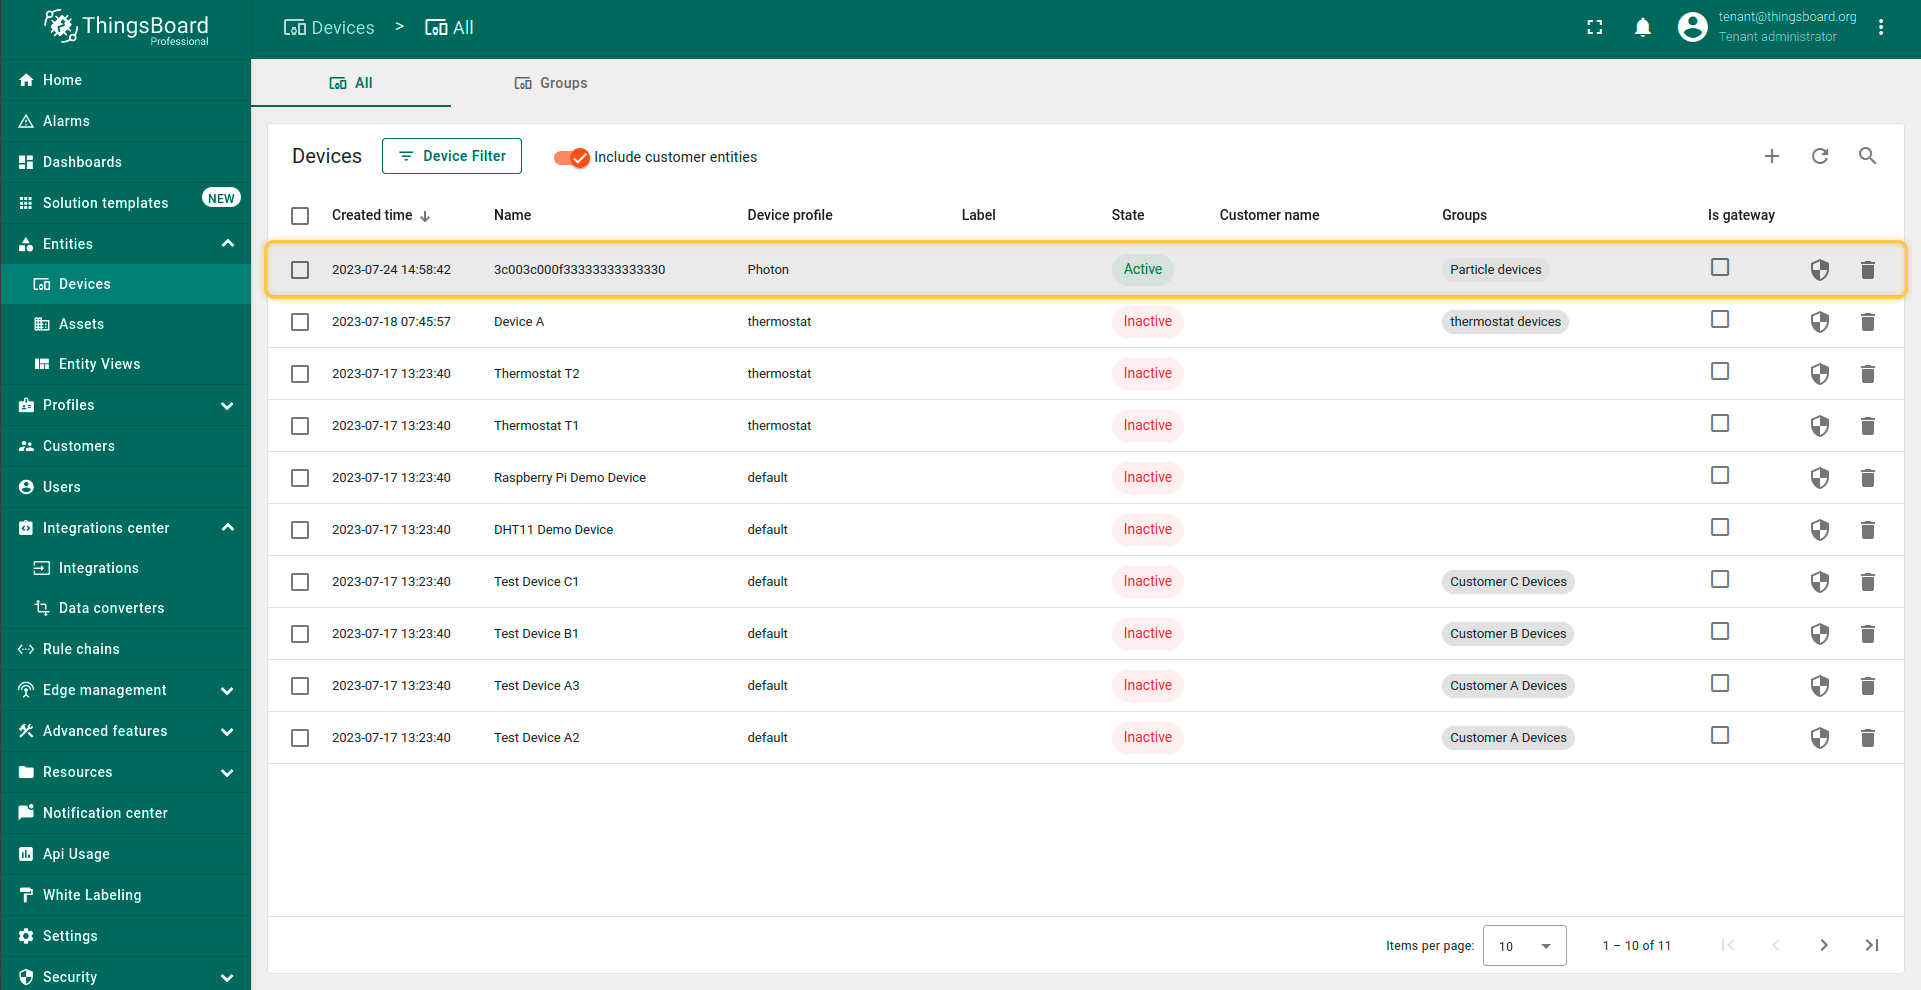
Once integration is created and any message arrives to it - you will be able to see a new device in your Devices.
Rule Chain configuration
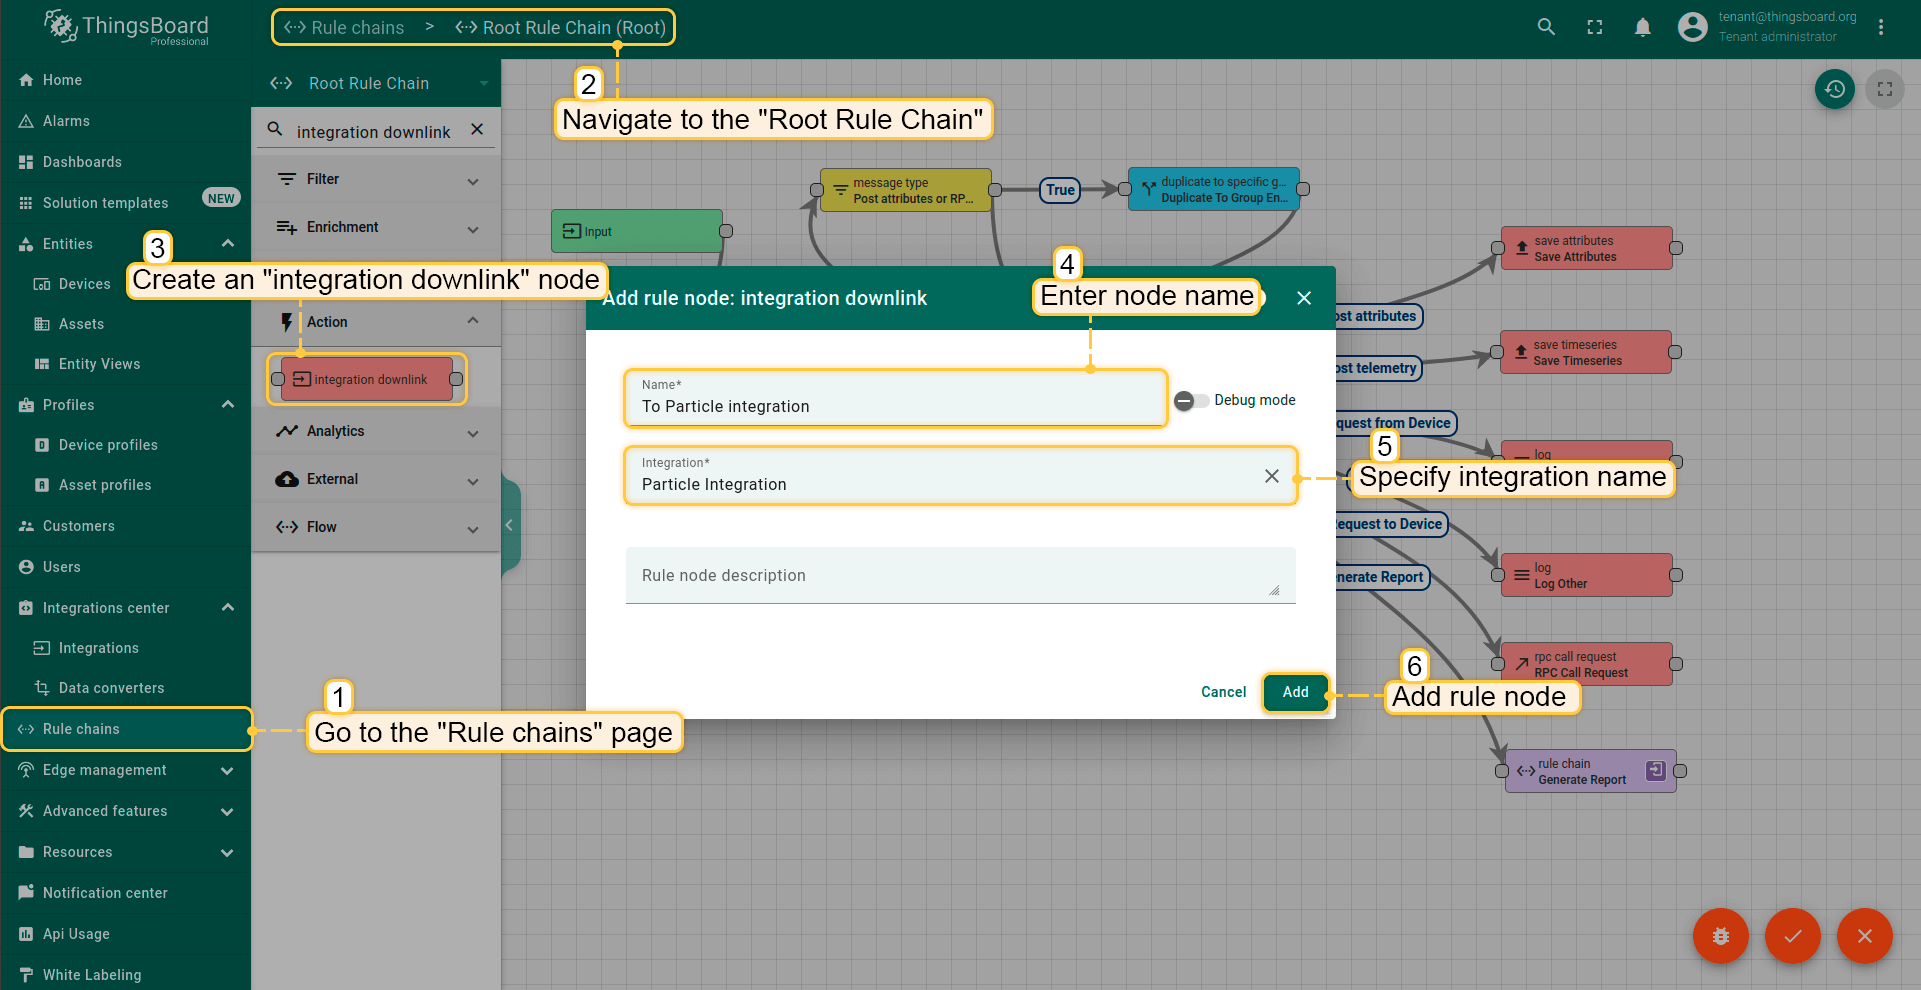
When integration is configured and ready to use, we need to go to Rule Chains, choose “Root Rule Chain” and create rule node Integration Downlink. Input some name here, choose earlier created Particle integration, and tap Add.
After these steps, we need to tap on a right grey square of rule node message type switch and drag this square to left side of Integration Downlink. In pop-up window, add “RPC Request to Device” relation and tap “Add”.
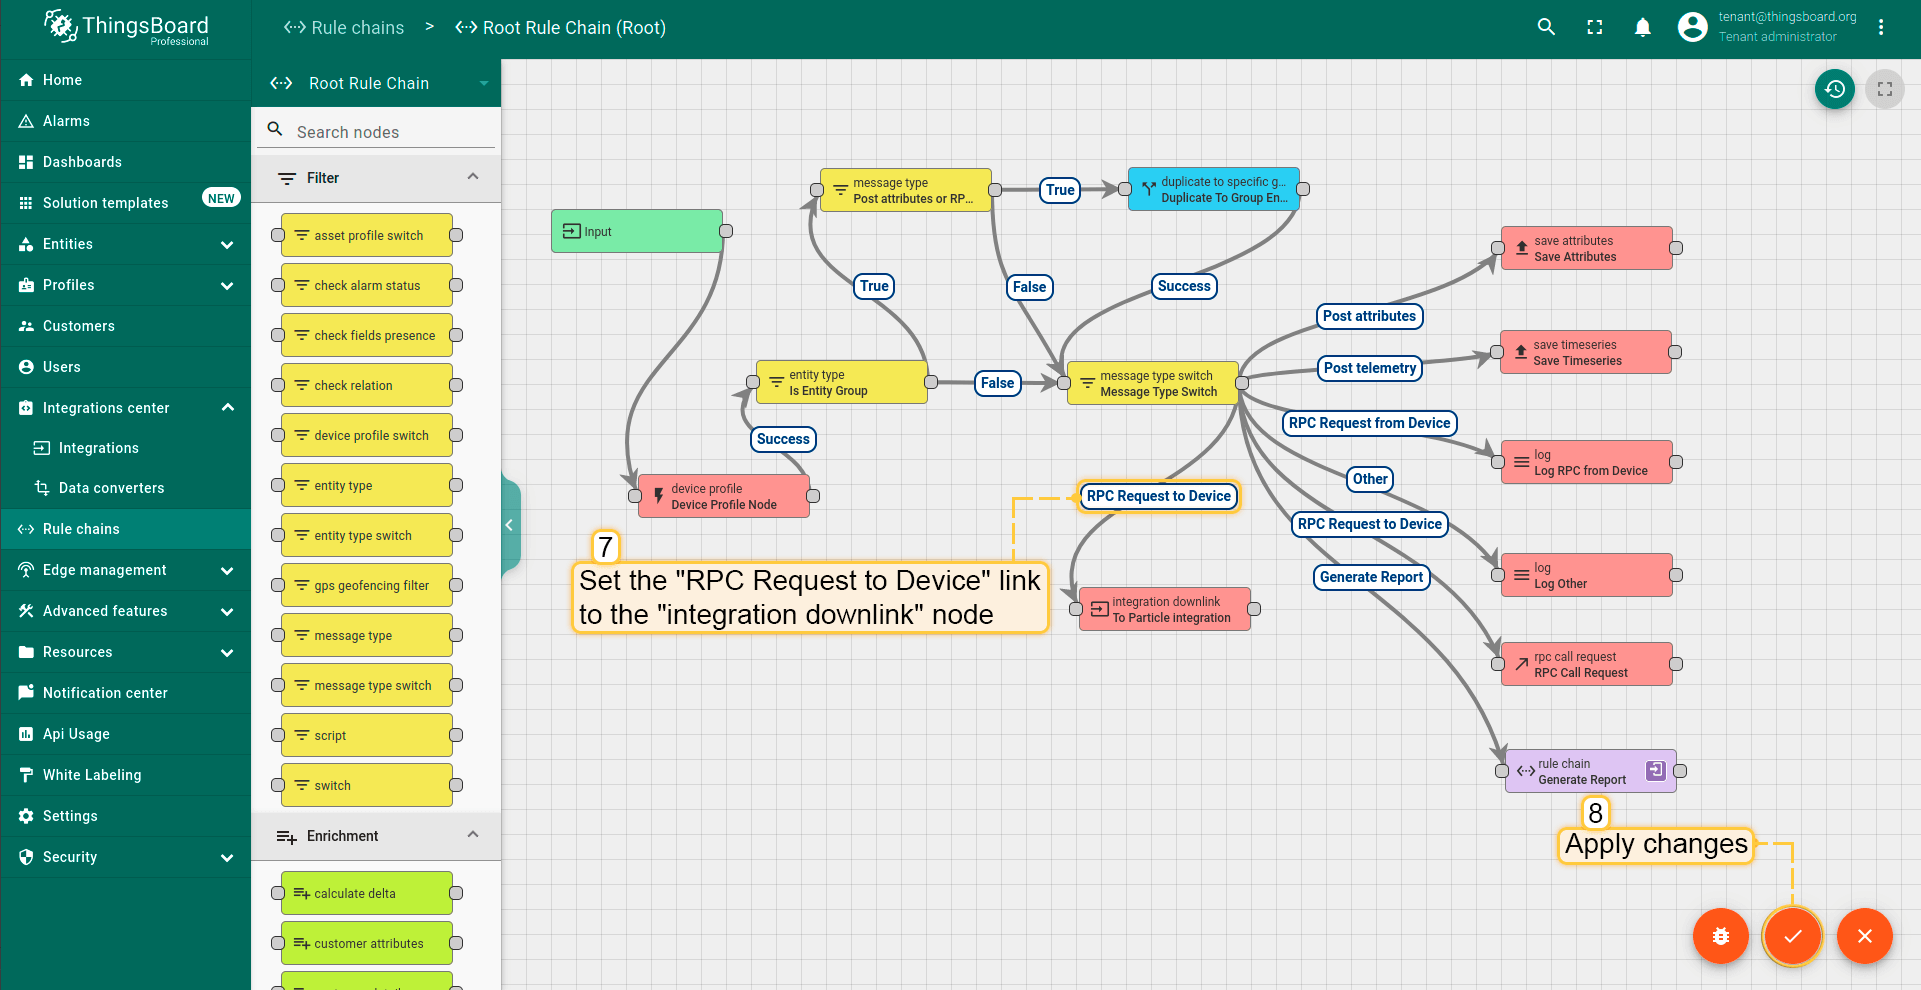
Click on check mark in bottom right corner of the screen to save the Root Rule Chain.
Downlink message to device from dashboard
To process command on device, we will use an example app Web-Connected LED from Particle WebIDE.
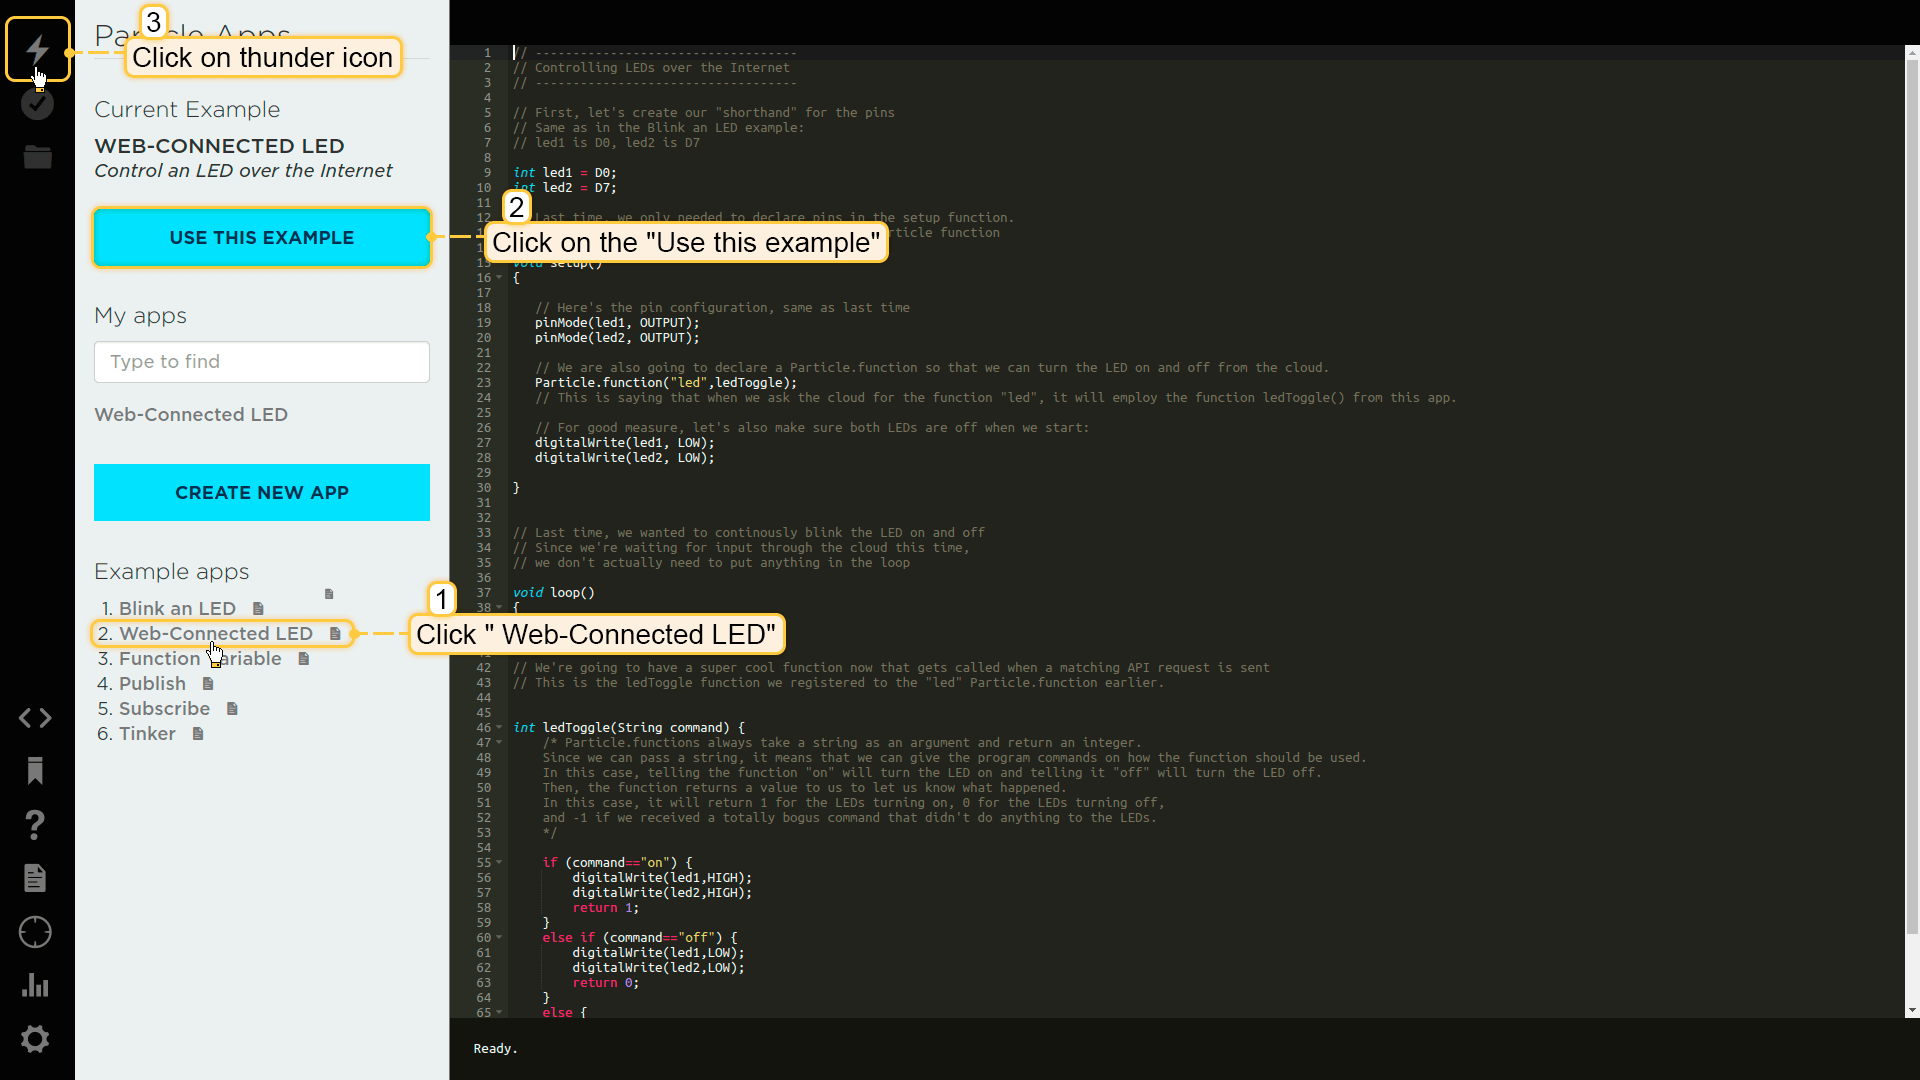
Click on Use this example and thunder icon to flash it to the device.
Configure dashboard
Let’s return to ThingsBoard and configure the dashboard to control device.
To demonstrate how to send a command to the device, we will use a Switch Control Widget. To use it, you can follow next steps:
- Click on Edit mode button to enable edit mode.
- Open existing or create a new dashboard.
- Add new alias (Click on Aliases button -> Add alias -> Put the name for alias and select created device).
- Add switch control widget (Click on Add widget button -> Click on Control widgets bundle -> Click on Switch Control).
- Select your entity alias.
- Open tab Appearance -> Change value for field “Retrieve value using method” to Don’t retrieve.
- Change “RPC set value method” to led.
- Paste to the convert value function the following code:
1
return value ? "on" : "off";
- Click on Add button to save a widget.
- Click on save button to save a dashboard.
Now, you can toggle the button and LED on your Photon should change it's led state.
If no - check that your device is connected to Particle and connection is stable.
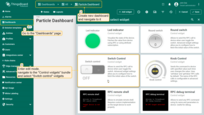
Go to the “Dashboards” page, create a new dashboard and select “Switch Control” widget from the “Control Widgets” bundle.
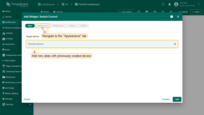
Add new alias with previously created device. Then navigate to the “Appearance” tab.
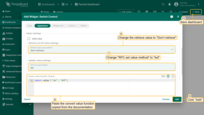
Change retrieve value to “Don't retrieve” and change “RPC set value method” to “led”. Then paste the convert value function copied from the documentation. Click “Add”, then save dashboard.
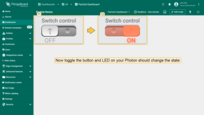
Now toggle the button and LED on your Photon should change it's led state.
Read more about dashboards here.
Next steps
-
Getting started guides - These guides provide quick overview of main ThingsBoard features. Designed to be completed in 15-30 minutes.
-
Data visualization - These guides contain instructions on how to configure complex ThingsBoard dashboards.
-
Data processing & actions - Learn how to use ThingsBoard Rule Engine.
-
IoT Data analytics - Learn how to use rule engine to perform basic analytics tasks.
-
Advanced features - Learn about advanced ThingsBoard features.
-
Contribution and Development - Learn about contribution and development in ThingsBoard.
