- Kafka Integration
- Required environment
- Create Uplink Converter
- Create Integration
- Send Uplink message
- Advanced Usage: Kafka Producer (Downlink)
- Next steps
Kafka Integration
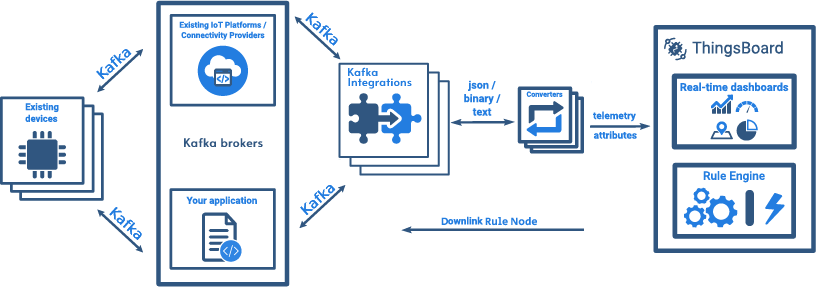
Apache Kafka — is an open-source distributed software message broker under the Apache foundation. It is written in the Java and Scala programming languages.
Designed as a distributed, horizontally scalable system that provides capacity growth both with an increase in the number and load from the sources, and the number of subscriber systems. Subscribers can be combined into groups. Supports the ability to temporarily store data for subsequent batch processing.
In some scenarios, Kafka can be used instead of a message queue, in cases where there is no stable connection between the device and an instance.
Required environment
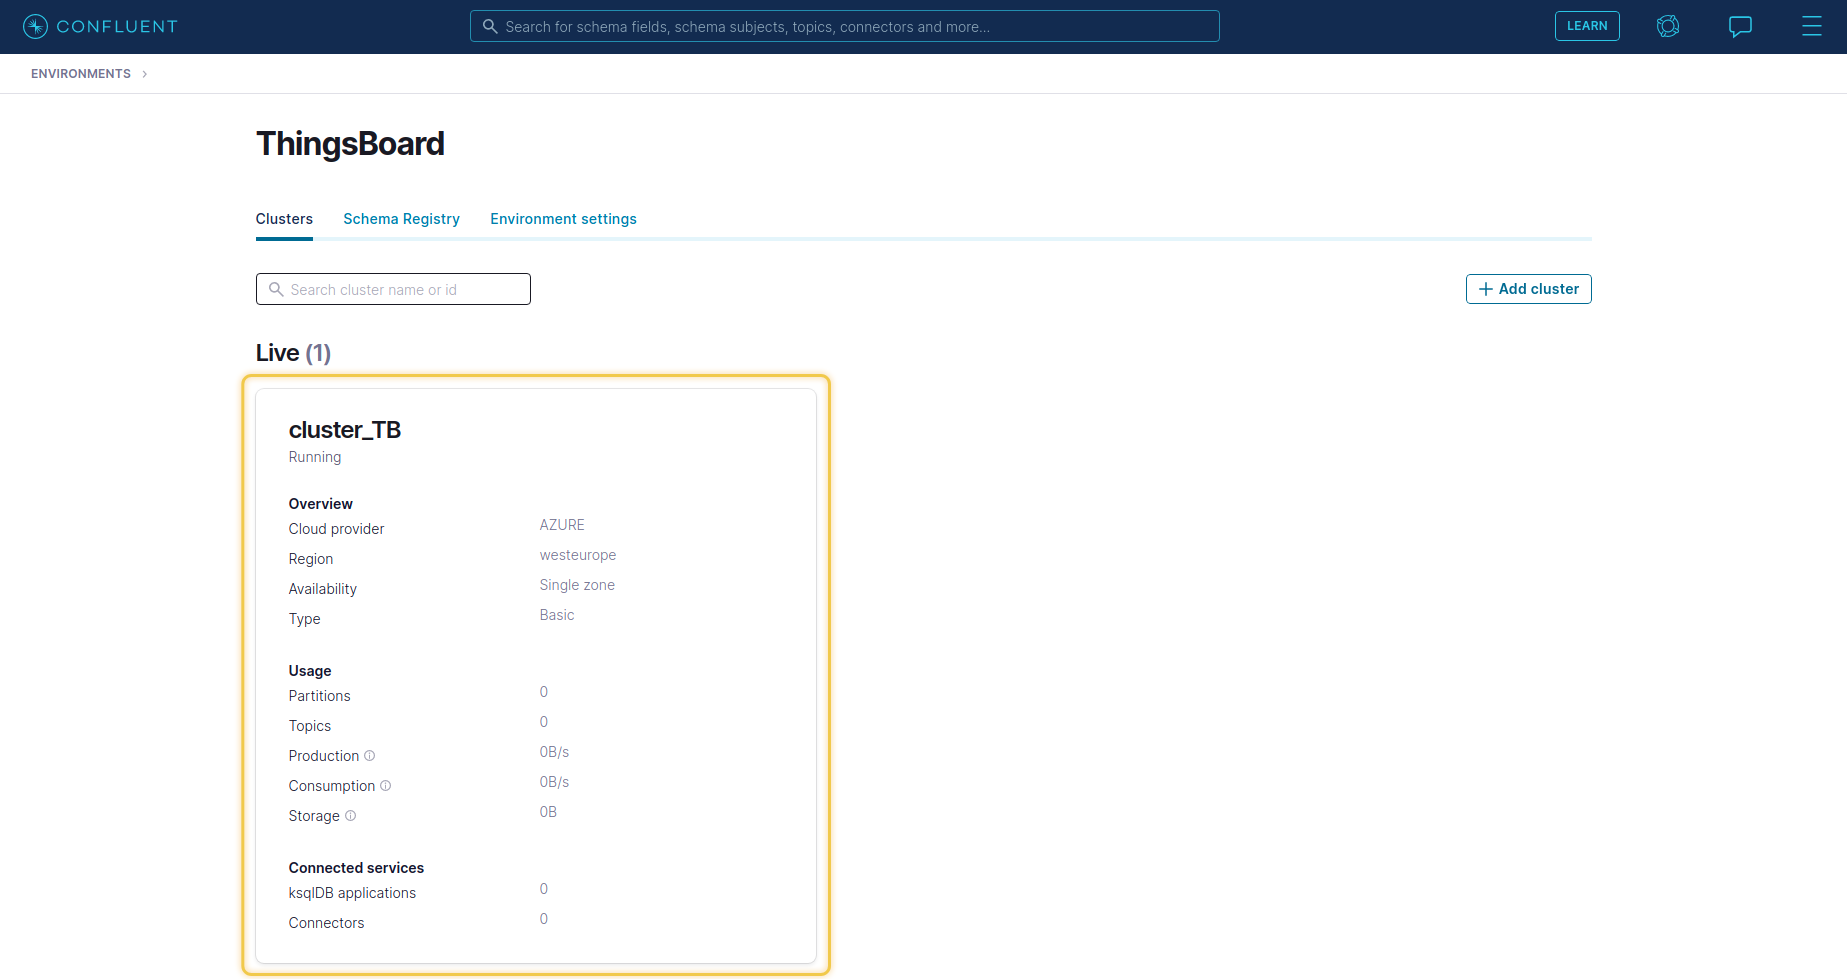
Before you start setting up the integration, you should already have a prepared Broker Kafka server. This is either a local installation or a cloud solution. If you haven’t installed Kafka Broker yet, there is an example of basic installation of Kafka Broker locally on our site. If you need to use a cloud solution, then you can consider Kafka Confluent, on the basis of which examples will be built in this guide.
Create Uplink Converter
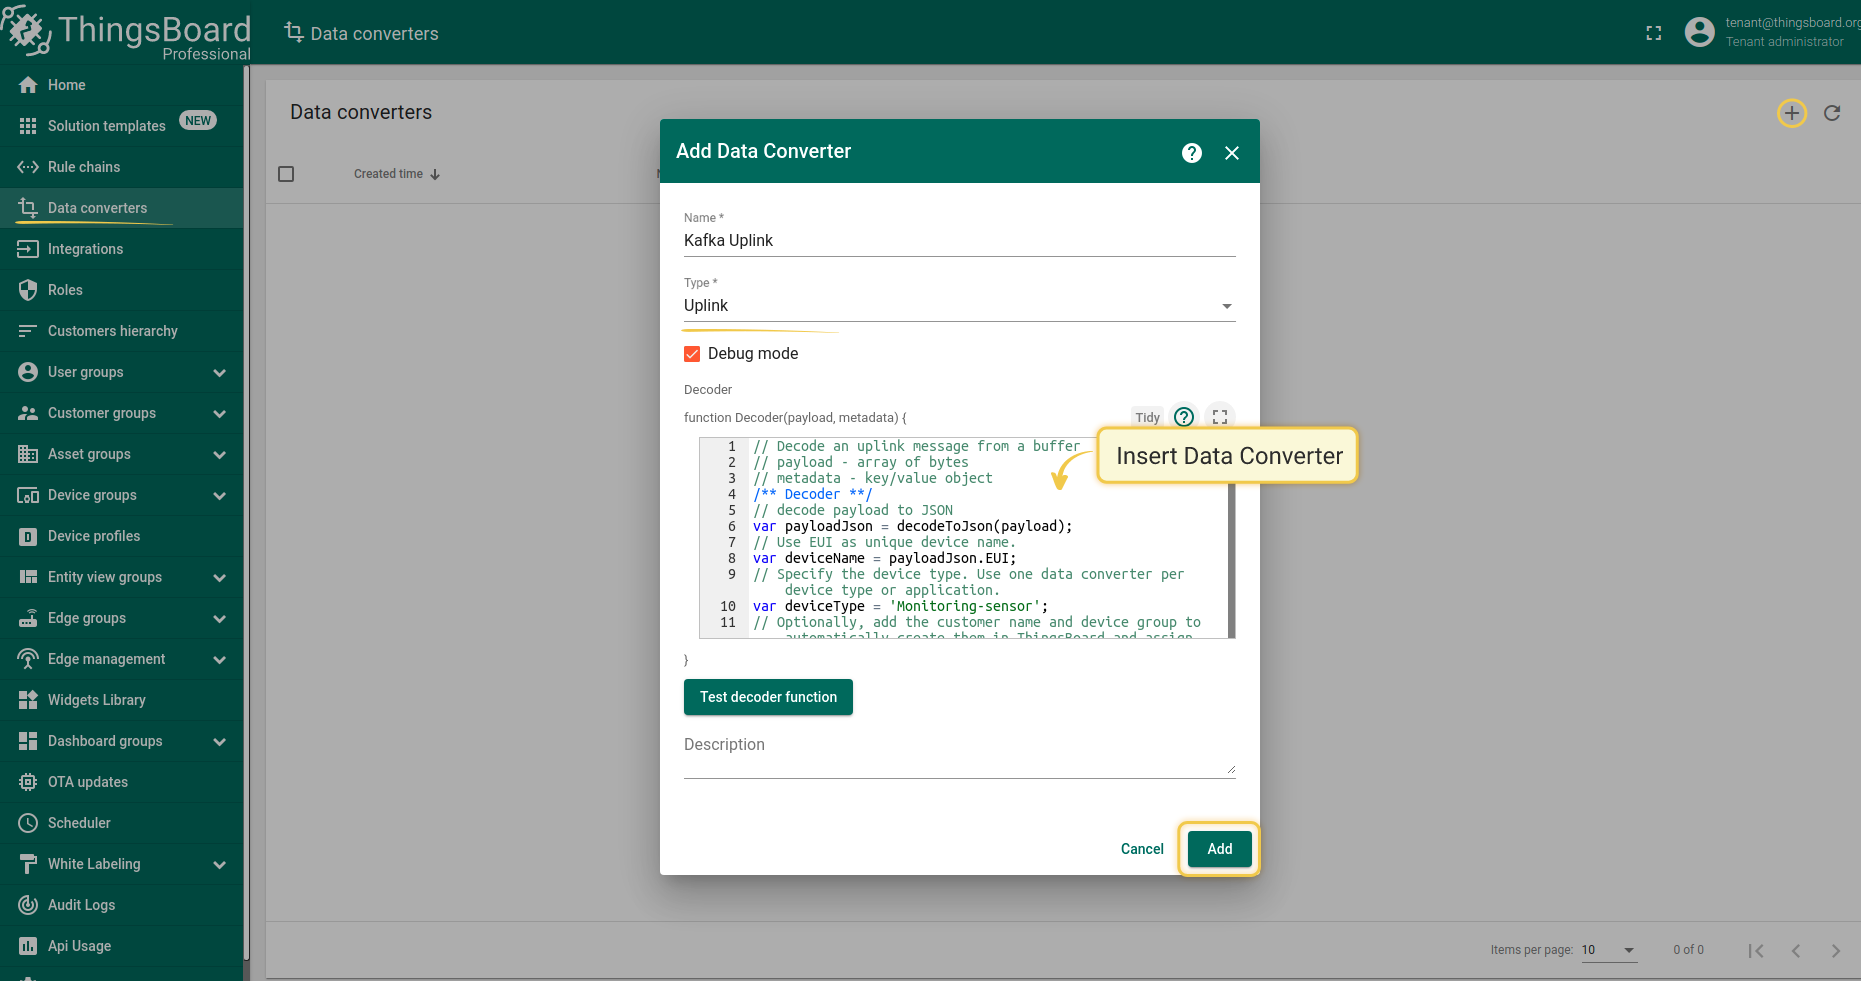
Before creating the integration, you need to create an Uplink converter in Data converters. Uplink is necessary in order to convert the incoming data from the device into the required format for displaying them in ThingsBoard. Click on the “plus” and on “Create new converter”. To view the events, enable Debug. In the function decoder field, specify a script to parse and transform data.
Debug mode
Enabling debug mode allows you to track events, states, and potential errors related to the execution of integrations. This greatly simplifies development and troubleshooting.
Debug mode settings can be combined or disabled entirely.
Let’s review sample uplink message from Kafka:
1
2
3
4
5
6
7
8
9
{
  "EUI"  : "43T1YH-REE",
  "ts"   : 1638876127000,
  "data"  : "3d1f0059",
  "port" : 10,
  "freq" : 24300,
  "rssi" : -130,
  "serial"  : "230165HRT"
}
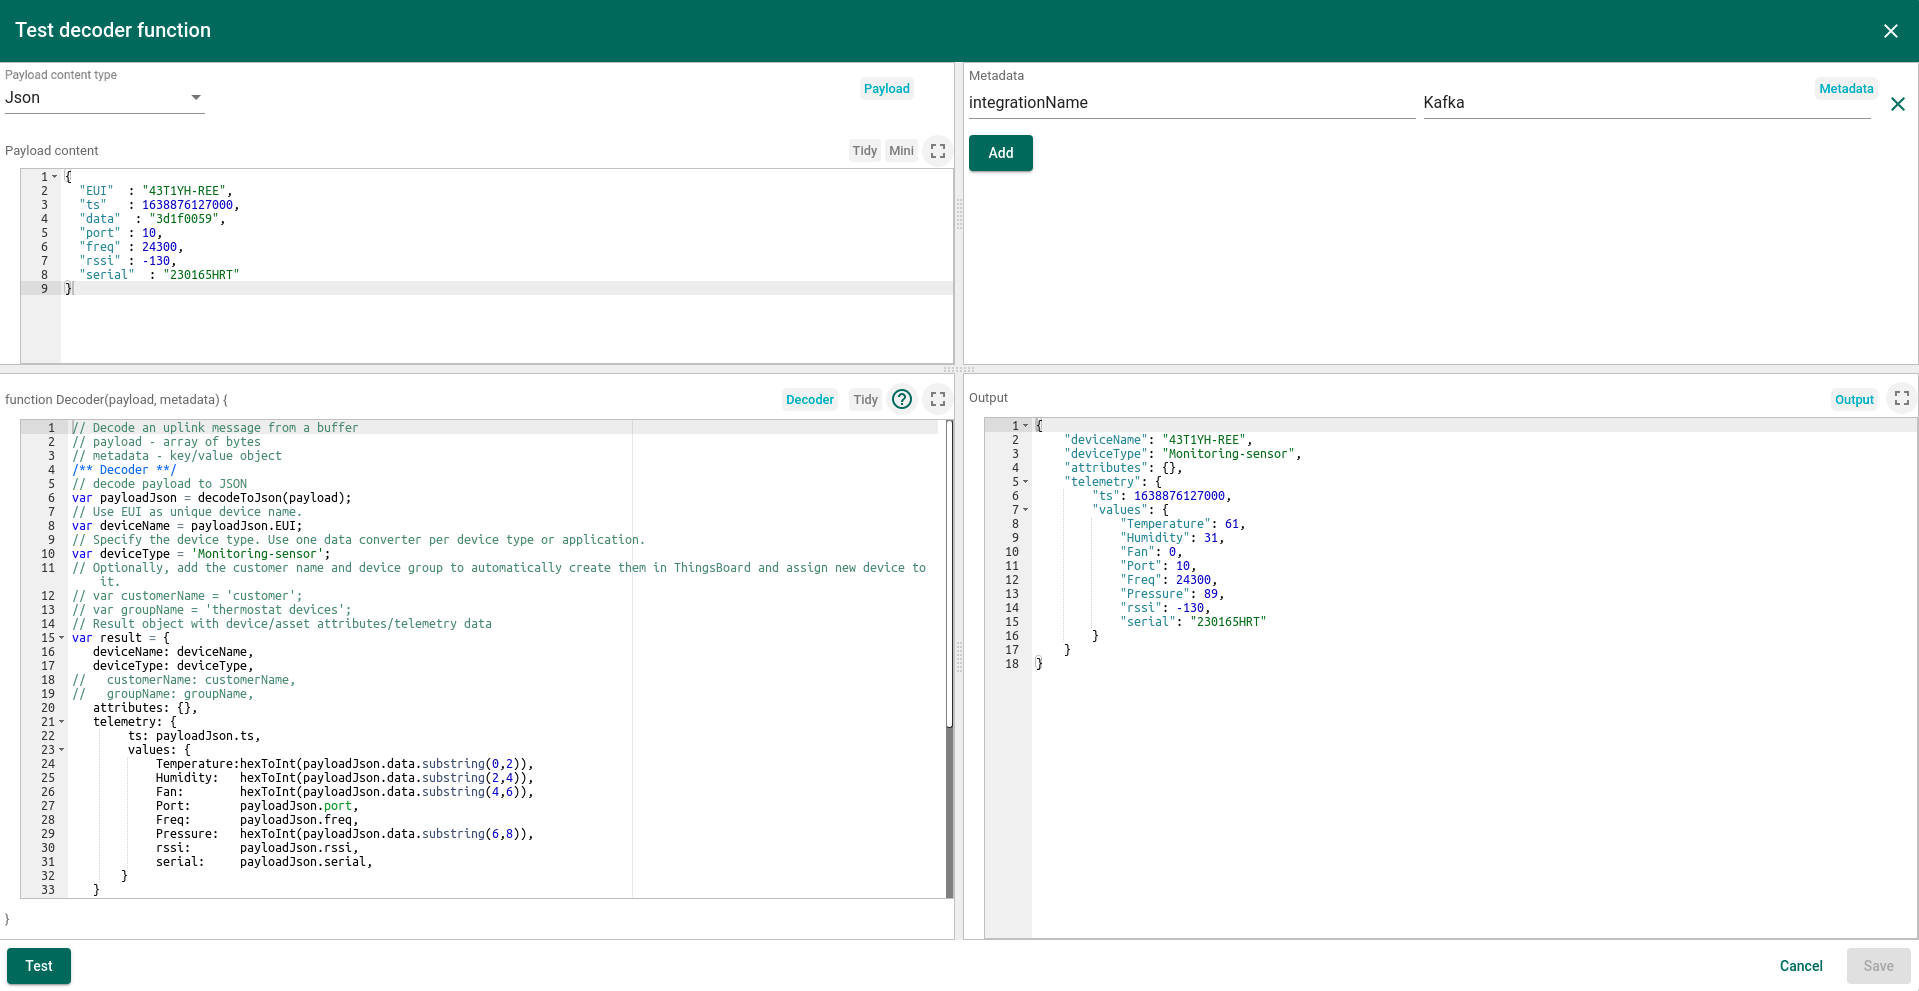
EUI is responsible for the name of the device. The “data” is a telemetry concatenation by two characters, where the first value “3d” - temperature, “1f” - humidity, “00” - fan speed, “59” - pressure.
You can use the following code, copy it to the decoder function section:
1
2
3
4
5
6
7
8
9
10
11
12
13
14
15
16
17
18
19
20
21
22
23
24
25
26
27
28
29
30
31
32
33
34
35
36
37
38
39
40
41
42
43
44
45
46
47
48
49
50
51
52
// Decode an uplink message from a buffer
// payload - array of bytes
// metadata - key/value object
/** Decoder **/
// decode payload to JSON
var payloadJson = decodeToJson(payload);
// Use EUI as unique device name.
var deviceName = payloadJson.EUI;
// Specify the device type. Use one data converter per device type or application.
var deviceType = 'Monitoring-sensor';
// Optionally, add the customer name and device group to automatically create them in ThingsBoard and assign new device to it.
// var customerName = 'customer';
// var groupName = 'thermostat devices';
// Result object with device/asset attributes/telemetry data
var result = {
   deviceName: deviceName,
   deviceType: deviceType,
//   customerName: customerName,
//   groupName: groupName,
   attributes: {},
   telemetry: {
        ts: payloadJson.ts,
        values: {
            Temperature:hexToInt(payloadJson.data.substring(0,2)),
            Humidity:   hexToInt(payloadJson.data.substring(2,4)),
            Fan:        hexToInt(payloadJson.data.substring(4,6)),
            Port:       payloadJson.port,
            Freq:       payloadJson.freq,
            Pressure:   hexToInt(payloadJson.data.substring(6,8)),
            rssi:       payloadJson.rssi,
            serial:     payloadJson.serial
       }
   }
};
/** Helper functions **/
function decodeToString(payload) {
   return String.fromCharCode.apply(String, payload);
}

function decodeToJson(payload) {
   // covert payload to string.
   var str = decodeToString(payload);
   // parse string to JSON
   var data = JSON.parse(str);
   return data;
}

function hexToInt(value) {
    return parseInt('0x' + value.match(/../g).reverse().join(''));
}

return result;
You can change the parameters and decoder code when creating a converter or editing. If the converter has already been created, click the pencil icon to edit it. Copy the sample converter configuration (or use your own configuration) and paste it into the decoder function. Then save the changes by clicking the checkmark icon.
Create Integration
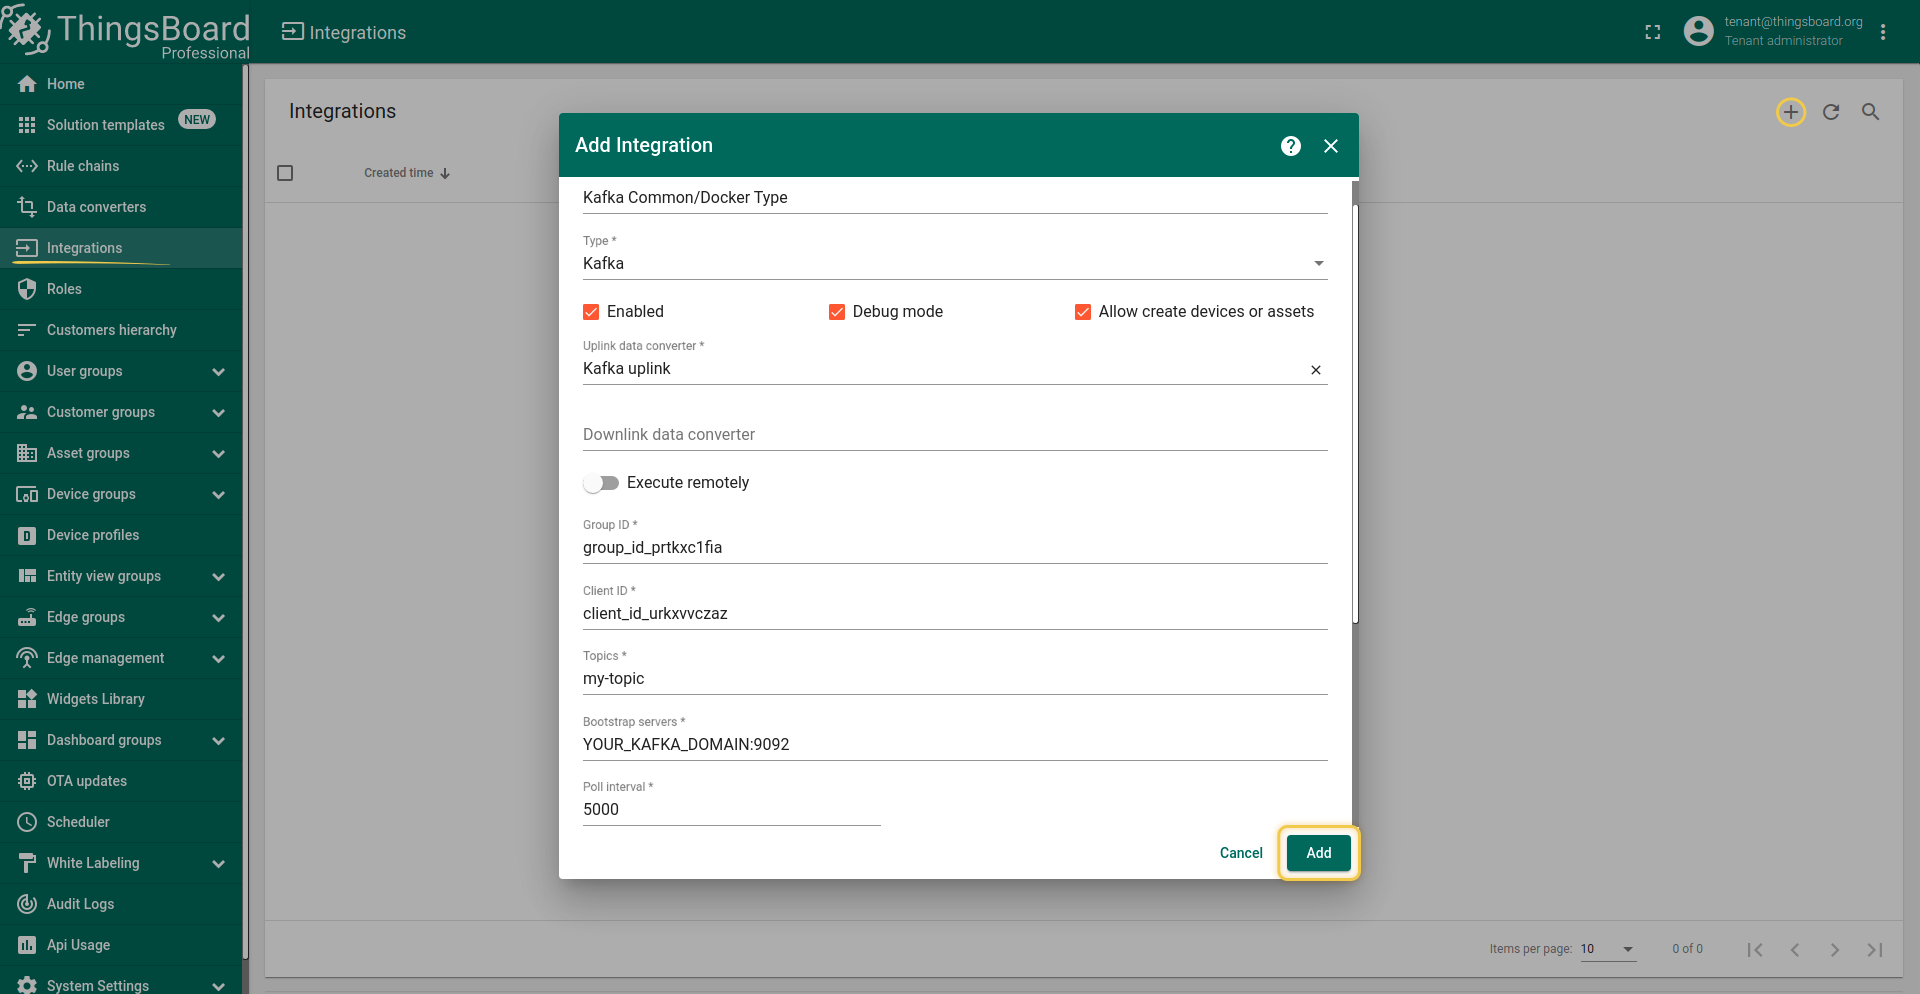
After creating the Uplink converter, it is possible to create an integration. At this stage, you need to set the parameters to establish a connection between ThingsBoard and Kafka Broker. After the connection is established, the integration will be transmitting all received data to the Uplink converter for processing and subsequent transfer to Rule Chain according to the Device profile specified in the Device.
| Field | Description |
|---|---|
| Name | The name of your integration. |
| Type | Choose Kafka type. |
| ‘Enable’ Checkbox | Enable / Disable Integration. |
| ‘Debug Mode’ Checkbox | Enable during integration debugging. |
| Allow create devices or assets | If there was no device in ThingsBoard, the device will be created. |
| Uplink data converter | Select the previously created converter. |
| Downlink data converter | This option is not supported through the integration, More details about Downlink below in the guide. |
| ‘Execute remotely’ Checkbox | Activate if you want to execute integration remotely from main ThingsBoard instance. For more information on remote integration follow the link (Remote Integrations). |
| Group ID | Specifies the name of the consumer group to which the Kafka consumer belongs. |
| Client ID | An Kafka consumer identifier in a consumer group. |
| Topics | Topics that ThingsBoard will subscribe to after connecting to the Kafka broker. |
| Bootstrap servers | Host and port pair that is the address of the Kafka broker to which the Kafka client first connects for bootstrapping. |
| Poll interval | Duration in milliseconds between polling of the messages if no new messages arrive. |
| Auto create topics | Set Enable if need topics to be created automatically |
| Other properties | Any other additional properties could be provided for kafka broker connection.. |
| Metadata | Metadata is a key-value map with some integration specific fields. For example, you can put device type. |
|
The screenshot shows the basic configuration for establishing a connection between ThingsBoard and Kafka Broker. With these settings, the integration will request updates from the Kafka broker every 5 seconds. And if set a topic does not exist at the broker, it will be created automatically. Note: With debug mode enabled, you can view errors, connection status and other events by opening the Events tab. |
|
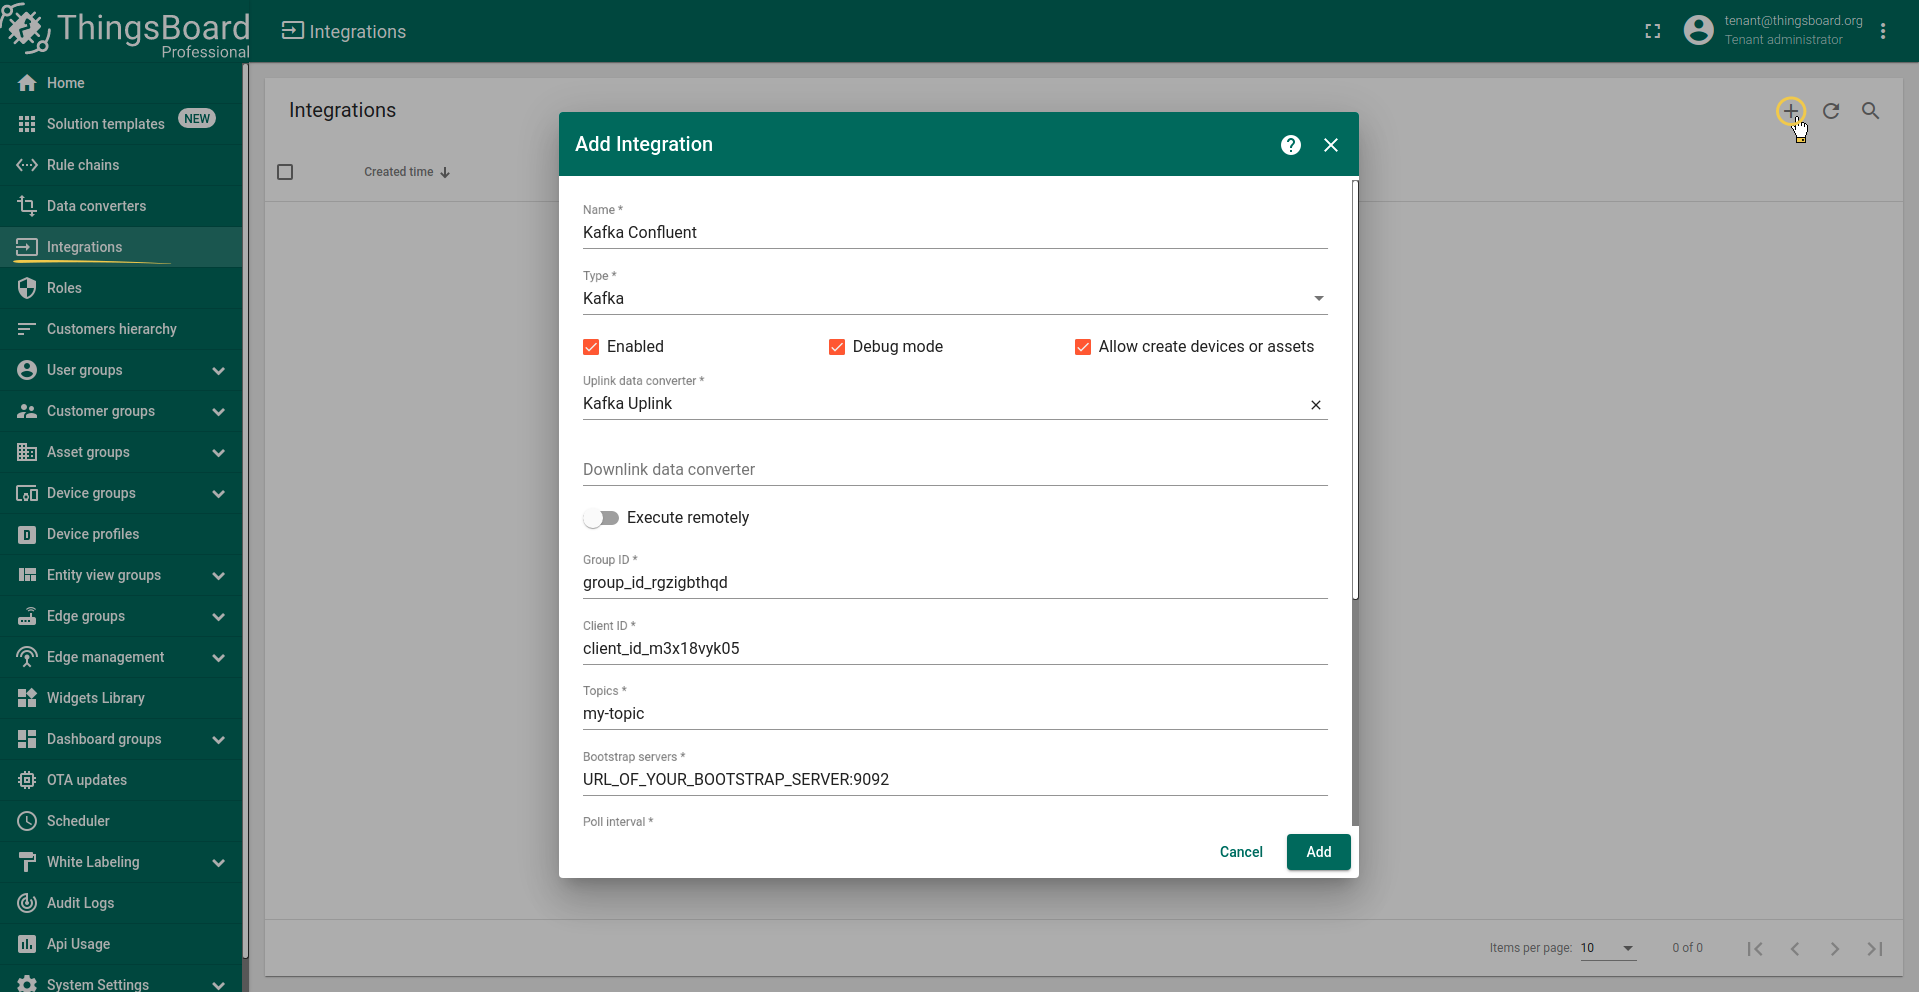
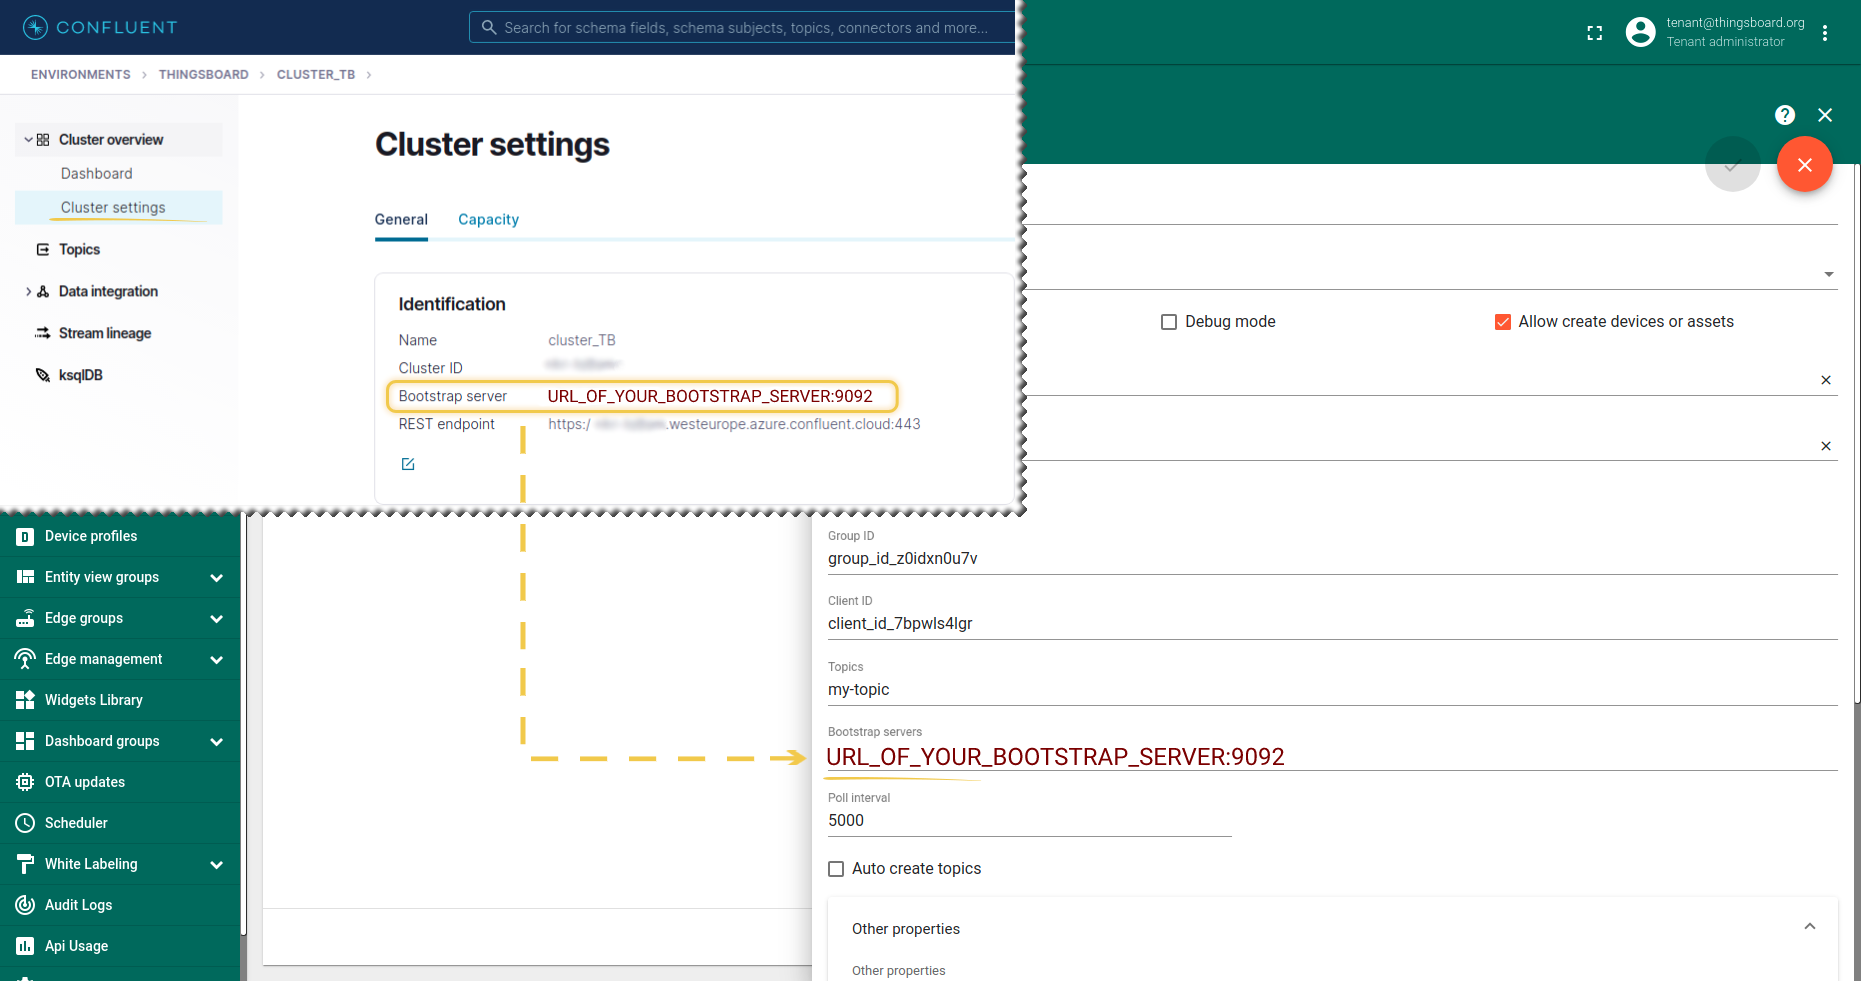
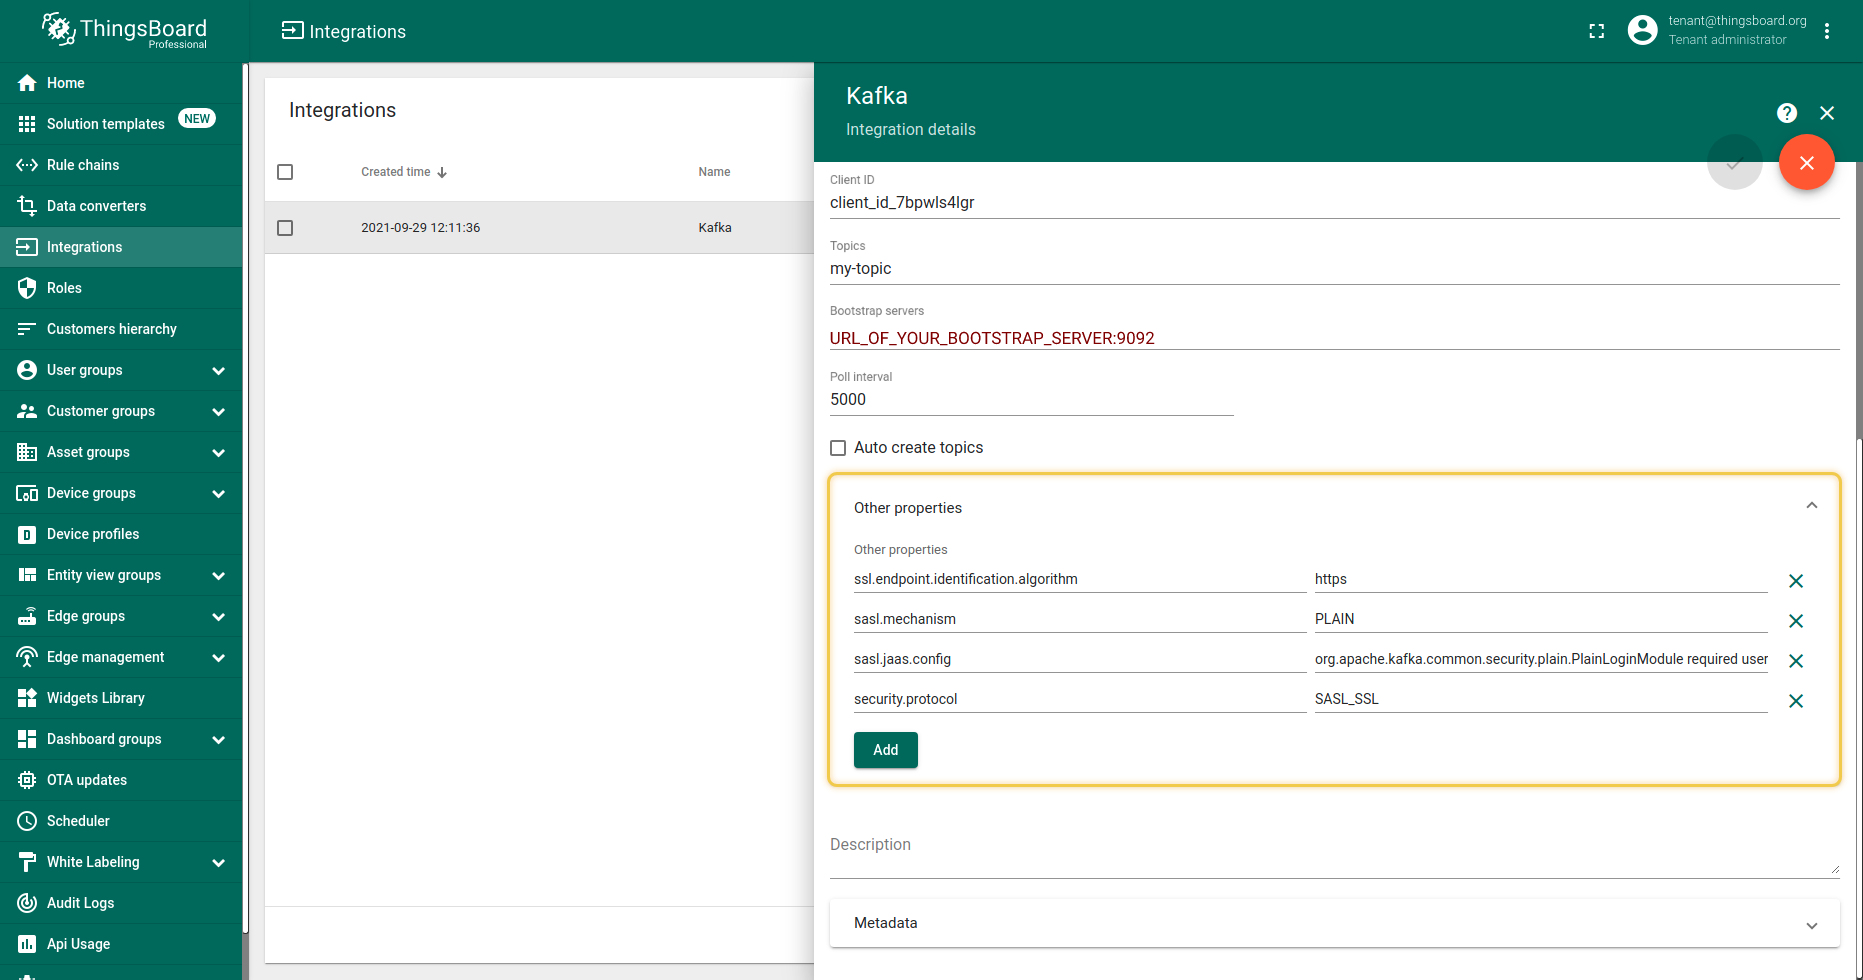
Configure kafka integration So in ThingsBoard instance open the Integration menu, select Add integration or Edit action - Details tab. Set Name, Choose type and select your Uplink data converter from dropdown menu. And fill other required fields: Topics, Bootstrap server, properties. In Confluent select the created environment, then open Cluster, Cluster settings. After, find Bootstrap server URL, it looks like URL_OF_YOUR_BOOTSTRAP_SERVER:9092 You should copy it to integration: Also, need will be to add several other properties, namely:
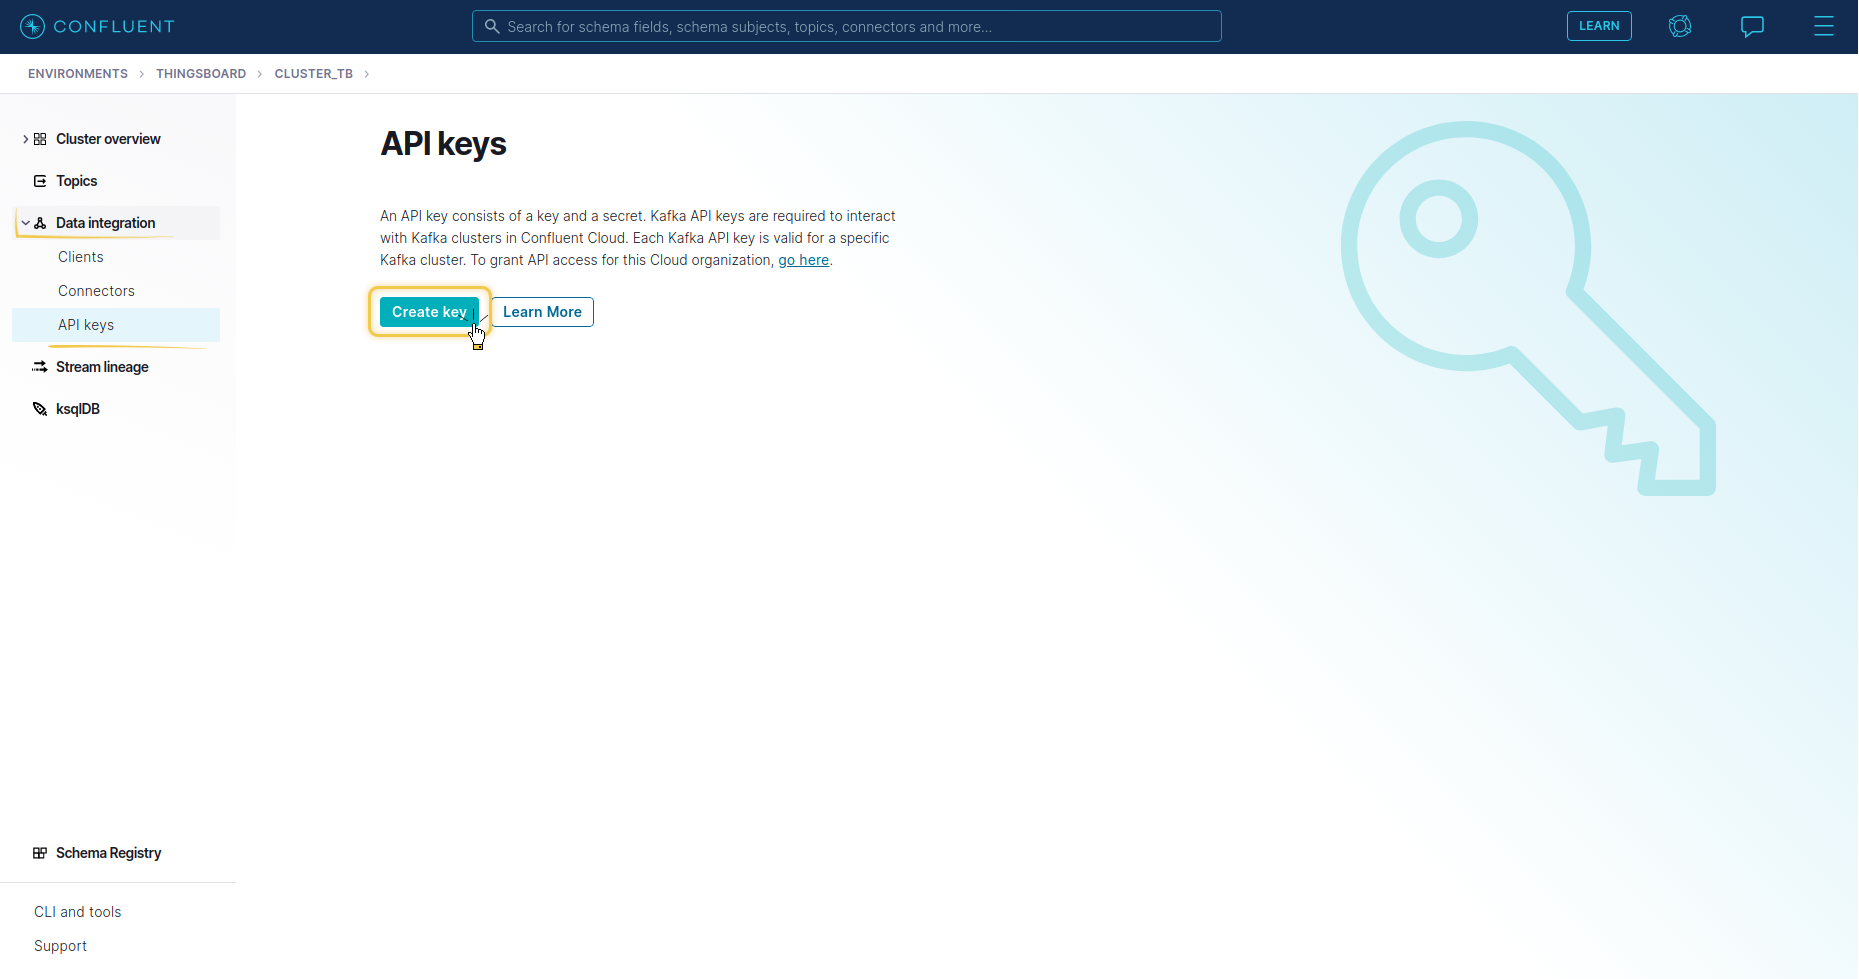
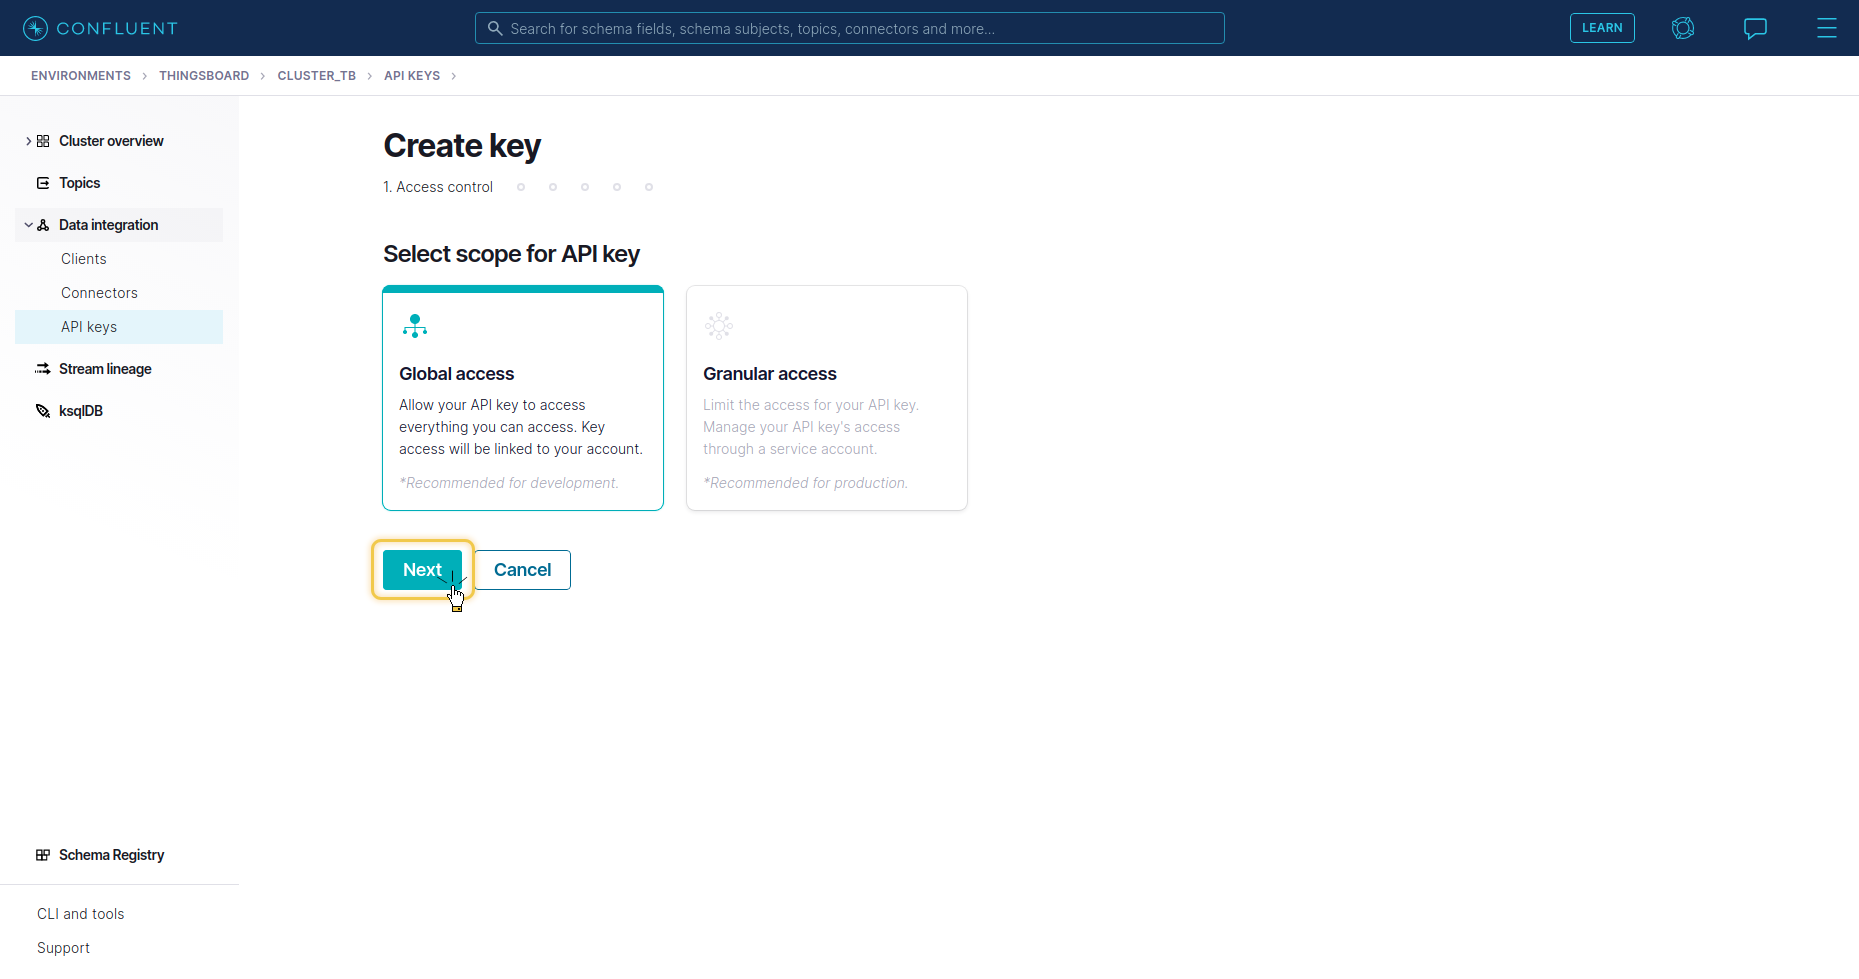
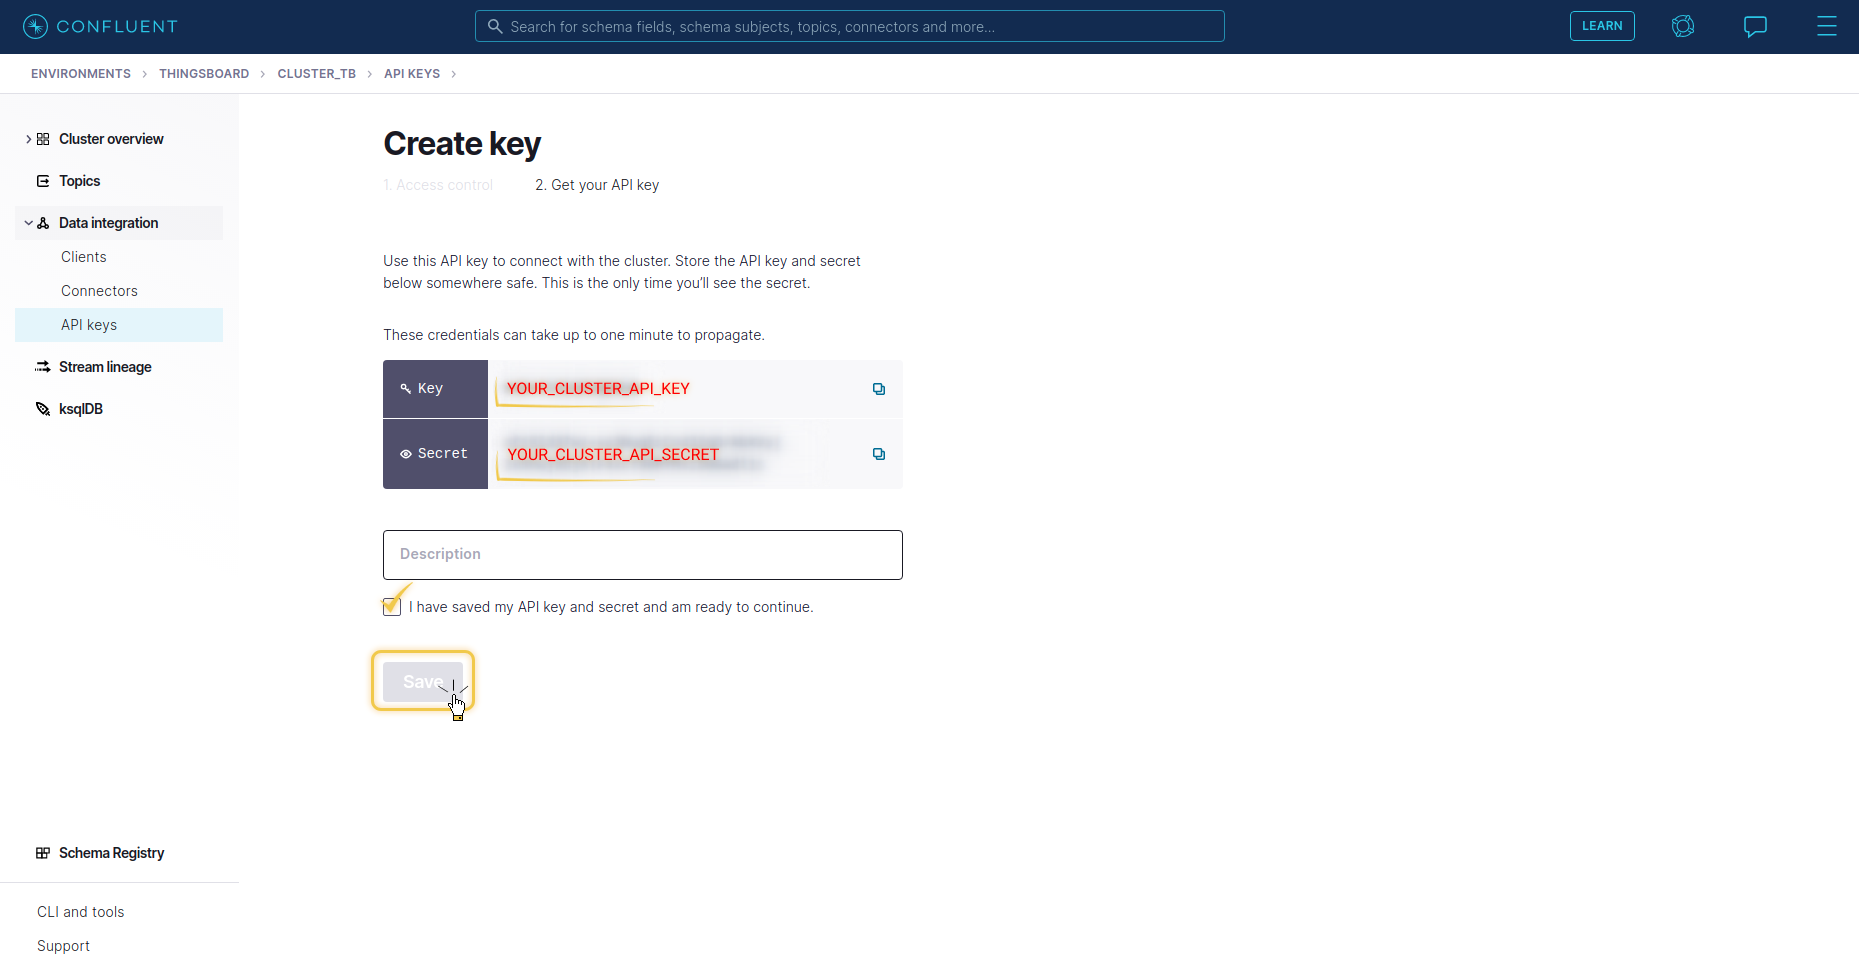
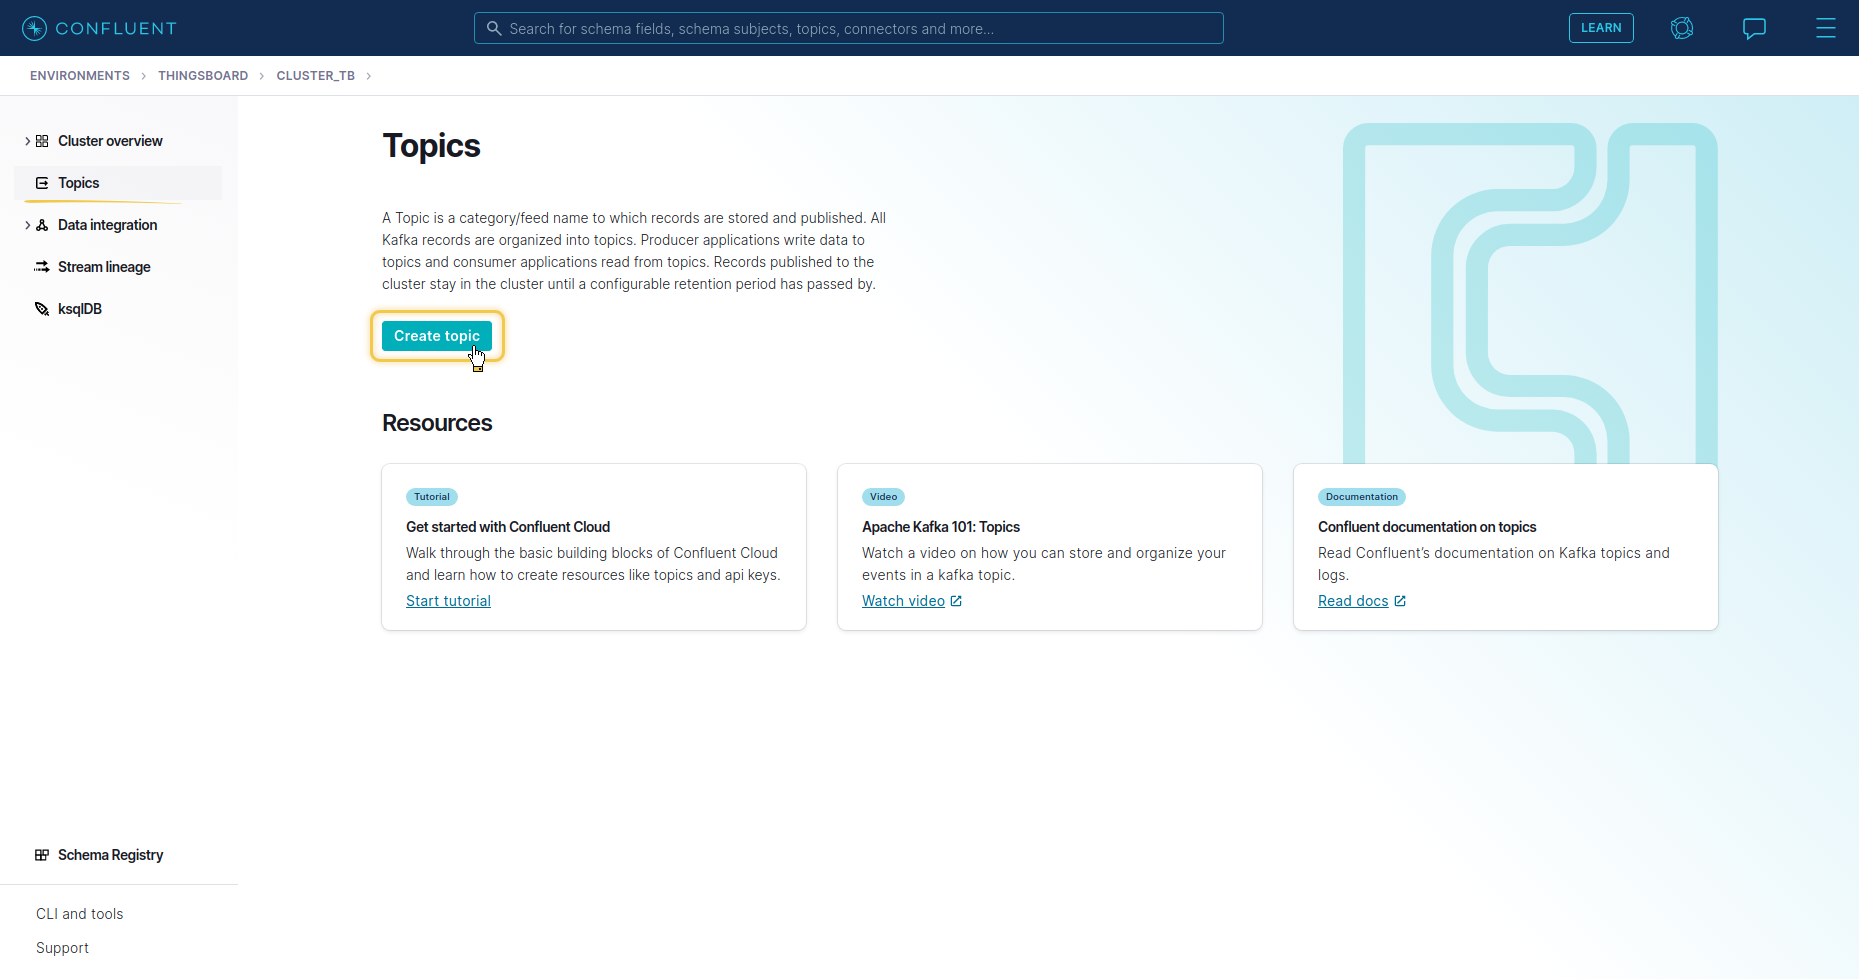
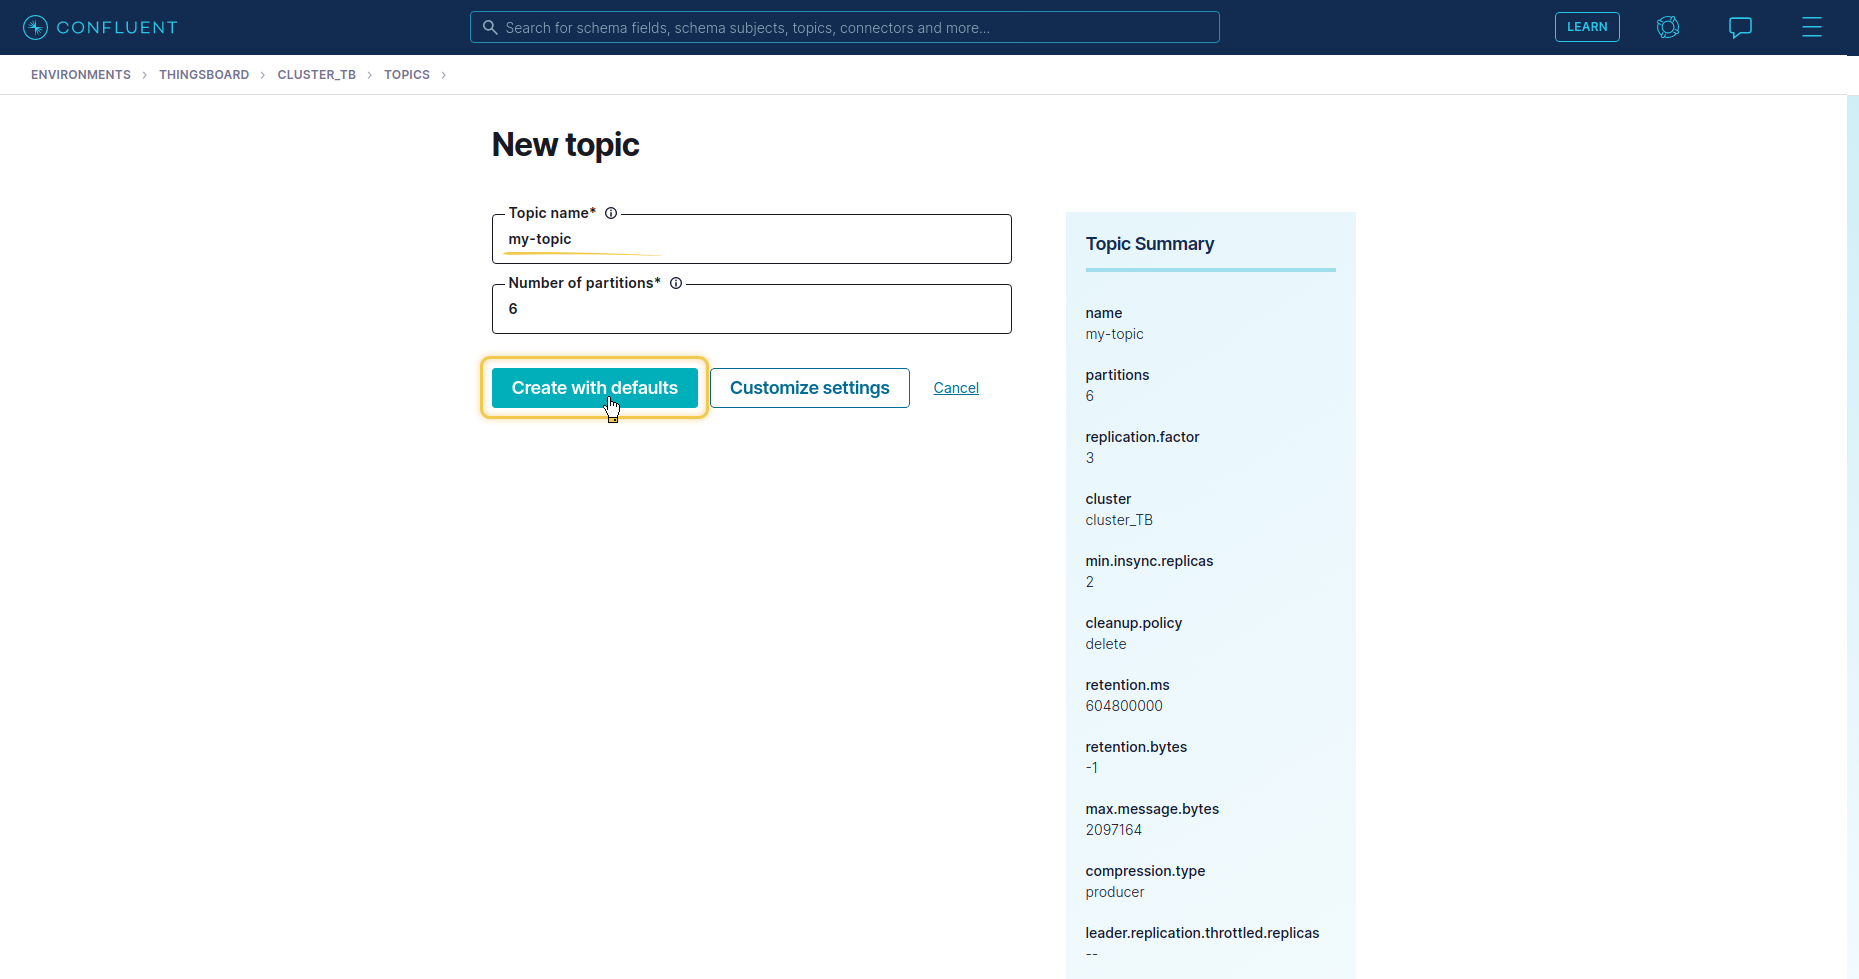
To generate the required API key and secret for it, in the cluster you must go to the Data Integration menu, select the API Keys submenu, pick Create key and Select the Scope for the API Key. Here you will see the key and secret to it, which should be used in the integration properties. It remains to create a topic on Confluent. To do this, select the “Topics” menu, select “Create Topics”, set the name to my-topic (It is important that the topics coincide with the specified in the integration. At the next stage, if necessary, you can change the Storage and Message size parameters, and then confirm the creation by the Create with defaults button. With these settings, the integration will request updates from the Kafka broker every 5 seconds. |
Send Uplink message
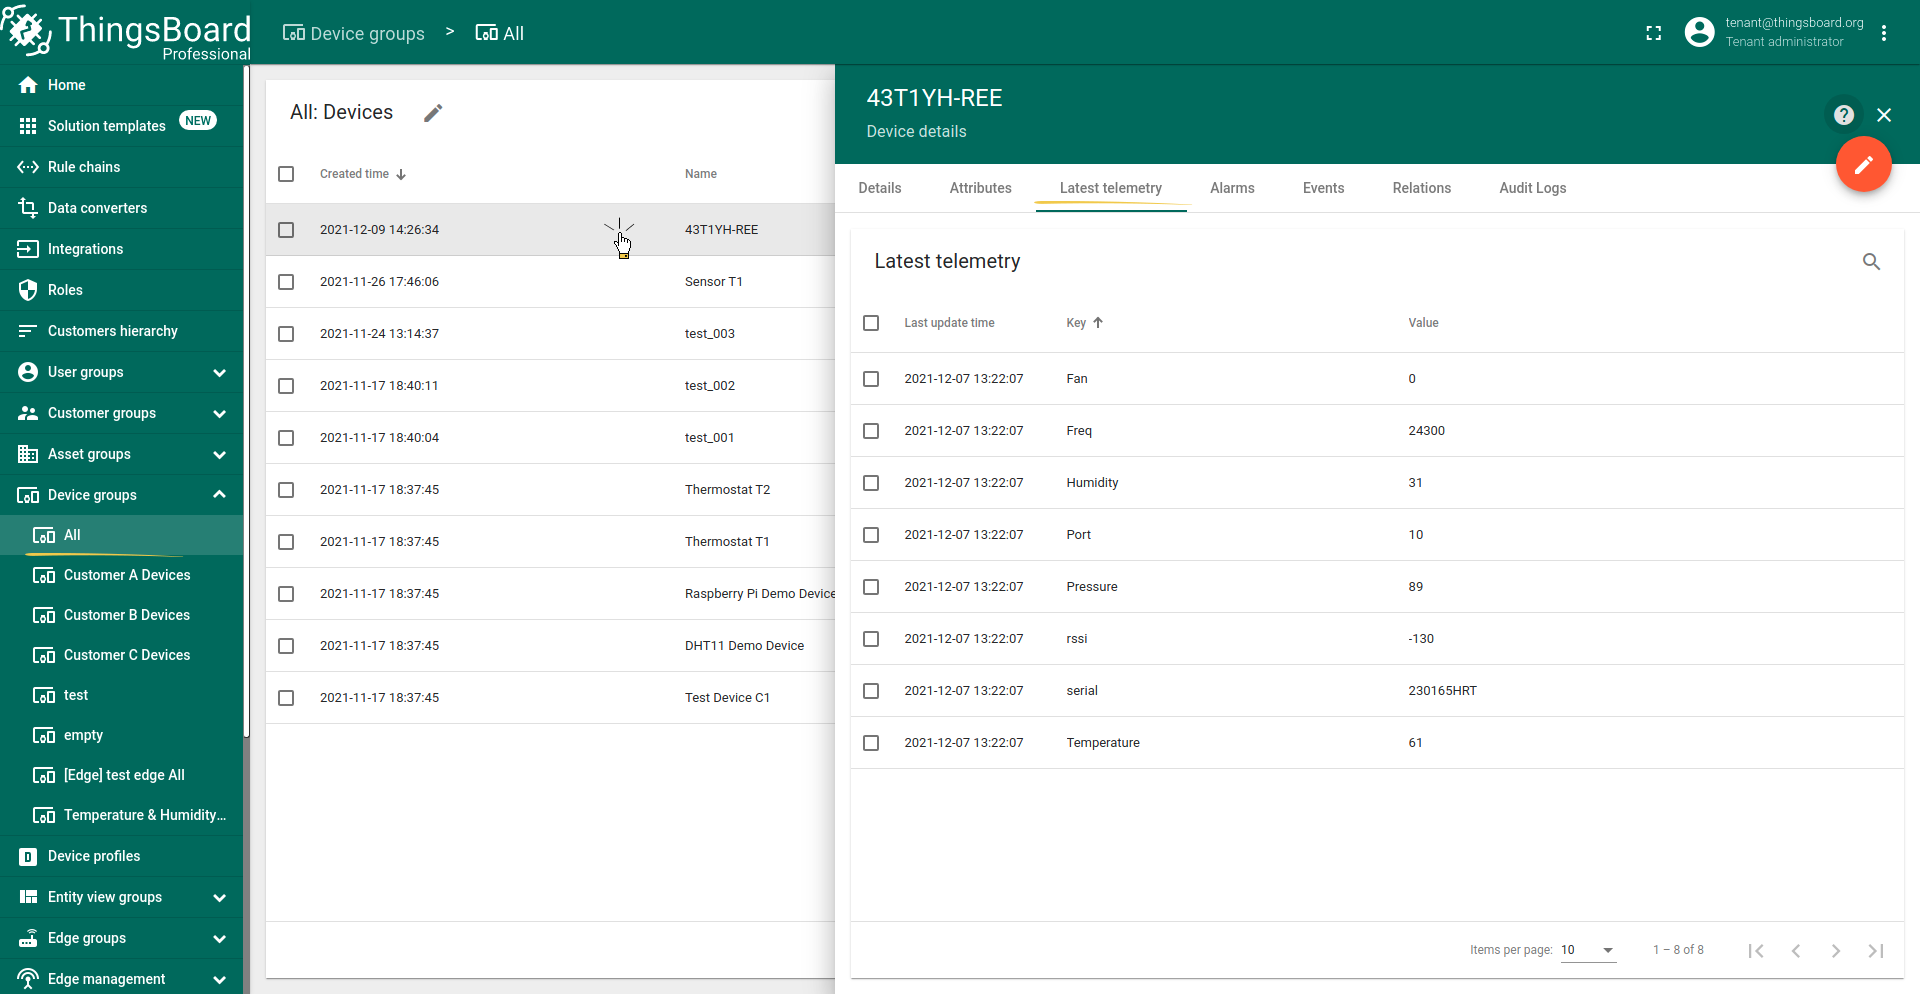
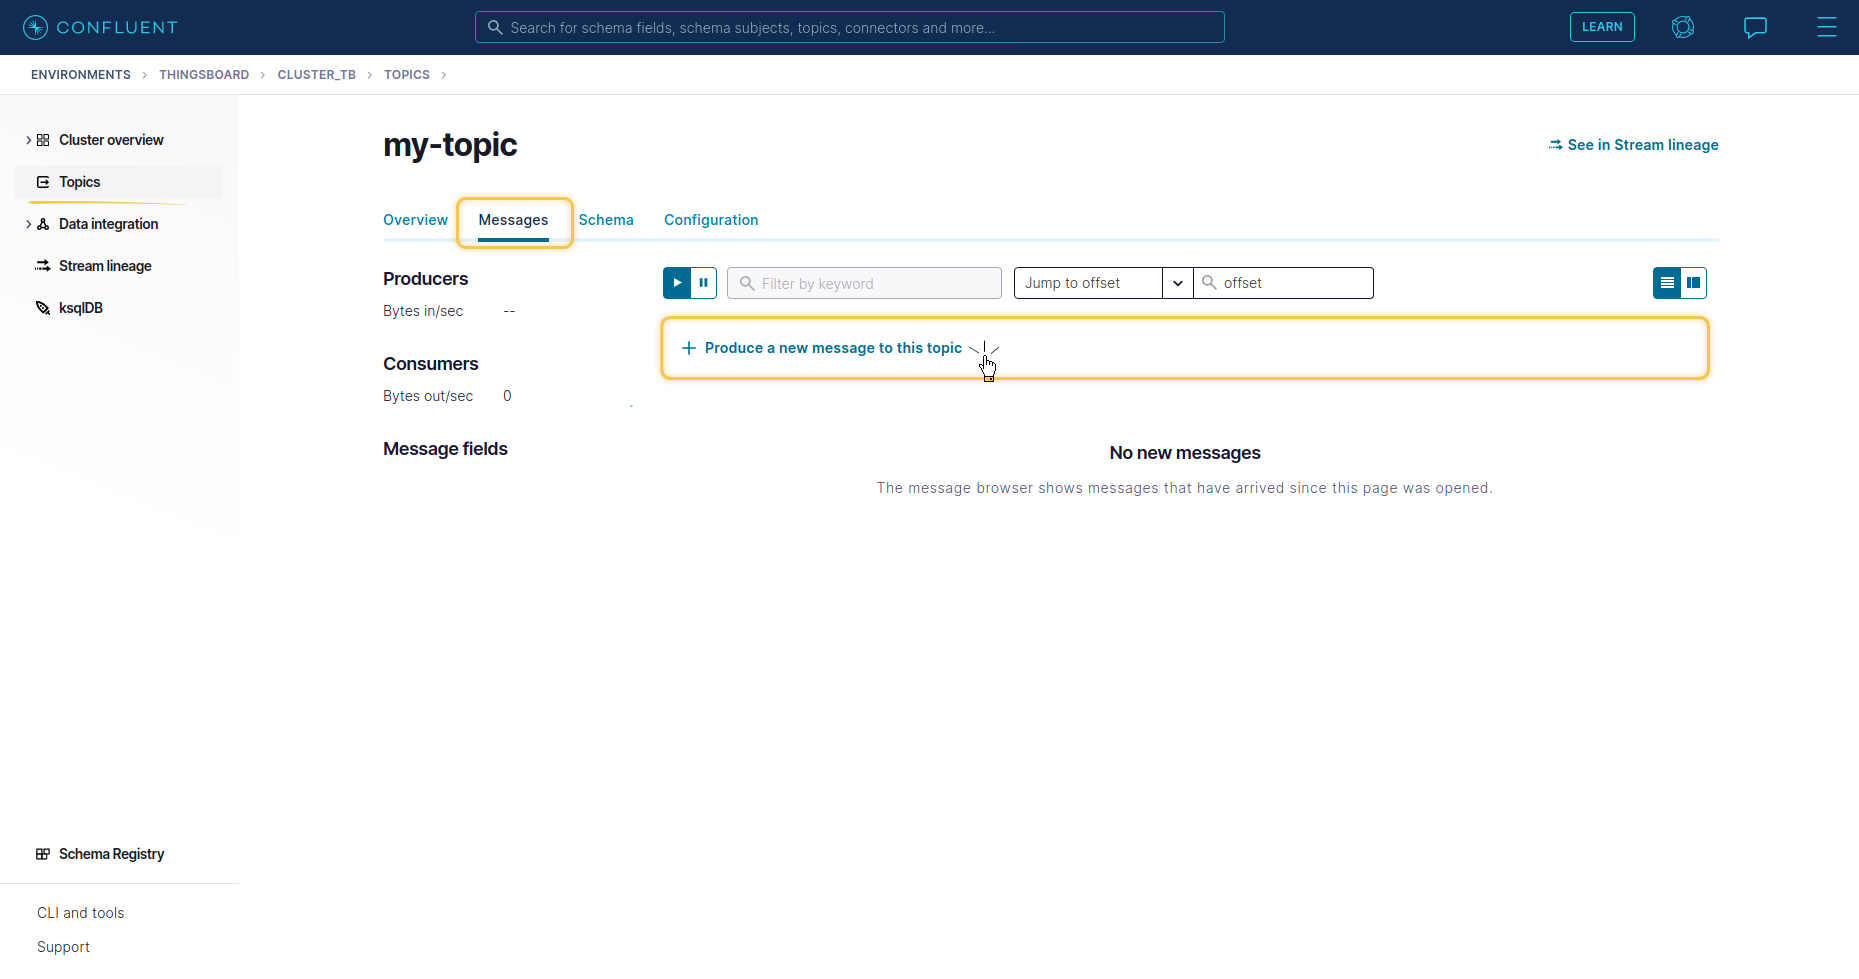
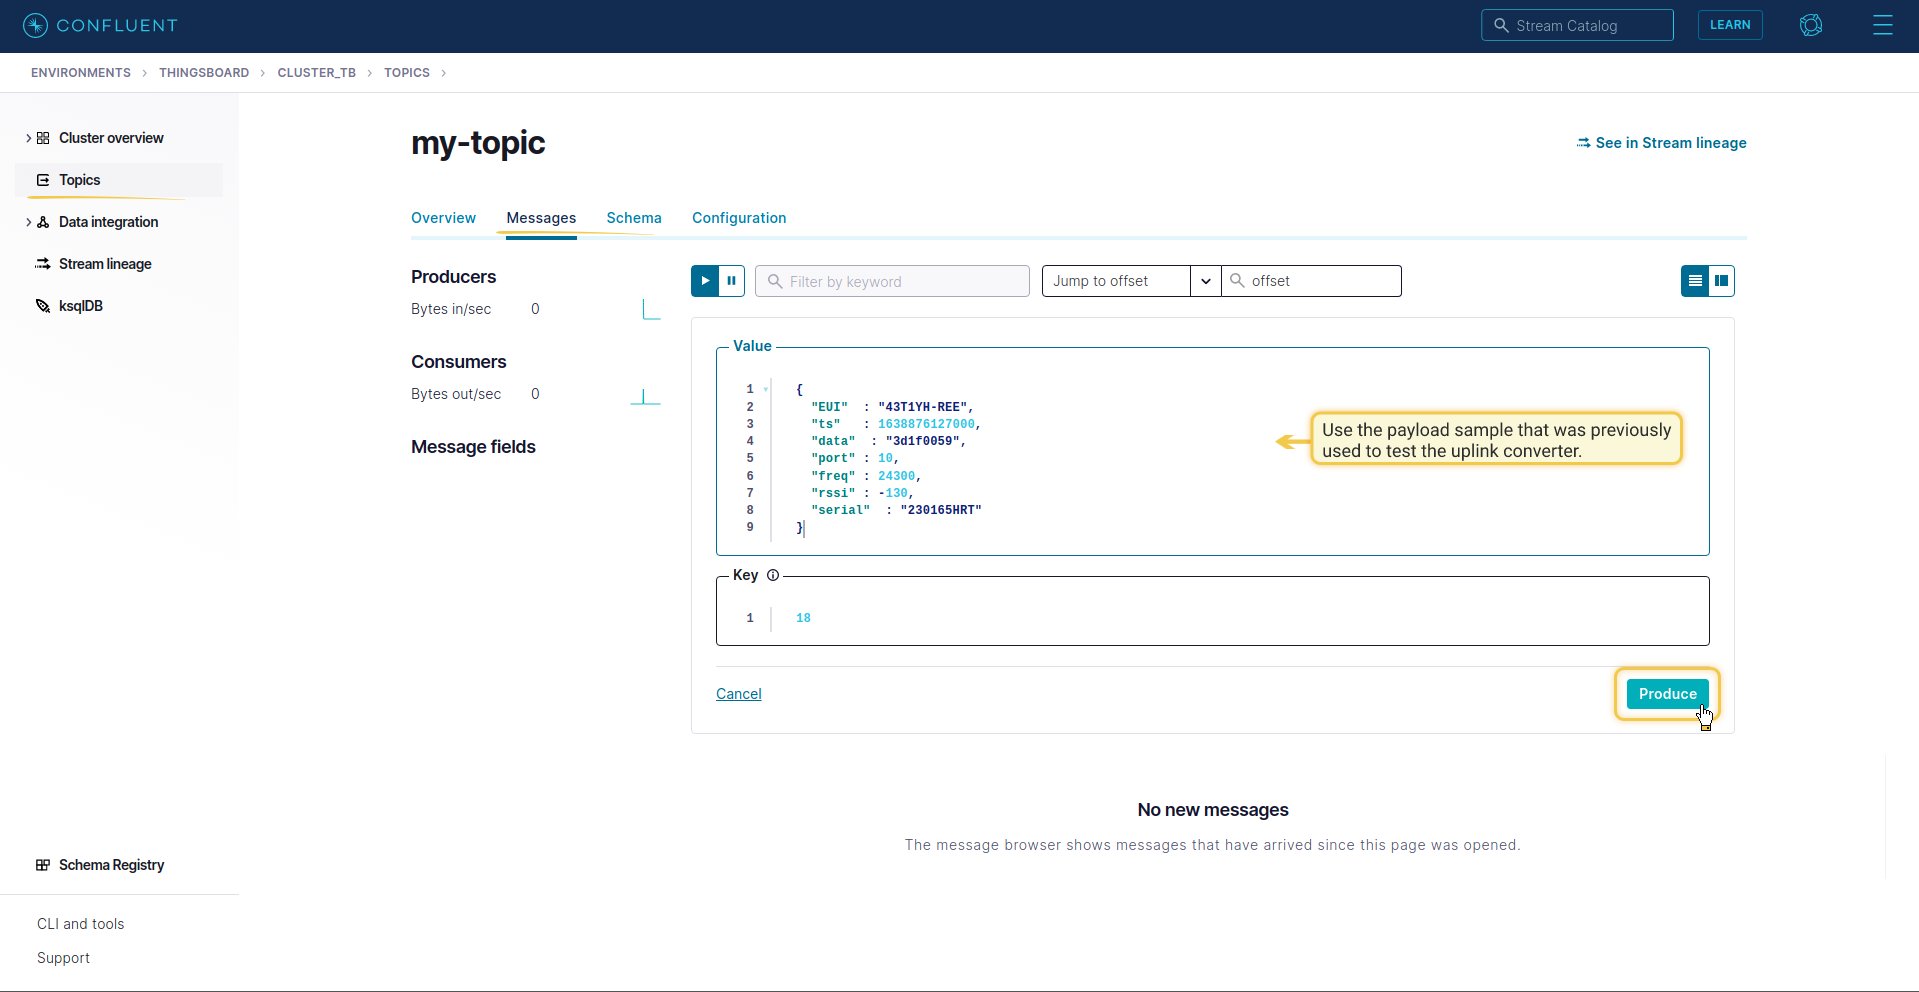
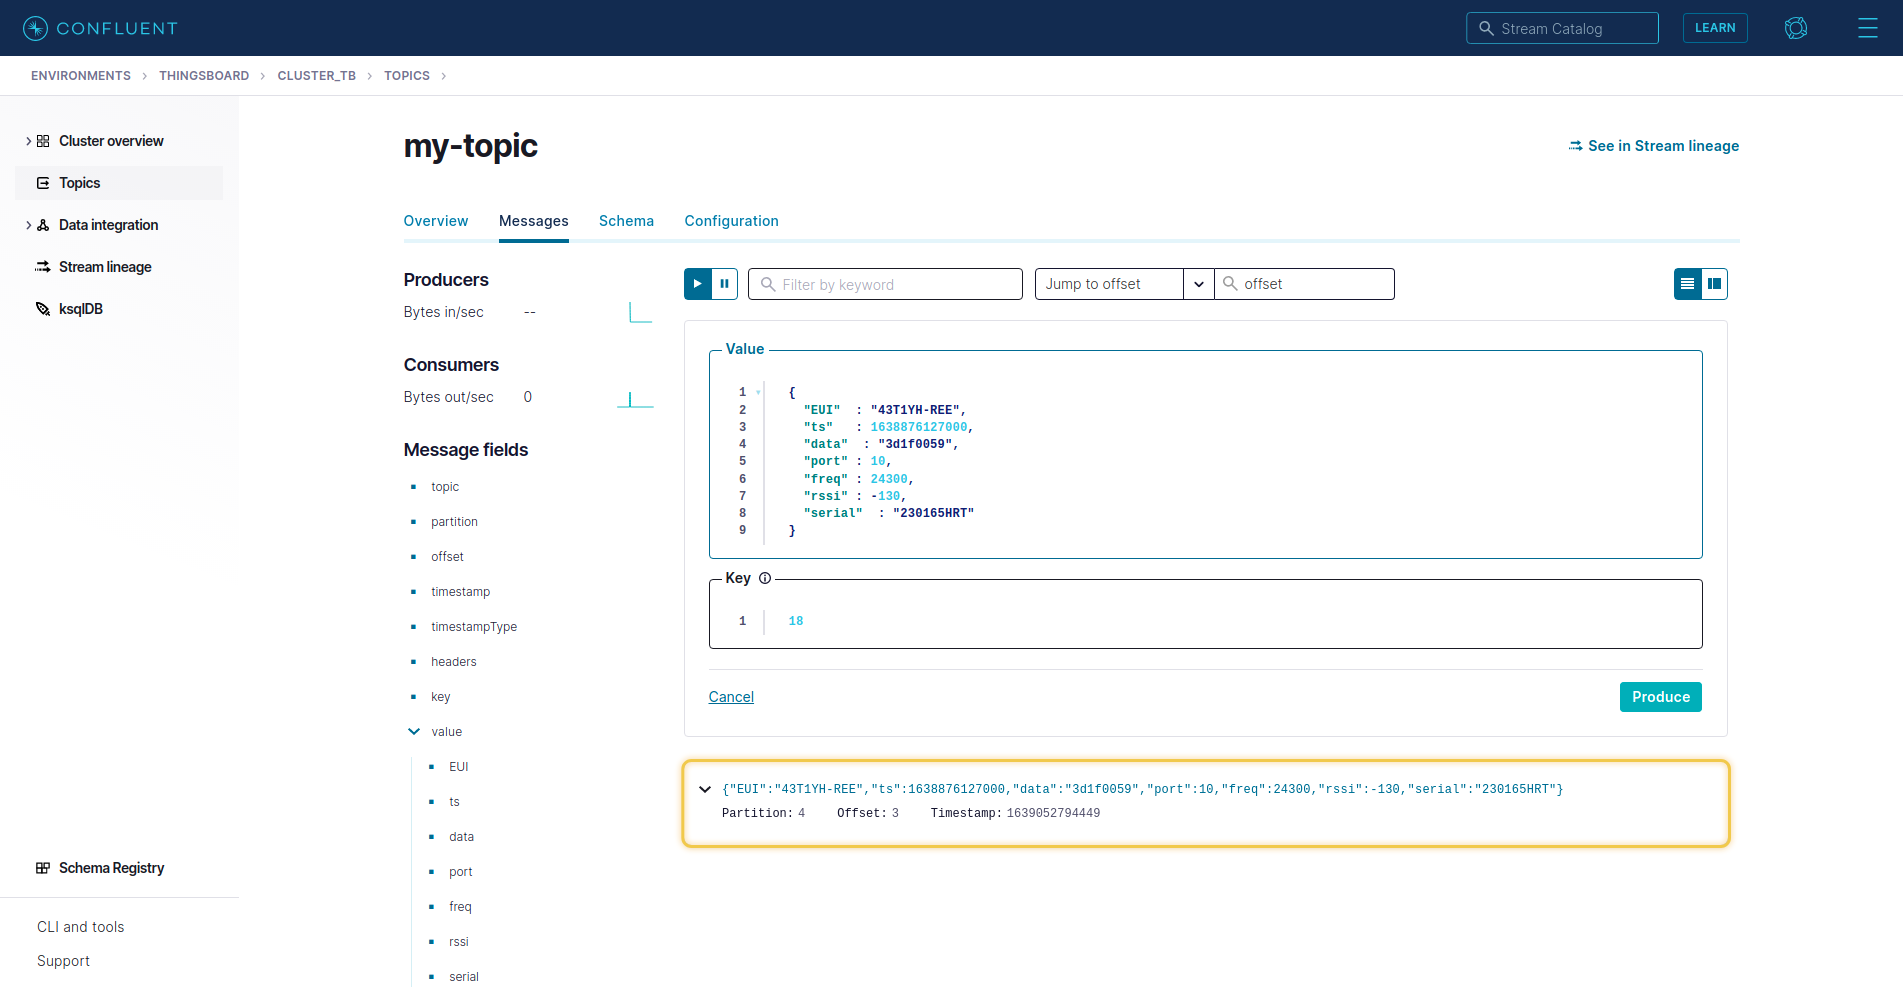
You can simulate a message from a device or server using a terminal. To send an uplink message, you need a Kafka endpoint URL from the integration. Result: Also, you can check through the terminal what data came to Kafka. |
Advanced Usage: Kafka Producer (Downlink)
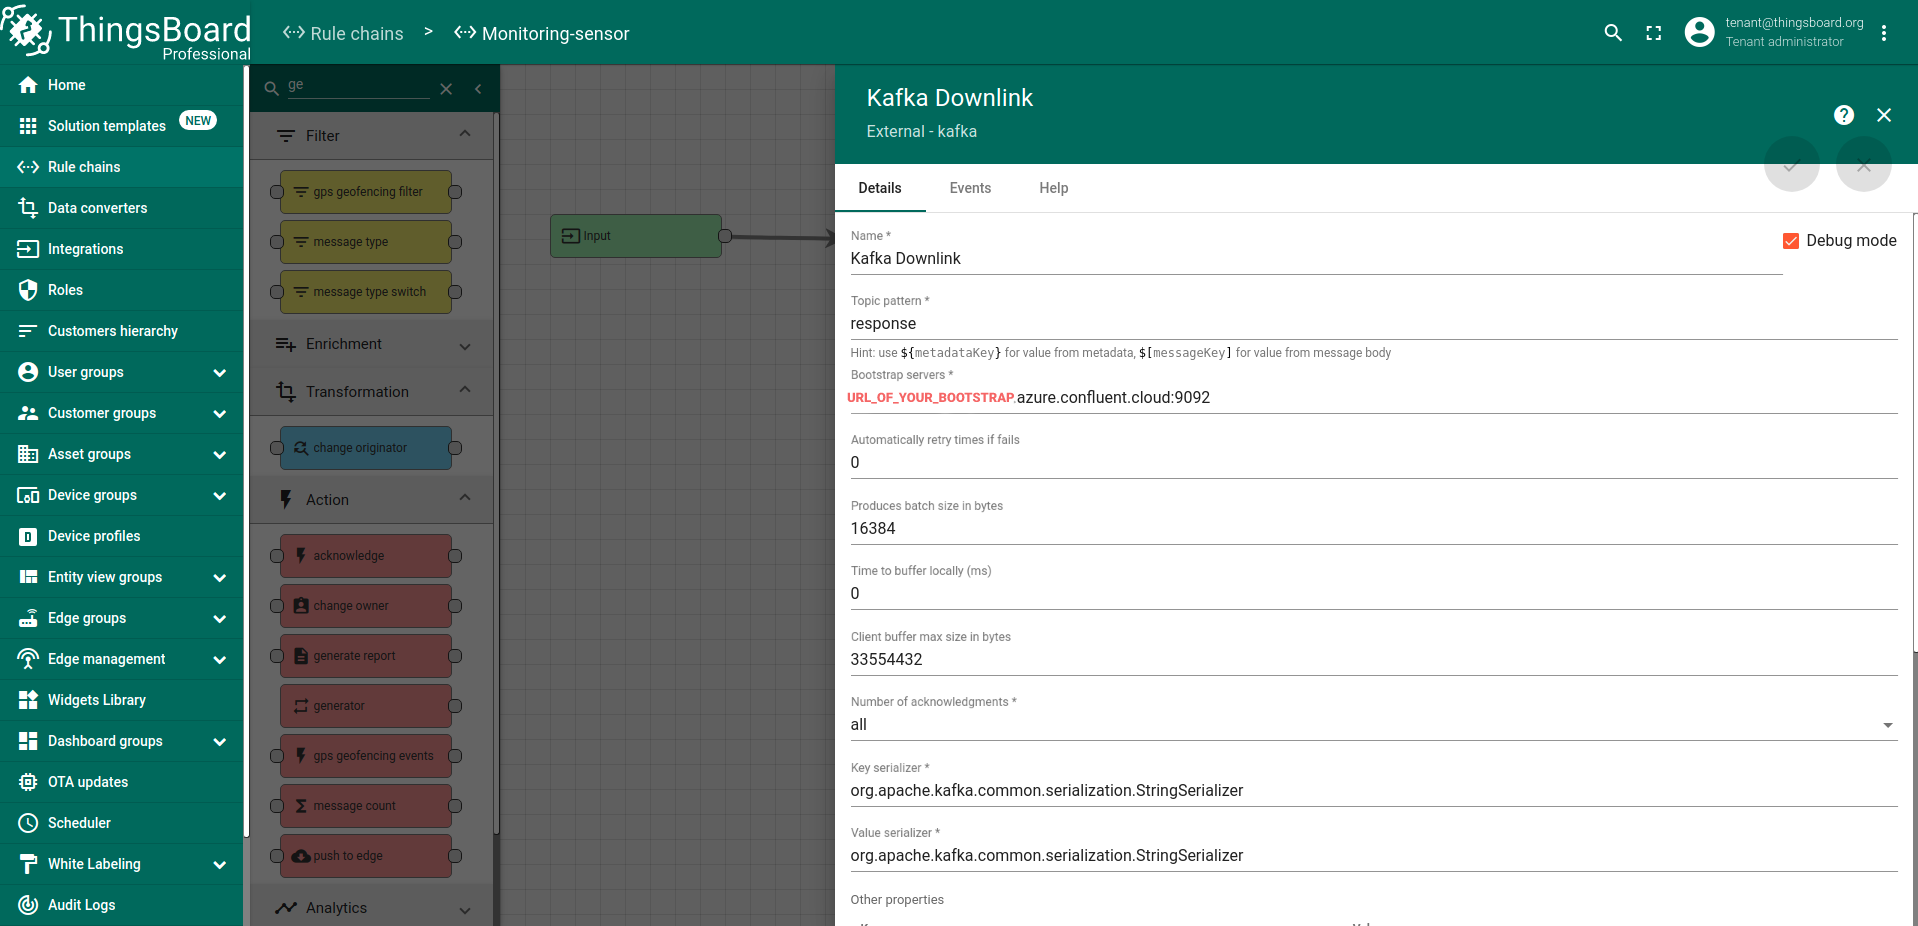
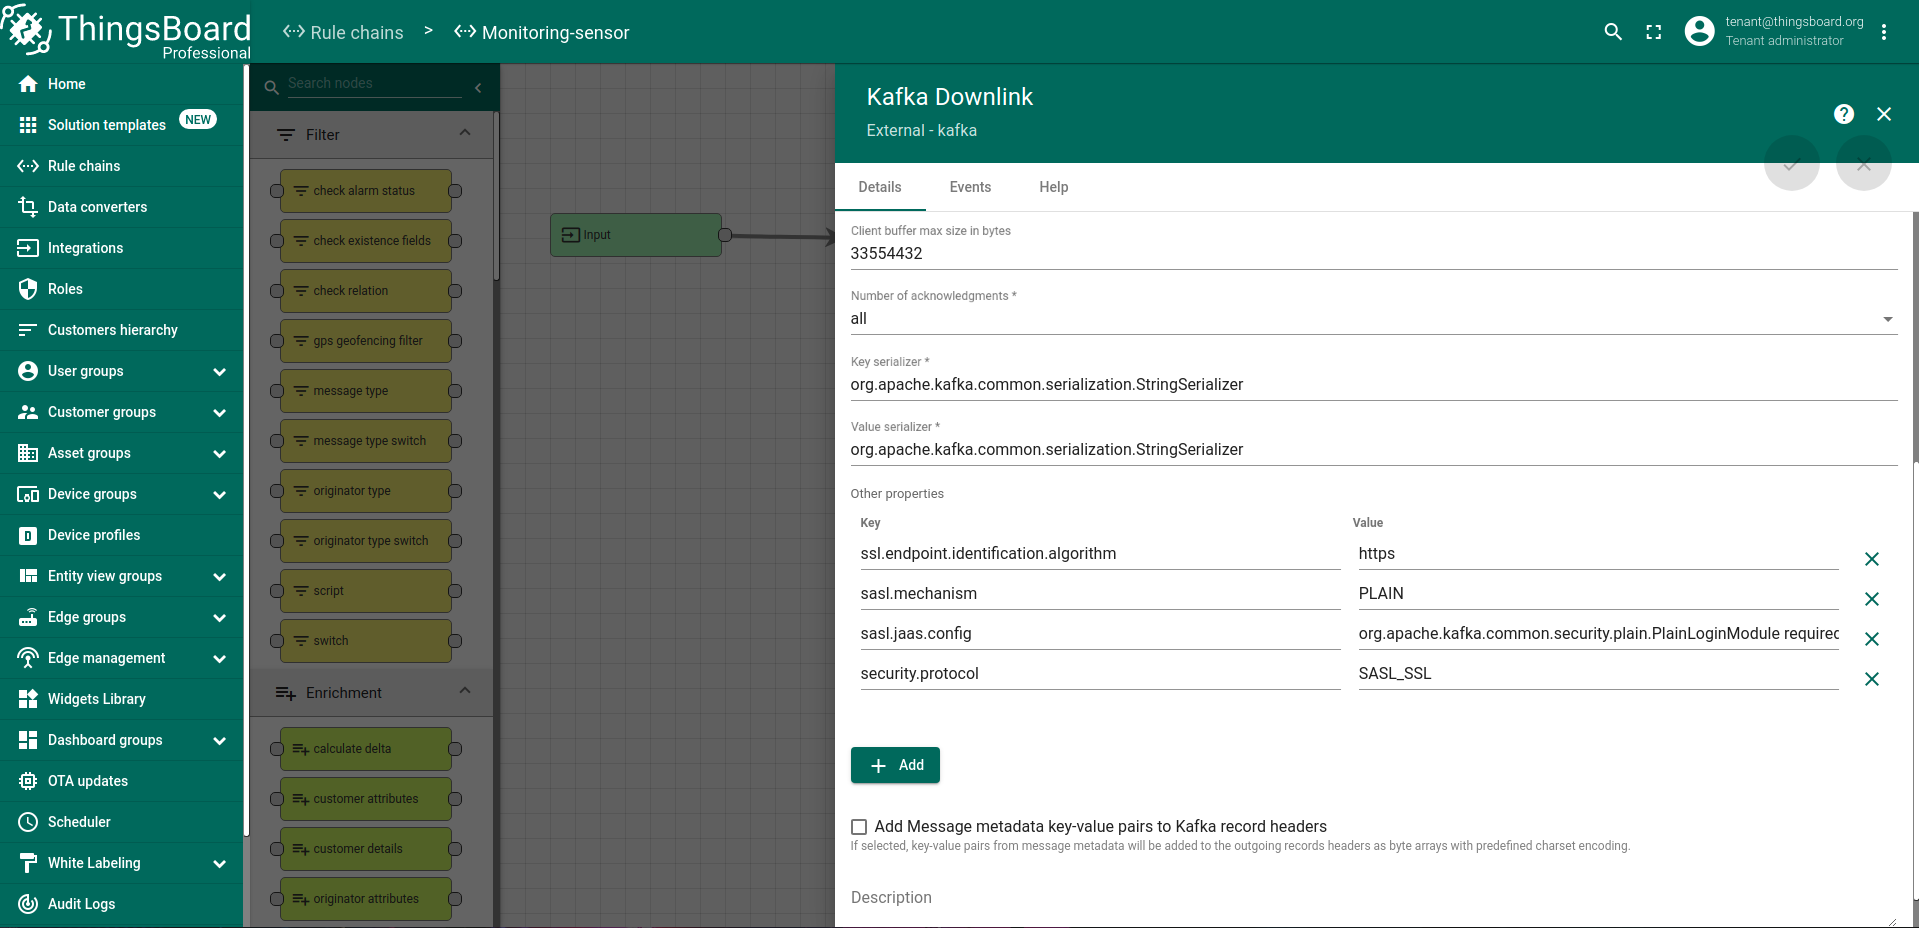
To get functionality such as Kafka Producer, you need to use the Kafka Rule Node in which you can specify Bootstrap servers, Topic and other parameters to connect to the Kafka broker, you can find more details in the corresponding guide .
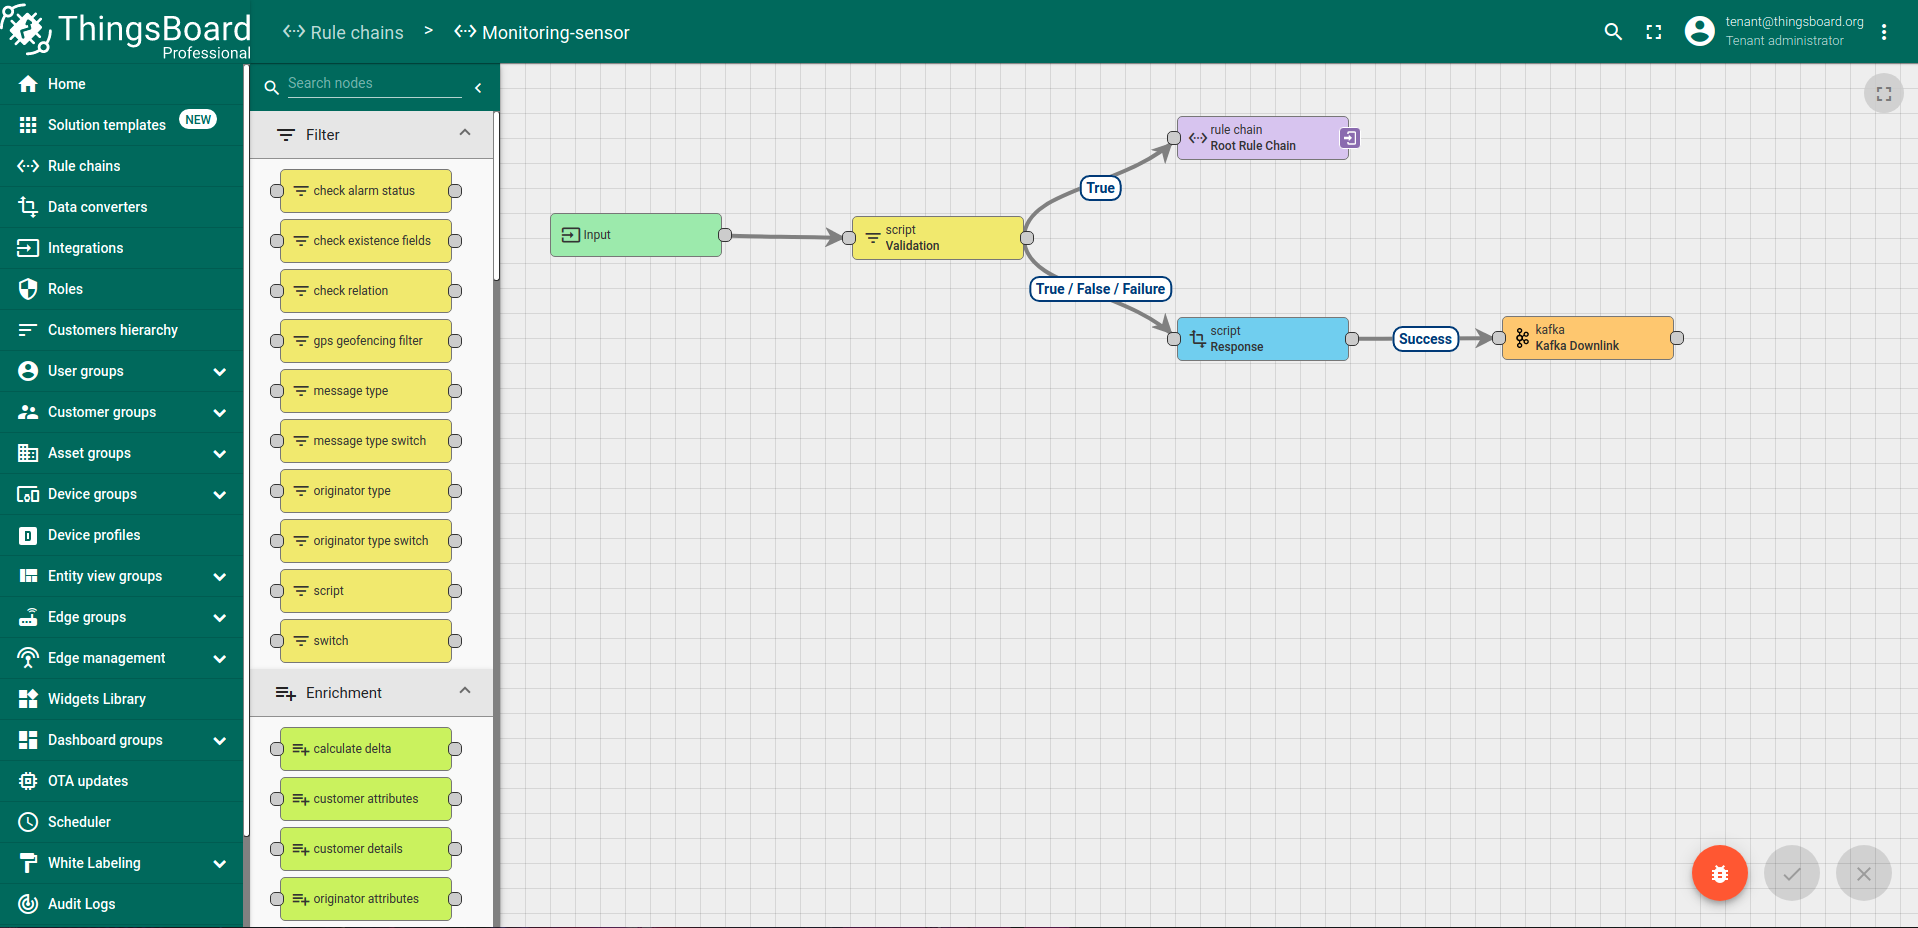
If it is not possible to send commands directly to devices to manage from ThingsBoard, but only through a broker, then in this case you can use the Kafka Downlink Rule Node. Let’s consider a small example with its Node, suppose the data came from the broker and passed the converter and, according to the config of Device Profile, were directed to the custom Rule Chain (“Monitoring-sensor”) and at the end of all processing, we will send a response about success or failure back to the broker ( you can change the response to commands to control your device, etc.)
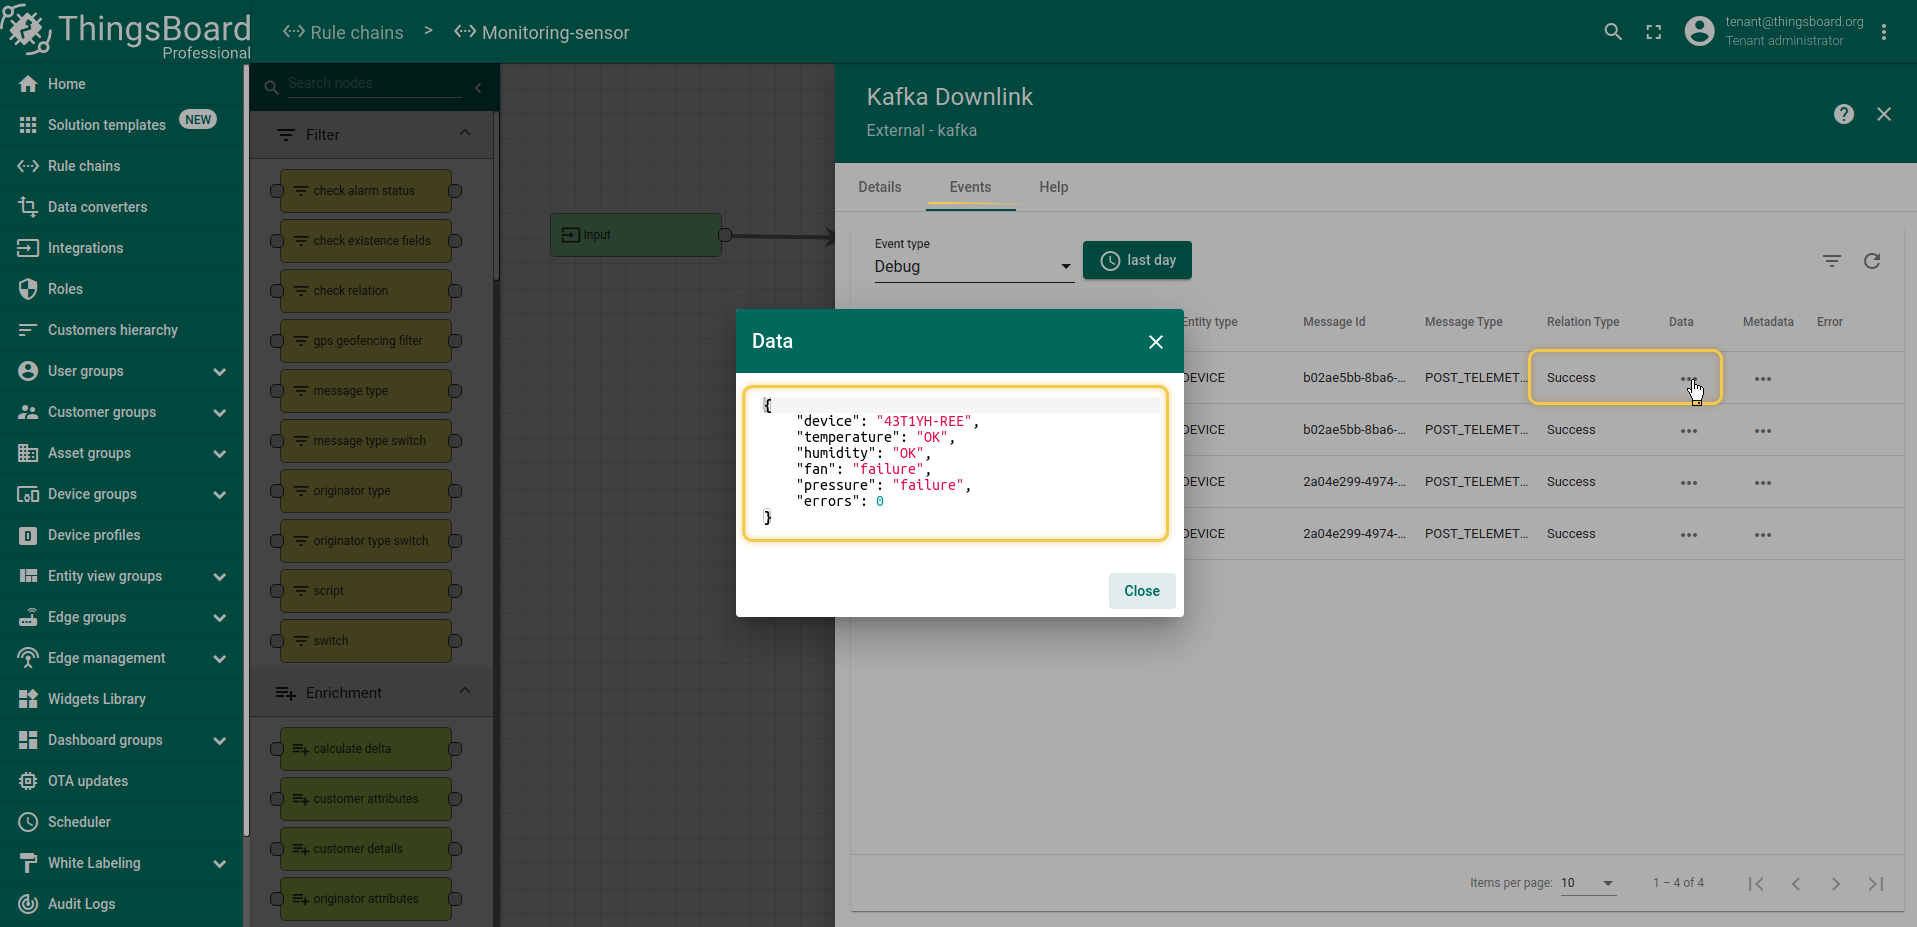
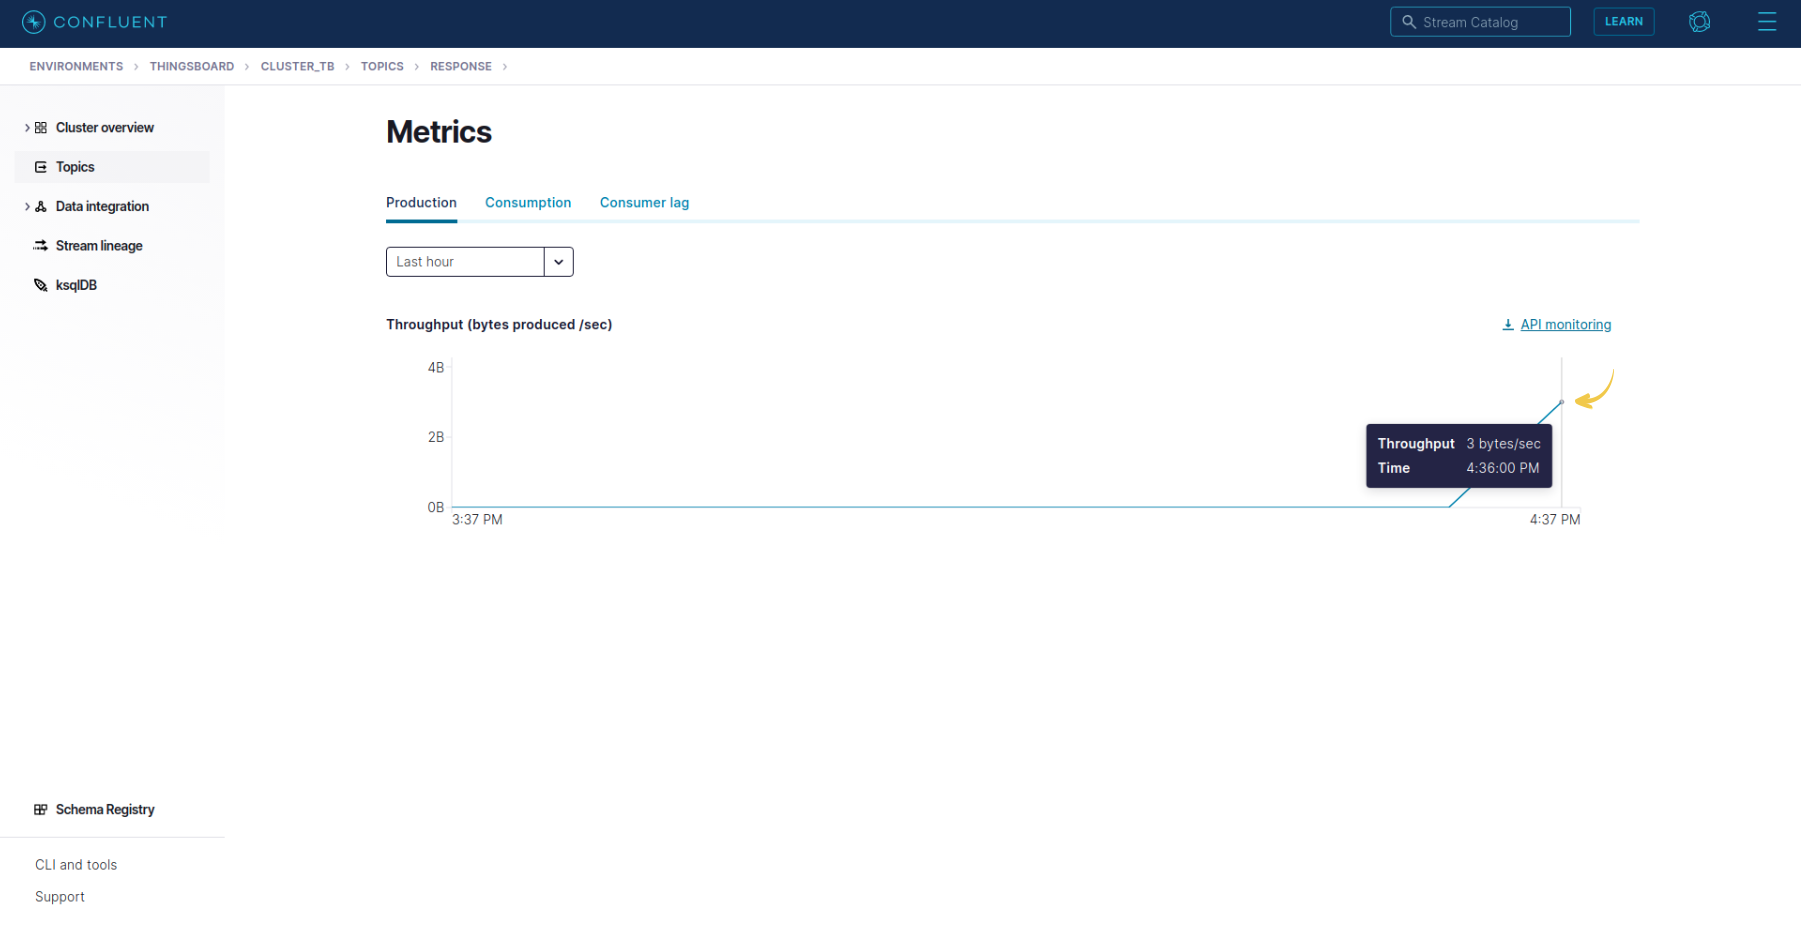
Сheck whether the message has been transmitted, you can see in the Events tab of Kafka Rule Node with enable Debug Mode:
Next steps
-
Getting started guides - These guides provide quick overview of main ThingsBoard features. Designed to be completed in 15-30 minutes.
-
Data visualization - These guides contain instructions on how to configure complex ThingsBoard dashboards.
-
Data processing & actions - Learn how to use ThingsBoard Rule Engine.
-
IoT Data analytics - Learn how to use rule engine to perform basic analytics tasks.
-
Advanced features - Learn about advanced ThingsBoard features.
