- Introduction
- Create new entity group
- Entity group configuration
- Batch operations
- Share entity group
- Make group public or private
- Delete entity group
- Video tutorial
- Next steps
Introduction
ThingsBoard allows you to configure multiple custom Entity Groups. You can create an entity group for the devices, assets, entity views, customers, users, dashboards and edge instances Each entity may belong to multiple groups simultaneously. Special group “All” always contains all entities that belong to specific tenant account.
For each entity group, ThingsBoard user may configure different columns to visualize specific telemetry or attributes values. ThingsBoard user may also define custom actions to be present for each entity: open dashboard or send RPC call, etc. Bulk operations to delete entities, add them to the group or remove are also supported.
Create new entity group
In this tutorial, we will create an entity group for devices. The steps below are identical for any entities.
- Go to the "Entities" section - "Devices" page. By default, you navigate to the device group "All". Navigate to the "Groups" tab and click on the "plus" icon in the upper right corner;
- Enter the name of the device group and click "Add";
- The new device group is created.
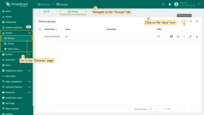
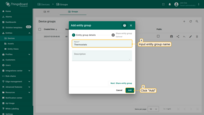
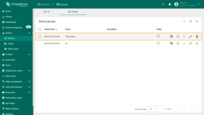
You can share an entity group during the process of creating a group. Let’s create another group and share it with your customer.
- Go to the "Entities" section - "Devices" page, then navigate to the "Groups" tab and click on the "plus" icon in the upper right corner. Enter the name of entity group and then click on the "Next: Share entity group" button;
- Check the box "Share entity group", and select the customer we share entity group. Then select the user group and permission for it. Click "Add";
- The new device group is created.
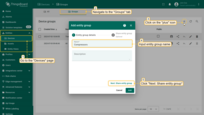
Entity group configuration
Edit general information
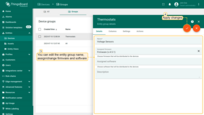
You can edit the general information of the entity group. For example, you can change the group name, firmware and software for your entity group.
Let’s see how to do this:
- Click the "pencil" icon located in the group's row to open entity group details;
- Then click on the "pencil" icon to enter edit mode;
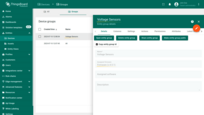
- On the "Details" tab, edit or fill in the fields. For example, change the group name and assign firmware. After that, save all changes;
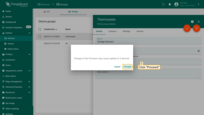
- Confirm firmware change for devices in this group;
- You have updated entity group information.
Columns configuration
You can add, delete, move columns, change their title and type. You can also use a special style function and content function for column cell.
For this example, we have device group with two devices that post temperature values. This group has 4 columns which display devices data: “Created time”, “Name”, “Device profile”, and “Label”.
Let’s add a new column that will display temperature values for each device.
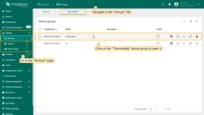
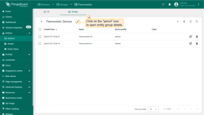
- Go to the "Entities" section - "Devices" page, then navigate to the "Groups" tab and click on the "Thermostats" device group to open it;
- Click on the "pencil" icon to open entity group details;
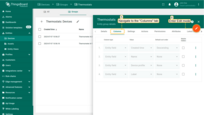
- Navigate to the "Columns" tab and click on the "pencil" icon to enter edit mode;
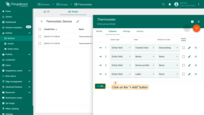
- Then click on the "+ Add" button;
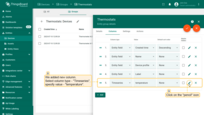
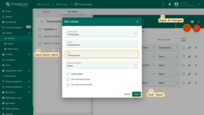
- We added new column. Now select column type - "Timeseries", specify value - "temperature". Then click "pencil" icon located in the column's row to open edit column window;
- Input column name in the "title" row. Click "Save" and then apply all changes. We added new column - "Temperature";
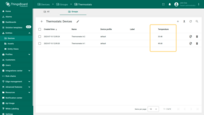
- It displays the current temperature value for each device.
Now let’s delete the “Label” column from this device group.
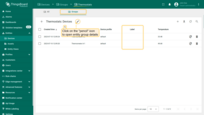
- In the device group click on the "pencil" icon to open entity group details;
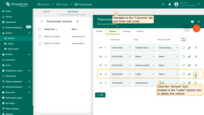
- Navigate to the "Columns" tab in the entity group details and enter edit mode. Click the "remove" icon located in the "Label" column row to delete this column;
- After that, apply all changes;
- The "Label" column is deleted from the device group.
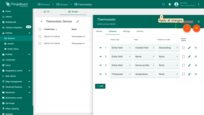
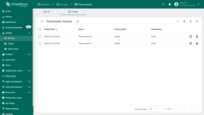
Now let’s set a style function for the “Temperature” column so that when the temperature value is greater than or equal to 45, the values turn orange, and if the temperature value is less than 45, the values turn blue.
- Navigate to the "Columns" tab in the entity group details and enter edit mode. Then click "pencil" icon located in the column's row to open edit column window;
- Check the box "Use cell style function" and add a style function in the function window. Click "Save" and then apply all changes;
- The values in the "Temperature" column change their color according to the set function.
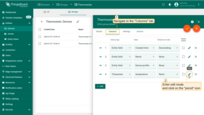
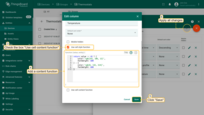
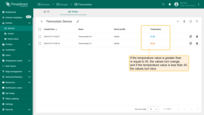
Style function:
1
2
3
4
5
6
7
return value >= 45 ? {
    color:'rgb(255, 106, 12)',
    fontWeight: 600
} : {
    color:'rgb(0, 132, 214)',
    fontWeight: 600
}
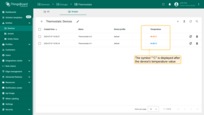
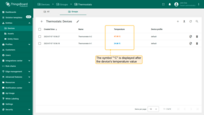
Let’s set a content function to display the symbol “℃” after the temperature value of the device.
- Navigate to the "Columns" tab in the entity group details and enter edit mode. Then click on the "pencil" icon located in the column's row to open edit column window;
- Check the box "Use cell content function" and add a content function in the function window. Click "Save" and then apply all changes;
- The symbol "℃" is displayed after the device's temperature value.

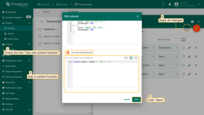
Content function:
1
return value ? value + ' ℃' : '-';
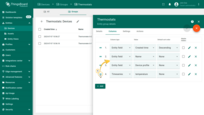
You can also move columns according to your preference.
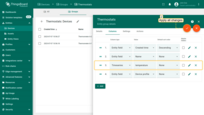
- To move column, go to the "Columns" tab in the entity group details and enter edit mode. Press and hold the left mouse button on the "Drag" icon of the "Temperature" column and place it between the "Name" and "Device profile" columns;
- After that, apply all changes;
- The "Temperature" column is now located between the "Name" and "Device profile" columns.
Entity group display setting
On the “Settings” tab, you can enable/disable the following function: search entity, add new entity, delete entity, and manage entity’s credentials. You can also configure pagination and select the action that will open entity details.
To go to the group settings, you need to:
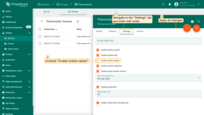
- Navigate to the "Settings" tab in the entity group details and enter edit mode. Check/uncheck with selected parameters. For example, uncheck "Enable entities delete". Then apply all changes;
- Now the "trash" icon is not in the device line;
- There is also no "Delete device" button in the device details.
Entity group actions configuration
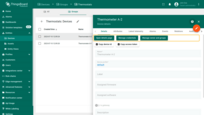
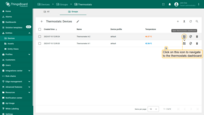
Actions allow quickly and easily configure the navigating to the selected dashboard, or create custom action. For example, let’s create an action to quickly go to the dashboard with full information about thermometers.
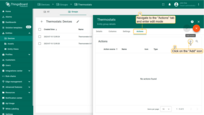
- Navigate to the "Actions" tab in the entity group details and enter edit mode. Then click on the "plus" icon to add new action;
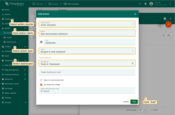
- Fill in all required fields in the pop-up window according to your task. Click "Add";
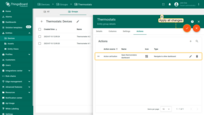
- We created new action. After that, apply all changes;
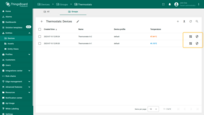
- A new icon appeared in the line of each of the devices, which is responsible for the created action. Click it;
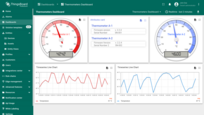
- We will move to the dashboard with full information about thermometers.
Group permissions
Use the Permissions tab to define who can access the entities inside this group and what actions they can perform. A permission links a Group role to a User group and applies only to the entities inside this group. Permissions supplement tenant-wide RBAC and do not override global restrictions. See Group roles in RBAC.
How to add group permissions:
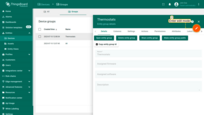
- Open Entity group details → Permissions tab.
- Click “+” (Plus icon) to add a group permission.
- Select Role (Group role) from dropdown list.
- Select User group owner Tenant or a specific Customer, and User group
- Click “Add” to save. The group permission appears in the table.
You can Edit or Delete existing group permissions at any time from Permissions tab:
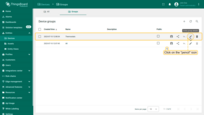
- Edit: click “Edit” (pencil icon) of the target permission → update fields → “Save”.
- Delete: click “Delete” (trash icon) of the target permission → “Confirm”.
Changes take effect immediately for all members who can access the group.
To review assigned permissions from the user side: Open Users group details → Roles tab.
Batch operations
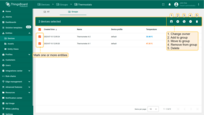
Over each entity of the group, you can perform operations such as: change the owner of the entity, move it to another group, add or remove an entity from the group.
- Mark one or more entities, and select the operation you want to perform on the entity in the menu at the top of the window.
Share entity group
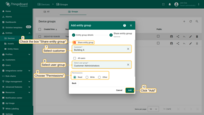
Sharing a group provides access to all entities inside the group at once and creates a permission entry that links this entity group to the selected user group.
How to share an entity group:
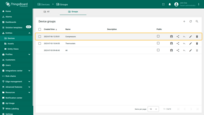
- In Groups tab, click “Share” icon in the row of the target group.
- Choose Customer from dropdown list.
- (Optional) Enable All users checkbox to provide access to every user of that customer.
- Choose the Permissions access: Read, Write, or Other (Roles).
- Click “Share” to apply. The access is propagated to all entities within the group.
To update or revoke access, open the group permissions tab and edit/delete the corresponding permission.
Make group public or private
Public groups provide read-only access to anyone (no sign-in). Use it for non-sensitive data only. When you set a group as Public, the platform adds permissions to that entity group for the Public customer’s “Public users” group.
Make public:
-
In the Groups tab, click “Make public” icon of the target group.
-
Confirm in the dialog.
The Public checkbox becomes enabled for this group.
Make private (revoke public access):
-
In the Groups tab, click “Make private” icon of the target group.
-
Confirm in the dialog. Public access is removed.
If you need controlled access for specific customers or users, use Share entity group or configure entries on the Permissions tab.
Delete entity group
You can delete an entity group along with all its entities using one of the following ways:
First way:
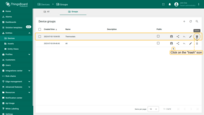
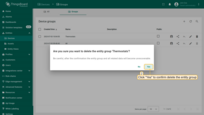
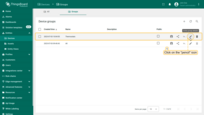
- Click a "trash" icon can opposite the groups name you want to delete;
- Confirm deleting the entity group in the dialog box.
Second way:
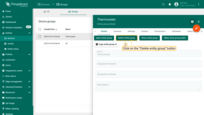
- Click the "pencil" icon located in the group's row to open entity group details;
- Click on the "Delete entity group" button in the entity group details;
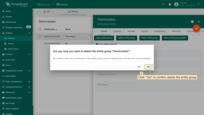
- Confirm deleting the entity group in the dialog box.
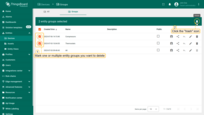
You and your customers can also delete multiple entity groups at once.
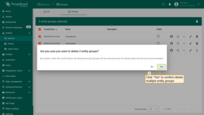
- Mark one or multiple groups you want to delete. Click on the trash bin icon in the top right corner;
- Confirm deleting entity groups in the dialog box.
Video tutorial
Watch the detailed video tutorial with examples of how you can configure the entity group to suit your needs.
Next steps
-
Getting started guides - These guides provide quick overview of main ThingsBoard features. Designed to be completed in 15-30 minutes.
-
Connect your device - Learn how to connect devices based on your connectivity technology or solution.
-
Data visualization - These guides contain instructions on how to configure complex ThingsBoard dashboards.
-
Data processing & actions - Learn how to use ThingsBoard Rule Engine.
-
IoT Data analytics - Learn how to use rule engine to perform basic analytics tasks.