- How Does It Work?
- Prerequisites
- Step 1. Creating a New Edge Instance
- Step 2. Installing Edge on the Gateway Device
- Step 3. Provisioning the ThingsBoard IoT Gateway on Edge
- Step 4. Installing the ThingsBoard IoT Gateway Software on the Gateway Device
- Next Steps
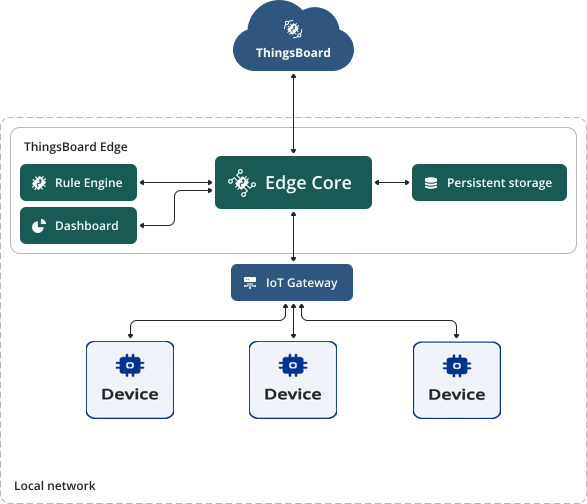
The ThingsBoard Edge can be run alongside the ThingsBoard IoT Gateway. This approach can create a robust, decentralized IoT architecture due to Edge’s ability to process data at its source and IoT Gateway’s extended list of communication protocols.
How Does It Work?
ThingsBoard IoT Gateway collects data locally, translates it into the ThingsBoard-compatible communication protocols, and transmits it to the ThingsBoard Edge. The Rule Engine processes the data in real time, enabling immediate visualizations and event responses. Summarised or aggregated data can be sent to the central server for analysis if required.
Prerequisites
- Have Docker installed
- The ThingsBoard Cloud Account (Demo, Professional edition, or Community edition)
- Any Linux-based IoT Gateway device
Step 1. Creating a New Edge Instance
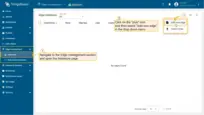
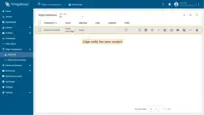
- Log in to your Cloud account and navigate to the Edge Management > Instances section. Click the “+” button and select the “Add new edge” option.
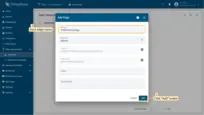
- In the "Add Edge" pop-up window, enter a name for your Edge in the "Name" field, and click the "Add" button.
- The Edge instance is displayed at the top of the list, as entries are sorted by creation time by default.
Step 2. Installing Edge on the Gateway Device
To install the Edge instance on the IoT Gateway device, initiate the SSH (Secure Shell) connection to the device through the terminal:
1
ssh username@ip_address
- username: Enter the actual username with access to the Gateway device;
- ip_address: Enter the actual IP address of the Gateway device;
- password: The terminal will request the authentication credentials.
Once connected, create a new directory:
1
mkdir tb_edge
Create a docker-compose file for the ThingsBoard Edge service within this directory:
1
nano docker-compose.yml
Configure this file:
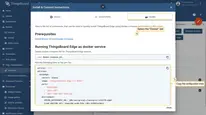
- Go to the Edge Management > Instances section, and click on the Edge instance. On the Edge details" page, click the "Install & Connect Instructions" button.
- In the "Install & Connect Instructions" pop-up window, select the "Docker" tab and copy the configuration lines.
- Paste the copied lines into the docker-compose.yml file in the terminal and save it. To close the file, press CTRL+X.

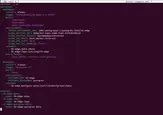
To run the Edge instance on the IoT Gateway device, execute the following commands:
1
2
docker compose up -d
docker compose logs -f mytbedge
To configure a local port forwarding via SSH, open another terminal tab and execute the following command:
1
ssh -N -L 8080:127.0.0.1:8080 username@ip_address
- 8080: The port on your local machine;
- 127.0.0.1: The target remote host accessible by the IoT Gateway device;
- 8080: The port to access the IoT Gateway device.
- username: Enter the actual username with access to the Gateway device;
- ip_address: Enter the actual IP address of the Gateway device;
Any connection to localhost:8080 on your local machine will be forwarded to 127.0.0.1:8080 on the IoT Gateway device. The ThingsBoard Edge instance is available at http://127.0.0.1:8080. Use your credentials to log in.
Step 3. Provisioning the ThingsBoard IoT Gateway on Edge
To provision the ThingsBoard Gateway on Edge instance:
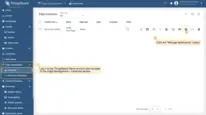
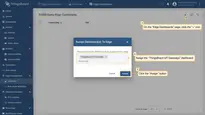
- Log into your Cloud, navigate to the Edge Management > Instances section, and click the “Manage dashboards” button.
- Click the “+” button. Select the “ThingsBoard IoT Gateways” dashboard from the drop-down menu in the pop-up window. Click the “Assign” button to assign it to the Edge instance. The “ThingsBoard IoT Gateways” dashboard is one of the pre-created, out-of-the-box dashboards available.
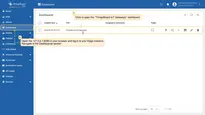
- Use http://127.0.0.1:8080 to open the Edge instance, log in with your credentials, and go to the Dashboards section to open the “ThingsBoard IoT Gateways” dashboard.
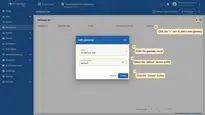
- Click the “+” button to add a new IoT Gateway device. Enter the gateway name in the “Name” field, and select the “default” device profile. Click the “Create” button.
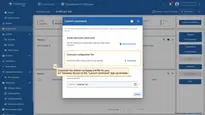
- Download the docker-compose.yml file for your IoT Gateway device from the “Launch command” pop-up window.
Step 4. Installing the ThingsBoard IoT Gateway Software on the Gateway Device
Once the docker-compose.yml file has been downloaded, open the terminal and initiate the SSH connection to the IoT Gateway device:
1
ssh username@ip_address
- username: Enter the actual username with access to the Gateway device;
- ip_address: Enter the actual IP address of the Gateway device;
- password: The terminal will request the authentication credentials.
To install ThingsBoard IoT Gateway, create a new directory:
1
mkdir iot_gateway
Create the docker-compose file for your ThingsBoard IoT Gateway within this directory:
1
nano docker-compose.yml
Copy the content of the previously downloaded docker-compose.yml file and paste it into the new one via the terminal:
Save the changes in the docker-compose.yml file. To close it, press CTRL+X.
To start the ThingsBoard IoT Gateway, execute the following command in the terminal:
1
2
docker compose up -d
docker compose logs -f
Once the ThingsBoard Edge and ThingsBoard IoT Gateway are running on the IoT Gateway device, you can connect IoT devices and sensors to transfer data. Read this real-life example of visualizing data from IoT devices on a Dashboard when ThingsBoard Edge and Gateway are deployed on the same IoT Gateway device.
Next Steps
-
Getting started guide - Provide quick overview of main ThingsBoard Edge features. Designed to be completed in 15-30 minutes:
-
Installation guides - Learn how to setup ThingsBoard Edge on various available operating systems and connect to ThingsBoard Server.
-
Edge Rule Engine:
-
Rule Chain Templates - Learn how to use ThingsBoard Edge Rule Chain Templates.
-
Provision Rule Chains from cloud to edge - Learn how to provision edge rule chains from cloud to edge.
-
- Security:
- gRPC over SSL/TLS - Learn how to configure gRPC over SSL/TLS for communication between edge and cloud.
-
Features:
-
Edge Status - Learn about Edge Status page on ThingsBoard Edge.
-
Cloud Events - Learn about Cloud Events page on ThingsBoard Edge.
-
-
Use cases:
-
Manage alarms and RPC requests on edge devices - This guide will show how to generate local alarms on the edge and send RPC requests to devices connected to edge:
-
Data filtering and traffic reduce - This guide will show how to send to cloud from edge only filterd amount of device data:
-
- Roadmap - ThingsBoard Edge roadmap.
