- Hardware type: Sensors
- Connectivity: LoRaWAN
- Industry: Smart Cities, Smart Buildings, Environmental Monitoring, Industrial Manufacturing
- Use cases: Environment Monitoring, Smart Office, Health Care, Air Quality Monitoring
- Platforms: Professional Edition, Cloud
- Introduction
- Features of RN-320 BTH device
- Prerequisites
- The Things Stack Configuration
- ThingsBoard configuration
- Create Webhook in The Things Stack
- Check data on ThingsBoard
- Dashboard (Optional)
Introduction
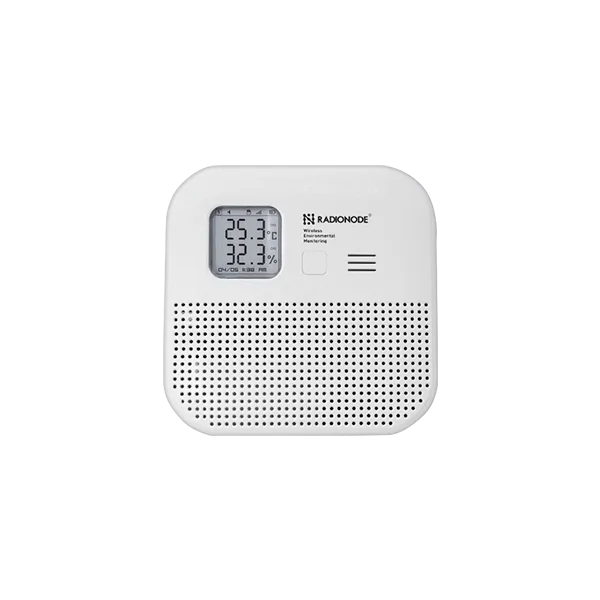
The Radionode RN320 series is a battery-powered LoRaWAN® environmental sensor designed for long-term, low-maintenance deployments. The RN320-BTH model features a high-capacity 17,000 mAh battery, enabling up to 10 years of operation under typical conditions.
The device integrates a high-accuracy temperature and humidity sensor and supports data reliability mechanisms, including retransmission to prevent sample loss. Measurements can also be stored locally on a microSD card for redundancy and offline access.
User interaction is provided via an E-paper display, audible buzzer, and LED status indicator. The device supports simplified onboarding and remote monitoring through QR-code-based registration with the Radionode365 service.
Features of RN-320 BTH device
- LoRaWAN® long-range wireless communication
- High-accuracy temperature and humidity sensor
- E-paper display
- Loud buzzer (97 dBA)
- 3-color LED indicator (Best / Moderate / Bad)
- Long battery life (17,000 mAh, up to 10 years)
- MicroSD card for local data storage
- Magnetic and wall-mount installation options
Prerequisites
Before starting, ensure the following requirements are met:
Hardware
- RN-320 BTH LoRaWAN Temperature and Humidity sensor
- LoRaWAN gateway registered and online in The Things Stack (in our case Radionode LoRaWAN Gateway)
Accounts & Access
-
The Things Stack account
Device Information
- DevEUI (from device label)
- JoinEUI and AppKey (for OTAA activation)
- LoRaWAN region (e.g. EU868, US915)
The Things Stack Configuration
Create an Application
- Log in to The Things Stack Console.
- Create an application in TheThingsStack console.
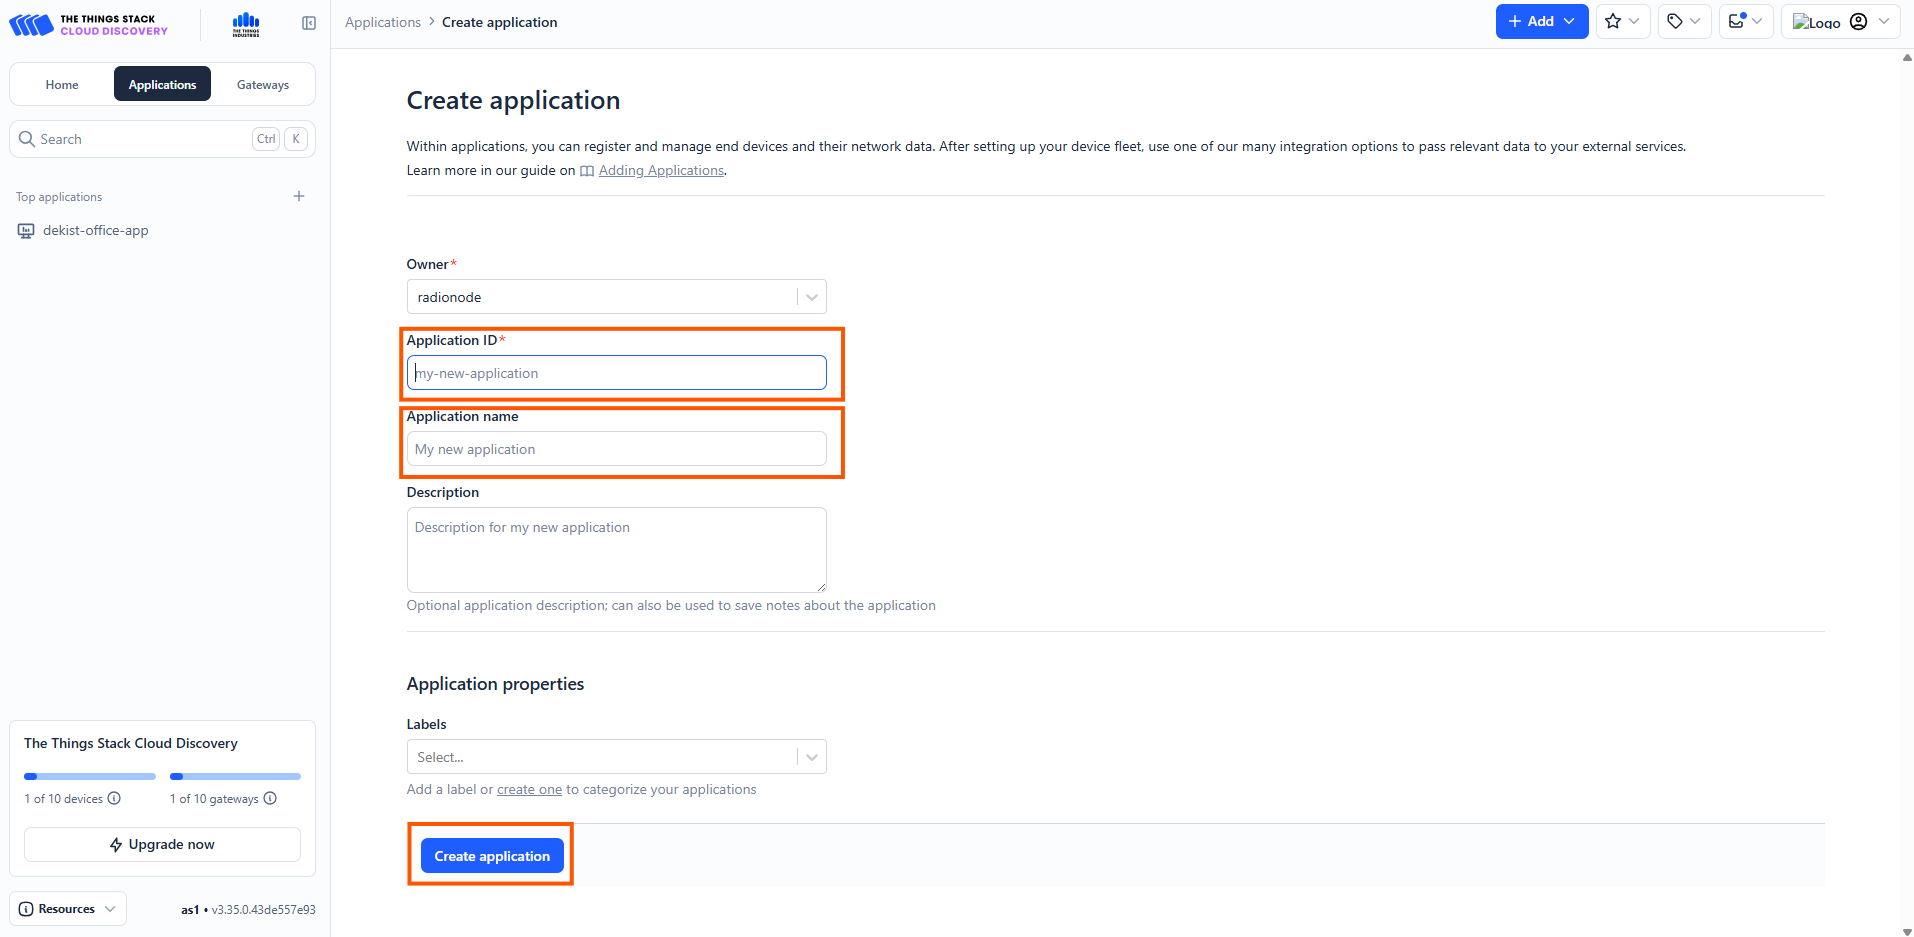
- Go to the console, open Applications section, press the Add application tab.
- Fill the application ID, application name
- Click create the application.
Configure Payload Formatter (Uplink Decoder)
RN320-BTH transmits sensor data in binary format. Decoding must be performed before forwarding data to ThingsBoard.
- Open your application in TTS.
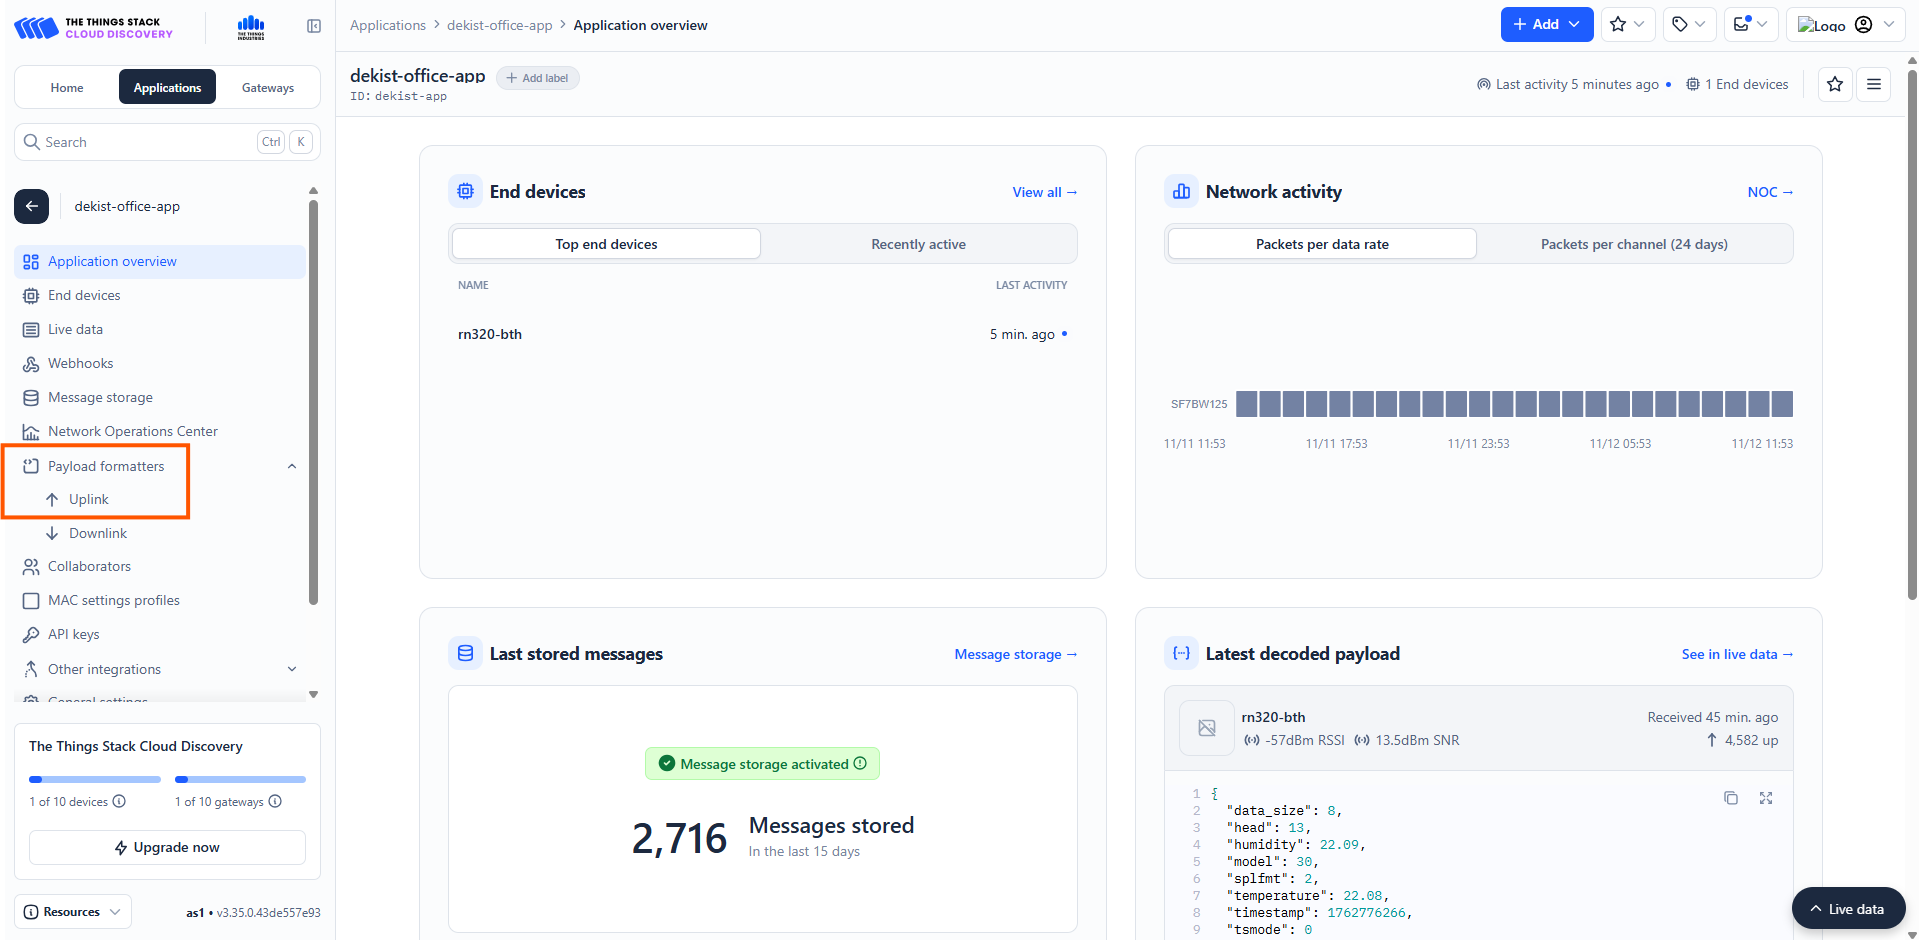
- Navigate to Payload formatters → Uplink.
- Paste the following decoder:
Register the End Device
Next step is an End Device creation in the TTS. Navigate to End devices → Register end device.
To register the end Device enter these details as shown in the image below:
- Select From The LoRaWAN Device Repository.
- Input method: Select the end device in the LoRaWAN Device Repository (Radionode devices are already registered in the Thing stack platform).
- End device brand: choose:
- Brand: Dekist Co., Ltd
- Model: RN320-BTH
- Select the correct frequency plan.
- Enter the DevEUI correctly in the slot provided there. You can find DevEUI on the sticker on the side of the device.
- Add an End device ID in the slot given.
- Click Register end device to complete the end device registration.
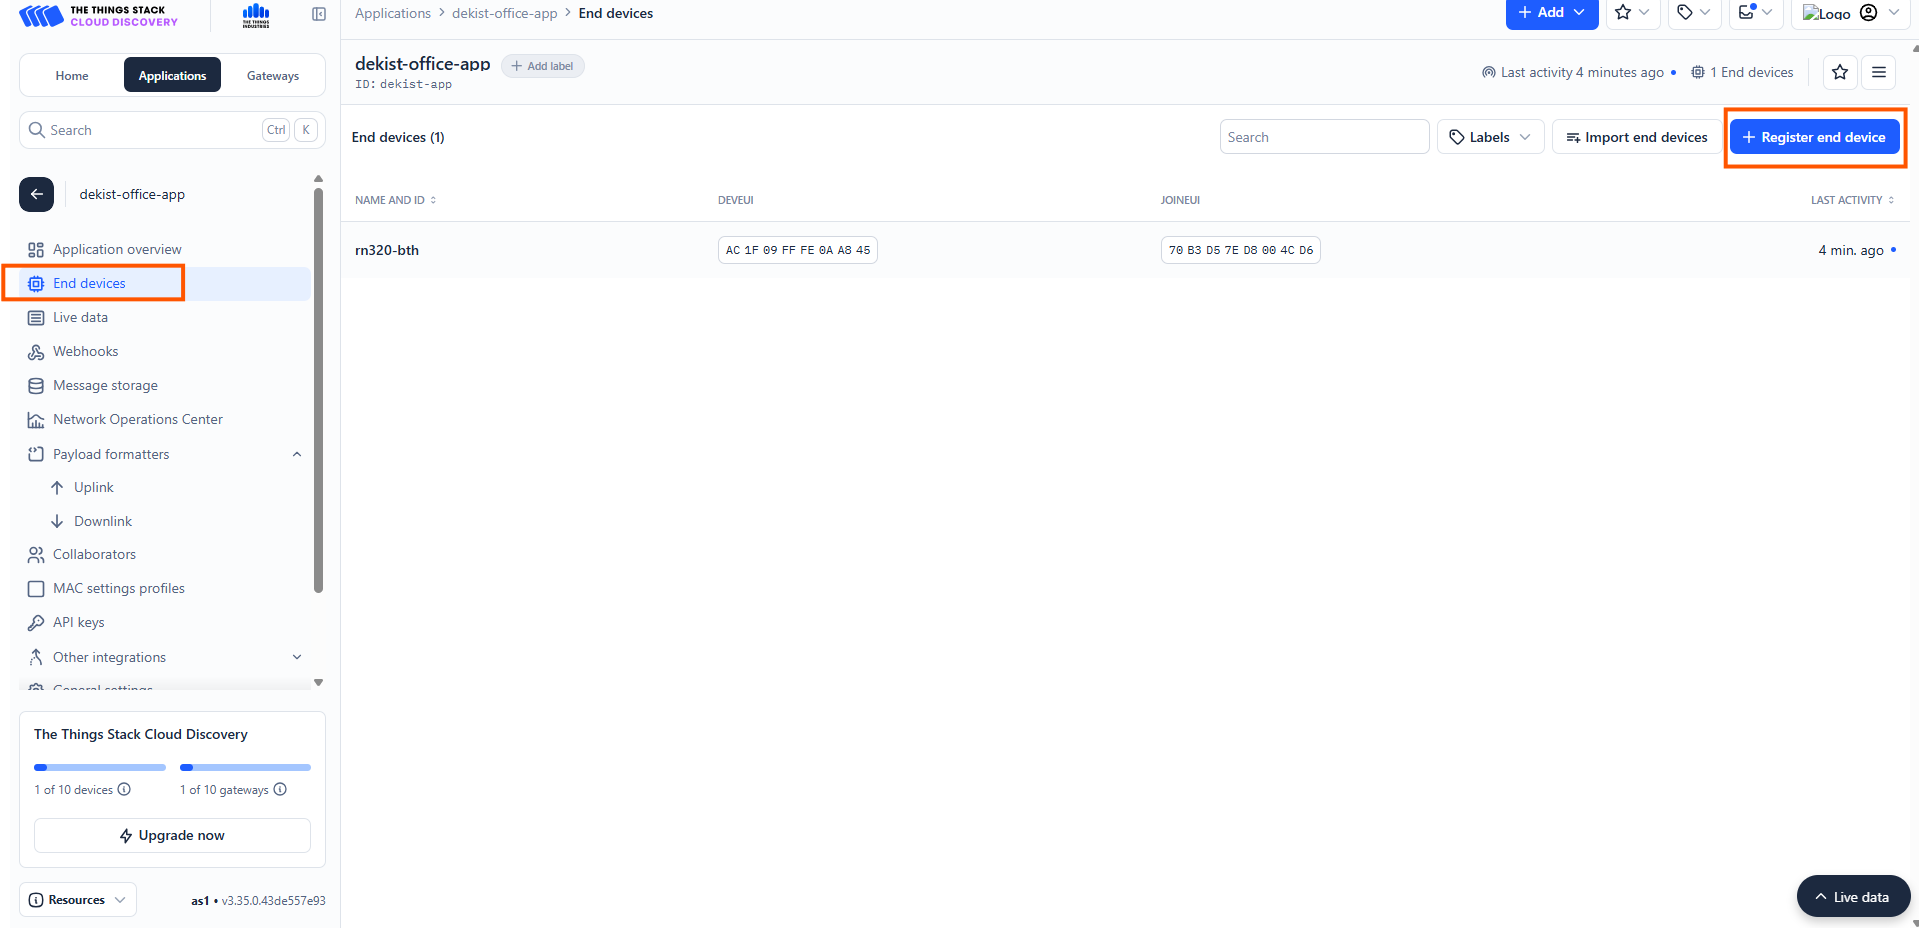
Navigate to End devices → Register end device.
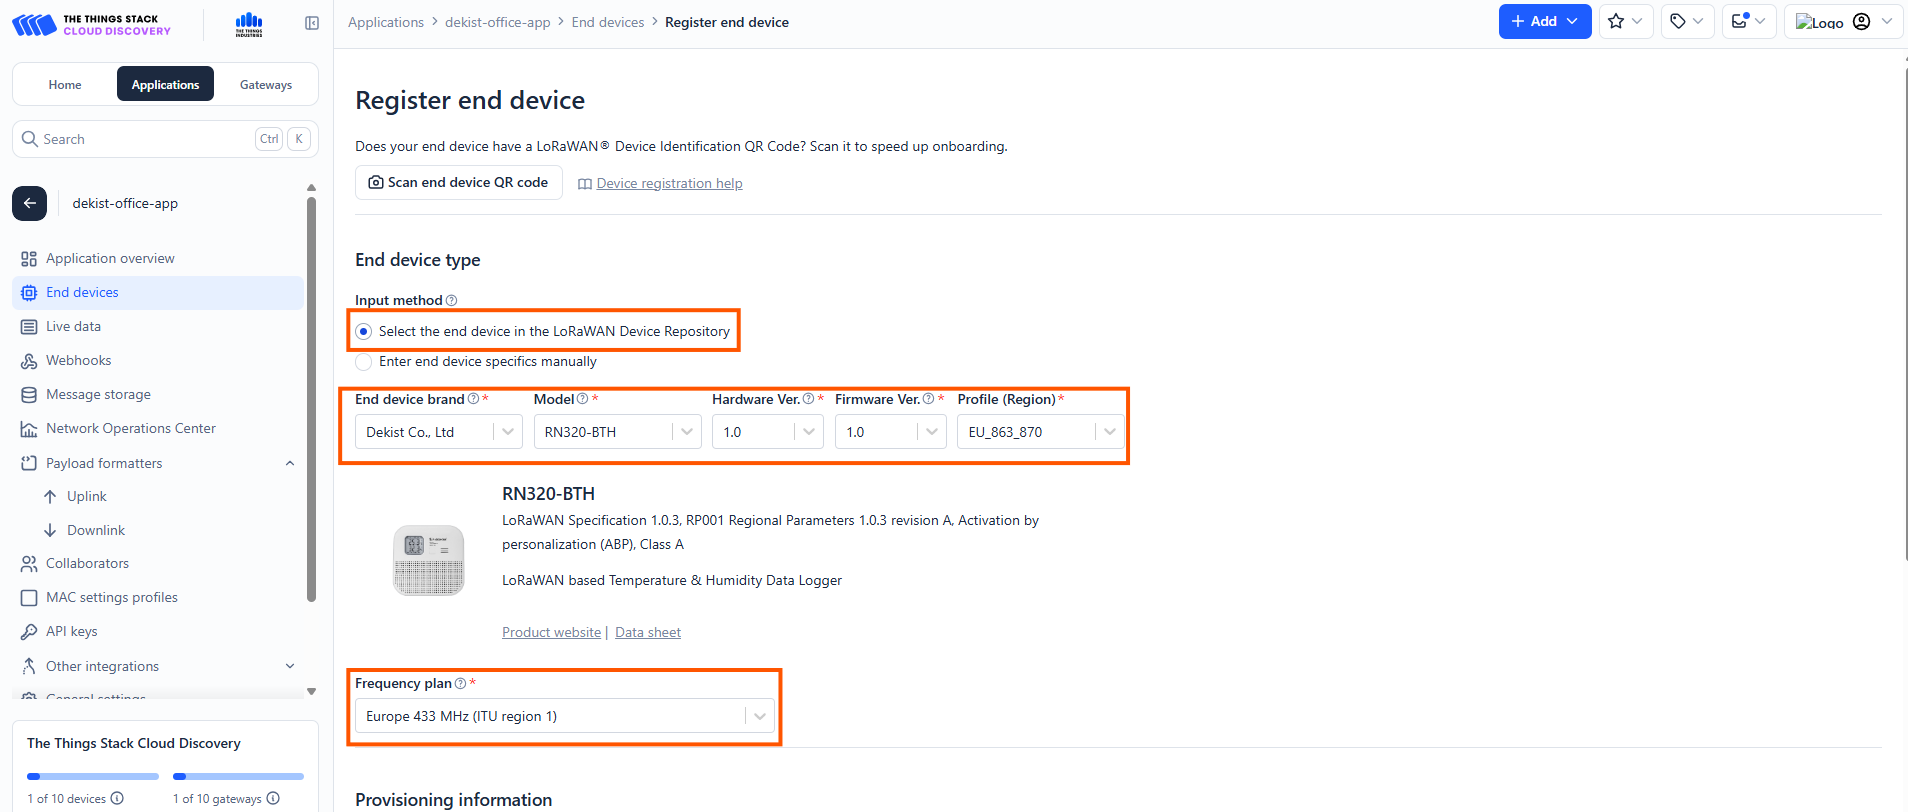
To register the end Device enter these details as shown in the image.
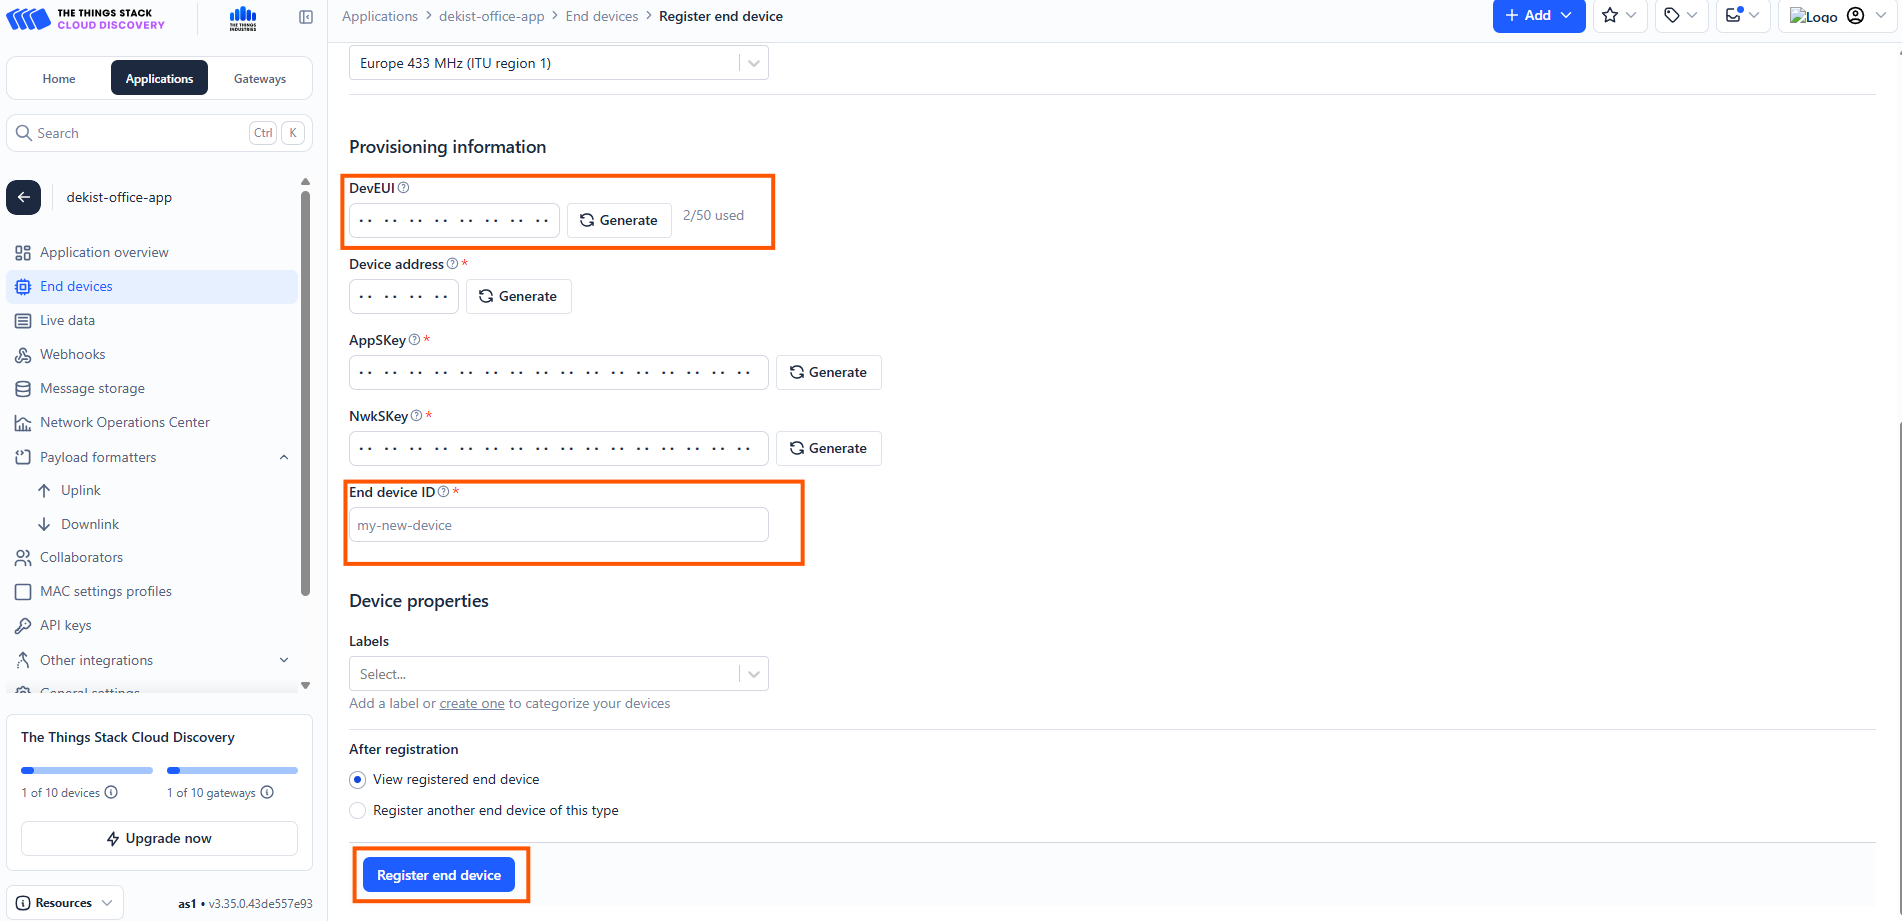
Enter the DevEUI correctly in the slot provided there. You can find DevEUI on the sticker on the side of the device.
Add an End device ID in the slot given.
Click Register end device to complete the end device registration.
ThingsBoard configuration
- Log in to ThingsBoard.
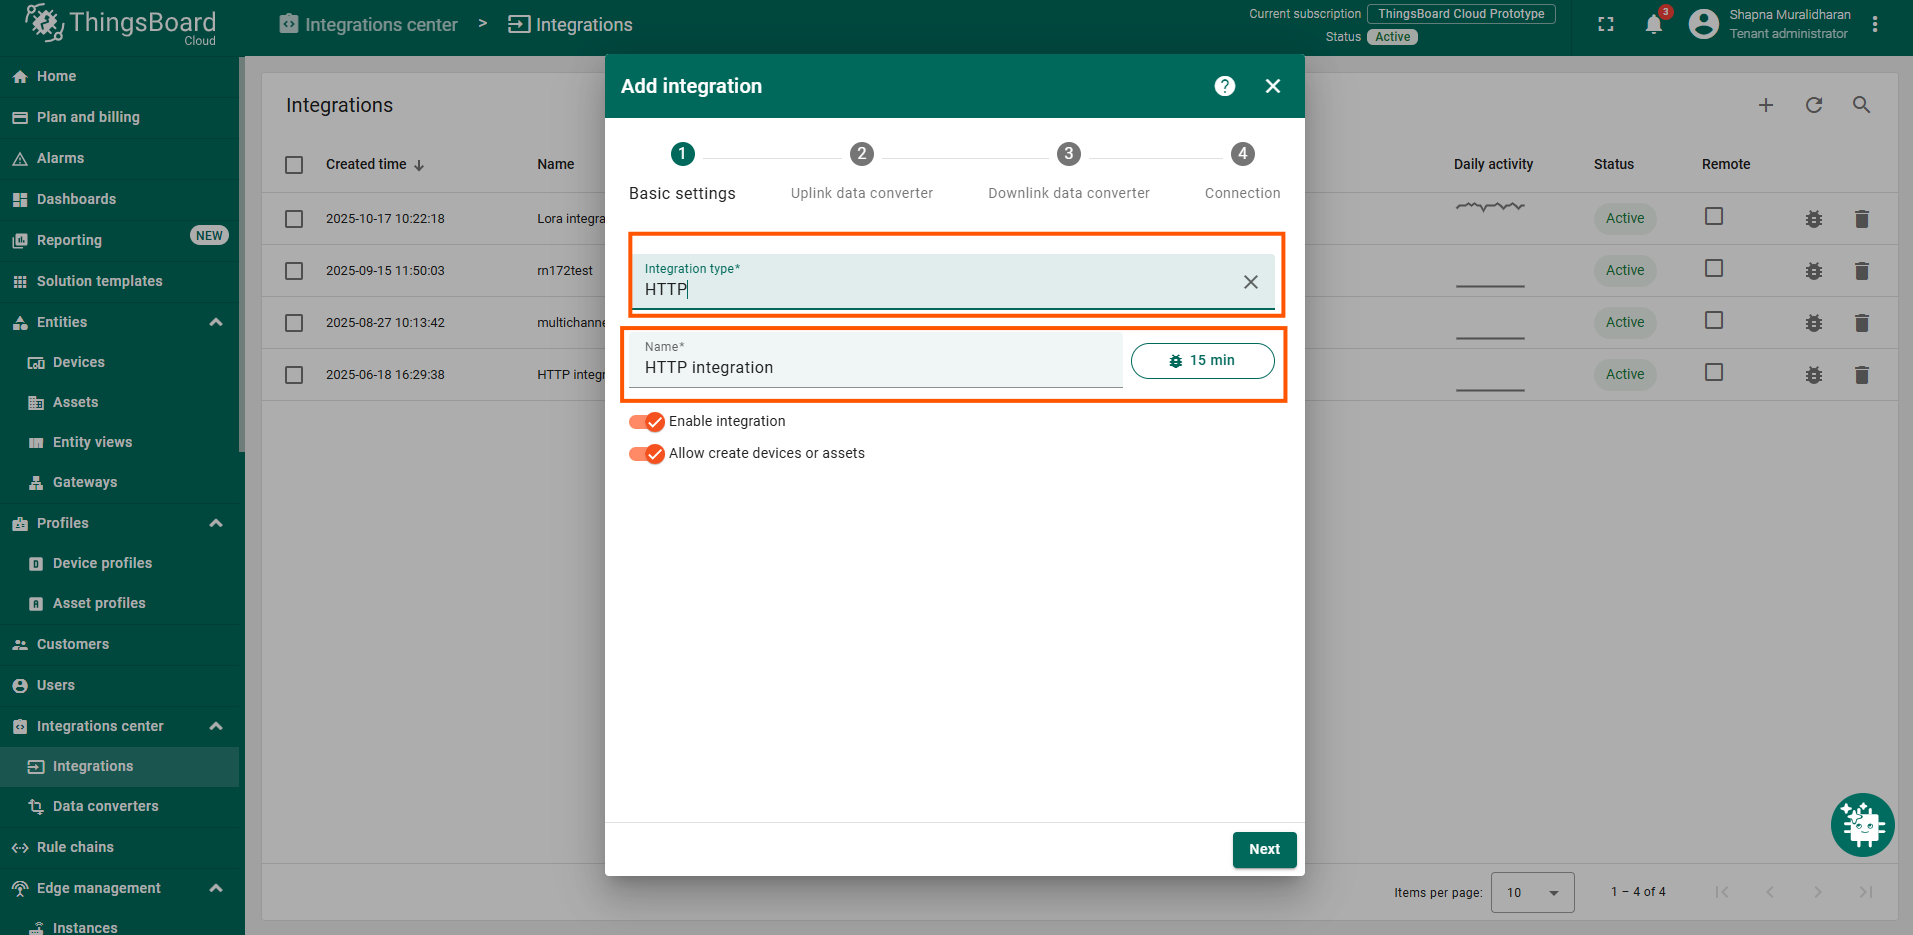
- Navigate to Integrations ⇾ Add integration.
- Select HTTP Integration as we will be receiving data from the webhooks created in TTS (Webhook configuration we will explain later in this documentation) .
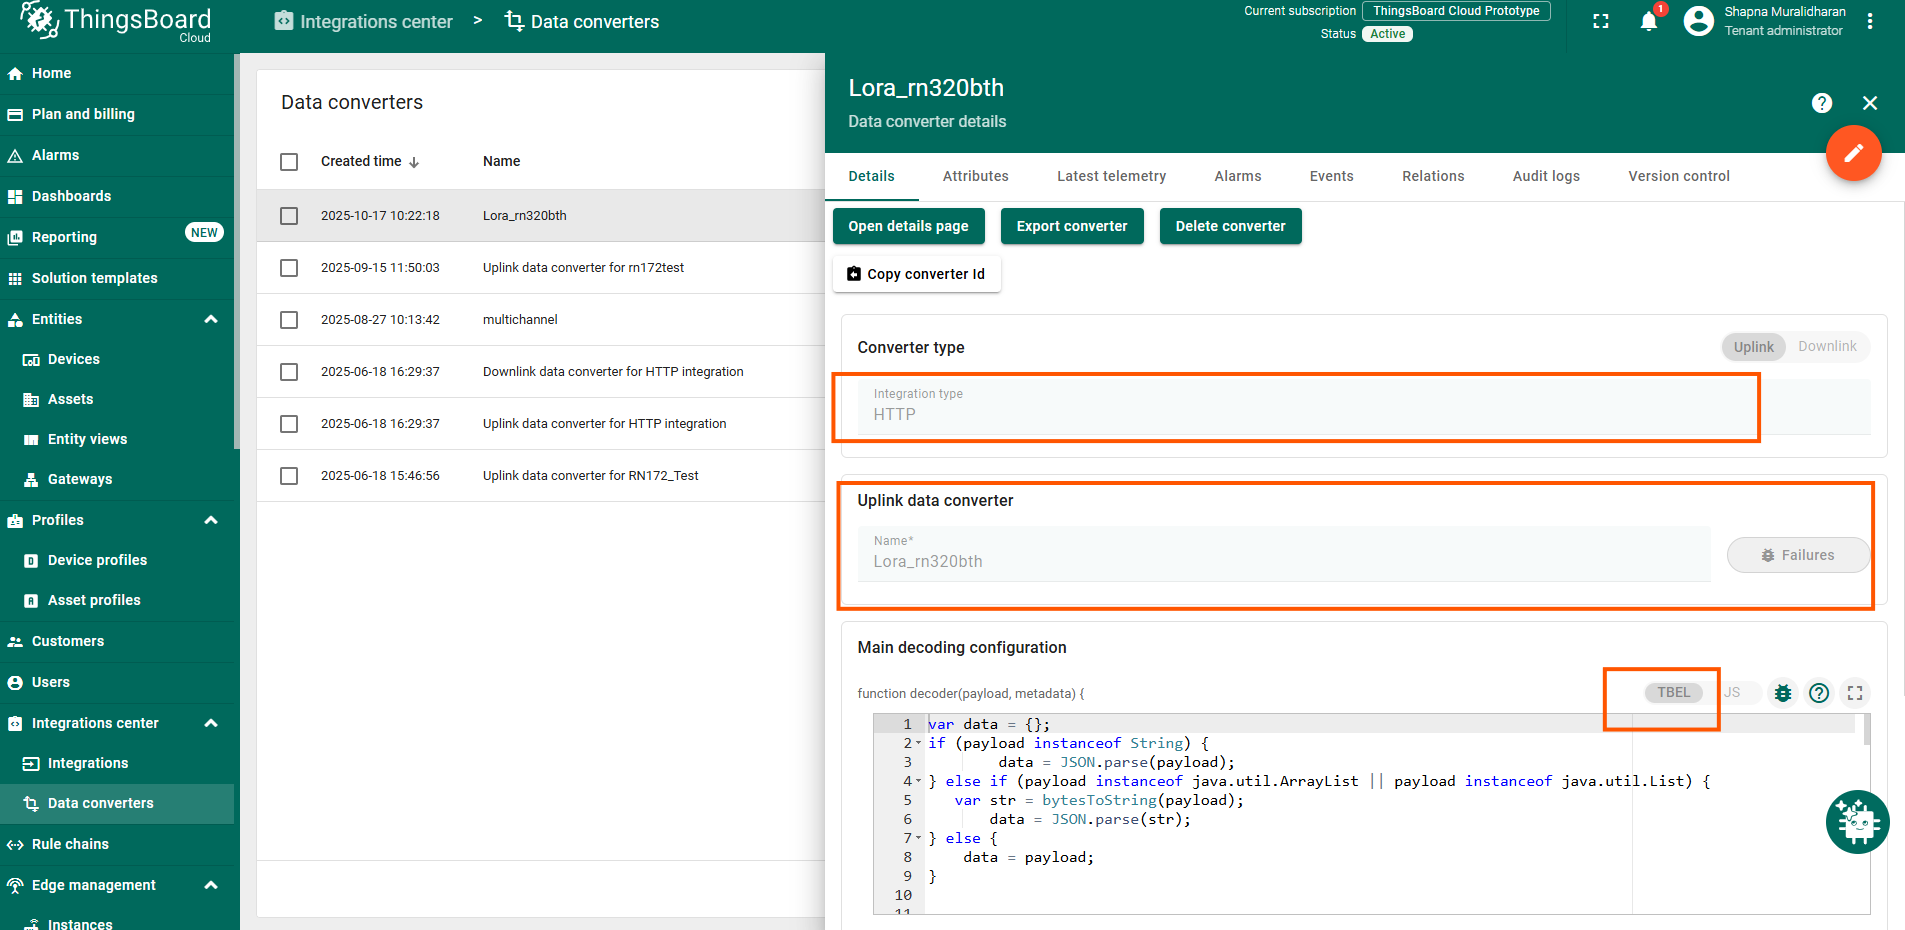
- In the payload decoder for the message received from the network server, copy and paste the following TBEL decoder code:
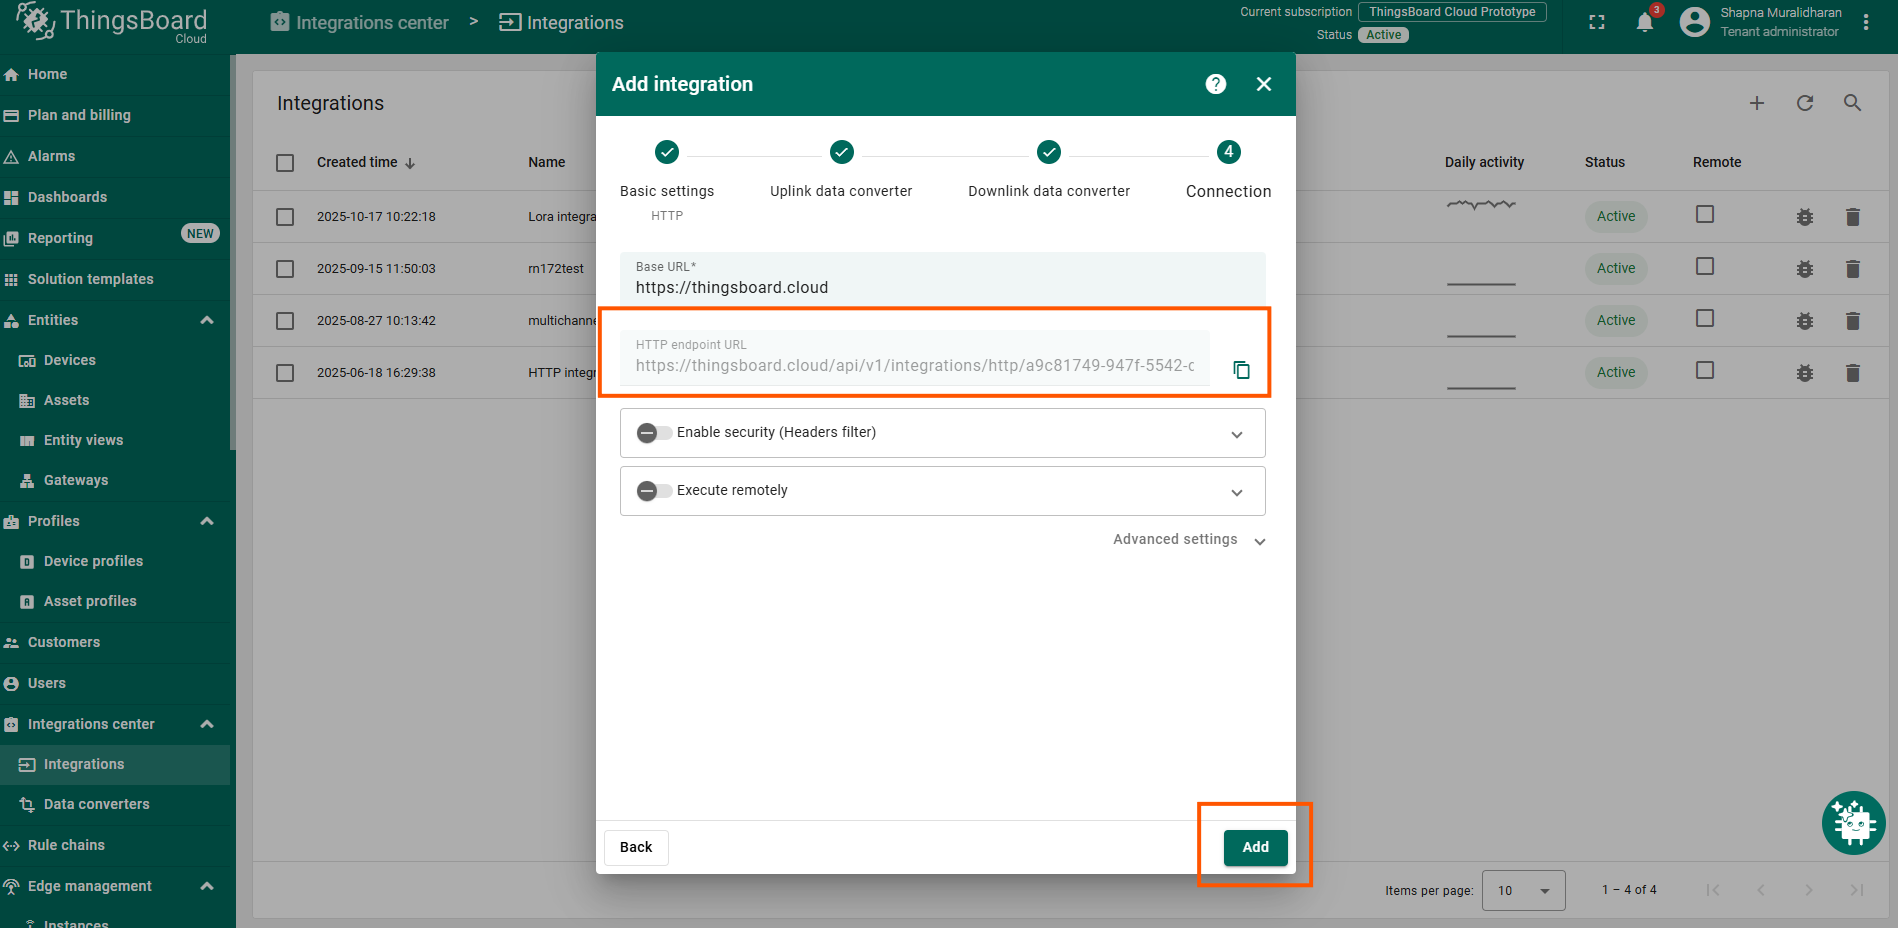
- Copy and save the generated HTTP endpoint URL.
- Click Add to create the integration.
Create Webhook in The Things Stack
To create a webhook in the TTS platform:
- Open your application in TTS.
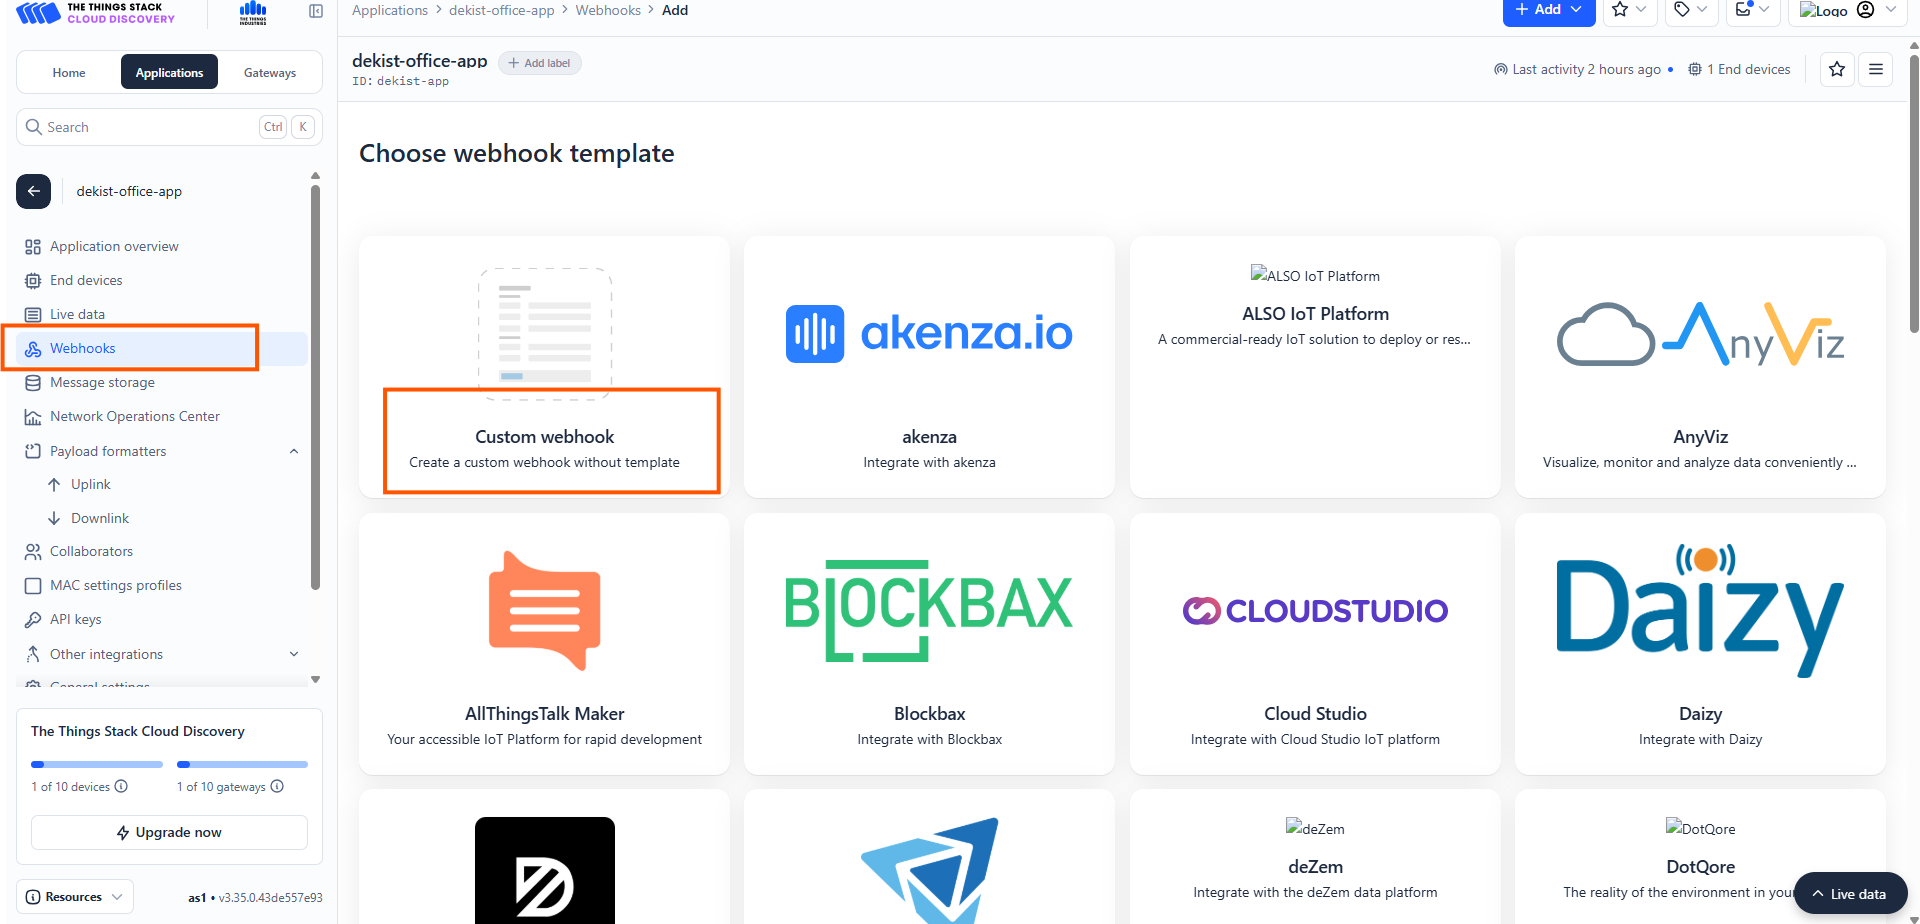
- Navigate to Webhooks.
- Select Custom webhook.
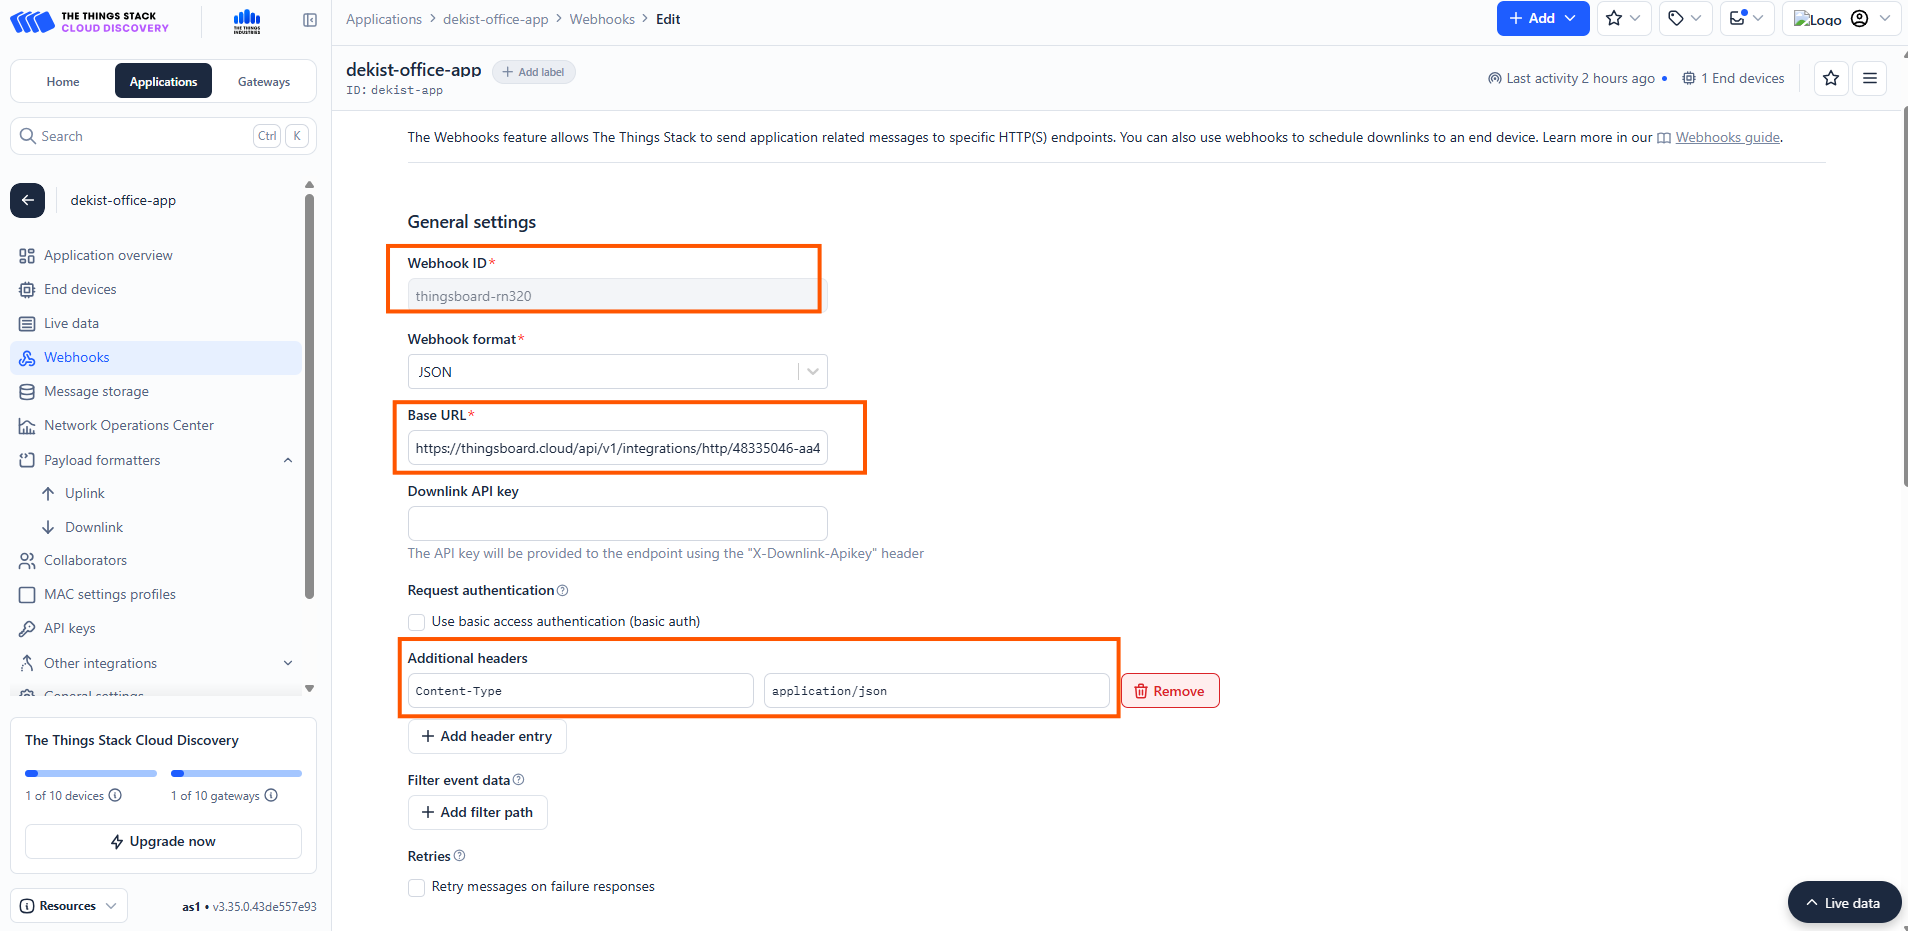
General settings
- Add a webhook ID - name for your webhook.
- In the Base URL add the endpoint URL you copied from the ThingsBoard platform.
- In the Additional header option add application/json
- Save the webhook.
Now the communication will start between the network server and the ThingsBoard platform to send data from your LoRaWAN devices to the ThingsBoard.
Check data on ThingsBoard
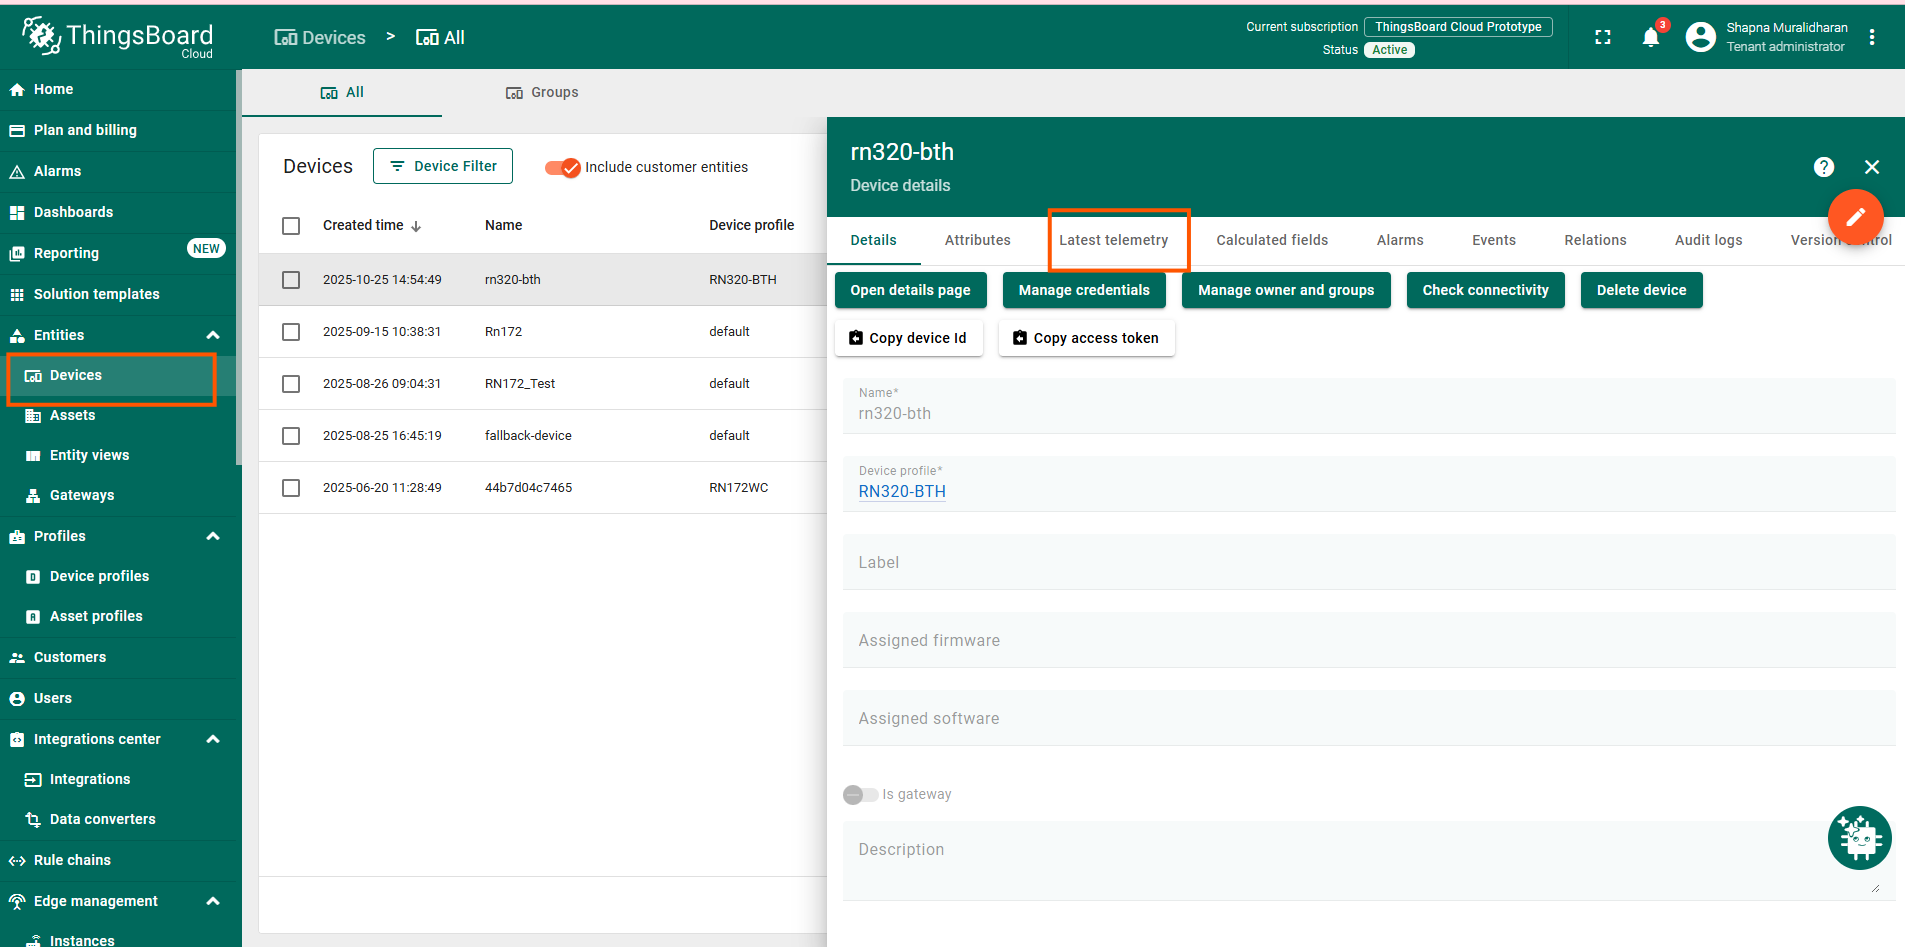
- Navigate to Devices.
- Confirm the rn320-bth device is created automatically.
- Check Latest Telemetry for temperature and humidity values.
Dashboard (Optional)
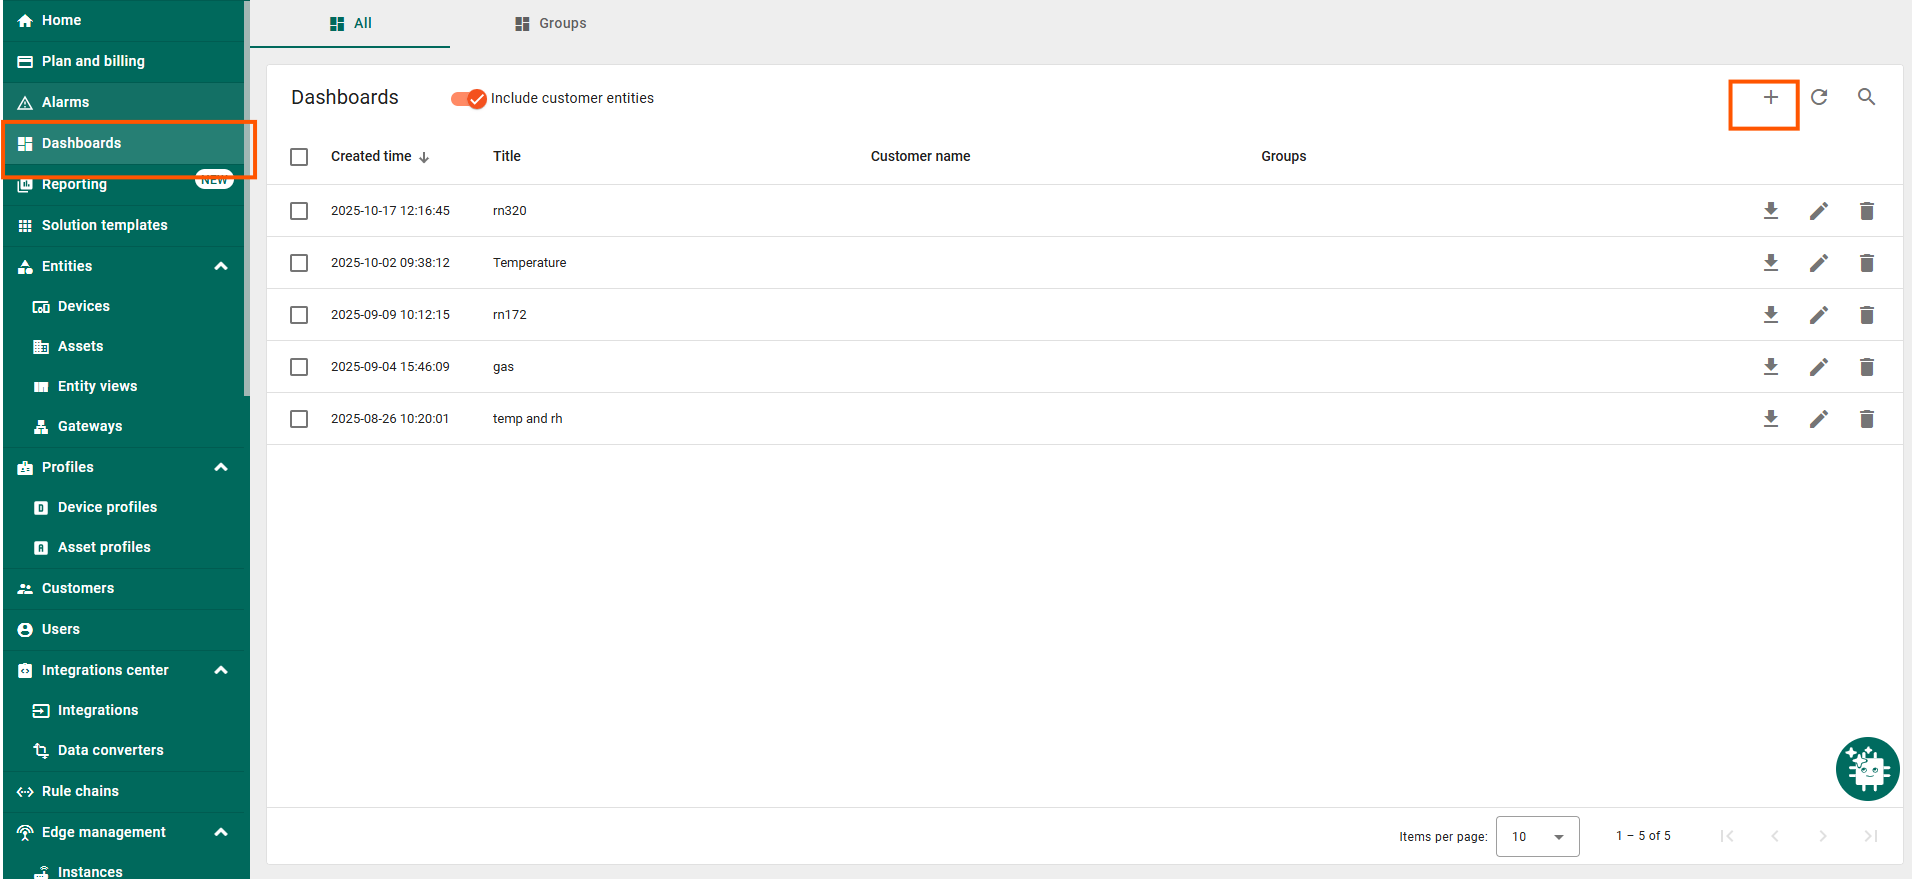
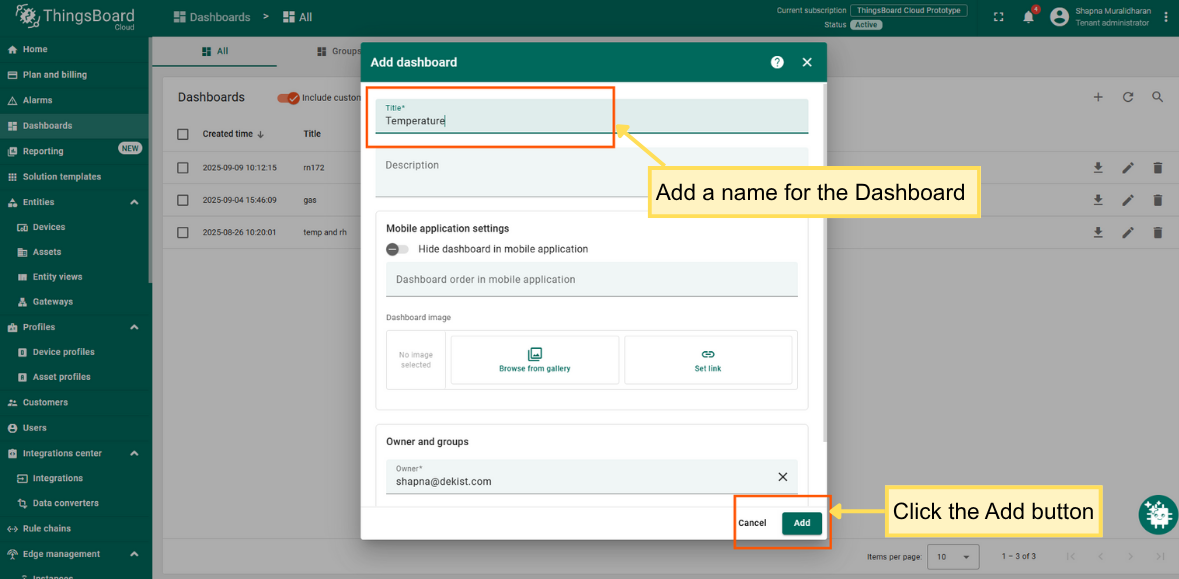
- Navigate to Dashboards → Create new dashboard.
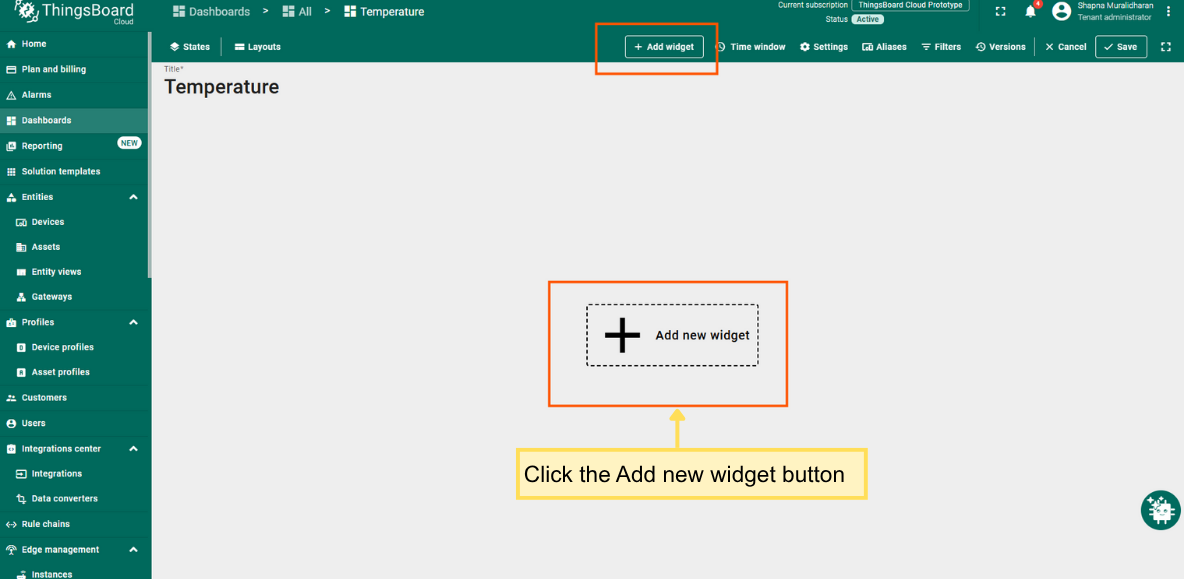
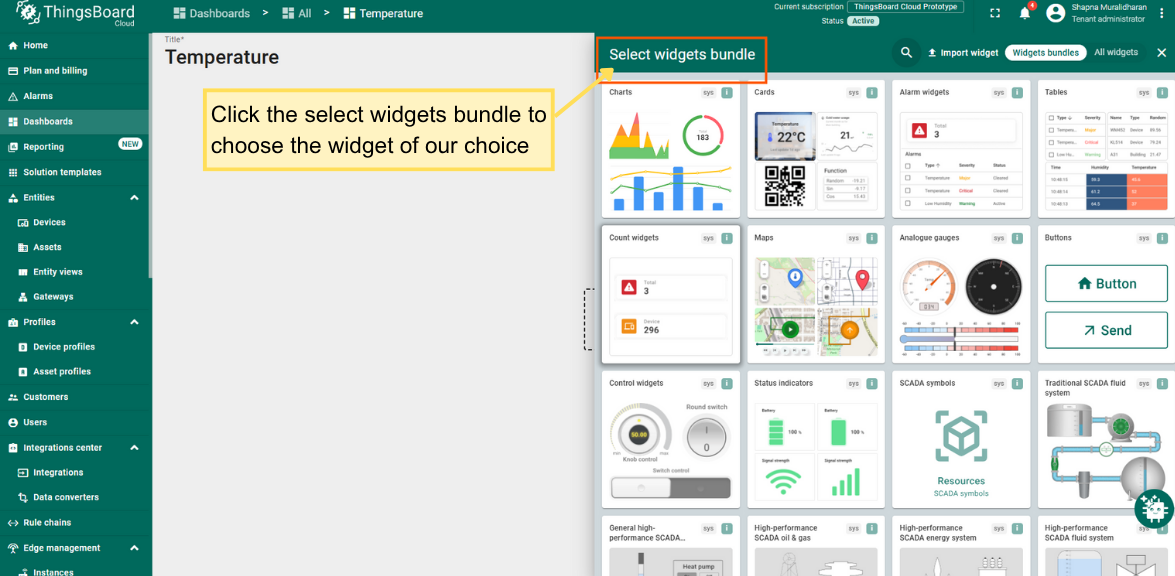
- Add widgets for:
- Temperature
- Humidity
- RSSI / SNR
- Bind widgets to the RN320-BTH device.
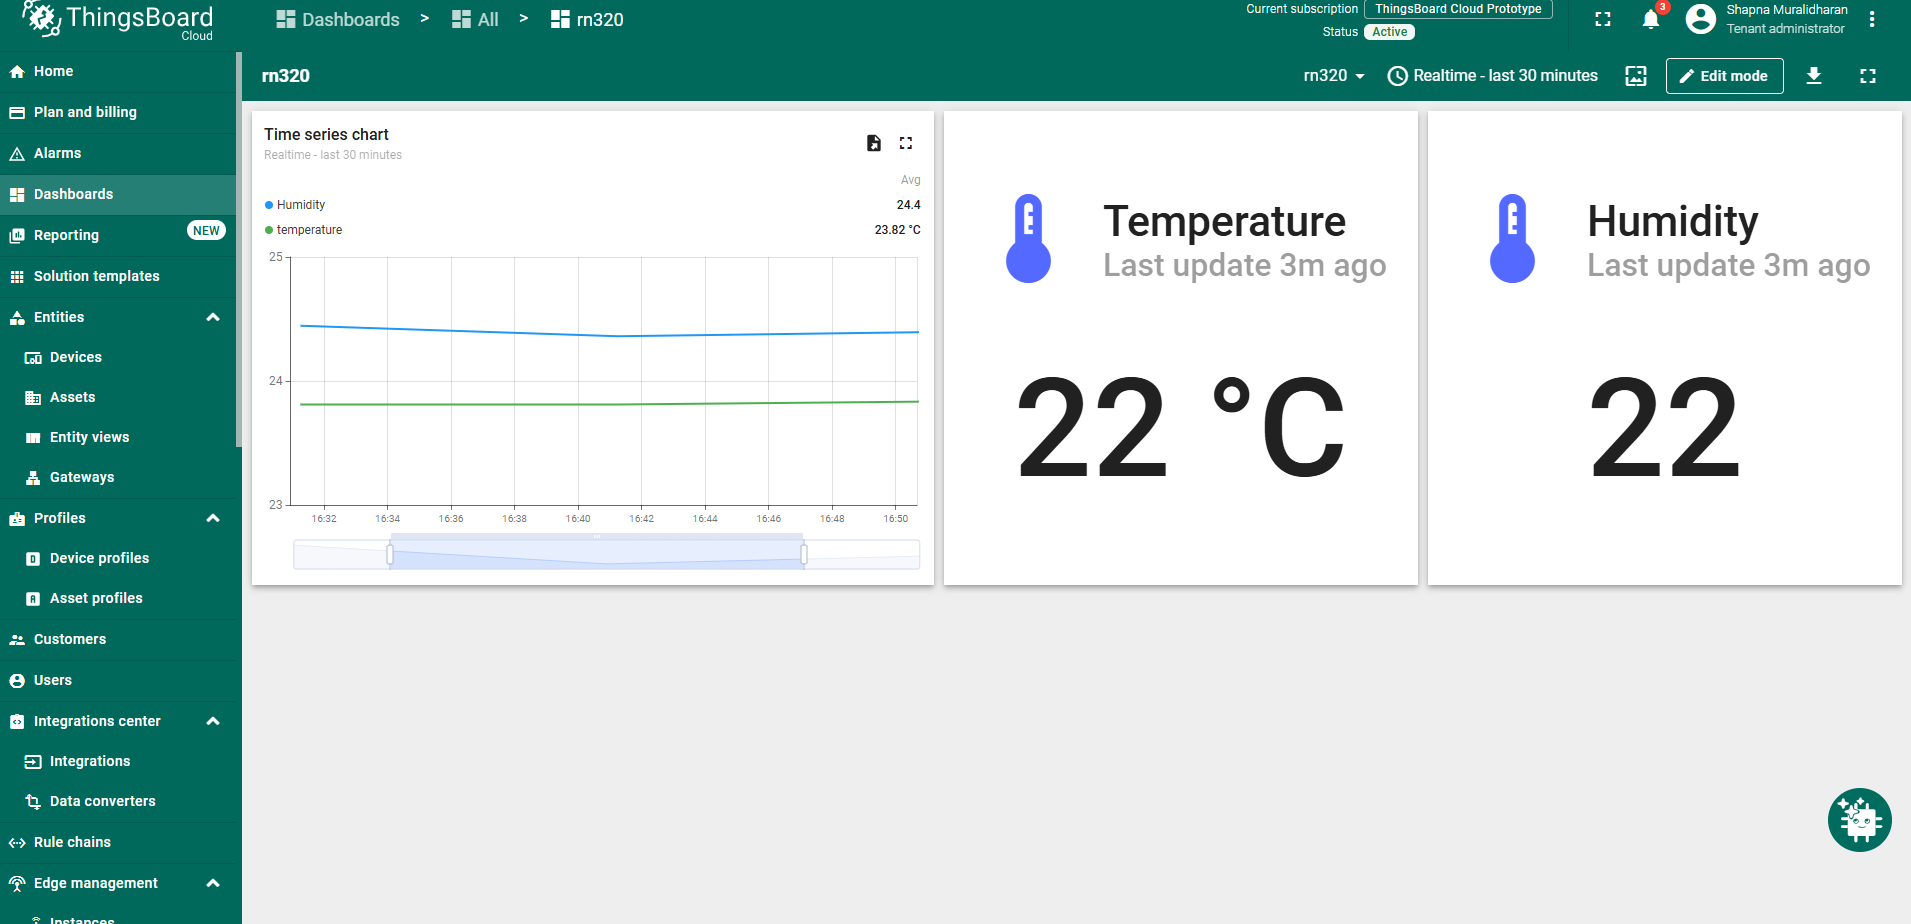
A sample of the dashboard created is shown in the pictures below.